


 |
 |
Updated Oct 21, 2008 |
This page is intended for newcomers to the hobby. It contains some of the 'wisdom' I have gained in 10 years of garden railways, that you will need to get your first track down and trains running. I hope there are some hints here for you.
Standards
Laying Track
Useful materials
"Standards"
Before you start you need to set yourself a set of 'standards' that you want to adhere to.
max height and width that your rollingstock will be. minimum radius track you will use
maximum gradient you will use.
maximum train length you want to run (determines grades, radius and crossing loop lengths) Track centres.
If you're making your own vehicles, you'll also need to decide on:
Floor height (45-50mm)
Buffer height (35mm)
Coupling types and height
Longest Vehicle you want to run (550mm with bogies centres 370mm and 100mm wide)
Maximum Endthrow of a long vehicle (25mm for a 110 wide, 30mm for 100mm wide)
click here for Excel spreadsheet with equations to calculate endthrow and centre overhang as a function of length and radius.
Most vehicles will get around a 600mm radius curve, but.....
For a 90 degree turn you could go as low as 900mm radius, and get just
about any length train around it on the level.
Laying out Track 'on the ground'
As for starting to determine the track layout on ground which is not level, I just use a 2'
long spirit level and a couple of blocks of wood to put under one end. A 1"
block gives a grade of 1:24 = 4% approx or a half inch block gives 1:48 or
2% etc. Then just get a lot of pieces of wood for pegs (6" pieces of tree
branches) and start putting them in every 2' as set out by the spirit level.
There are some articles on the web such as at MyLargeScale.com or LSOL.com
which might help.
These will include: (The figures in brackets are what I use.)
(180mm, & 110 mm. Go for 220 high if you want to run Shays.)
Click here to see a profile gauge I made for checking clearances under bridges, tunnels and platforms.
(You'll see I increased the height by adding the yellow bit on.)
(1.0m on level, 1.5m on 2% grade, 2.0m on 4% grade. If I have no other constraints I use 1500mm radius on the level and 2000m on a 2% grade.)
(4% on straight, 2% on 1.5m radius)
(3.6m but I should have gone longer!)
(140 on straight, 180 on 900mm radius curve - these allow for a 500mm long vehicle.)
There are 3 variables to consider:
The grade
How far round the curve goes. ie is it a 90 degree turn, or 180 degrees etc.
How long a train you want to run.
As a rough rule, for more than 90 degrees, the trailing train (ie excluding the locos) should be no longer than the diameter, or the wagons are likely to be pulled off the track.
I have had no problems with a 90 degree turn at 1000mm radius on level track. My worst curve at present is 200 degrees and level and 900mm radius and it will not allow trains longer than about 2m.
 This picture shows a tool I made for measuring the radius of a curve I have laid.


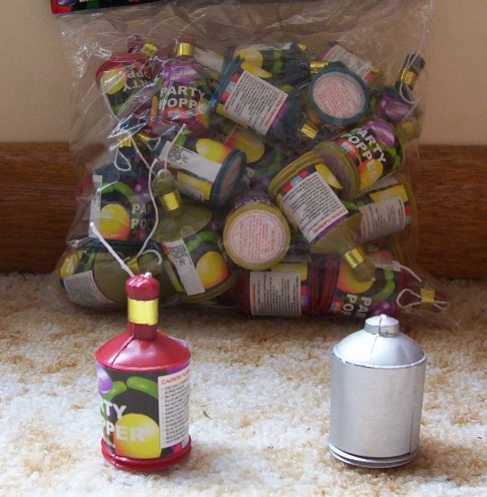 Cream can loads - These Party Poppers are 30 for $2. Cut the long neck off and superglue the cap back on and paint silver or grey, as shown on the right. Perfect for a wagon load. They finish up 27mm dia and 40mm high.


