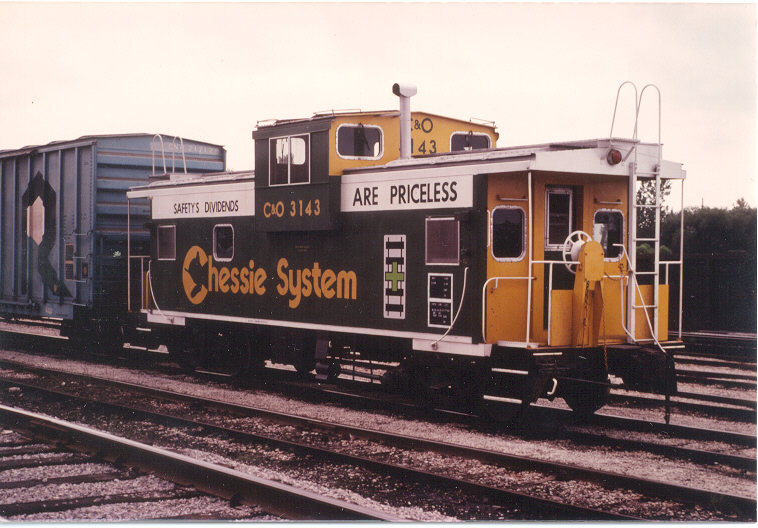
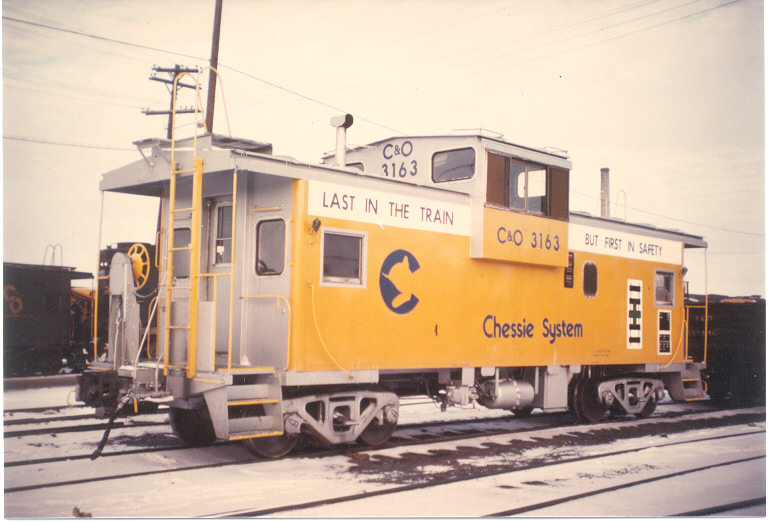
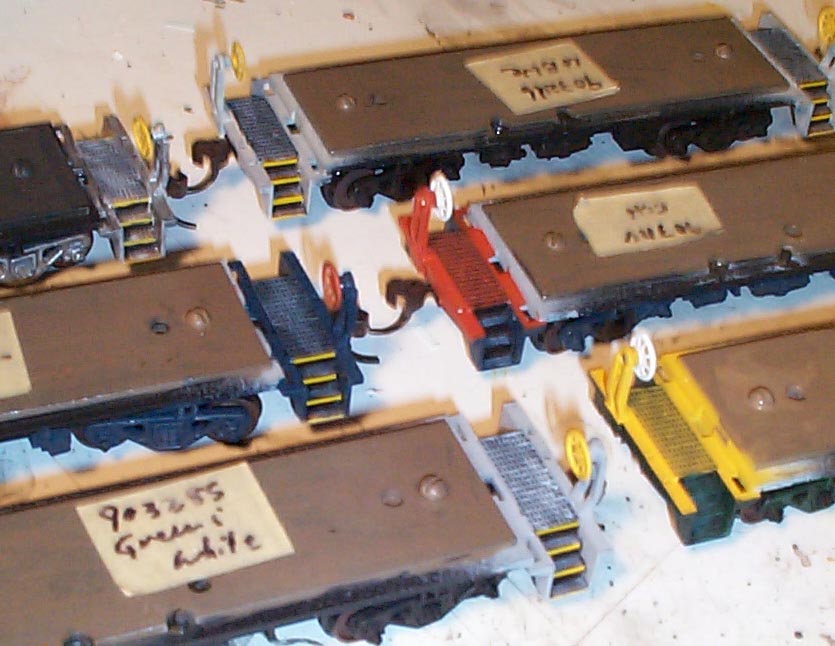
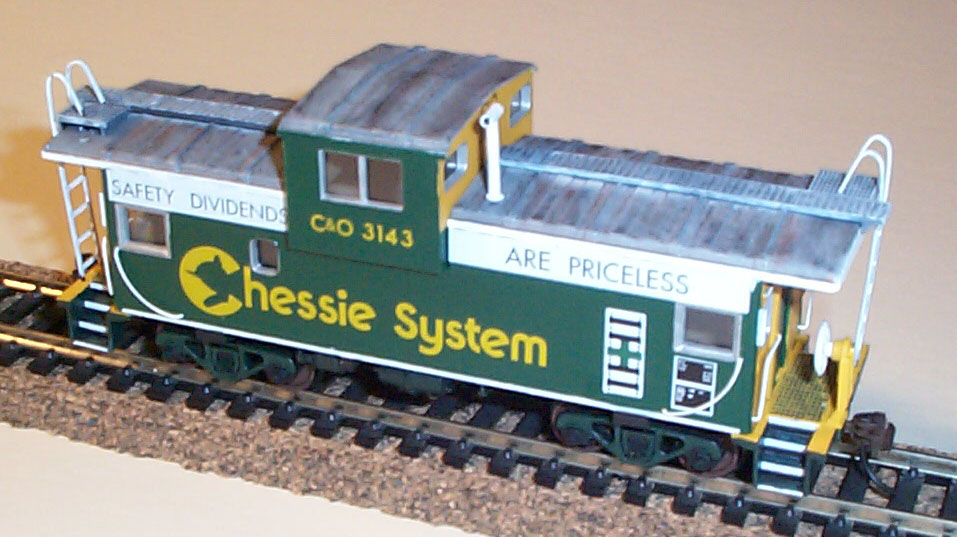
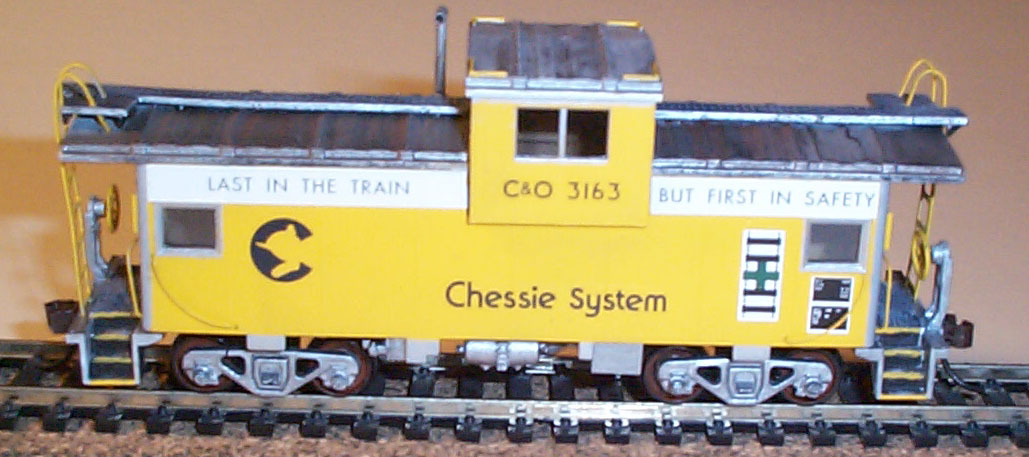
I have chosen to do 4 Safety, 1 "Careful Car Handling", and 1 Standard Chessie wide vision cabeese. These cabeese, unlike the previous article in this "tips" section, have wire grab irons. Below are six pics of Dean Heacock's of the cabins I am doing. As you can see they are very colorful. The first one is 3143. 3143 was originally a lighter green with silver ends, but it got the yellow ends as shown here. That is how I modeled it. The other safety cabins have silver ends, but only 3163 (Yellow) even looks silver. 3163 is so newly painted, look at the wheels, it probably just rolled out of the paint shop. I modeled this one clean as in this pic.
How to make 6 Wide Vision Cabeese (Assembly Line Style)
1. Get 6 undecorated wide vision cabeese.
Choose which 6 you want to do. I chose the six above. If you
want to do a prototypical proportion, you should have only one CCH car,
4 standard painted cars and one safety car. But that would be too
boring, so if you want do it like I am doing.
2. Take the cupolas off all 6 cars. They
just snap off.
3. Shave the side and end grab irons off each car.
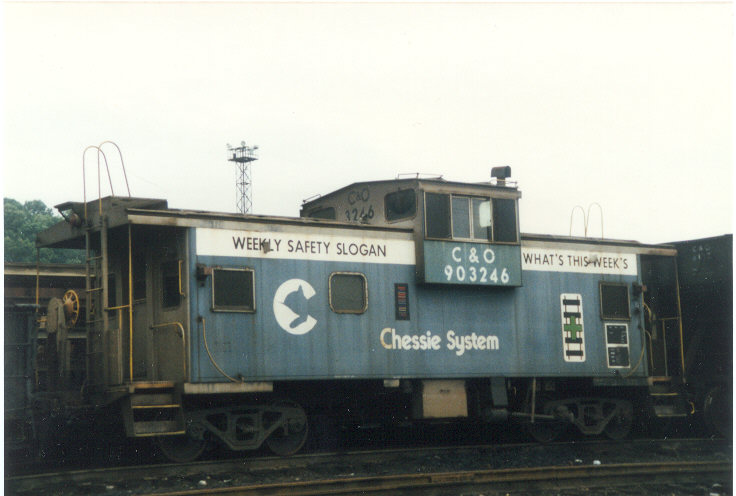
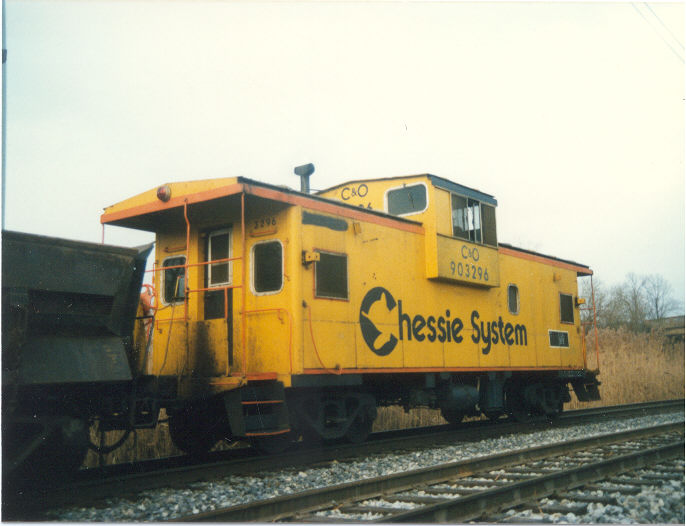
4. Notice that the 903285 and 903296 don't have
roof walks. This is seen on some wide vision cabeese. Shave
off the nubs and fill in the holes where the roof walks should go with
bondo. Also fill in the two holes for the ladder to go in the roof.
Shave off the grab irons on the top of the cupola too. These are
needed if you can't walk on the roof.
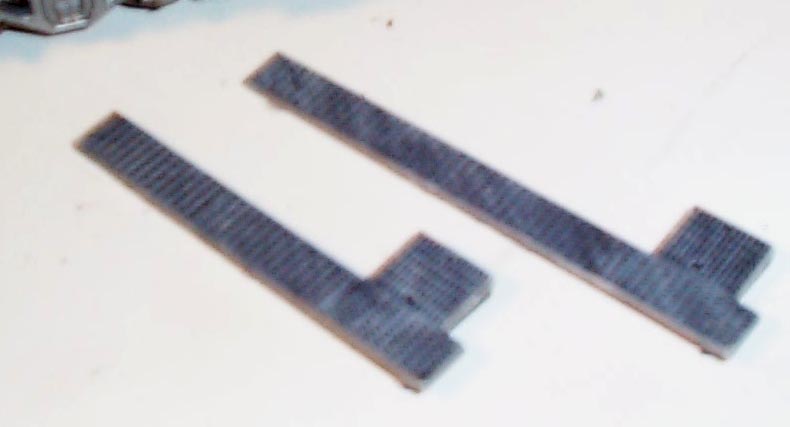
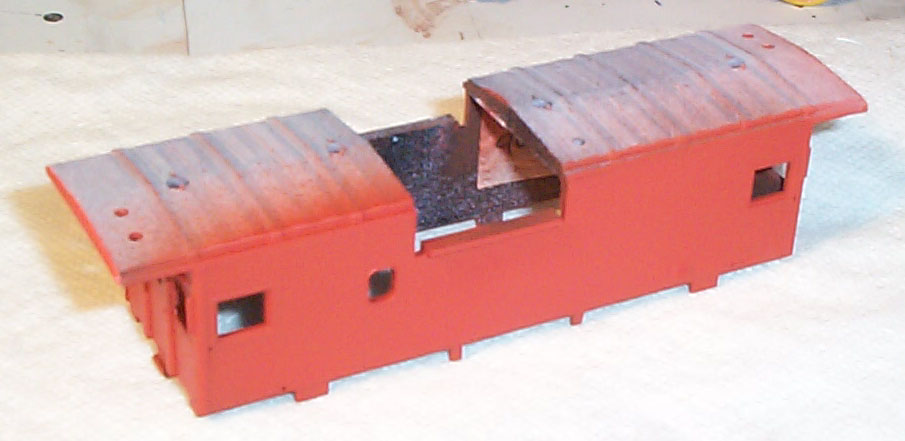
5. Add a piece of plastic to each end to make it
appear more solid. The Athearn kit roof ends in a "V" shape, the
shape should be a triangle. See the end piece over the door with
the light on it, that is the part I mean. Glue a piece of plasic
on there and sand it so it is flush with the roof. (see photo below)
6. Drill holes for the new wire grab irons
7. Prime the bodies and the bases. (see photo below)
8. BASES: Paint the steps and screen on the
end platform black (see photo below). Drybrush the steps and screen
the color of the end platform. (see photo below). Paint the
brake wheel appropriate color and glue in place. Spray ends with
gloss coat. Apply yellow or white (whichever color is appropriate)
to step edges. Add battery boxes to bottom. Add other bottom
details as per instructions. Paint bottom and trucks appropriate
color. Paint wheel faces rust color. Assemble trucks.
Screw trucks on bottom.
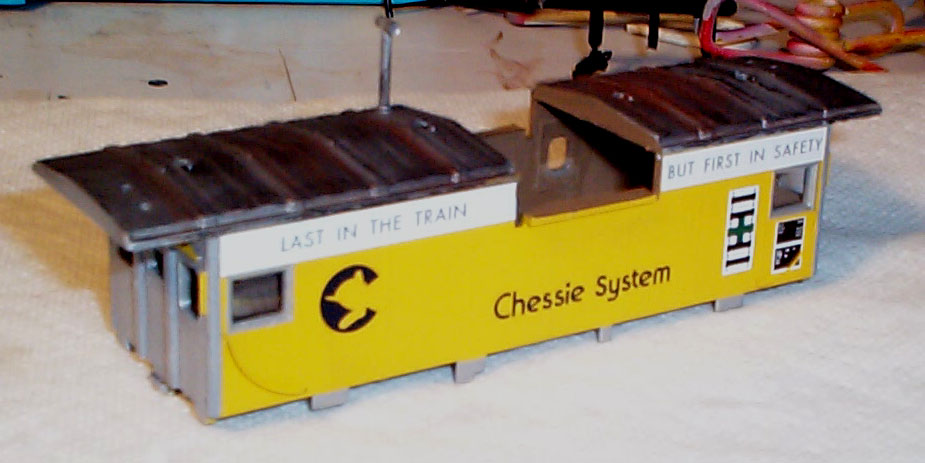
9. BODIES: Paint yellow body sides on 3163,
yellow ends on 3143, and all yellow for standard Chessie cabin. Paint
yellow cupola sides on 3163 and yellow ends on 3143, and all yellow on
standard.
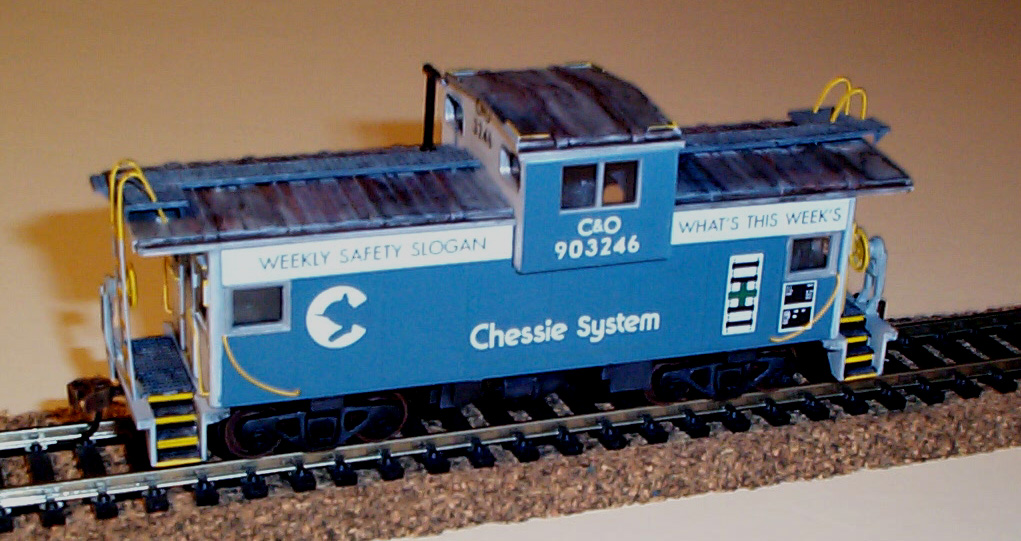
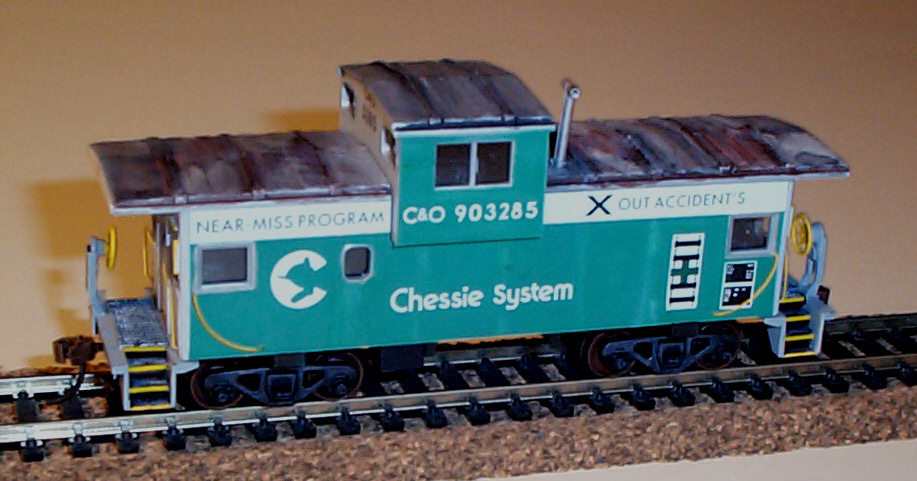
10. Paint the sides of 3246, 3285 the appropriate
blue or green. I just use my eyeball to match the color. I
mixed white and grey into B&O Royal blue for 903246. I mixed
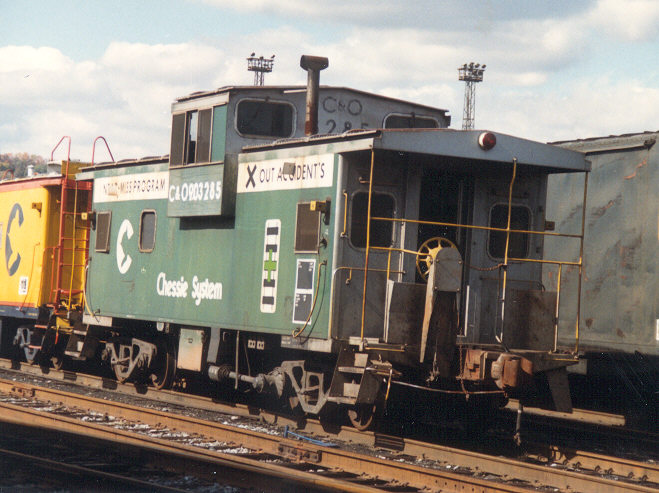
white and grey into CNW Green for 903285.
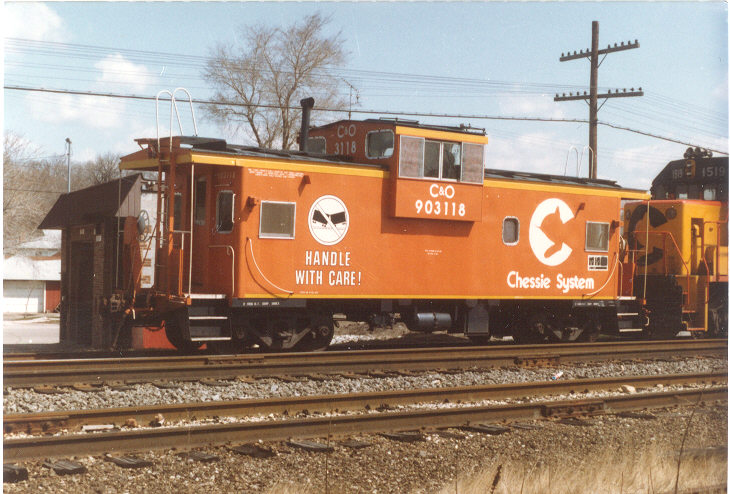
11. Paint the whole body (not the roofs) and cupola
a mix of caboose red and Southern Pacific Daylight red for the 903118 CCH
car. Paint its roofs black. (see pic below)
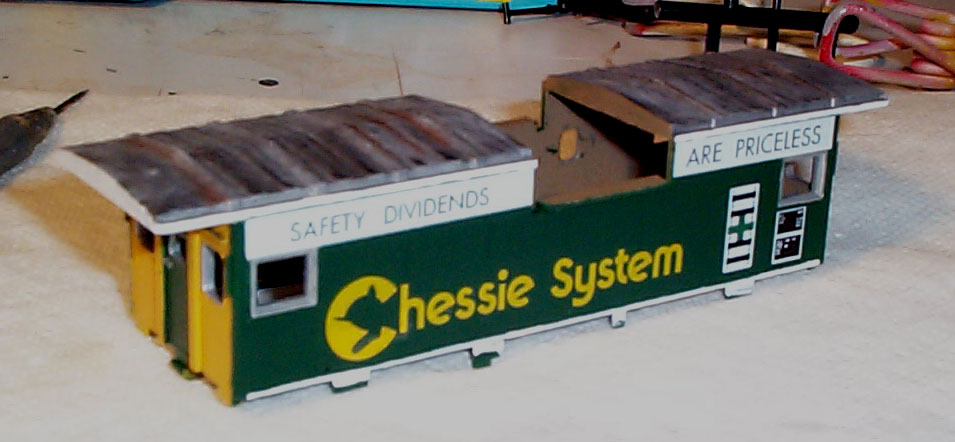
12. Paint the sides of 3143 CNW green. It
is a nearly perfect color right out of the can.
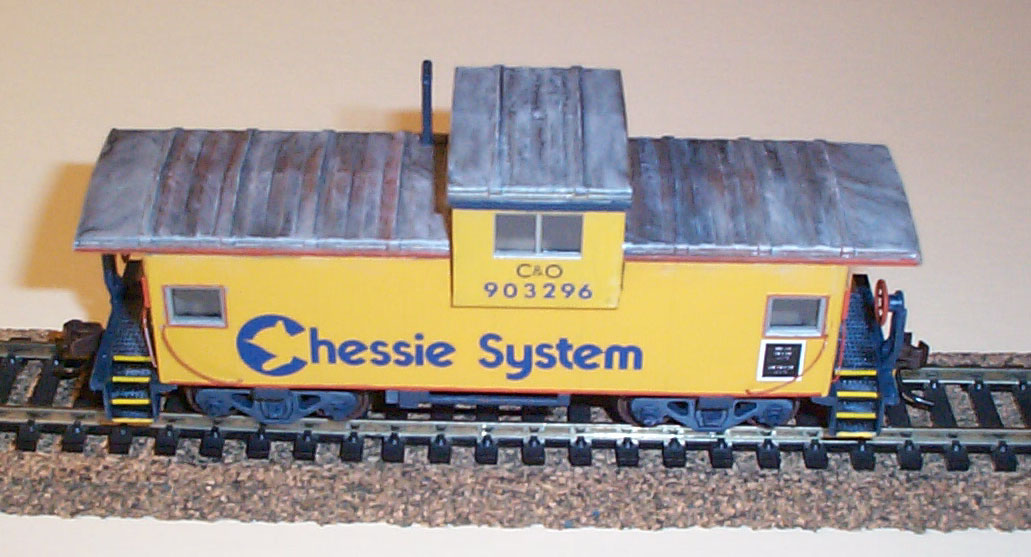
13. Weather the roofs of all 6 cabins. Paint
the trim the appropriate color. 903118 has yellow stripes, 903296
has orange stripes, 3143 has white trim. (see pics above and below for
clarification)
14. Paint the insides a nice tan or dark grey.
Any even color will do. Paint the window frames silver.
15. Spray all of them with gloss coat. Add
the decals to all 6 cabins. I used Microscale C&O Safety Cabins
sheet for 3143, 3163, 3246, and 3285. I used Herald King sheets for
903296 and the CCH 903118.
16. When fully decaled spray each car with dull
coat.
17. Paint the grab irons the appropriate color.
Be sure to prime them with an enamel paint first. The acrylic paint
will not stick to bare brass or metal.
18. Insert the grab irons in the pre-drilled holes
from step 6. Some may have to be drilled out again since they tend
to get gunked up with paint. Glue from behind with super glue.
19. Cut the windows from clear sheet styrene (plastic)
and glue on with white glue. (See pics below)
20. Paint the ladders for the 4 cabins that have
roofwalks. 903296 and 903285 don't have any.
21. Cut notches in the base so that the grab irons
don't interfere with the body and base coming together. See pic below
for clarity. Snap the body on the base. Snap the cupola on
the body. Glue the roof walks on.
22. Put the ladders in their holes. You will
need to bend the top of the ladder from a "U" shape to more of a "V" shape,
to make the ladder straight when it sits in its holes.
23. You are done. 6 C&O cabins ready
to wow your visitors. If you have found building 6 at a time confusing,
try my Athearn W/V
article for how to do just one. Building 6 saves alot of time waiting
for things to dry. I built 6 assembly line style in the time it would
take me to do two, one at a time.
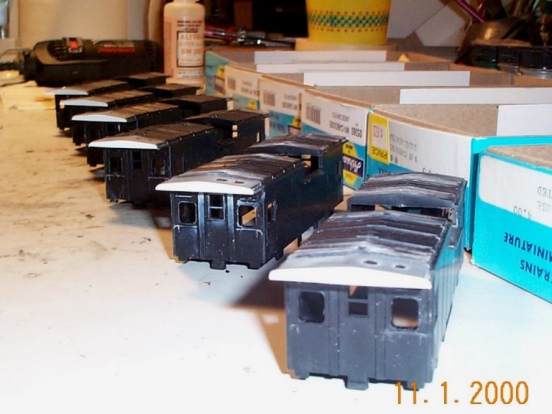
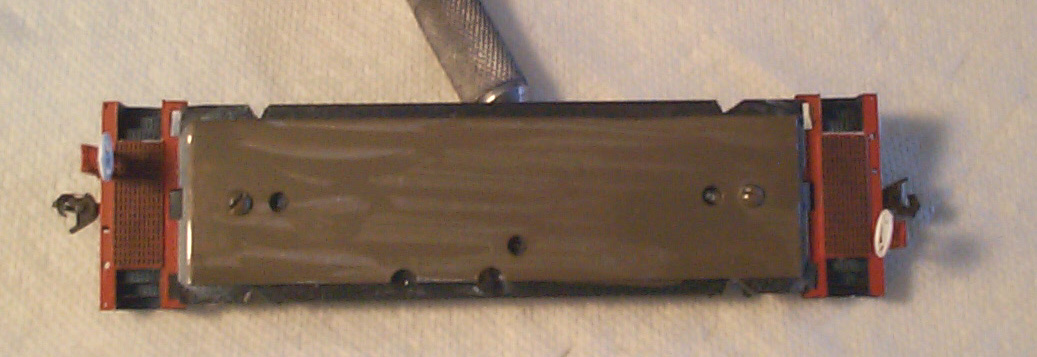
Below are two "in work" pictures. The first is the
start of the whole project. I put a piece of tape in each one labeled
for the caboose I was going to do. The second pic shows how I filed
off the grab irons and made the roof ends more solid looking.

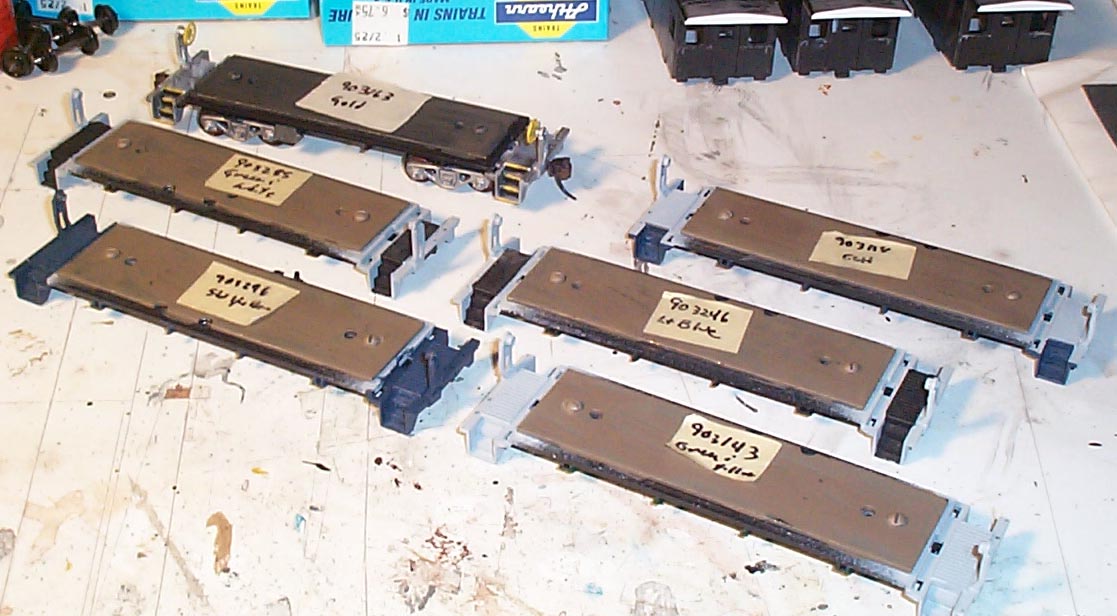
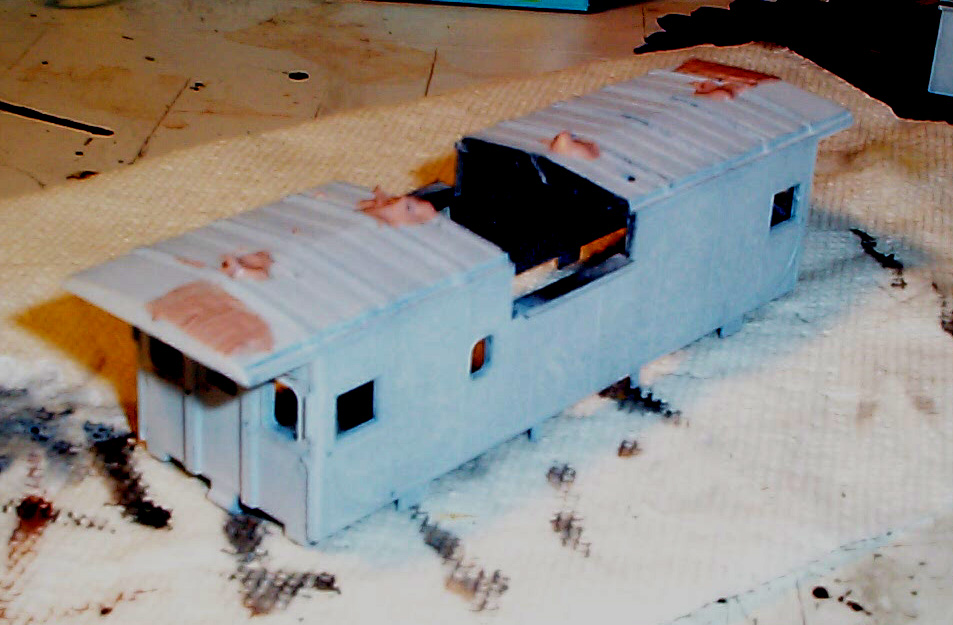
More in work pics. Each base has been primed light
grey. The upper one has been painted silver and weathered.
It is ready to go. The others are still getting their finishing touches.
Note in the second pic that the steps have been painted black. Dry
brush the raised detail light grey leaving the look of depth in the grates
on the steps. The vertical faces of the steps will remain black to
give them a sense of being see through, like the real cabeese.
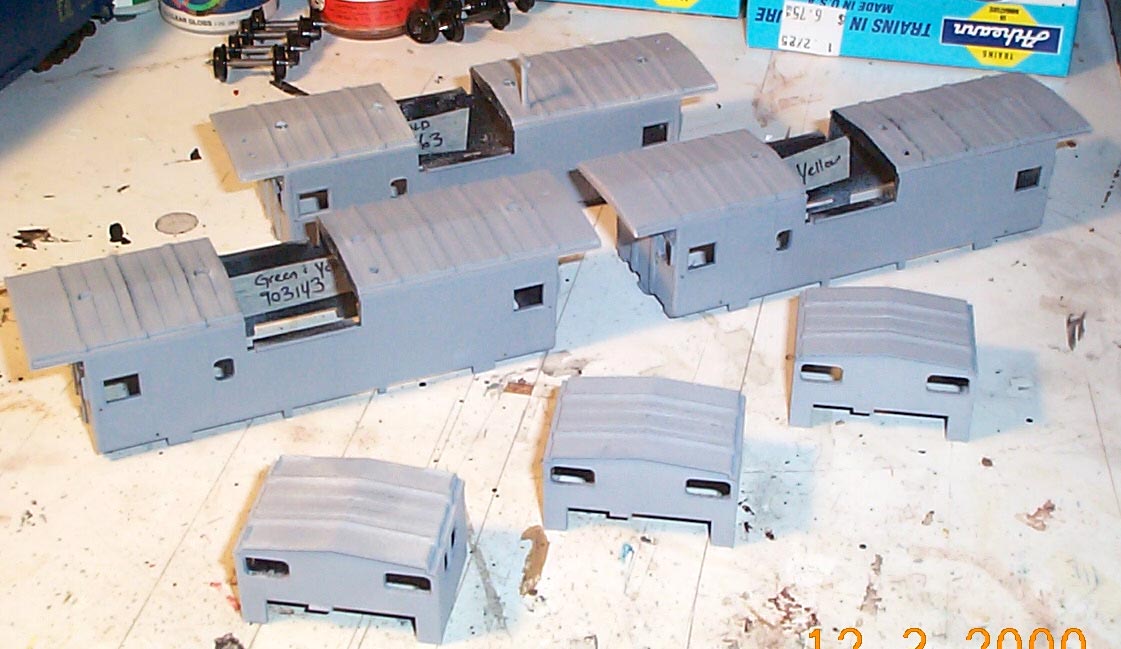
Three of the cabins and their cupolas primed and ready
for their respective colors. Also below are two roof walks ready
to go. Paint the roof walks all black and dry brush the tops light
grey and white. Whalla your walks look like they are see through.
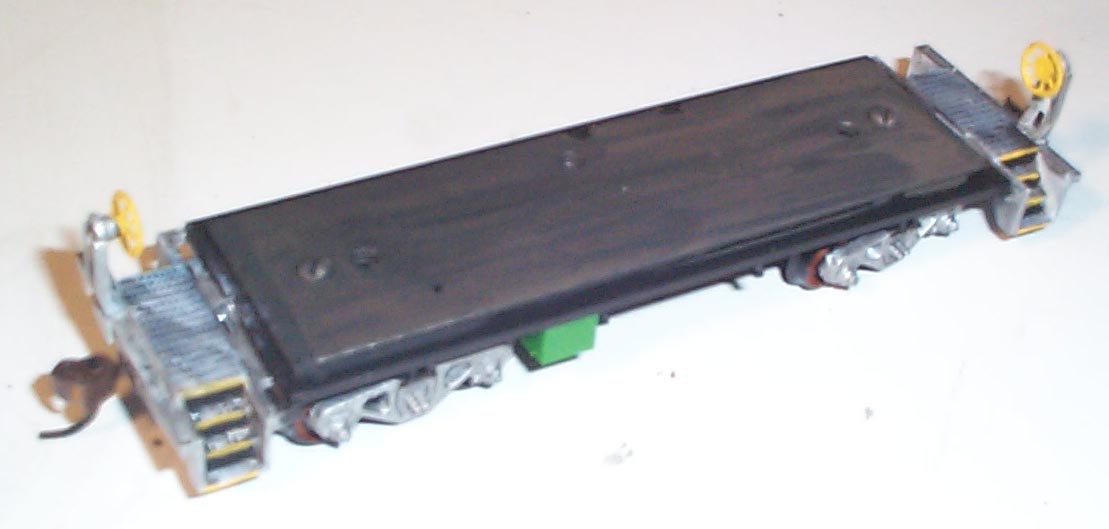
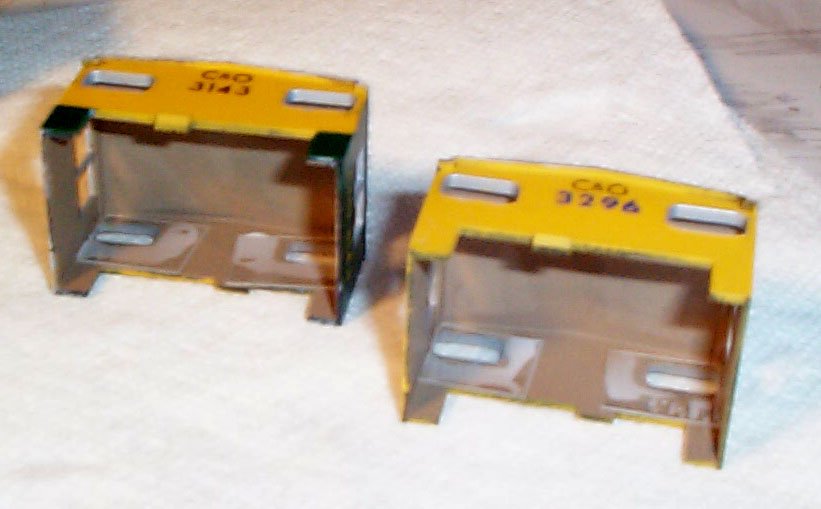
Below is a simple edition to an Athearn cabin that will
make it look much better. There are two large boxes underneath a
wide vision caboose, one is the battery, I don't know what the other is.
You can add these by cutting a scrap box in half like I did. Just
super glue them on and paint them silver or grey. Notice that I paint
the underside black and the steps silver. This gives more depth to
the car. The vertical faces on the inside of the steps should be
painted black too.
Below are the 6 bases pretty much done. The CCH
car and green and yellow car still need white step edge decals, the others
already have their yellow step edge decals. All of the steps have
been painted and drybrushed. All underbody details are on and painted.
Now it is time to work on the bodies and cupolas.
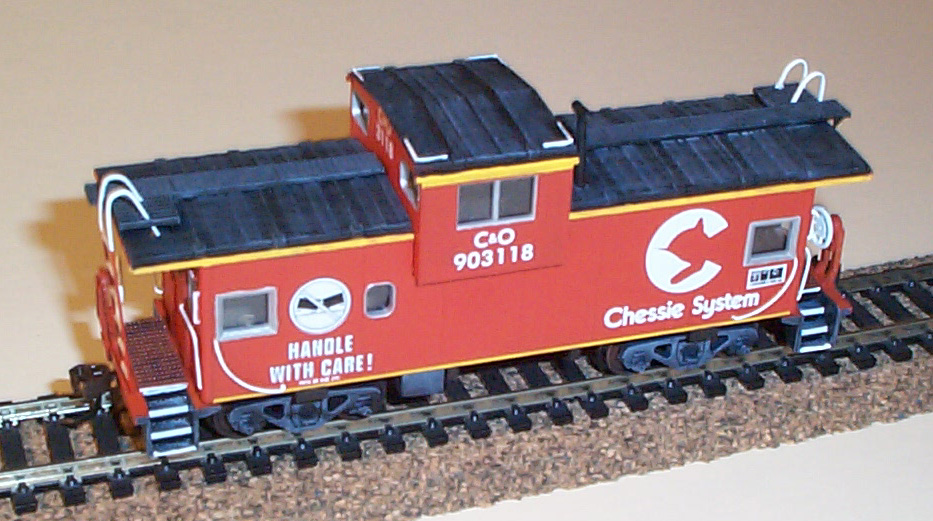
Below is the CCH car 903118 with painted sides.
The roof will get painted black next, and then on to decals.
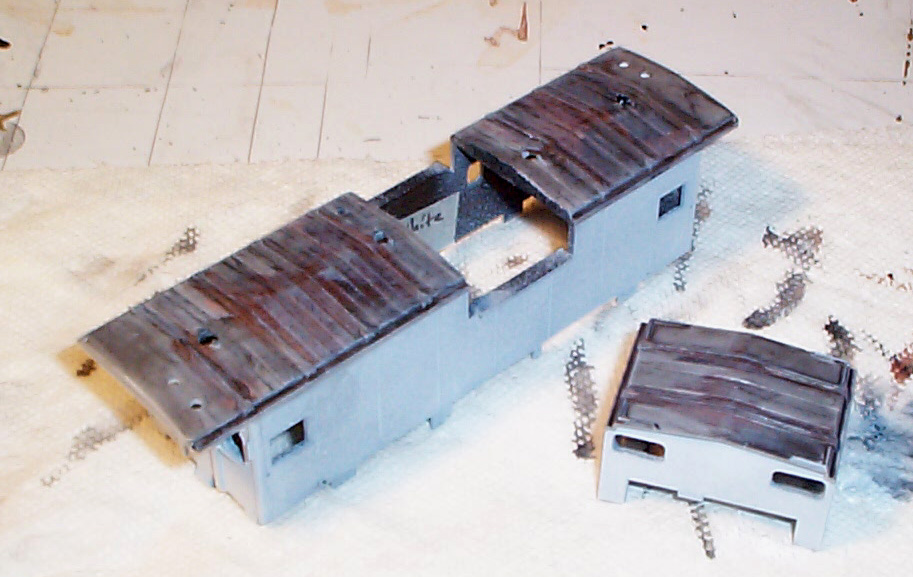
Below is a pic of the roof holes being bondoed.
This is done only for the 903296 and 903285. The bondo will be sanded
smooth and the roof weathered, like the pic on the right (although this
pic is actually of one of the cabins with the holes still in it).
Below are 3143 and 903296 painted and sprayed with gloss
coat. They are ready for decals. Notice the dark blue door
on 903296 and the dark green door on 3143.
Below is 3143 with all the decals on. The white
trim stripes have been painted on by hand. Paint the tabs on the
bottom black to hide them, they are white in this pic.
Below is 3163 in much the same state as 3143 above. Its
tabs are silver like the real prototype. There is no trim on this
car or 3246 or 3285.
Below a pic of the windows going into 3143 and 903296.
Notice the white glue is white here because it is still wet. It dries
clear in color.
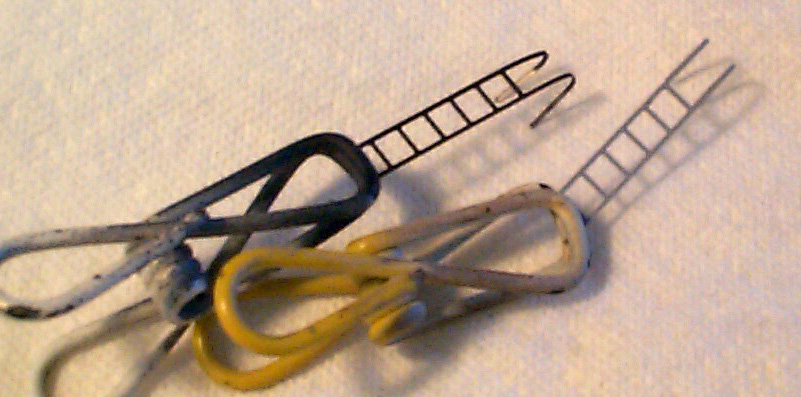
The metal ladders that come in Athearn kits will not take
acrylic paint. If you don't primer it with an enamel paint, the acrylic
color will just peel and flake off. Here is a ladder out of the box
on the left, and a primered ladder on the right. This primer is enamel,
but the primer I put on the car bodies and cupolas is acrylic (since the
car bodies and cupolas are plastic, they don't need an enamel primer).
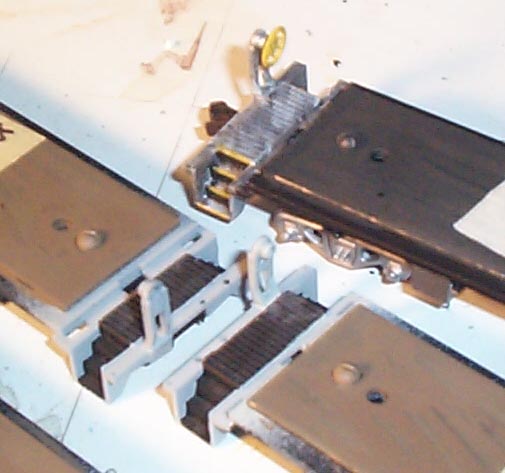
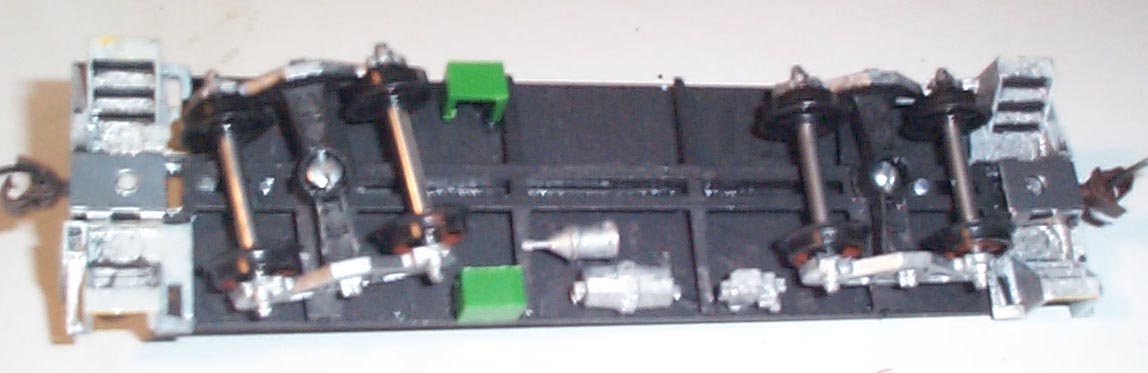
Before you can fit the bodies to the base, you need to
make four notches in the base. The grab irons you just put on will
extend into the car body and not allow a good fit. These notches
allow for clearance of the grab iron extensions. You may need to
shave the end corners too if your end grab irons interfere with the base.
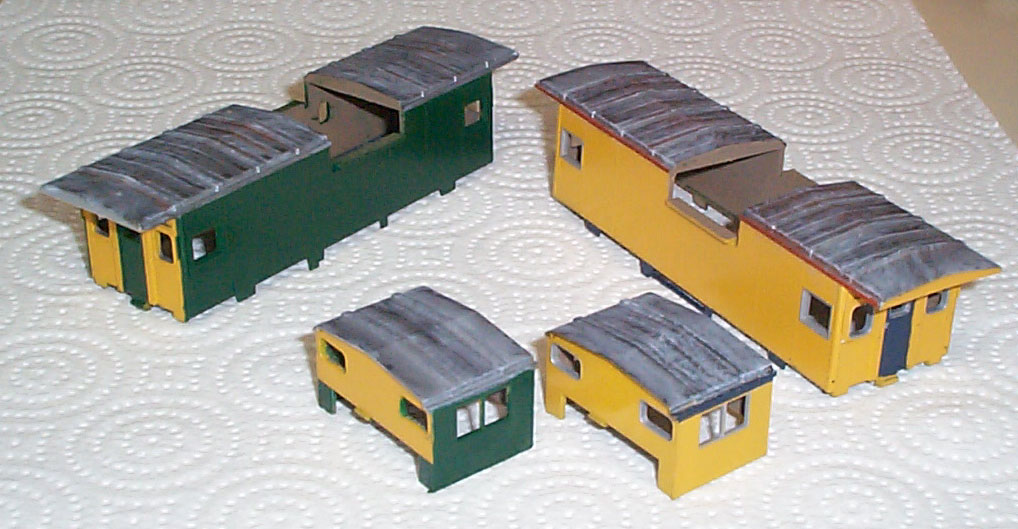
Below are the two finished pics of 3143 and 3163.
Below are the finished pics of 903296 and 903118.
Below are the finished pics of 903246 and 903285.
Note that the Microscale decal diagram for 903285 is wrong. The safety
slogan does not read "X out accidents - near miss program", it reads "Near
miss program - X out accidents". Also 903285 had the only safety
cab paint job with the "C&O" next to the "903285". See the others
for the standard way with the "C&O" on top of the 6 digit road number.