Athearn's kit is nearly perfect right out of the box. With just a few quick Chessie specific details added you can have one of these big six axle units out on your pike.
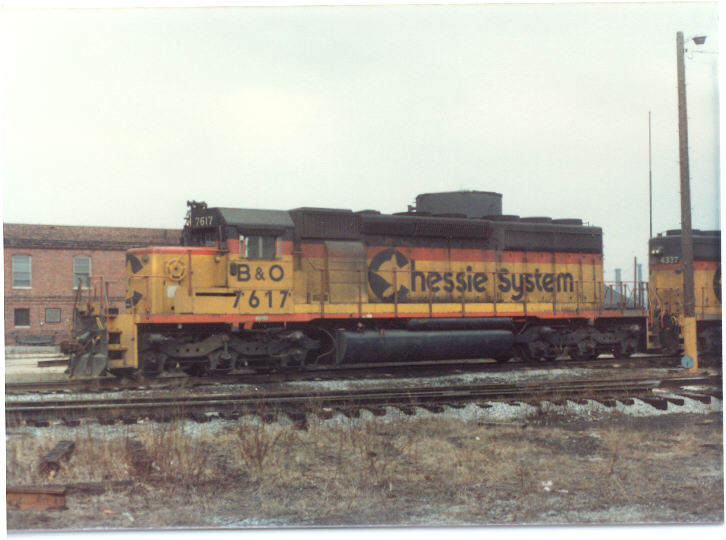
Below is an actual pic of a real SD40-2. It
is a
Dean Heacock pic.
How to make an Athearn SD40-2:
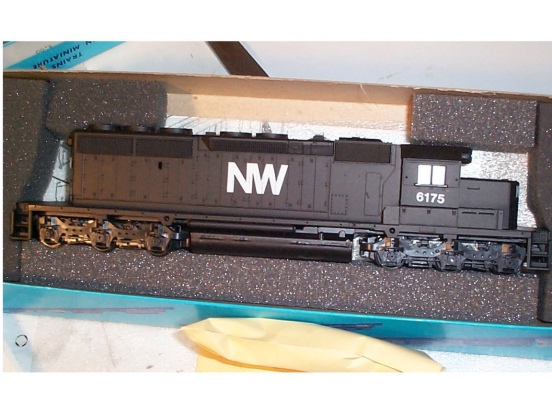
1. Buy either an undecorated model or one
that
you can strip. The Athearn Chessie paint job is not good,
so I don't
suggest buying one. A powered model should cost you $20-25
on eBay
and a dummy $12-15.
2. SHELL: Shave off molded on grab irons
with a
sharp chisel blade. Drill holes for all the new grab irons
and the
lift rings. There are grab irons on the front of the nose,
the right
side of the nose, the top of the nose, and the back of the long
hood.
All the lift rings are on the top of the long hood. There
are about
12 or so of each. Also drill two holes on the top back of
the long
hood for the fan grab iron after you shave off the molded on
one.
3. SHELL: Sand off the small square with the
three
little posts on either side of the coupler. This is the
molding for
the m.u. hoses. There are two squares on the front pilot
and two
on the rear pilot.
4. SHELL: Sand off the foot boards on the
front
and the back. These are the protrusions at the bottom of
the pilot
where someone would stand to ride the locomotive. Drill
two holes
in the front pilot to accept the Details West Chessie
pilot. Drill
two holes in the rear pilot to accept the Details West rear
plow.
5. SHELL: While you have the drill out,
drill each
of the hand rail stancions so they are a little bigger.
They come
just a little too small to fit the stancions right out of the
box.
6. CAB: Drill a hole centered on top of each
of
the six windows. This will be where the windshield wipers
attach.
7. CAB: Drill out the holes for the
handrails attach.
There are two on each side of the cab. They are just a
little too
small to fit the wire right out of the box.
8. SHELL: Prime a Details West 5 Chime
Leslie
horn, the Details West Chessie plow, the Details West rear plow,
a curved
fan grab iron, 2 pairs of mu hoses, a side mounted bell, 2
uncoupling levers,
and enough grab irons to fill all spots they belong (around 12
or so).
9. SHELL: Super glue in lift rings
into the
holes on the top of the long hood. I don't prime these
before I put
them in. Prime them carefully when the glue is dry.
Try not
to fill the hole of the inside of the lift ring with paint.
10. SHELL: Super glue on the Chessie pilot
on the
front of the shell, in the two holes you drilled in step number
4.
Also super glue the rear plow on. When the pilot and plow
are dry,
super glue on the mu hoses.
11. FRAME: Shave off the four pegs
that attach
the frame to the shell. Also prime the silver metal parts
of the
trucks with an enamel primer. You will need to remove the
plastic
truck side frames to do this. When the primer is dry,
paint the wheel
faces rust colors and the part behind the wheels black.
12. SHELL: Shave off the four holes
that
held the frame attachment pegs. There are two of these on
each sided
of the shell. Fill the small notch that is left with bondo
and sand
smooth.
13. SHELL: Sand the "NW" lightly. No
need
to get rid of it all, just soften the edges so that it isn't
obvious it
said "NW" after you paint it. Remember this area will be
covered
with a decal eventually.
14. SHELL and CAB: Prime the sides of the
shell
and cab light grey. There is no need to prime the top or
the frame
since they will be dark blue. The light grey allows for
the yellow
and orange to stand out better than a black surface underneath.
15. FRAME: Put the truck side frames back on
the
frame. Drybrush the fuel tank and the side frames with
shades of
grey and brown. Overspray the side frames and fuel tank
with a light
dusting of railroad tie brown or another brown shade. This
will give
it a nice dusty look.
16. SHELL: Paint the side sill and
stripe
SP Daylight Red.
17. SHELL: Paint the top of the hood,
the
walkways, the pilots and the top of the shell C&O
Enchantment Blue.
This is quite involved and requires lots of tape. It may
be easier
to to in multiple paintings.
18. SHELL: Spray the shell with
Testors gloss
coat and allow it to dry for a day. Decal the shell with
Microscale's
Chessie locomotive set. I used the Ches-C logo from one of
the "Chessie
System" decals for the nose herald. The one given for the
nose on
the Microscale sheet is too small. Also, the road #s are
too small.
They should be the same size as the "B&O" letters. I
used the
road #s from a set provided with my GP30 from the C&O
Historical Society.
The builders plate came from another Microscale sheet.
19. SHELL: When done decaling, spray
the
shell with Testors Dull Coat and allow it to dry for a day.
20. Prime the handrail parts and attach them
to
the shell. I paint the parts that enter the shell so that
when I
paint the rest of the hand rails I don't get any paint on the
shell itself,
just the hand rails. Paint them SP Daylight Red.
21. Put in the "glass". I just cut
clear
plastic the size of the windows and use white glue to hold them
in.
22. Assemble the shell and frame. This
will
be tricky, since the couplers will need to be on the frame
before you mate
the two parts.
23. Weather the model with an overspray with
roof
brown. Center the spray around the bottom 1/4 of the
locomotive.
Also, put some black weathering chalks around the exhaust on the
top, the
side sill under the battery box, and the louvers on the left
side right
behind the cab. See photos for clarity.
24. Attach the windshield wipers.
25. You are done, enjoy your SD40-2.
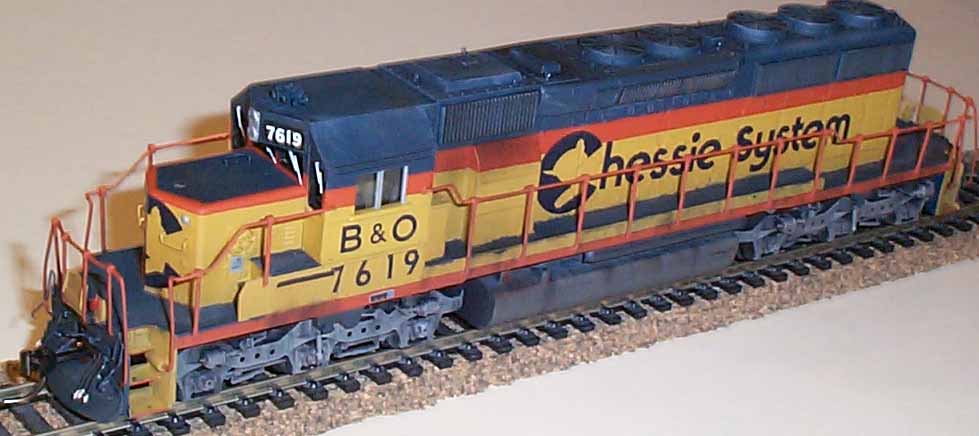
Below is a pic of my SD40-2 in work. Enjoy.
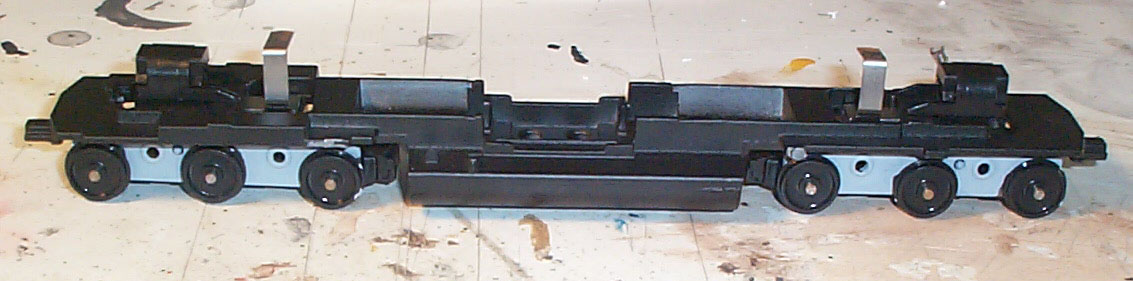
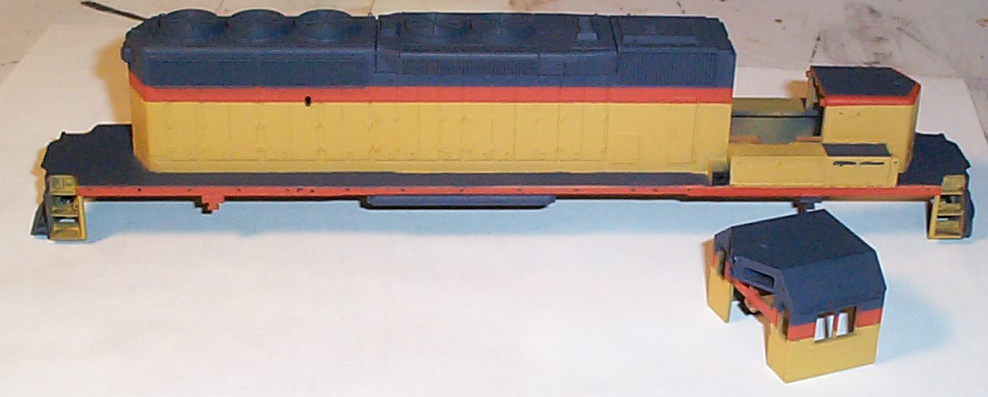
Below is a picture of the frame with the
attachment pegs
sanded off and the sides of the trucks primered. You can
see where
the attachment pegs used to be. They were right above the
inside
axles.
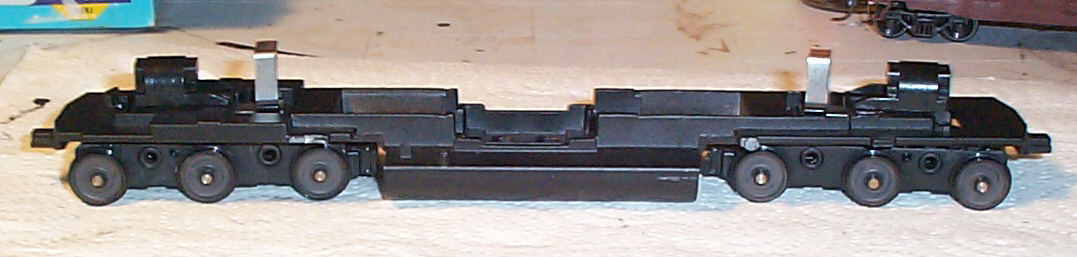
Below is a pic of the frame with the wheel faces
painted.
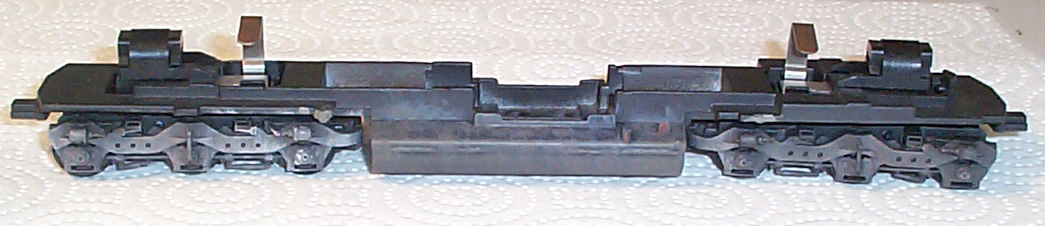
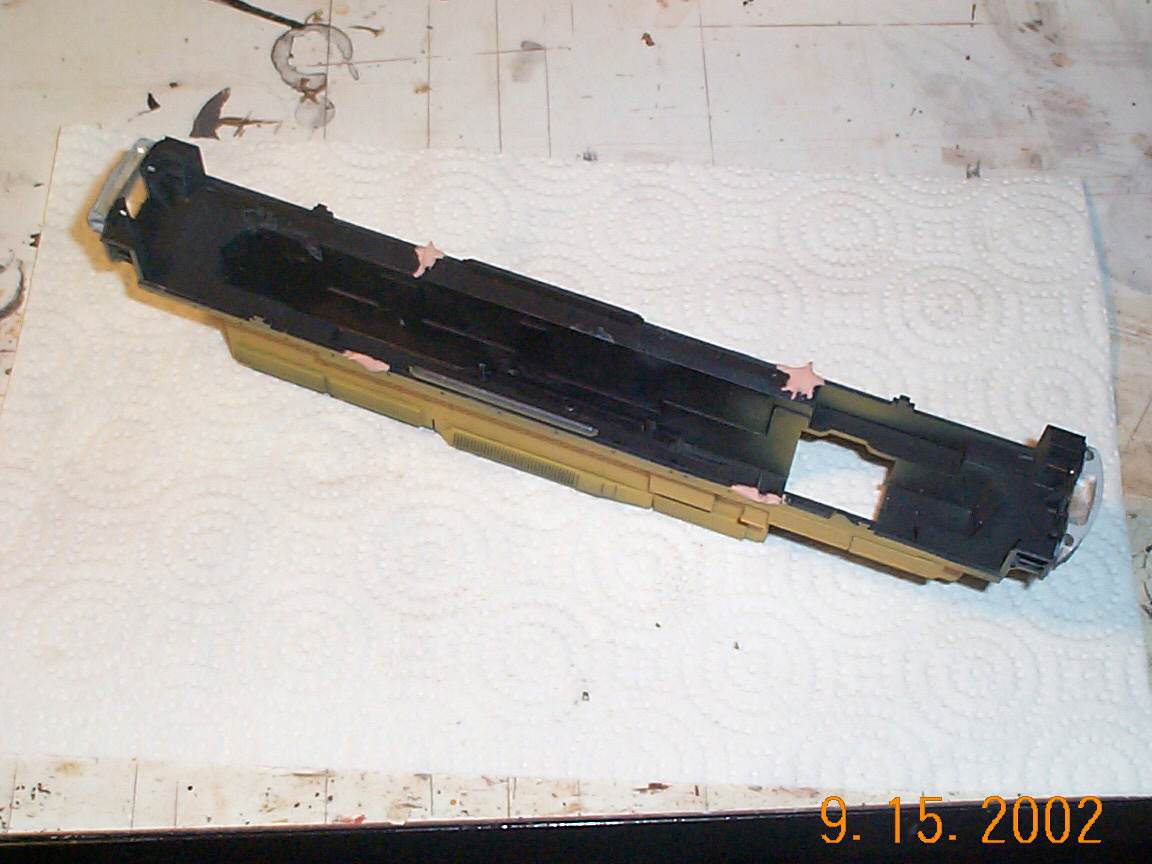
Below is a pic of the frame completely done and
ready
to mate with the shell.
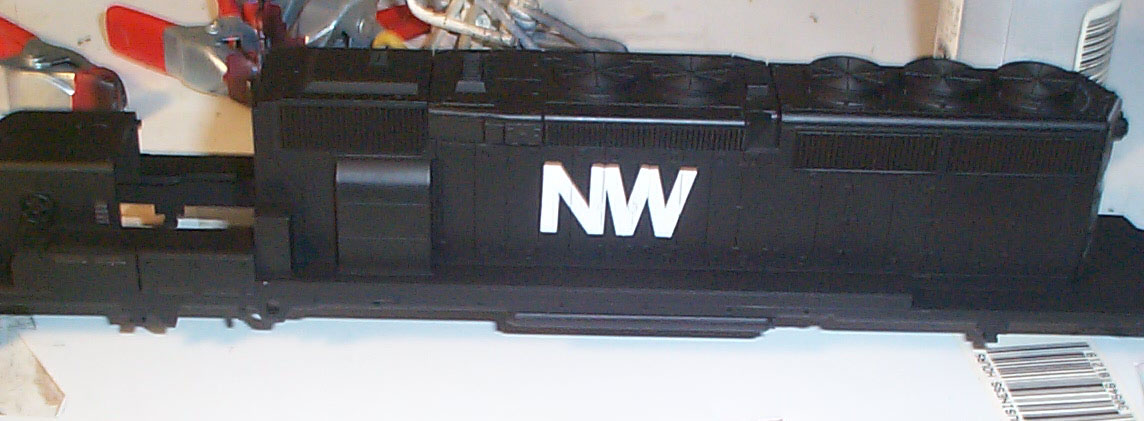
Below is a pic of the shell with the front
attachment
hole intact and the rear attachment hole sanded smooth with the
side sill.
The front hole can be seen directly under the front edge of the
long hood.
The small notch is all that is left of the sanded smooth hole in
the back.
It is just behind the long tube that runs under the "NW" on the
side sill.
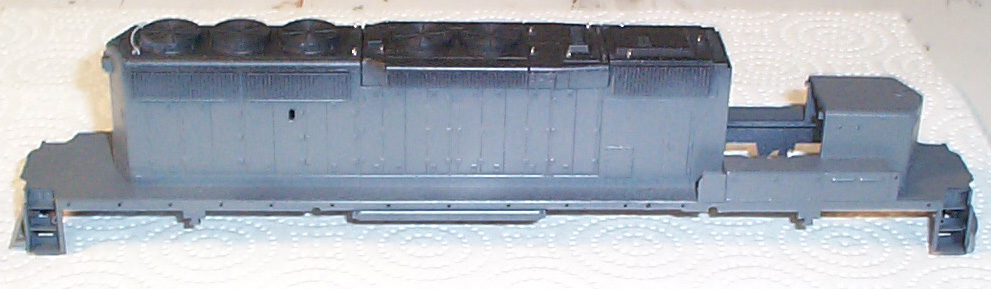
Below is a pic of the shell primed and ready to
be painted
yellow. No need to prime the top as it will be dark blue.
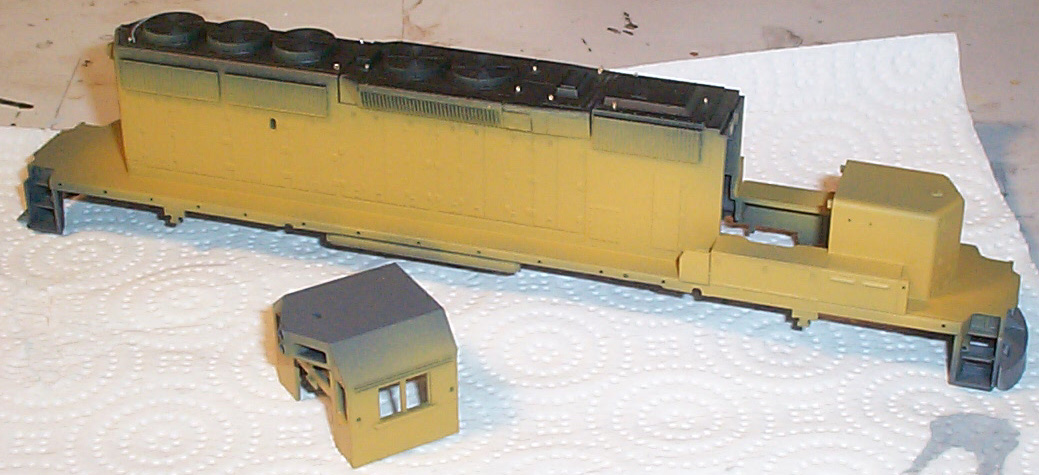
Below is a pic of the shell and cab painted
yellow.
Up next, bondoing the holes on the side sill, and painting
orange.
Below is a pic of the shell with the two mounting
holes
bondoed. Carefull sanding will leave a rock hard smooth
surface to
paint.
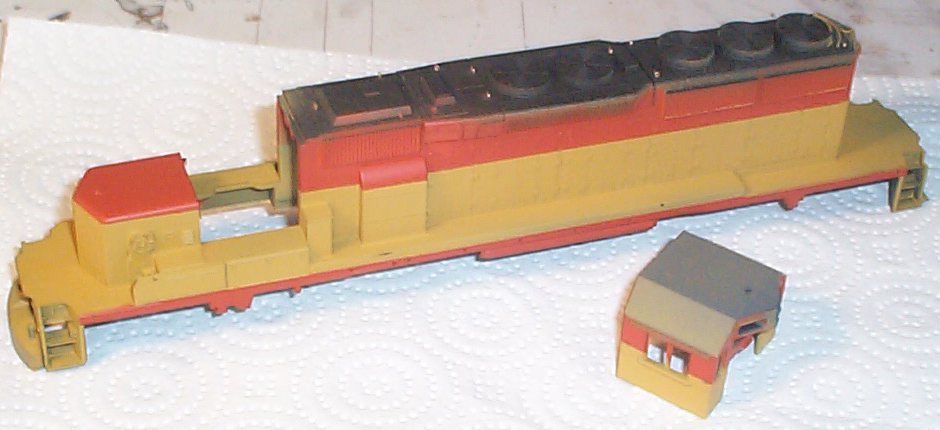
Below is the shell with the SP Daylight Red
applied
Below is the shell painted blue. The
louvers on
the battery box have been shaved off, a black strip of decal
will cover
this later. Also, only the front jack pad has been painted
blue in
this picture, the other one will be hand painted blue. I
was not
happy with the stair well's yellow color, and will be touching
that up
before finishing this project.
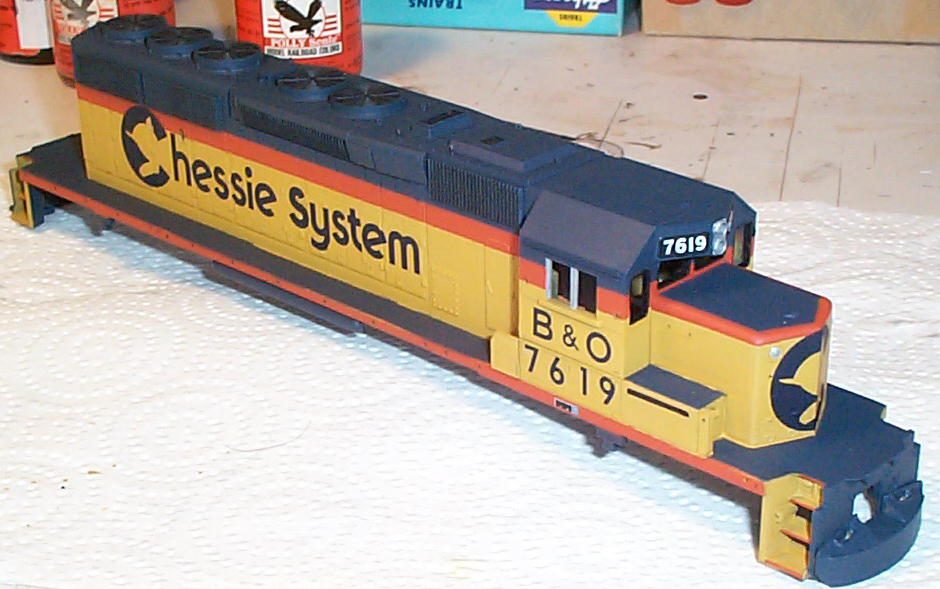
Below is the SD40-2 decaled and ready for final
assembly
and weathering.
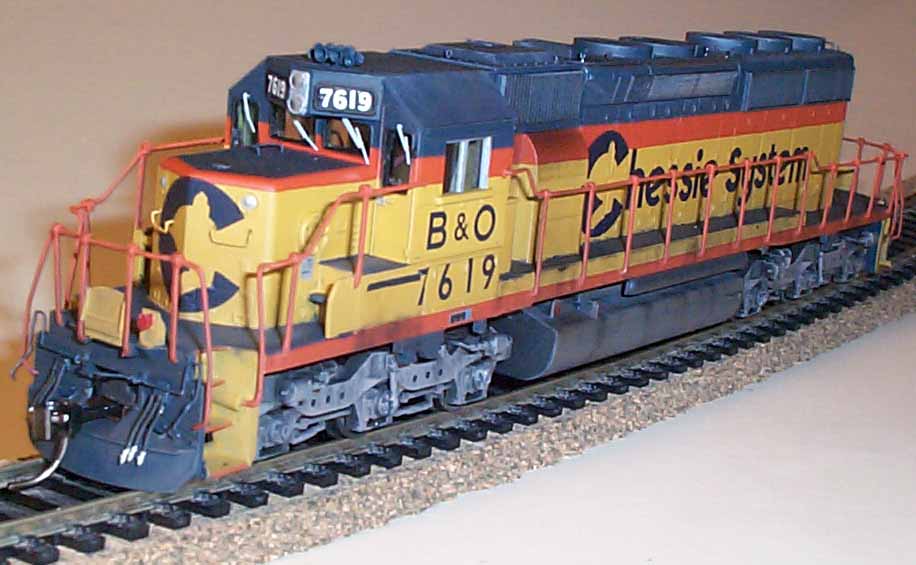
Below are some finished pics of the model.