How to make an Atlas U23B:
1. The Alas kit is very accurate right out
of the
box. The only real problems are that the class lights are
not painted,
and need to be silver. The drop step comes all blue and
needs to
be yellow on the bottom.
2. Add the road number decal. Mine
came from
the set included with my GP30, but Microscale makes decals for
them too.
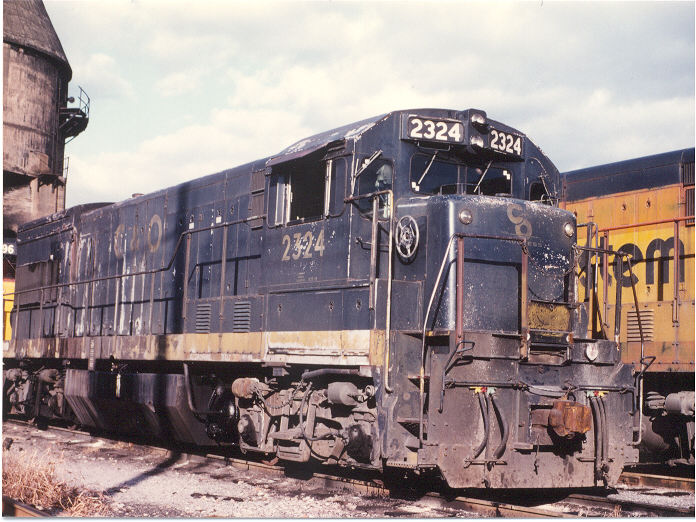
3. The biggest thing anyone notices about
all blue
GE units, like the U23B, is they collect dirt like small
children and their
paint peels like it was the cheapest paint GE could find.
So, you
will need to weather the heck out of it. As it comes in
the package
the engine looks like the day it was built. For the
Chessie Era,
you need to show some faded and peeling paint. I weathered
mine with
C&O blue right out of the bottle. Drybrushing and
streaking it
all over. Then I lightened it with white several times,
for several
different shades of blue.
4. Next I got the white and grey paint out
and
went to town on the yellow stripe. I streaked it according
to the
pic above.
5. Streak and drybrush dirt color, roof
brown,
and rust color around the point where the hood widens in the
back.
This is where the worst paint peeling always occurs on GEs.
6. Drybrush the trucks with grey and
white.
Drybrush the silver exhaust stack black. Drybrush an area
around
the stack black too.
7. Drybrush the couplers rust colors.
Also
paint the front face of the pilot (where the couplers are) a
dark bluish
black color. Drybrush on some tan and concentrate on
making two "stripes"
of lighter color. See the pic above for what I mean.
You want
to simulate all of the kicked up dirt that accumulates there.
7. Paint the numberboards black. When
the
paint is dry apply a gloss coat to the boards.
8. Apply numberboard number decals.
9. Add handrails. Paint the parts in
the
yellow stripe yellow. Paint the ends by the steps
yellow. Weather
them like the prototype photo.
10. Tape over the windows. Spray the entire
locomotive
with dull coat. This is needed to seal in the
numberboards.
11. Streak oily black (glossy sheen) on the
fuel
tank to simulate fuel spills.
12. You are done. Enjoy your
locomotive.
Below are pics of my U23B in work:
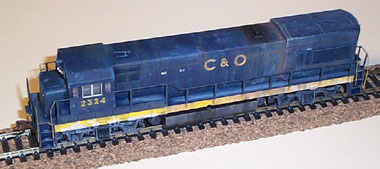
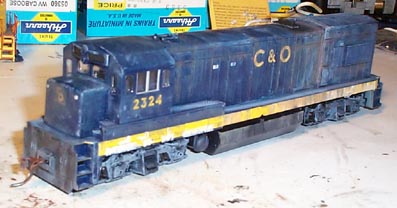
#2324 right out of the box.
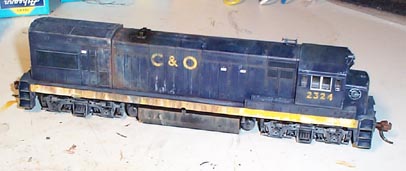
Below is my #2324 after steps 1-7. The road
number
was added and the weathering done. Notice the two silver
dots on
the nose. Those are the class lights and should be silver.
It is not easy to take that first brush load of
paint
to a pretty Atlas engine, but when all is said and done, it
looks like
a real locomotive and not a toy.
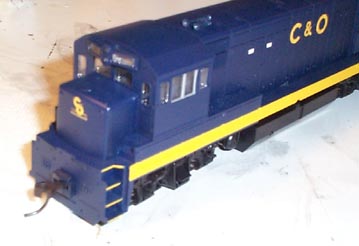
Below is a back view of the finished
locomotive.
The handrails and the numberboard decals have been added.
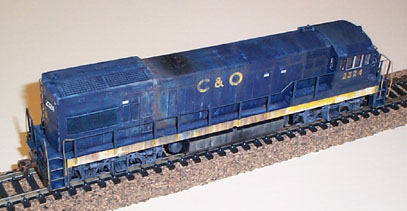
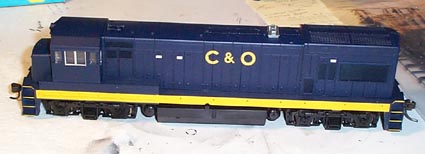
Below is a side view of the finished
locomotive.
It is ready to start hauling trains and earning some money.