Below is a Dean Heacock pic of the real car I am
modeling.
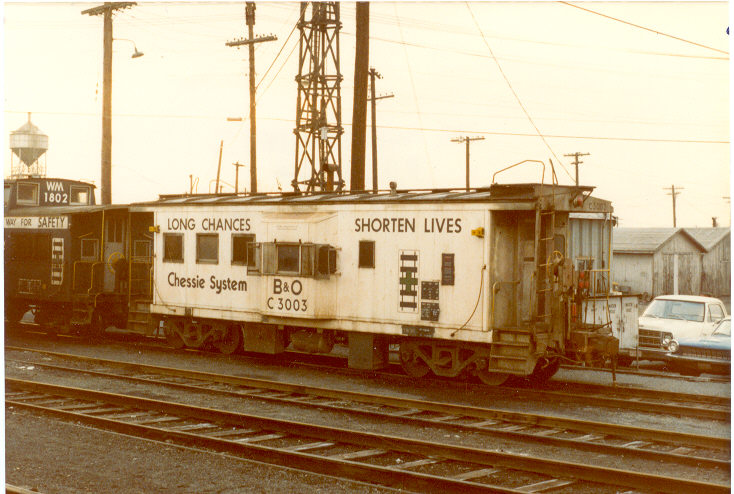
Dean
Heacock photo
How to make a Bev-Bel Safety Cabin:
1. The first thing to keep in mind is to not
ruin
the white painted areas of this caboose. Take the roof
walk and sand
off the pegs on the underside. Fill in the holes on the
roof where
the pegs go. They are so bulky they detract from the
appearance.
We will just glue the roofwalk directly to the roof later.
2. Add an end piece on the roof to make the
roof
look thicker. This is easily accomplished by adding a
small piece
of plastic and sanding it to shape.
3. Fill in the exhaust stack hole.
Drill
one on the other side of the caboose even with the old
hole. B&O
cabins had the smoke stack on the other side than the Athearn
model depicts.
When it comes time to put the smoke stack on use a "T" shaped
one from
your parts box, don't use the straight pipe one that comes in
the kit.
4. Paint the ends and roof grey. The
ends
will remain grey, the roof is being painted grey just to be a
primer.
Check your sanding work after the grey paint dries.
5. Paint the inside and metal weight on the
base
a uniform color. I use a tan color, but any will do.
Also paint
the window frames silver.
6. Tape off the roof, leave a small bit of
the
grey roof showing just above the white sides. Paint the
roof (not
the ends) rust color. Paint the roof walk too. I
used flat
dark brown by Tamiya for my base color.
7. Apply a black wash to the roof, end
platforms,
and roof walk. Also paint the bottom of the sides
black. This
will tend to hide the fact that the bottom sill doesn't look
right.
8. When the wash is thouroughly dry,
drybrush successively
lighter shades of rust color, ending with light grey. Give
the roof
walk a final light drybrushing with silver.
9. Apply a small dot of red paint on the end
cap
you added. This will simulate the light.
10. Glue the roof walk on.
11. Apply the "C3003" number to the end cap
of
the roof.
12. Apply an overspray of dark grey overall,
and
a tan overspray on the bottom quarter.
13. Seal with clear flat.
14. Cut squares of clear plastic and put in
for
windows.
15. Assemble the shell to the frame and you
are
done.
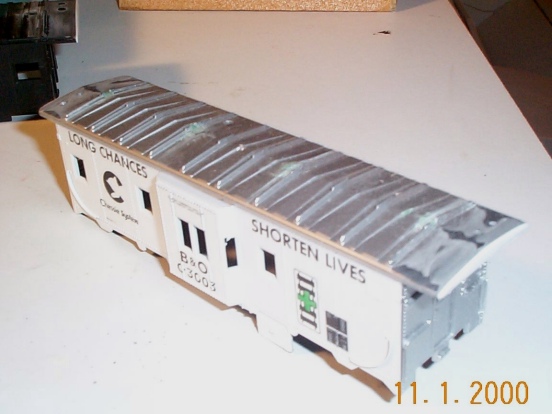
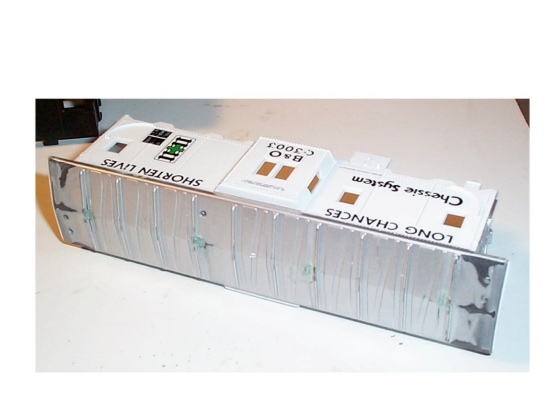
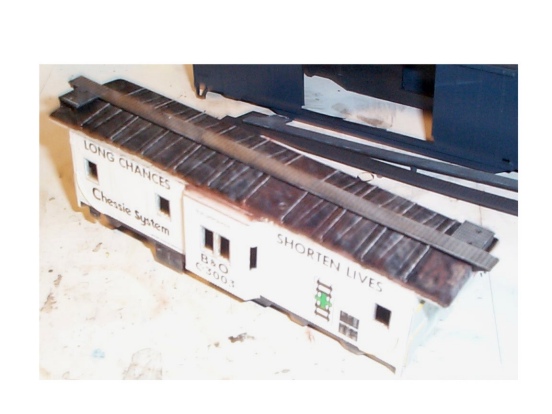
Below are four "in work" pictures. The
first shows
the end piece I added to the roof nicely. The second pic
shows how
I have filled in the holes where the roofwalk should go.
The next
two pics show the roof weathered and waiting to weather the
sides.
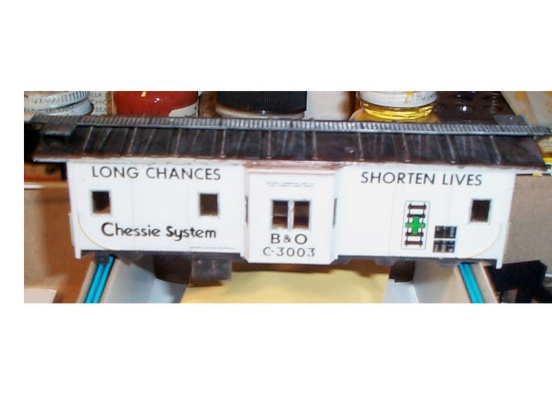
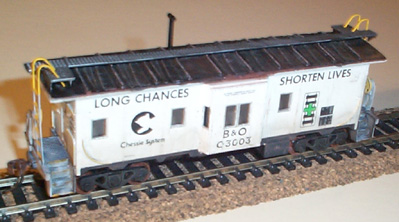
Below are the final pics of the C3003.
Notice the
end pic with the "C3003" letters added behind the ladder and the
red dot
to represent the light.