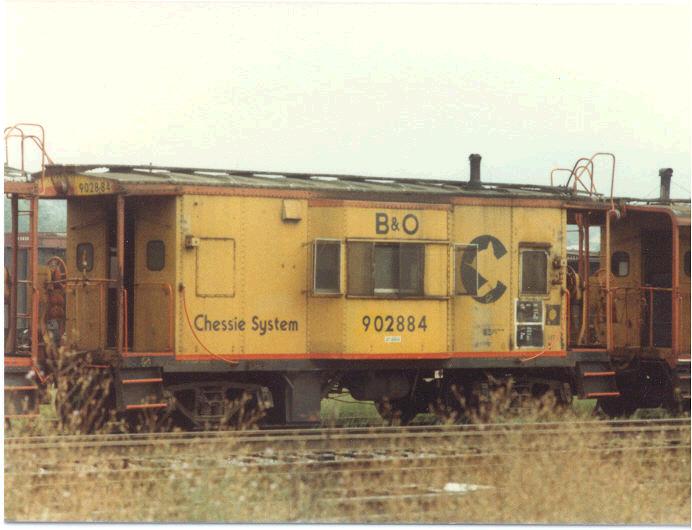
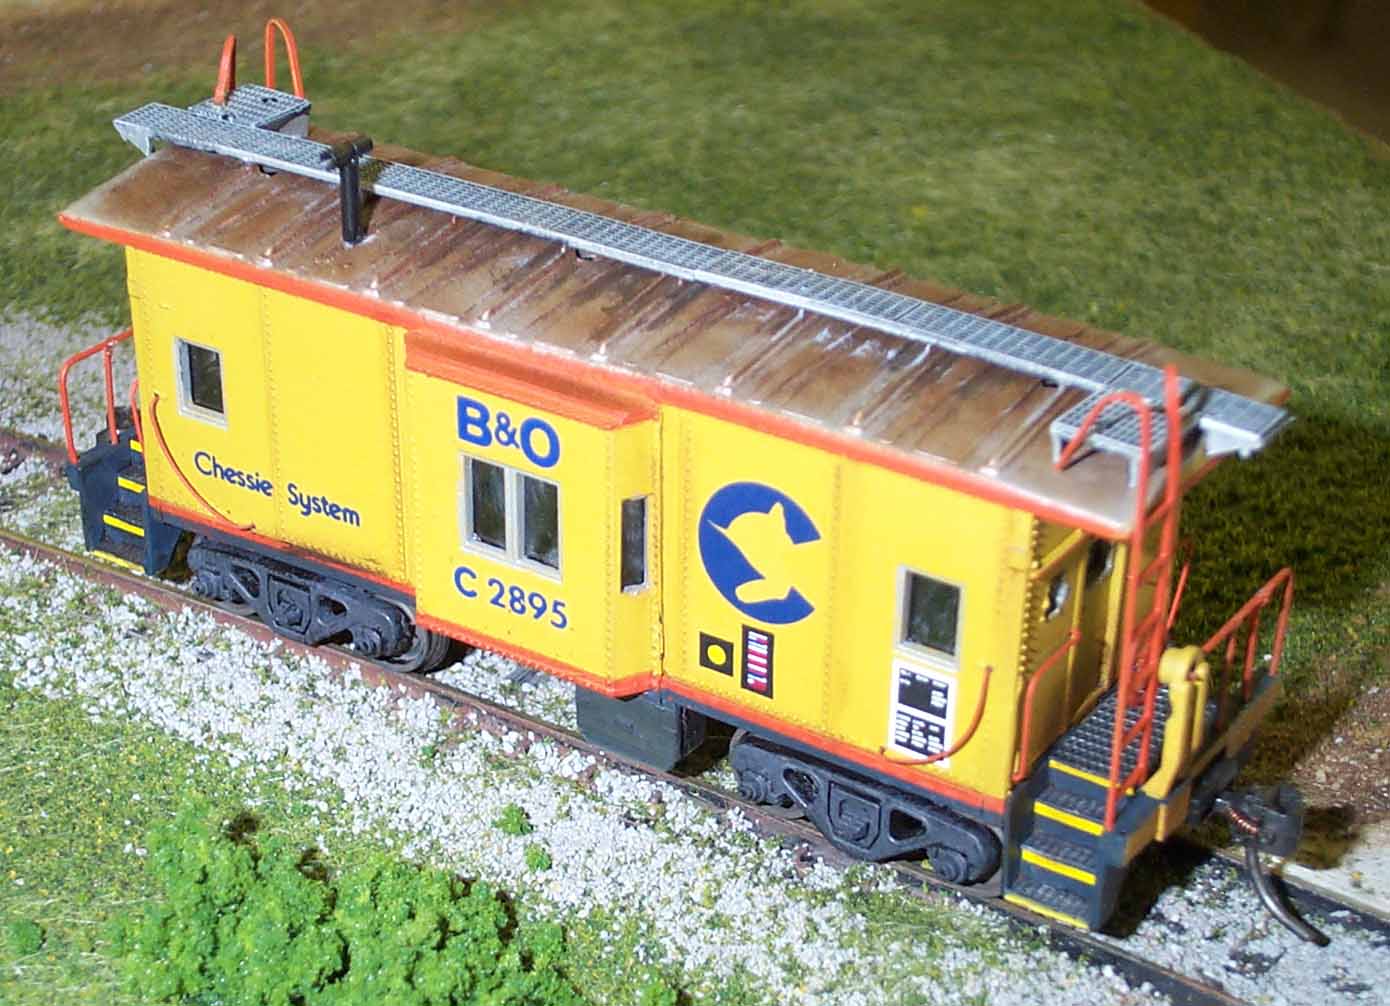
Chessie reclassified these cabooses as the C-22 and C-23 classes. I have chosen to make two C-23 class cabooses. They are identical except the C-22 class has slotted steps, which would be quite difficult to model. Several of these cars existed for many years in the all blue B&O scheme applied in the late 60's. However, no blue C-23 cabooses had the 90XXXX series numbers (which began in 1982) and all appear to have been painted in Chessie colors by December 1979. Choosing a C-2XXX number is therefore a must for this class and the all blue paint job. Many however were painted into Chessie colors before 1979. I am doing one of each paint job on this project. Chessie painted ones were seen with both the C-2XXX and 90XXXX series numbers.
The real cabooses were originally build with two windows on each side. Before the Chessie era the B&O sent all I-17 and I-17As through a rebuilding program. The net results were all Chessie C-22 and C-23s had one window on one side removed (see photo below). Doing this project as I have will produce a caboose with only one window on one side, but it is unfortunately the wrong window. The Athearn kit will produce a car with the blanked window on the right of the cupola not the left, as on the prototype. It is a small difference I can live with.
No one makes a kit of these classes in plastic,
but Pacific Mountain Scale Shops
(PMSS) did make resin I-17s around 2002.
They are very hard to find now, but you may get lucky and find
one.
The Athearn bay window, which is readily available and cheap, is a close starting point. It is however, too long. This will be a more difficult project to complete, as it will require much cutting and sanding to do right.
Below is a real pic of each of the two paint
jobs.
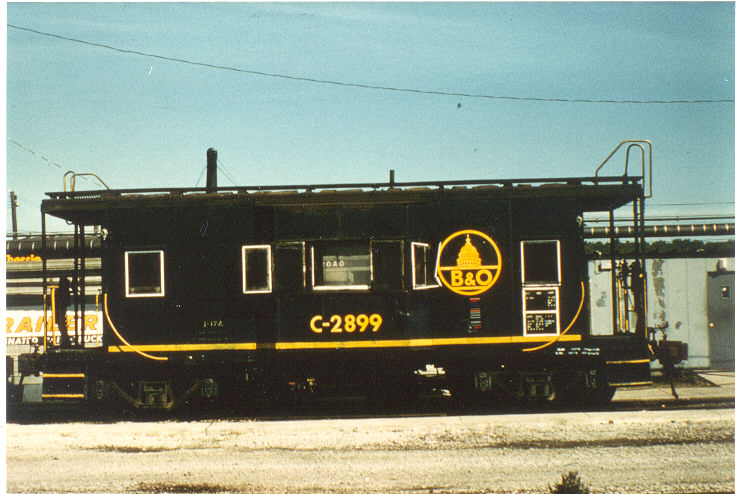
I chose to do C-2899 because I found another photo of the same
caboose
still wearing this all blue paint job in November 1979.
Dean Heacock
collection.
Dean
Heacock
collection
Dean
Heacock collection
How to:
1. Buy two undecorated Athearn Bay Window
Cabooses.
I got mine for $3 a piece at a train show.
2. Carefully cut the shell with a razor saw
(vertically
from the bottom of the shell to the roof line and horizontally
across the
roof line). See photos below for clarity. This will
remove
the bay window and the two inner most panels of the
caboose. Discard
the panels and keep the bay windows.
3. Cut off the two battery boxes on the
bottom
of the caboose. Keep these parts.
4. Cut the two middle panels out of the
roof.
Eliminate the plain panel and the one that is directly in the
middle (next
to the plain one). Discard the cut off pieces.
5. Carefully glue the roof back to one
piece.
Glue spare plastic along the joint inside the roof for added
strength.
Cut the existing side sill off. Simply glide a sharp blade
along
the panel line a few times and break it off with needle nose
pliers.
It will break off perfectly straight.
6. Carefully sand off the end grab irons
(except
the top ones), the side grab irons, and the vent that is at the
top right
of the side of the caboose that has only one window.
7. Cut out the bars across the end
windows.
Sand the end window smooth. Fill the whole with plastic,
and sand
smooth again. Cut in a small squarish whole on each side
of the door
on the end. See photos for clarity.
8. Glue an end cap to the roof ends.
Sand
smooth with the top of the roof. Fill the ladder
holes. I just
put a piece of plastic on the underside of the roof over hang
and filled
the hole with gel type super glue, sanded smooth.
9. Sand the two bay windows as thin as
possible.
Also sand smooth the two vertical rivet lines that touch the
corners of
the big window's opening. These rivets are not on a C23
class caboose.
Attach the bays to the shell.
10. Glue a new side sill on the shell.
The
plastic I used had a square cross section, which added to the
problems
on making the new frame. Use a piece of plastic only as
thick as
the shell and you won't have to do some of the next few steps.
11. Take the plastic floor of the caboose
and cut
it in three parts, to fit the length of the new shell. I
had to make
my floor about a 1/16 of an inch narrower on each side due to
the big new
side sill I added. A correct sized side sill would
eliminate this
step. Take the middle piece you cut and glue it on top of
one of
the other two pieces, so that it over hangs about 1/2 way.
This will
add strength to the joint when you glue it into the shell later.
12. Cut the metal weight in half and stack
them
on top of each other. Glue the pieces together with super
glue.
13. Take the center beam and trim off all
the side
beams. They will show if not trimmed off. You can't
see them
on a real C23, so just get rid of them. No one will see
the bottom
of your caboose anyway.
14. Take the roof walk and cut it into three
parts.
Trim the two end pieces to the correct length for your
shell. Discard
the middle piece. Trim off the side parts (with the two
holes in
them) of the roof walk. The ladder is on the other side on
the C23.
Paint the roof walk black and then dry brush it silver.
Glue it on.
I used spare parts for the side parts of the roof walk (don't
know what
kit they came from).
15. You can paint the cabooses at the same
time
or not, up to you. I painted the blue one first. I
used C&O
enchantment blue. Then when dry for 24 hours, I painted
the ends
Reefer Yellow. When that was dry for 24 hours, I painted
the roof
silver. I rusted the roof with brown paints and streaked
the sides
with lighter shades of blue to show some fading. Don't
over do the
streaking, caboose paint held up pretty well. I primed the
Chessie
one light grey. Since it is going to be all yellow, the
primer will
make the yellow paint look better. When dry, paint the
yellow, then
orange, then silver and finally C&O enchantment blue.
16. Spray the caboose with gloss coat and
decal
it. I used the Herald King's C-560 B&O caboose set for
the blue
caboose and a combination of Herald King C-141 and a covered
hopper set
to make the Chessie caboose. Spray with dull coat when the
decals
are dry.
17. Prime and paint the grab irons. I
used
Reefer Yellow for the color on the B&O one, the Chessie ones
are SP
Daylight Red. Detail Associates makes the grab
irons. The end
rail is the original Athearn end rail, cut to shape. The
two extra
vertical posts are spare Athearn end rails cut to size.
Drill holes
for the grab irons and attach them to the shell. The end
rail holes
are already there.
18. Glue the "glass" in. This is
simply clear
sheet plastic held in place with white glue inside the
shell. It
gives the impression of window glass.
19. Drill two holes for the ladder and glue
it
in. I also glued mine to the roof end for durability.
20. Put on the bottom frame, couplers and
wheels.
Also add the two battery box covers now. Finally, add the
smoke stack.
21. Spray the bottom 1/4 of the car with a
light
overspray of roof brown. Concentrate it on the ends and
steps, very
little on the body itself. Seal this weathering with dull
coat.
Be sure to not get any dull coat on the windows as it gives them
a hazy
appearance.
22. You are done, enjoy your cabooses.
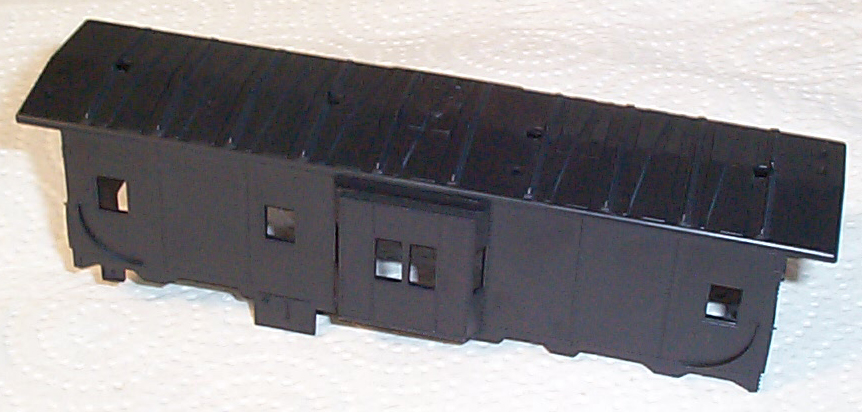
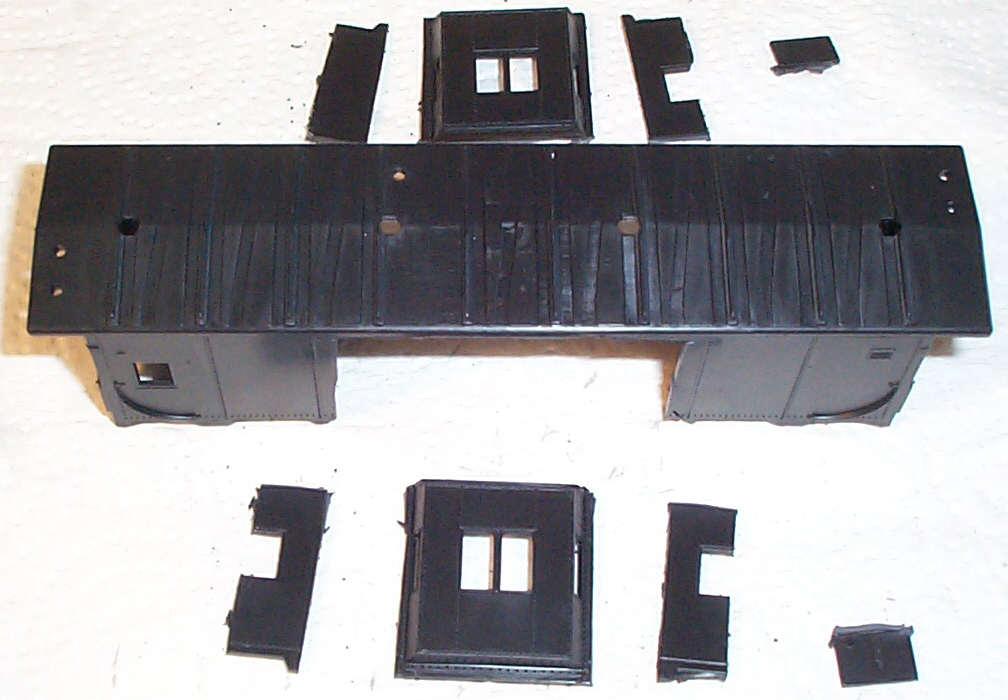
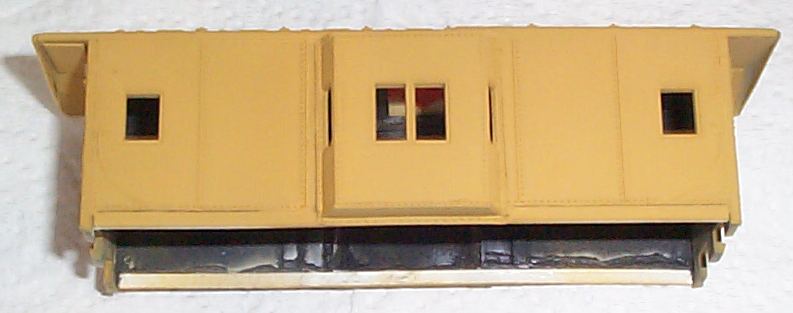
Below is the shell right out of the box.
Note that
there are three big panels on each side of the bay window.
The C23
had only two. We will be removing the two inside
panels. We
will also be modifying the ends, sill and bay window.
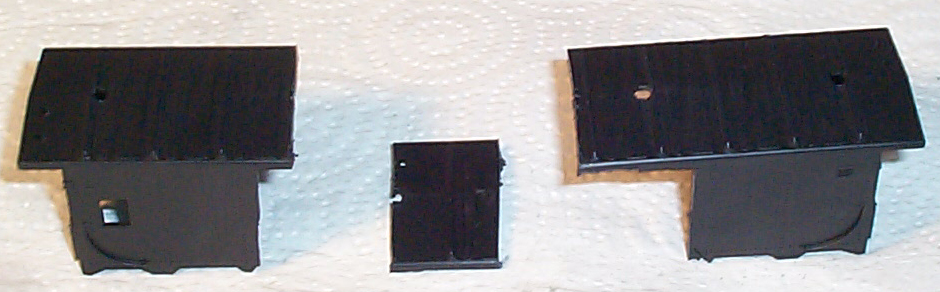
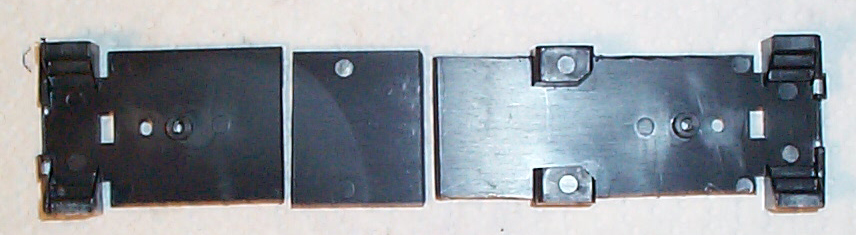
Below is the shell after the first series of
cuts.
Note how the battery boxes are cut and saved.
Below is the piece of the roof that is removed
next.
Eliminate the plain panel on the roof and the one next to it.
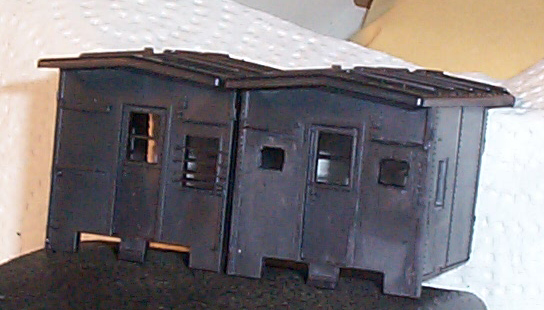
Below is the shell glued into one piece.
Note that
the right side has had the vent sanded smooth at the top of the
right most
panel. Also the right hand rail has been removed.
Also, note
that the right side has had the side sill excess removed, the
left side
has not.

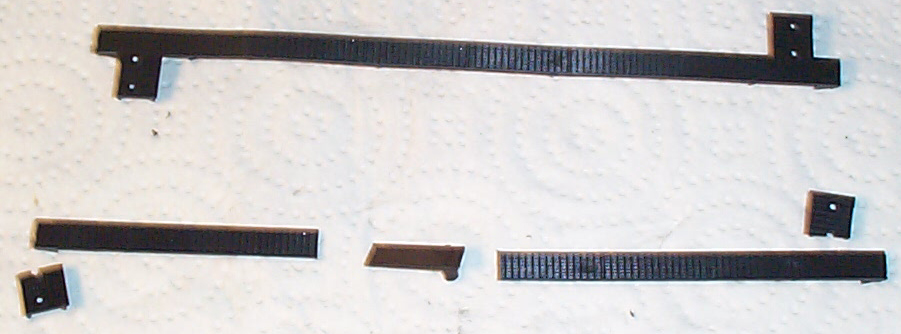
Below are the ends. The left side is right
out of
the box. The right has been modified to be more C23ish.
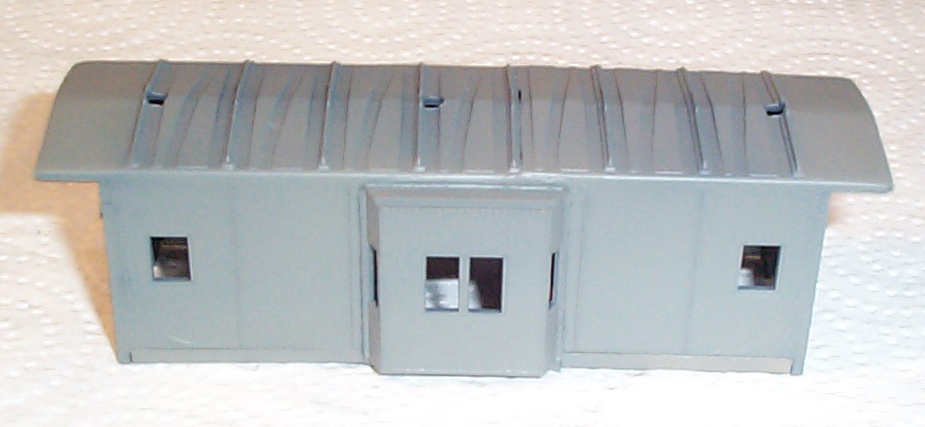
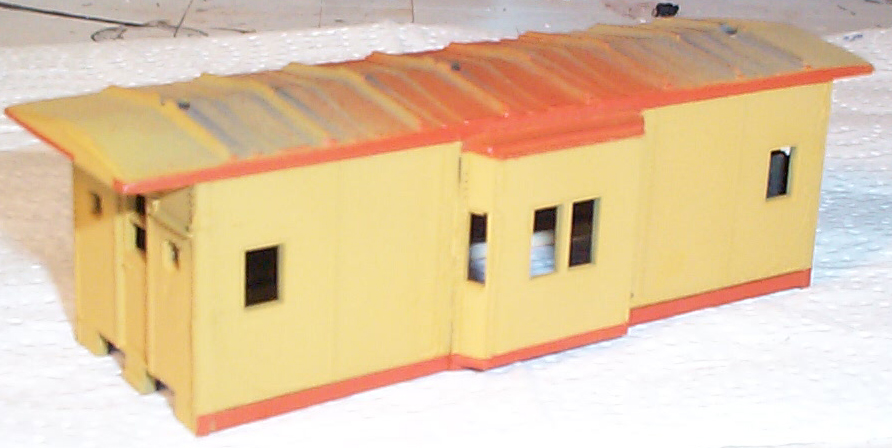
Below is the shell ready for painting. The
bay window
has been attached, the new end cap has been attached, the ladder
holes
filled, and the new side sill attached.
Below is the shell cut. Discard the middle
piece.
Notice how the right piece has been modified to accomodate the
thick side
sill I added.
Below is the modifications made to the
frame. Cut
the weight in half.
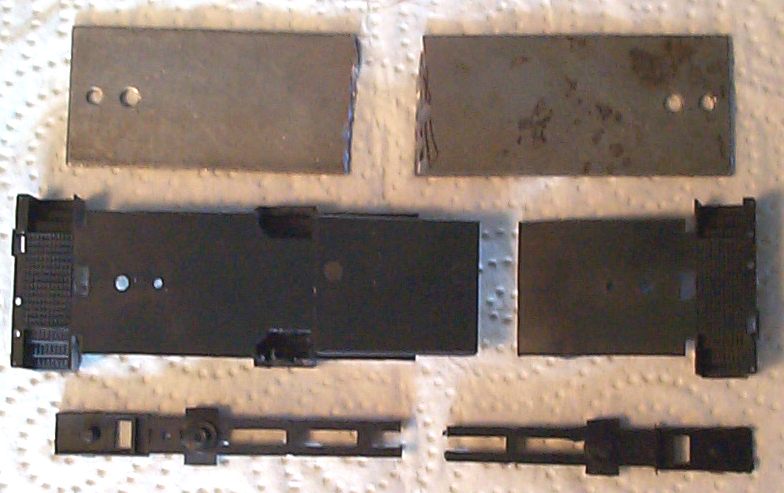
Below is the two roof walks. The top one is
right
out of the box. The bottom one is cut and ready to go on
in two pieces.
Discard the middle piece and the end pieces with the holes in
them.
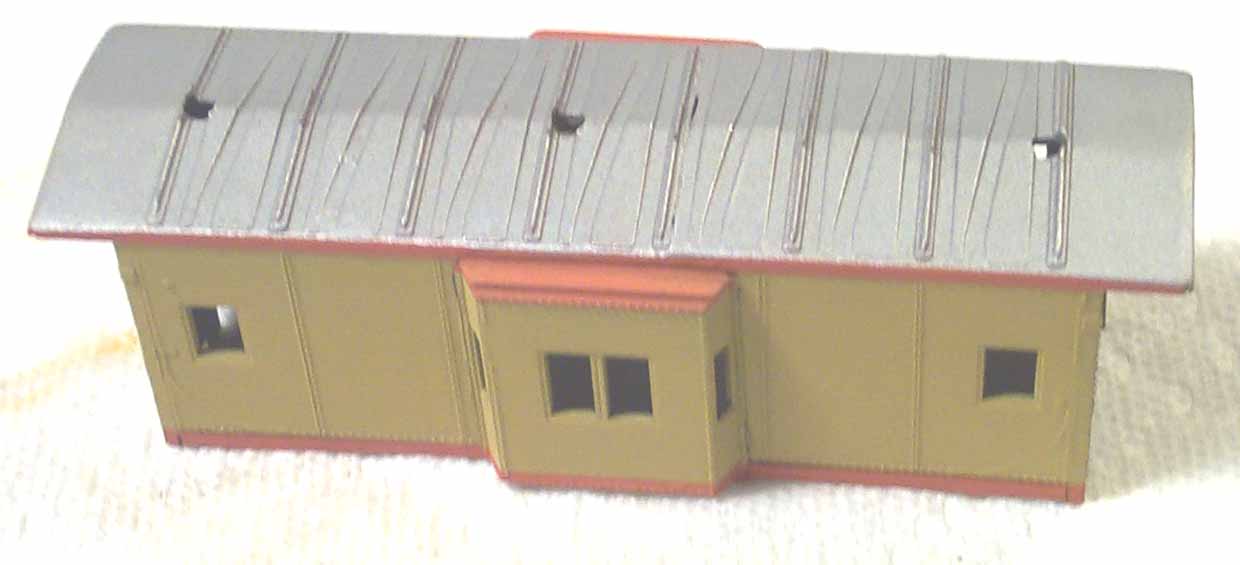
Below is the Chessie caboose at each stage of
painting:
primed, yellow, orange, silver and eventually blue.
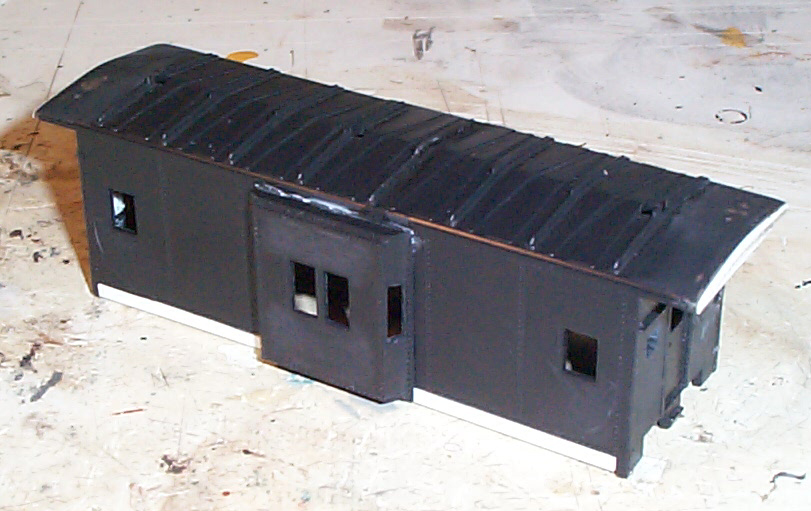
Below is the decaled Chessie caboose.
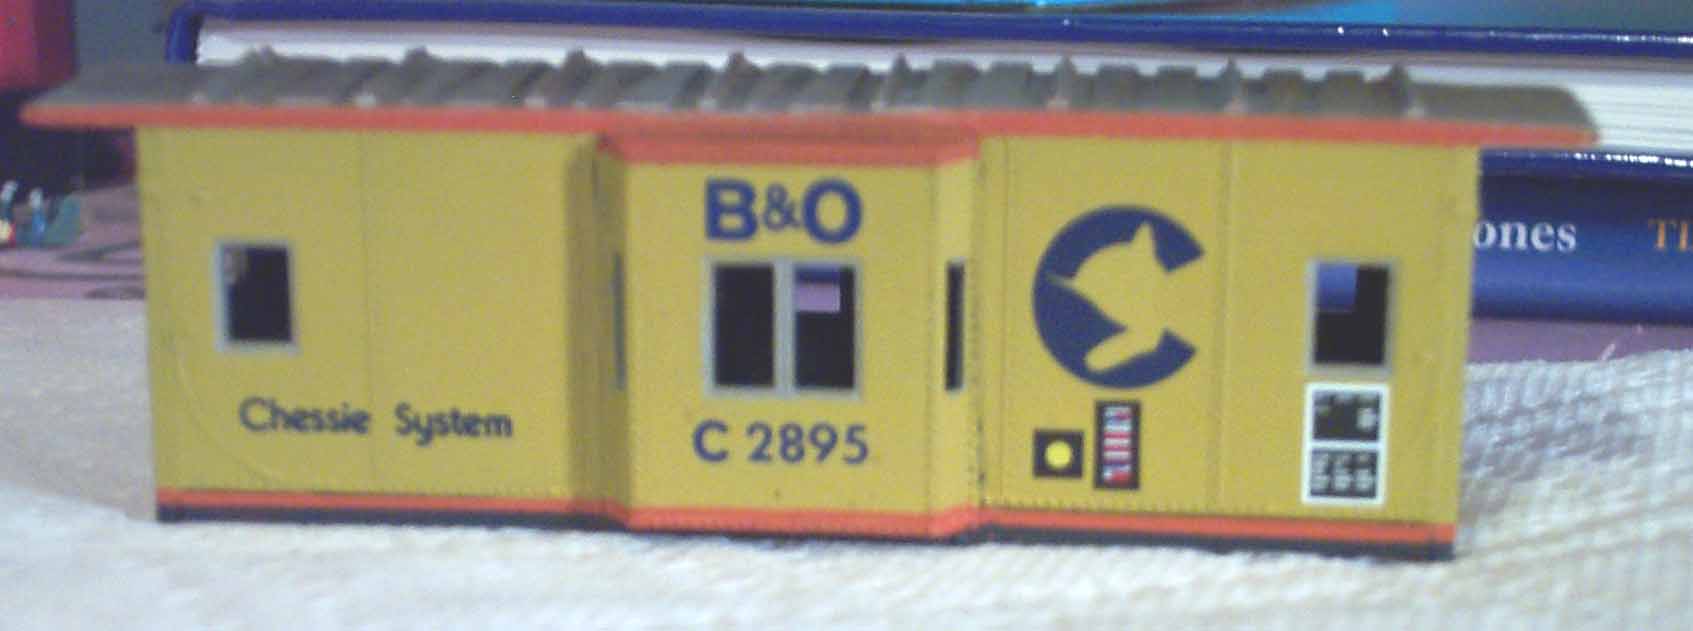
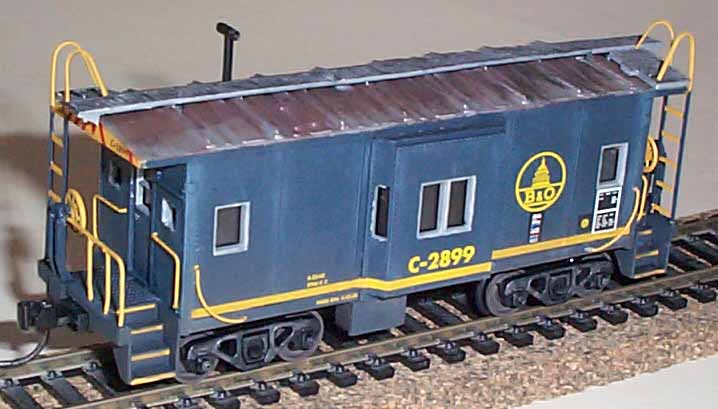
Below is the finished Chessie caboose.
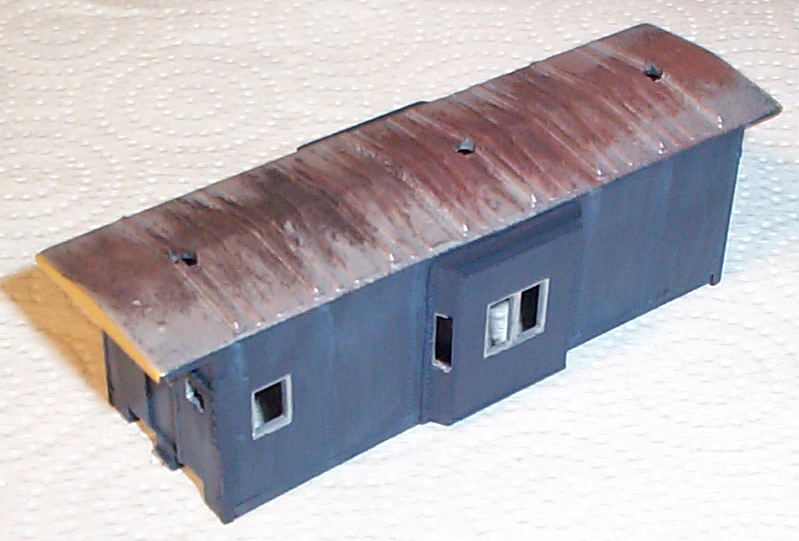
Below is the blue caboose, painted and ready to
be decaled.
The ends have been painted yellow. The roof has been
paitned silver
and weathered to look rusty ( a common site on all B&O
cabooses ).
I faded the blue sides slightly with lighter shades of
blue. This
would be a 20 year old paint job by 1982, so a little fading is
appropriate.
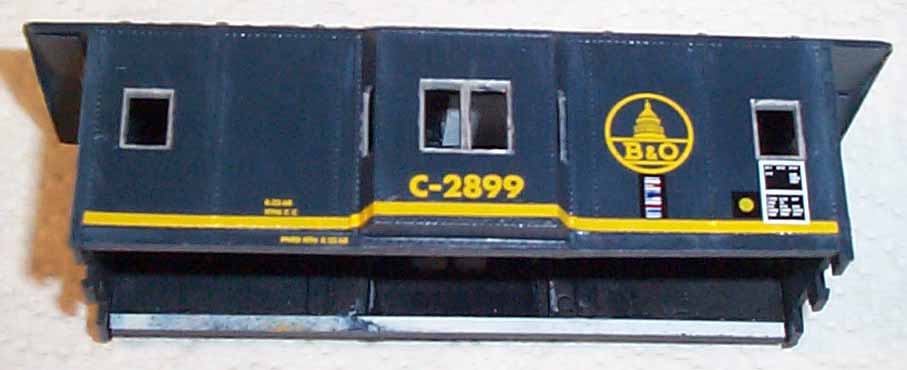
Below is the blue caboose decaled and ready for
some road
grime weathering. Note that the car had a wheel inspection
dot (black
square with yellow dot) in 1979. The prototype picture
above was
taken before it was applied.
Below is the finished B&O caboose.