Athearn makes a 4-bay ACF covered hopper that with some major work can be made into a good C&O HC-29 covered hoppers. This is a project I completed before Atlas came out with this same class ready to run. They offer it in C&O gray and Chessie C&O. I'd recommend you buy the Atlas car and save the work.
The C&O purchased cars 601200-299 (HC-29) and 601300-399 (HC-29A) right before the formation of the Chessie System. The HC-29 is identical to the HC-29A, with the exception of the hatches. The HC-29 had a continuous hatch along the top, the HC-29A had separate hatches. I chose to make the HC-29 since I had a spare continuous hatch from the Walthers HC-39 kit.
These classes are smaller than the HC-47 3-bay ACFs, but larger than the HC-44 2-bay ACFs. They are unique little cars and will make a handsome addition to any railroad. Most of them stayed in this paint scheme for the duration of the Chessie era, but a few did get painted in Chessie paint.
Here are some of the measurements I did for this project. The real HC29 is 476 inches long (5.47 inches in HO scale). The Athearn kit right out of the box is 7.625 inches long. That means you will need to take a 1.145 inch section out of the middle of the kit. Luckily there are two seams in the kit that can act as your guide. As for the bays and wheel spacing, they are too close to worry about correcting. The real car's bays are 111.125 inches apart (1.2773 inches in HO). The Athearn bays are 1.375 inches apart. By building up the bottom as I did, the bays are almost perfectly spaced.
Below is a Sam Martin picture of the real HC-29 I
chose
to model.
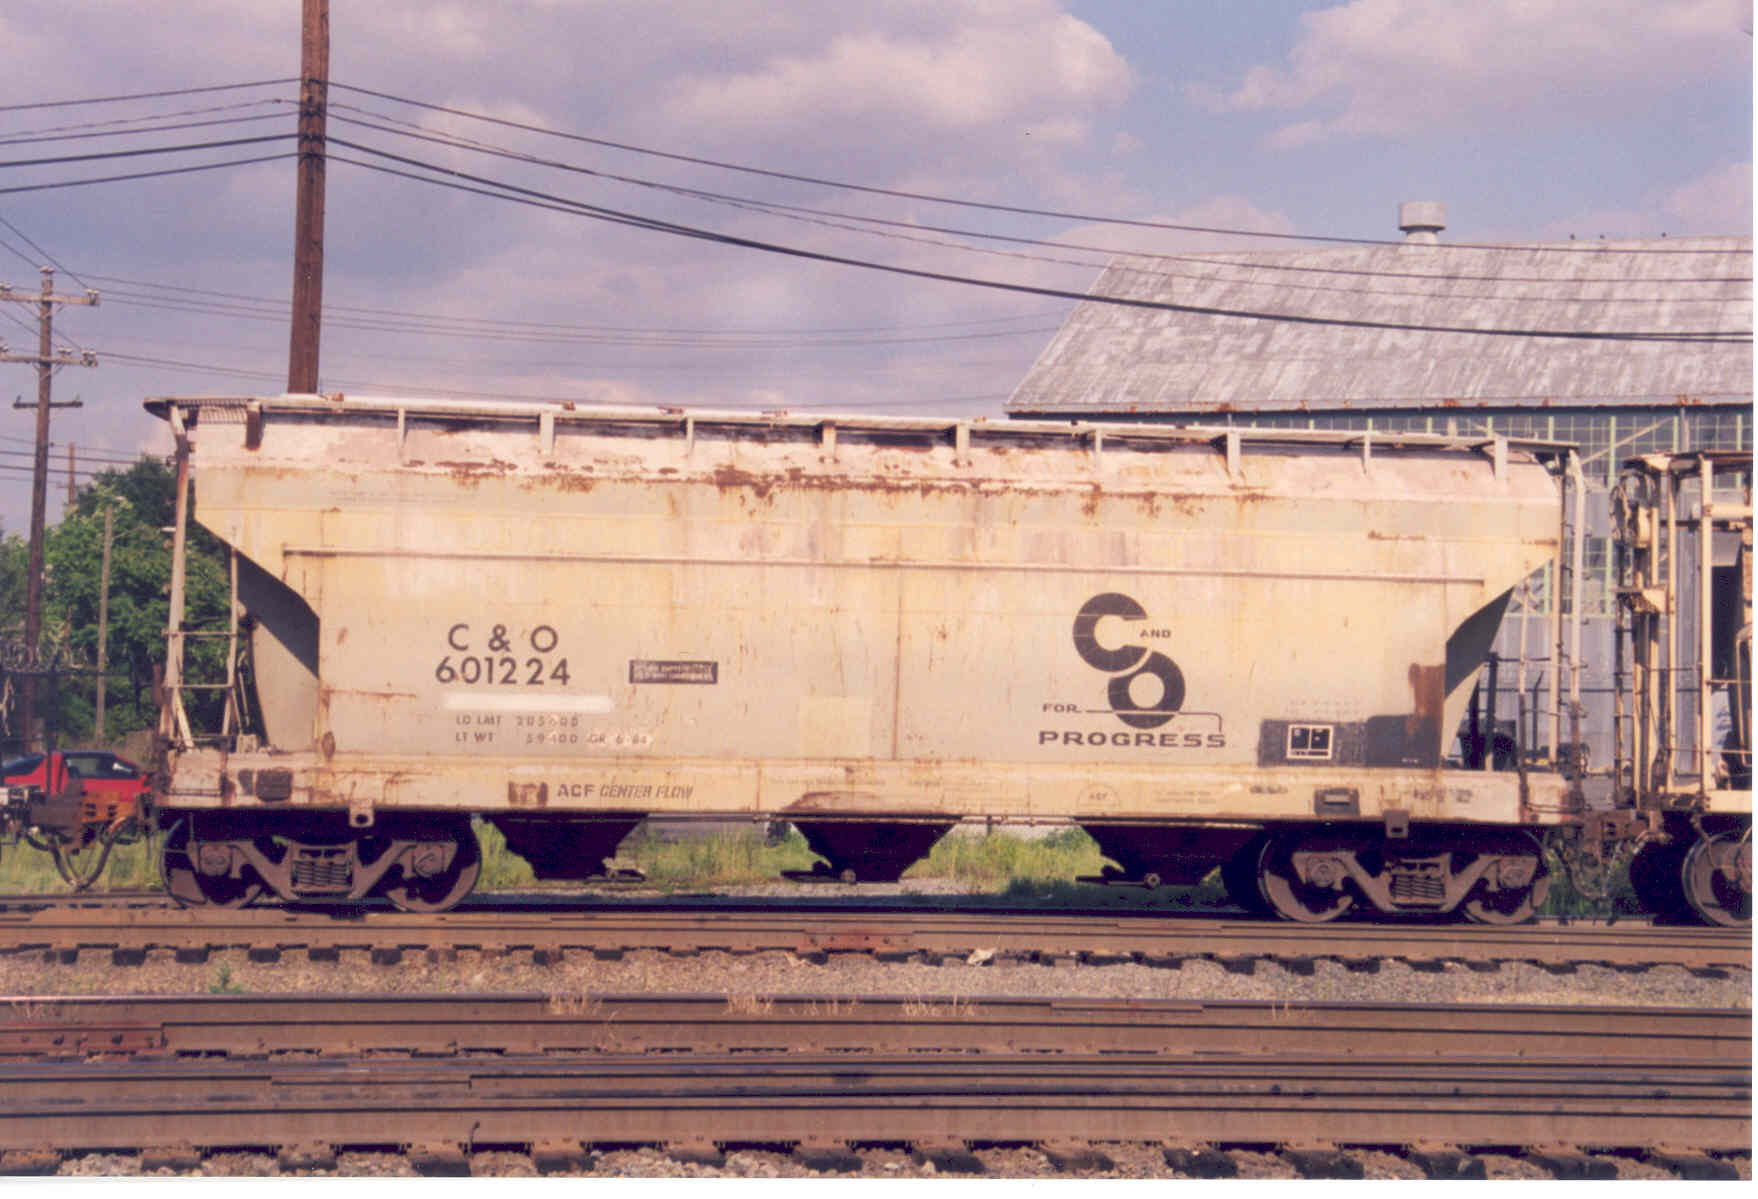
Sam
Martin photo.
How to:
1. Purchase an undecorated Athearn 4-bay ACF
covered
hopper. I got mine for $5-6 at a hobby store.
2. Make two vertical cuts (with a razor saw)
through
the shell. Each cut should be just inside the vertical
seams on the
car. These seams will be sanded off later, but basically
divided
the car into three equal sections. You want to eliminate
almost all
of the middle section. I made my cuts about 3/16" inside
these seams.
3. Sand the edges smooth and check the
joint.
When you are happy with how the joint looks, glue the halves
together with
super glue. Use gel type super glue. It will give
you more
time to work with it and it will fill any gaps.
4. When the glue is dry, sand the joint
smooth
with 400 grit sand paper.
5. Prime the shell with a light grey
color.
If an area needs more glue and sanding, do that now.
6. Prime the shell again with light grey if
you
did any touch up sanding. Add the hatch along the
top. I had
a spare Walthers hatch that was perfect, but any one will
work. If
you want to make a HC29A, than use round hatches.
7. For the bottom piece that holds the
wheels and
has the bays, some cutting is required. See the photo
below for exactly
where I made my cuts. The best way to do this is to cut
the two ends
first and attach them. Then sand the middle bay to fit in
the remaining
hole.
8. Modify the weight to fit on the new
frame.
I had to cut the weight and over lap them inside the car to make
it fit.
See photos below for clarity.
9. Paint the shell with reefer grey.
You
will want to add some white to this color or use SP Lettering
Grey.
My car is a little dark.
10. Spray the car with gloss coat.
11. Decal the car. I used H-563, a
B&O
covered hopper from Herald King, for everything but the "For
Progress"
logo. I got that logo from Champ's C&O car lettering
set.
12. Spray the car with dull coat.
Weather
the car with white chalk. Apply rust spots with a rust
colored paint.
When the paint is dry lightly streak the spots with rust colored
chalk.
Overspray with dirt colors.
13. Spray the car with dull coat to seal the
weathering.
14. Assemble the car.
15. You are done. Enjoy the C&O
shorty.
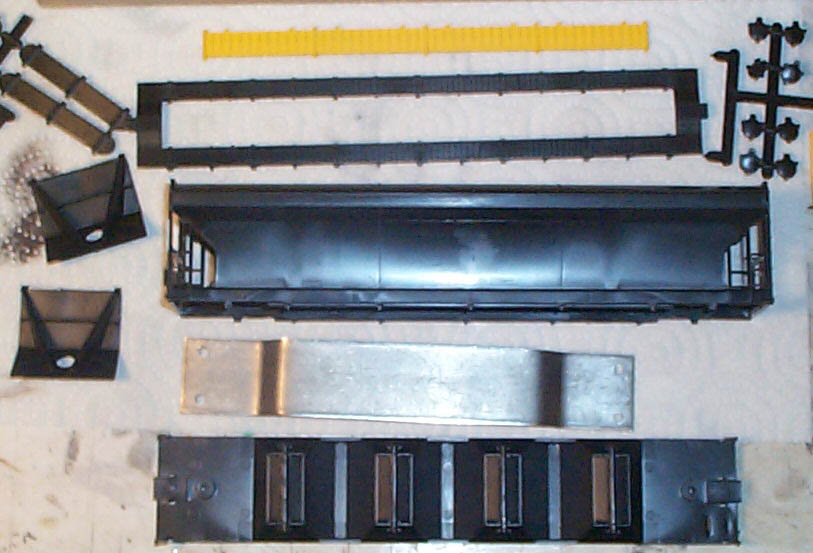
Below is a pic of what you get in the box.
The yellow
piece is the spare roof hatch from the Walthers HC39 kit.
Notice
the four bays on the original bottom. You can save all the
black
hatches for later projects you won't be needing them for this
one.
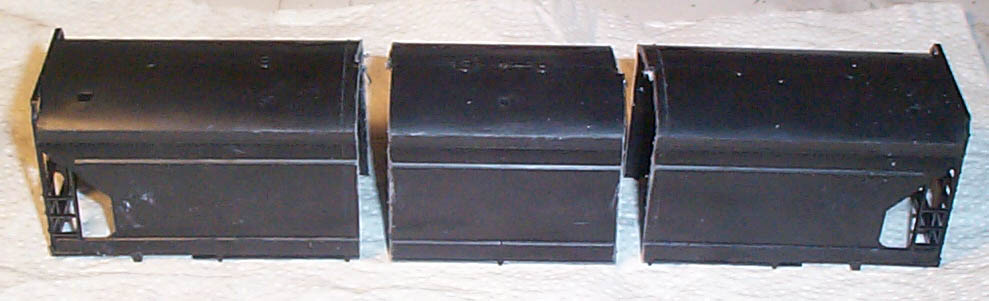
Below is a photo of the shell cut in three.
Discard
the middle section. Note the small seams that are just to
the outside
of each cut. These provided a nice guide to cutting the
body.
I cut about 3/16 of an inch inside each of these seams.
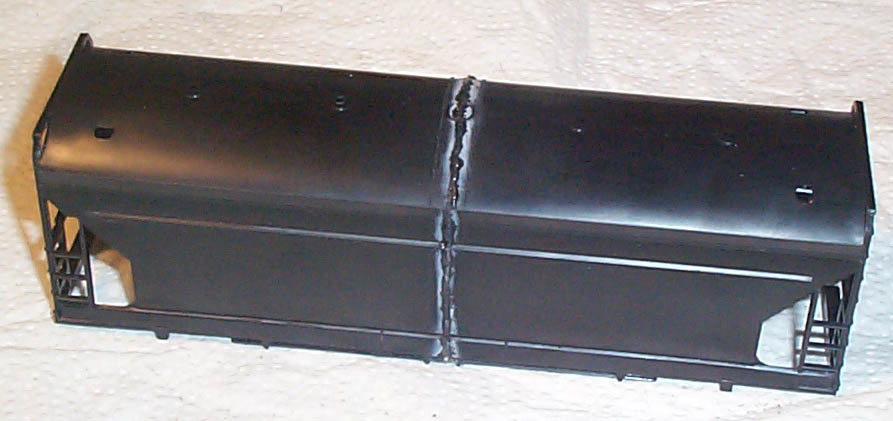
Below is a pic of the two halves glued
together.
Next up...sanding. The car is now 5 1/2 inches long,
nearly perfect
for a HC29.
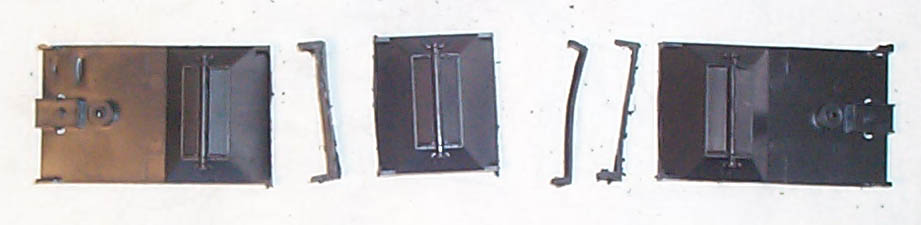
Below is a photo of the bottom cut into three
pieces.
I have discarded the fourth bay for this picure. I had to
trim off
some of each bay to make the pieces fit into the new shortened
shell.
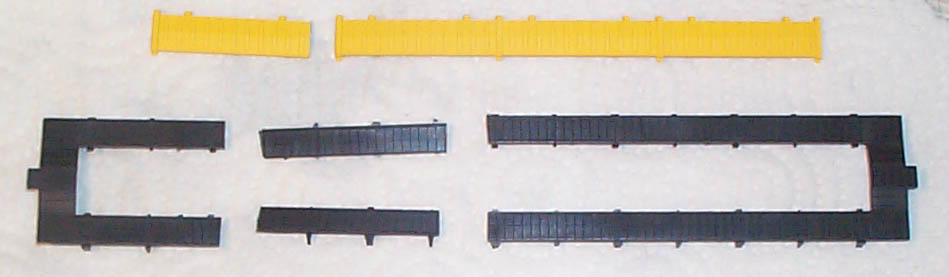
Below is a pic of the roofwalk and the
hatch. Cut
off 1/4 of the long yellow hatch cover. Just by dumb luck,
it is
the perfect length as shown. The roof walk is a little
more delicate.
Slide the pegs into the holes on the top of the car body.
Notice
I cut off one support brace off the left piece, so that the
finished walkway
doesn't have two braces right next to each other.
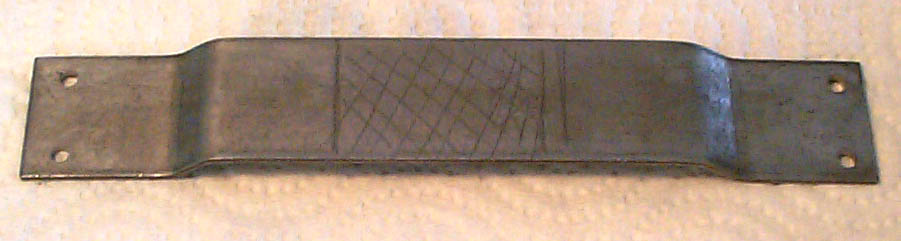
Below is a pic of the weight. It will need
to be
cut somewhere in the hashed section in the middle. When
the weight
goes in the car it will overlap in the middle.
Below is a photo of the sub assemblies painted
reefer
grey. The roofwalk is only painted on the sides and
bottom, the top
will be painted black next. Notice the weight is attached
to the
bottoms at this point.

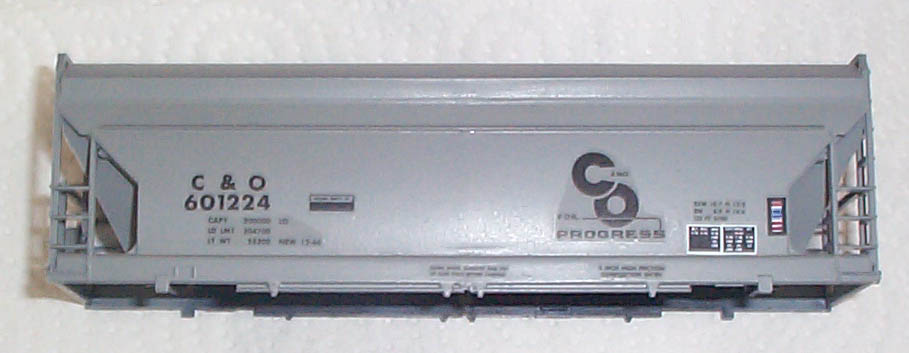
Below is a shot of the car decaled and ready to
be sprayed
with dull coat. Notice how you can see the decal film
around the
"C&O for progress" logo in this pic and not in the one
below.
That is the beauty of Testors Dull Coat.
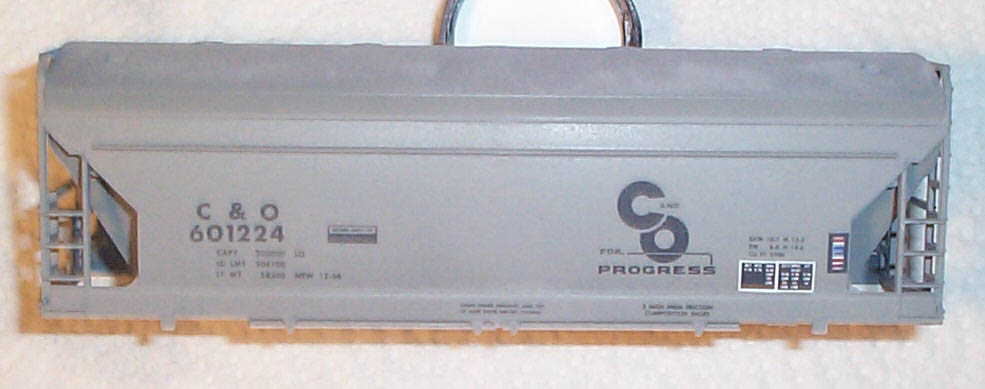
Below is the shell with dull coat. I also
oversprayed
the shell with an overspray of reefer white. This gave the
car the
appearance of an overall coating of dust. Notice you can't
see the
decal film now either.
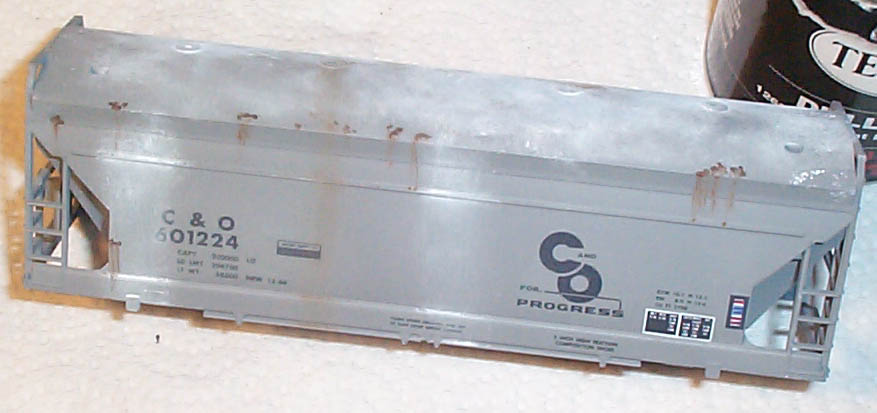
Below is the car weathered and ready for the
bottom to
be put on. The car has had white chalk applied to simulate
the spilled
load. Also spots of rust were added and streaks of rust
colored chalk
applied.
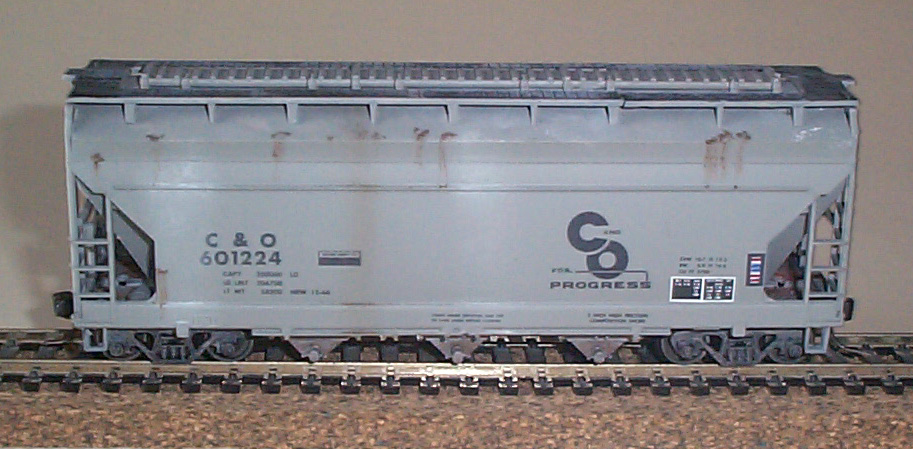
Below is a pic of the finished covered
hopper. Notice
how much less white chalk appears on the car after the final
dull coat
is applied. This makes for a nice subtle weathering look
to the car.
The only real thing wrong with this car is that the bays are
technically
the wrong type. I should have used bays that look like the
real thing,
but did not have any spares. I just used the ones in the
kit.
99% of model railroaders would never know the difference.