This kit is different than most in that the shell comes with separate pieces for the cab and side sills. In Athearn kits just the cab is separate.
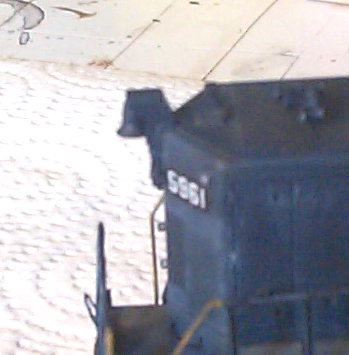
Below is a prototype pic of #5961. It is a Dean
Heacock photo.
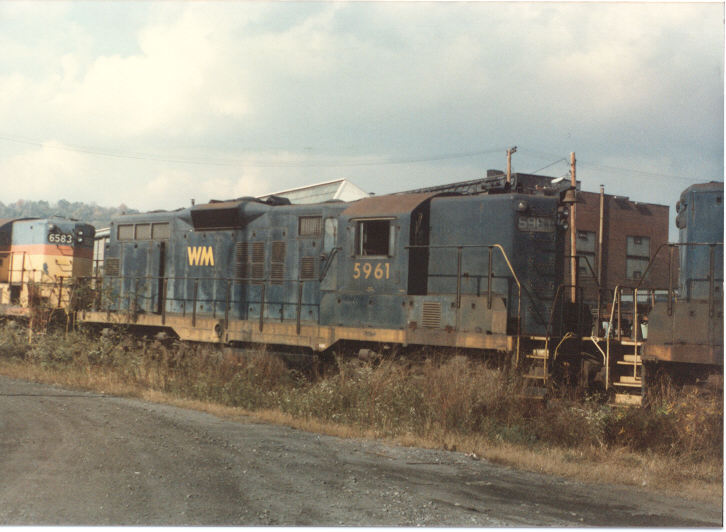
Dean Heacock photo
How to:
1. Buy a Front Range GP9 kit. Drill holes
for the grab irons, fan grab, and lift rings. Also use a Dremel tool
to correct the shape of the side sill. The four oval shaped holes
should all be removed. See pic below for clarity.
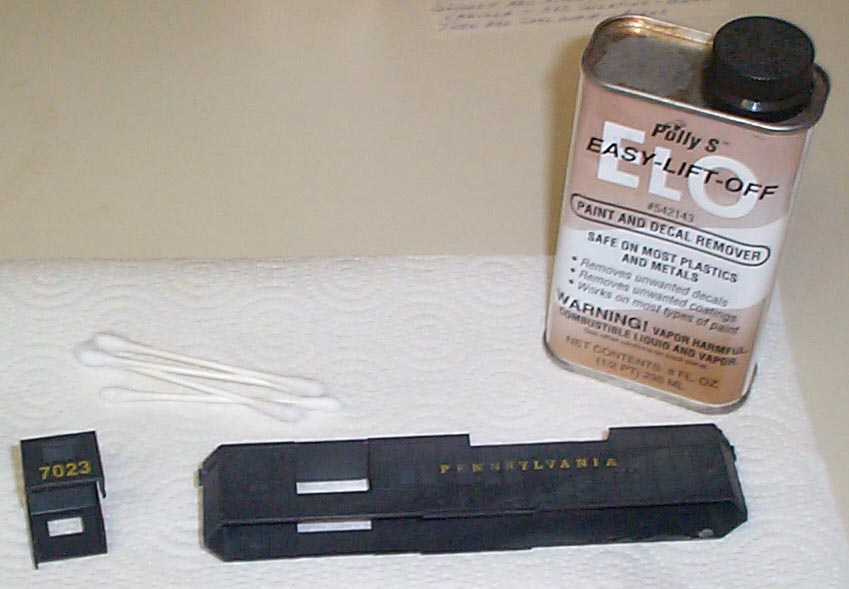
2. Strip off the original markings if it is decorated
for another railroad. I use Polly S Easy Lift Off (ELO). I
put it on with a Q-tip. Let it sit for 15 minutes and scrub off the
paint with an old tooth brush.
3. Wash the shell with warm soapy water and let
sit to dry.
4. Sand any rough spots where the stripper did
not get off all the paint.
5. Paint the shell, side sills, cab and detail
parts C&O Enchantment blue.
6. Paint the side sills a mix of UP Armor Yellow
and CSX Yellow. I wanted the side sill to look semi-faded, so I didn't
use straight UP Armor Yellow like normal. The small replacement battery
door is obviously from a Chessie painted unit, so I painted that with straight
UP Armor Yellow.
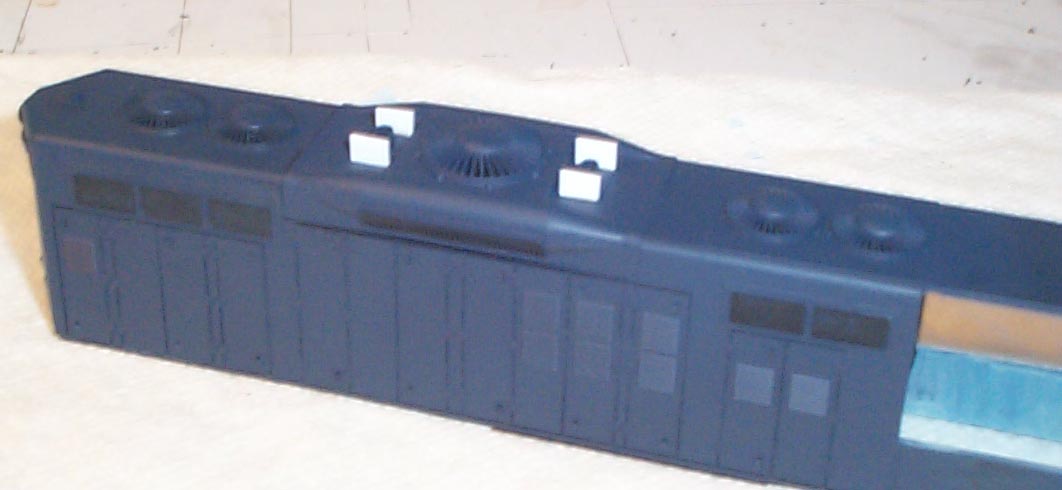
7. Add spark arrestor pieces made from scrap styrene.
I just guessed at their size. Paint blue when dry.
8. Spray the shell, cab, and side sill with gloss
coat.
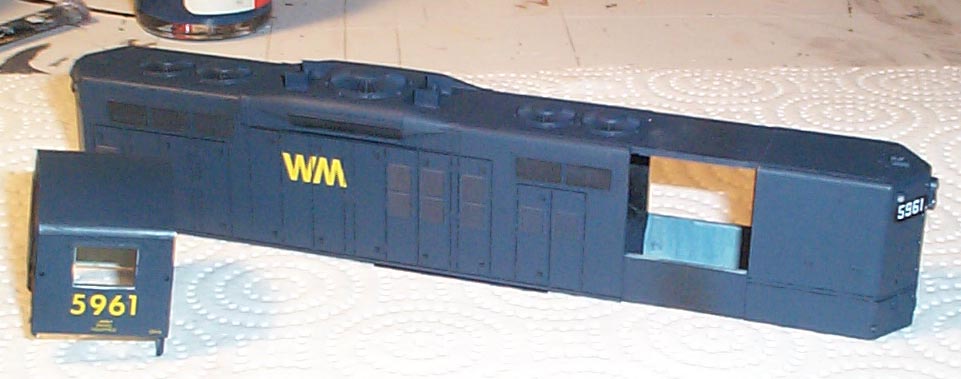
9. Decal the loco. I used a spare "WM" from
a boxcar decal set and the lettering from a Herald King C&O loco decal
set.
10. Spray the shell, cab, and side sills with dull
coat.
11. Dry brush and streak the shell, cab, and side
sill with white, shades of blue, and rust colors. These locos were
old, so don't be shy with the weathering. Put a small (1/4 inch by
1/4 inch) square of tape on the ends before drybrushing. Leave the
tape on while you dry brush, and remove it when done. This will leave
two dark squares on the end, which simulate where the C&O logo was
painted over when the WM lettering was applied.
12. Seal your drybrushing will dull coat.
13. Add on detail parts such as uncoupling levers,
mu stands, mu hoses, horn, bell, grab irons, hand rails and window "glass".
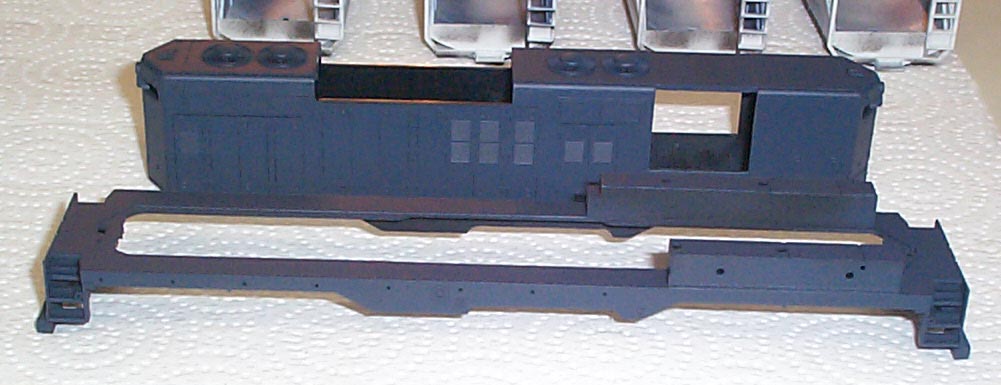
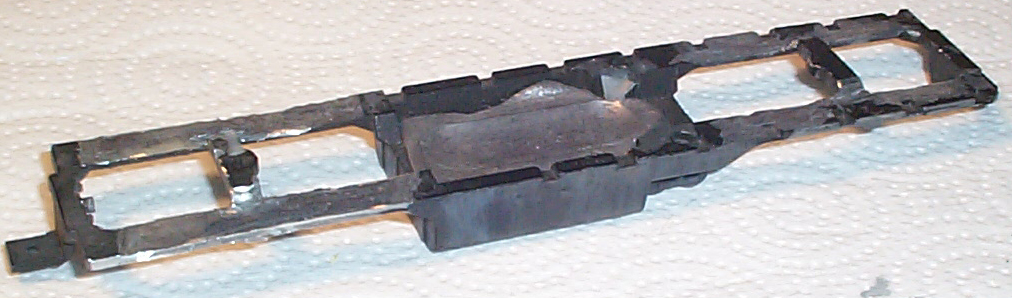
14. Assemble the frame and trucks if they are not
already. If your frame is an Athearn frame; like mine, you will have
to grind off the top parts and make it smooth. See photo below for
clarity. I broke my Dremel tool doing this, so take it easy.
Use a cutting disk and it goes fairly quickly.
15. Weather the sideframes and the fuel tank.
Seal with dull coat.
16. I used Kaydee #5 couplers on mine. They
are in Kaydee coupler boxes. I trimmed the back of the coupler boxes
to make them fit. The coulplers work perfectly and are held on by
a screw through the top of the coupler box.
17. Set the shell on the frame. I needed
to trim off the material directly below the coupler box on the shell to
get it to slide in there. It is not noticeable once the frame is
on.
18. You are done, enjoy your GP9.
Below is the shell right before I strip it. Those
PRR markings have to go!
Below is the side sills at the start. Notice where
the four holes on the side are in this pic, and how the side sill looks
in the pic below.

Below is the shell and the side sills painted C&O
Enchantment blue. The cab was painted too, but is not in this photo.
Below is the side sill painted the mixed yellow.
The door on the side piece is straight UP Armor Yellow.

Below is the spark arrestors ready to be painted.
I forgot to add these before painting the shell, this step could easily
be done before painting the shell blue the first time.
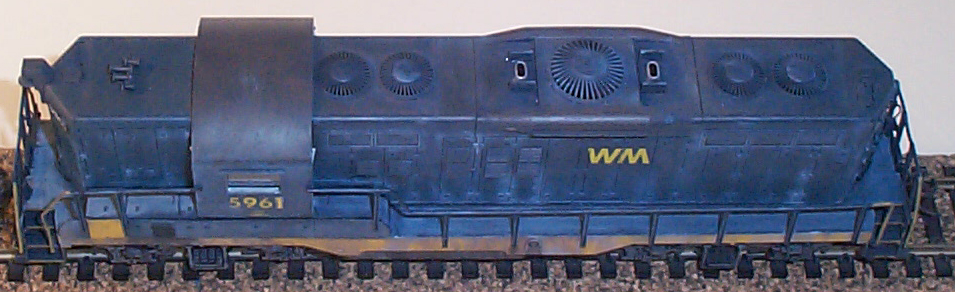
Below is the decaled shell and cab. These WM units
were sparcely decorated.
Below is the locomotive shell and cab dry brushed and
ready for detail parts. The older painted blue units tended to fade
along the bottom and along the panel lines like seen here. Also,
the vents on the doors of all GP7 or 9s are always very dark, so paint
them dark grey before dry brushing. Look at the front of the locomotive
and you can see the dark blue square left by the masking tape treatment.
This simulates where the C&O logo was painted over.

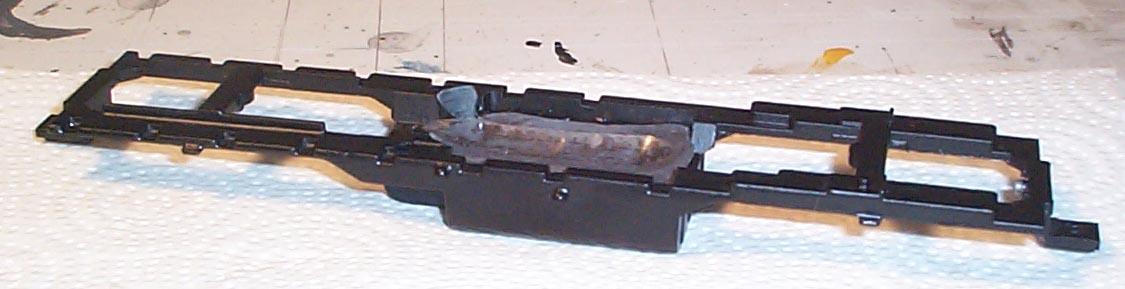
Below is the base as it came out of the box. I got
this kit second hand, and the previous owner added the liquid metal for
weight into the fuel tank.
Below is the shell complete with the exception of the
addition of the bell and weathering of the handrails. You can just
barely see the drop step, uncoupling levers, mu stand and mu hoses on the
front. The window glazing is also in at this time.
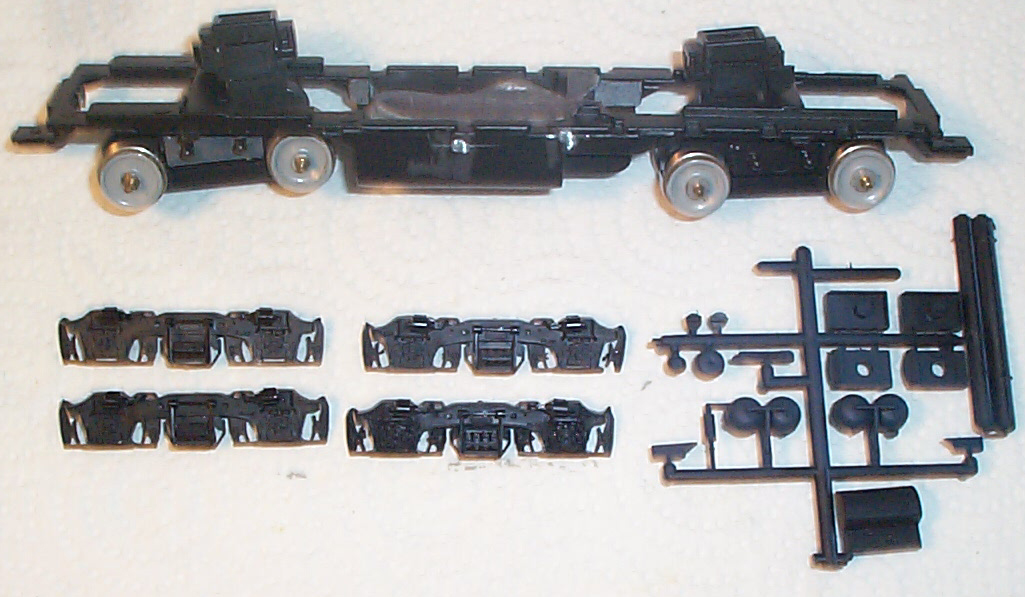
Below are the parts needed to complete the frame.
The only problem is, the frame won't fit on the shell as it comes from
Athearn. The second photo shows how much grinding I had to do to
get the top of the frame flat.
Below is a shot of the scratch built bell. This
is a unique C&O feature and really shows the unit's heritage as an
ex-C&O unit.
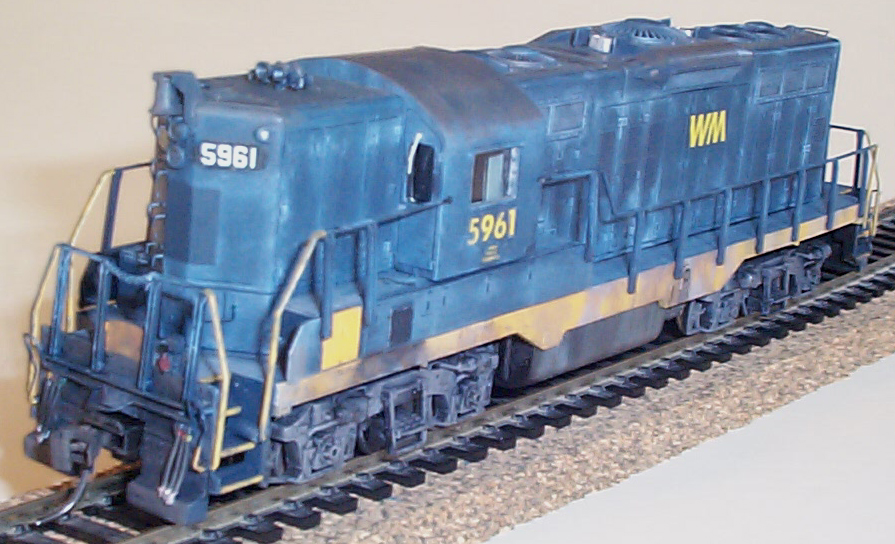
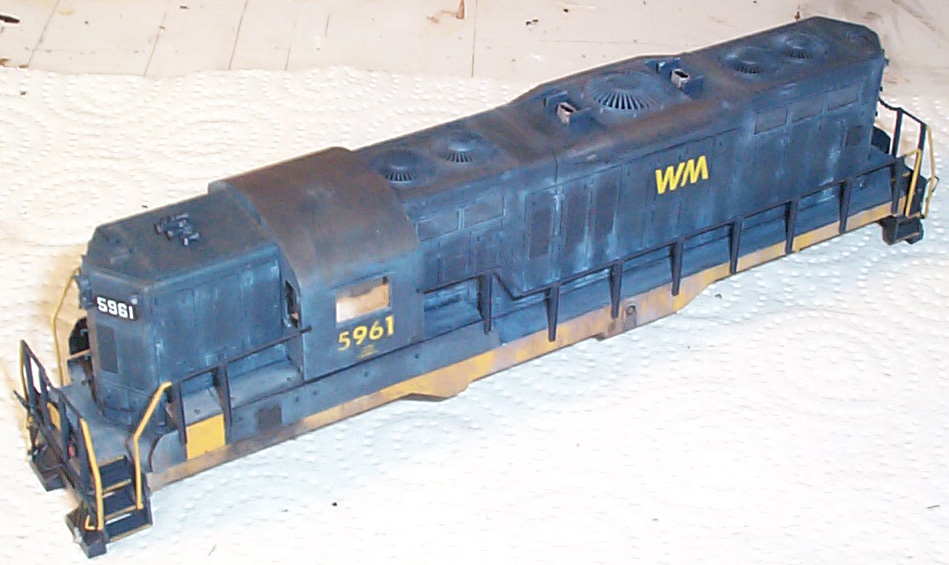
Below are finished shots of the loco. Notice the
yellow door which is a replacement door painted for a Chessie painted unit.
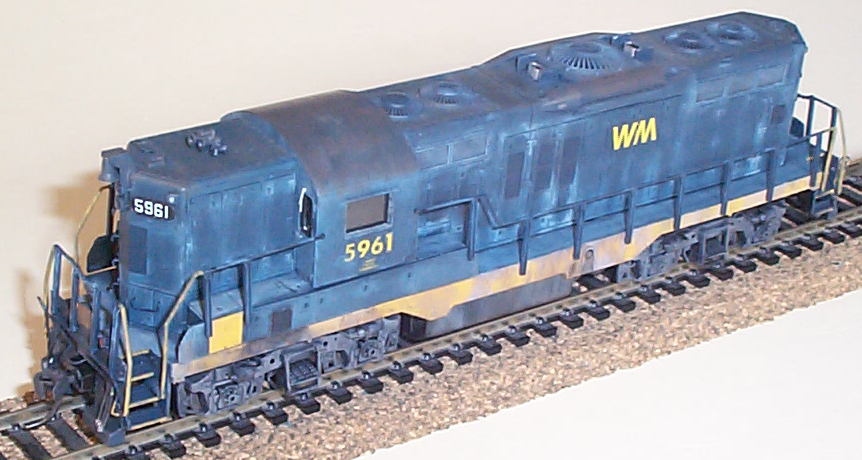
Below the top view shows the placement of the horn, the
weathering on the walkway and the rust on the cab.
Below is a head-on shot of the unit. Note the shape
of the bell holder, the patch on the front that covers up the original
C&O logo.