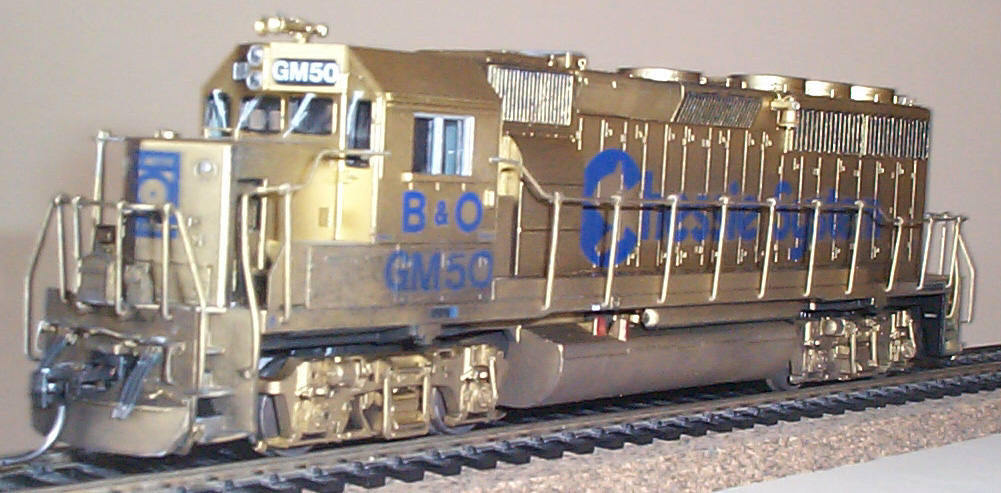
Below is a Dean Heacock pic of GM50. This photo
shows a typical problem with old 70's photos. It looks like the writing
is black, it isn't. It is actually dark blue. This is also
a pic of the original gold paint job. Notice how the "B&O" letters
are shorter than the "GM50" below and that the mu cables are black.
GM50 got repainted in 1983 and that paint job had the "B&O" stretched
to be equal in length to the "GM50" letters. Also, the mu cables
go painted gold at that time.
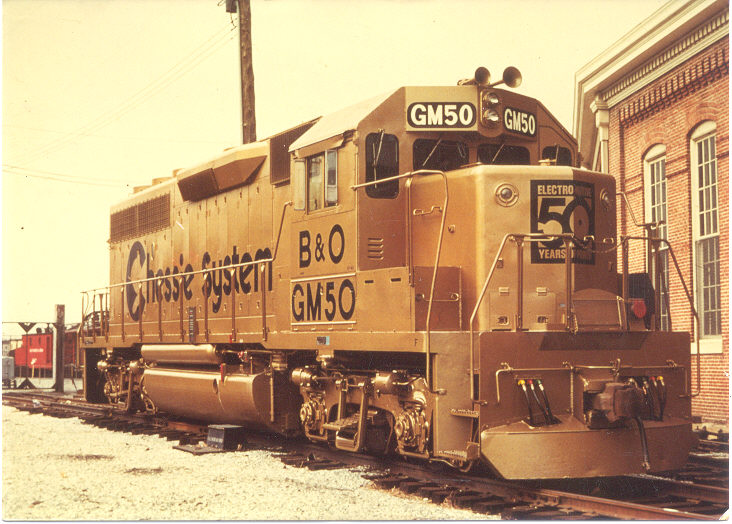
Dean Heacock photo
How to make GM50 from an Athearn GP40-2 kit:
1. Purchase an undecorated Athearn GP40-2 and Herald
King GM50 decals.
2. SHELL: Drill holes for all the grab irons and
lift rings. There are grab iron locations marked on the front of
the nose, the right side of the nose, the top of the nose, and the back
of the long hood. All the lift rings are on the top of the long hood.
There are about 10 or so of each. Also drill two holes on the top
back of the long hood for the fan grab iron.
3. SHELL: Sand off the small square with the three
little posts on either side of the coupler. This is the molding for
the m.u. hoses. There are two squares on the front pilot and two
on the rear pilot.
4. SHELL: Sand off the foot boards on the front
and rear pilots. These are the protrusions at the bottom of the pilot
where someone would stand to ride the locomotive. Drill two holes
in the front pilot to accept the Details West Chessie pilot. Drill
two holes in the rear pilot to accept the Details West rear plow.
5. SHELL: While you have the drill out, drill each
of the hand rail stancions so they are a little bigger. They come
just a little too small to fit the stancions right out of the box.
6. CAB: Drill a hole centered on top of each of
the six windows. This will be where the windshield wipers attach.
7. CAB: Drill out the holes for the handrails attach.
There are two on each side of the cab. They are just a little too
small to fit the wire right out of the box.
8. SHELL: Prime a Details West 3 Chime Leslie
horn, the Chessie rock pilot, the rear plow, a curved fan grab iron, 2
pairs of mu hoses, a side mounted bell, 2 uncoupling levers, and enough
grab irons to fill all spots they belong (around 12 or so).
9. SHELL: Super glue in lift rings into the
holes on the top of the long hood. I don't prime these before I put
them in. Prime them carefully when the glue is dry. Try not
to fill the hole of the inside of the lift ring with paint.
10. SHELL: Super glue on the Chessie pilot on the
front of the shell, in the two holes you drilled in step number 4.
Super glue the rear plow on. When dry, super glue on the mu hoses.
11. FRAME: Primer the wheels and metal part
behind the wheels with an enamel primer. When dry paint the wheel
faces rust colors and the part behind the wheels black.
12. SHELL and FRAME: Paint the shell, trucks, and
the fuel tank on the frame Floquil Brass. Gold may seem like the
right color, but it is too dark. Brass looks very close. This
is an Enamel paint and will need to be thinned with Floquil thinner.
It cleans up with mineral spirits. This is one of the few times I
use enamel paints.
13. SHELL: Spray with gloss coat. Decal with
Herald King decals.
14. SHELL: Add the horn, bell, mu hoses, mu stand,
wipers, drop step, grab irons and uncoupling levers when you have them
primed and painted gold. Mu hoses need only be gold at the base,
the tips are silver and the hoses are black.
15. Prime and paint the handrails gold. Attach
with superglue.
16. Add #39 Kaydee coupler to the front and #32 to the
back. These will put the coulpers at the right height and allow them
to not interfere with the Chessie plow or rear pilot. You may have
to remove the Chessie pilot to assemble the locomotive.
17. Put the "glass" into the cab. It just
pops in there.
18. Snap the cab on the shell. Snap the shell
onto the frame.
19. Weather lightly with oversprays of dark grey
and rail brown. GM50 got dirty, just like every other locomotive,
so don't forget to add this weathering.
20. You are done. Enjoy your one of a kind
all gold locomotive.
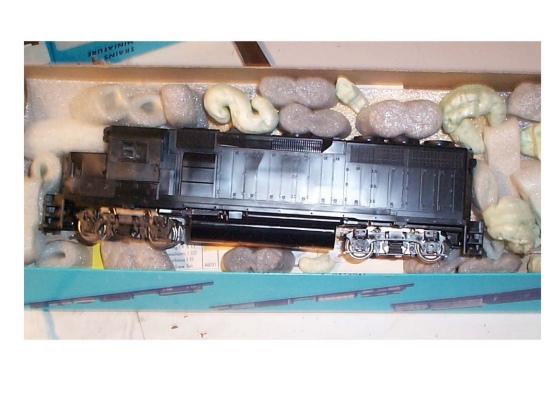
Below is a starting pic of my GM50. Enjoy.
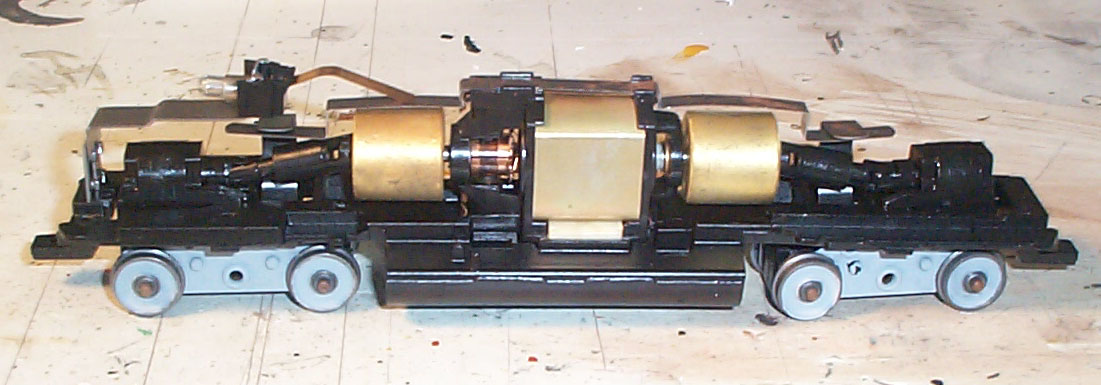
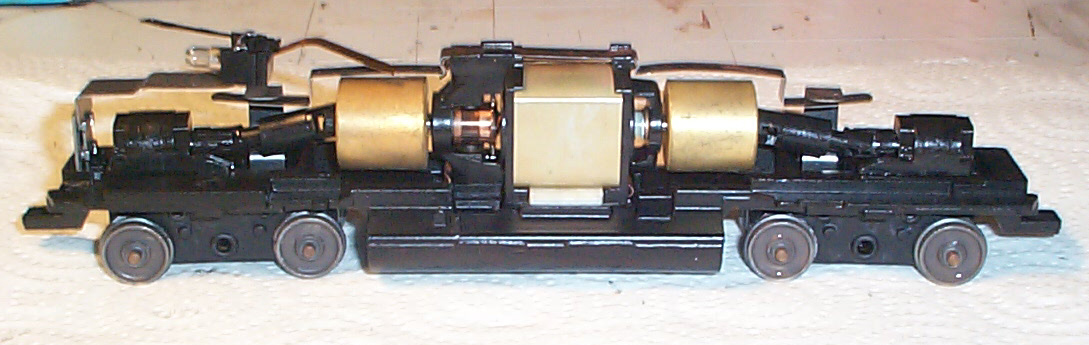
Below is a pic of the frame of GM50 primered.
Below is a pic of the frame of GM50 with the wheels painted.
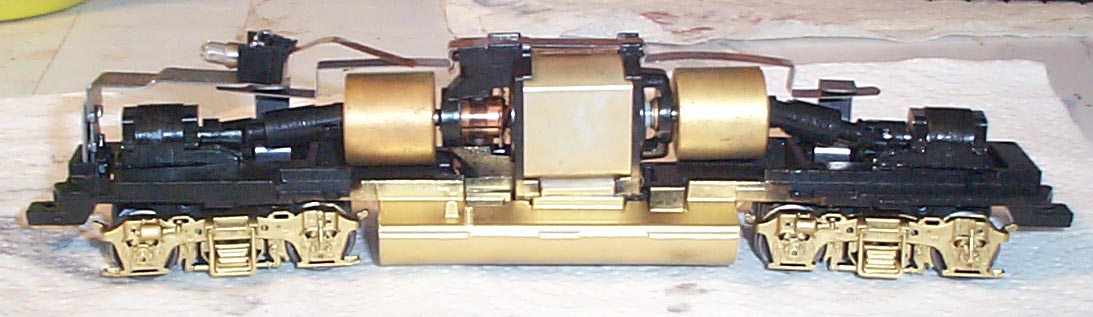
Below is the frame and trucks painted gold. The
frame is now basically done and ready for weathering.
Below is the shell all gold and ready for detailing.

Below is the shell decaled and ready for further detailing.
At this point the bell, mu hoses, uncoulpling lever, grab irons, drop step,
wipers and mu stand still need to be added. The horn, lift rings,
fan grab iron, Chessie rock pilot, and rear pilot have been added.
The Herald King decals are a little too royal blue, but an overspray of
dark grey should tone them down nicely at the end.

Below is a detail shot of the back of GM50. Notice
the lift rings, the bell, the fan grab iron on the top of the unit, the
grab irons going down the rear of the unit, the drop step, the uncoupling
lever, the mu hoses, and the rear pilot. All of these details do
not come on the Athearn kit, and I added them to make this a better looking
locomotive.
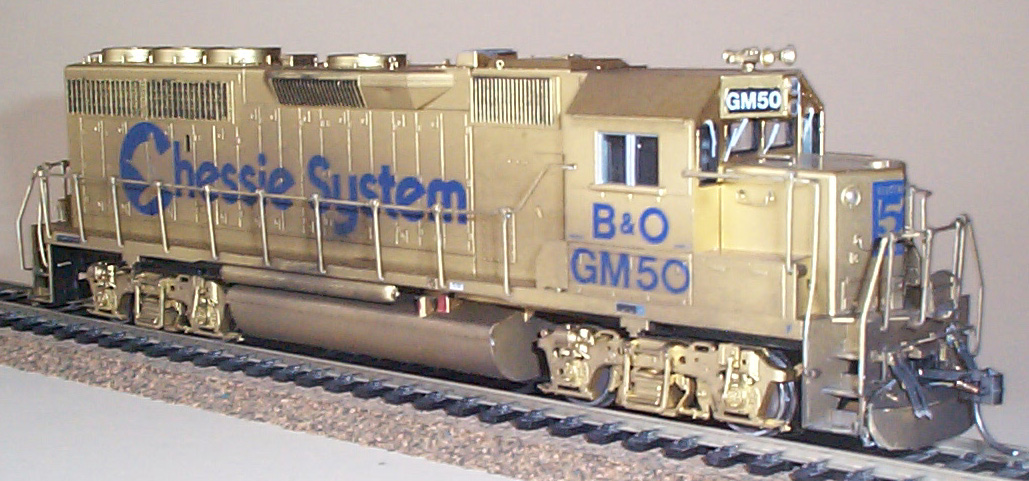
Below is a front shot of the unit. Notice the horn,
the wipers, the drop step, the uncoupling lever, the mu hoses, and the
Chessie rock pilot. All of these details were added by me to make
this unit look better. You can also notice on the window above the
"O" in "B&O", that I painted the inside light bluish green. This
is the color of the inside of locomotive cabs. Further, the decals
don't look this royal blue in real life, they look much more like the overhead
view below. The flash just makes them look royal blue.
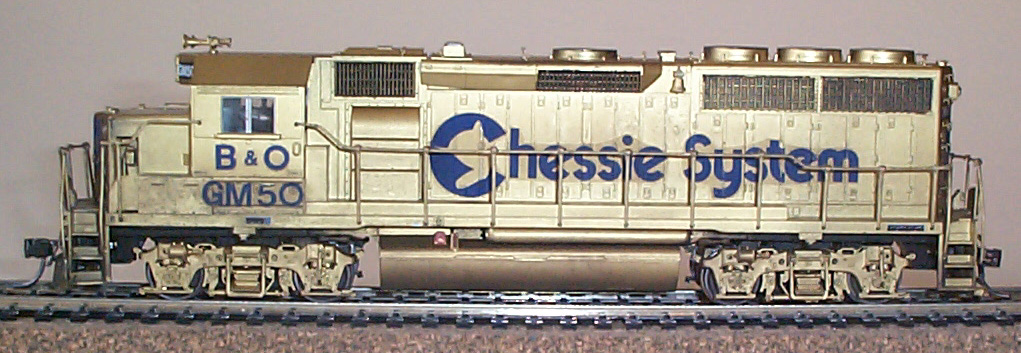
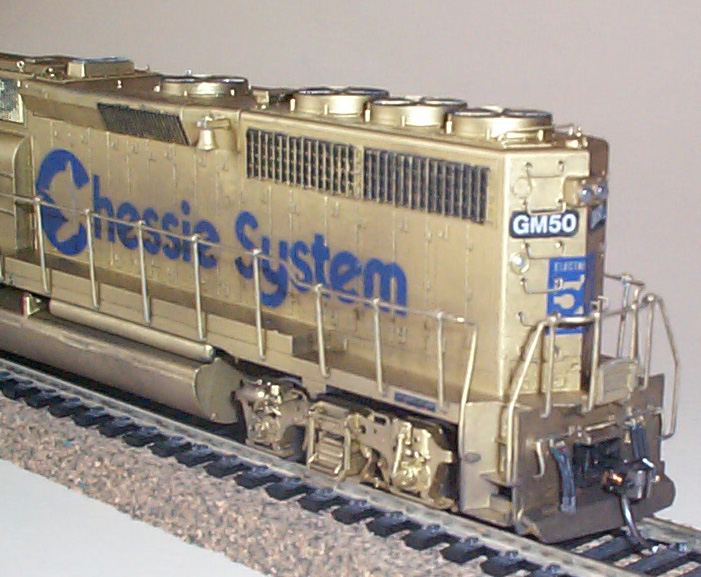
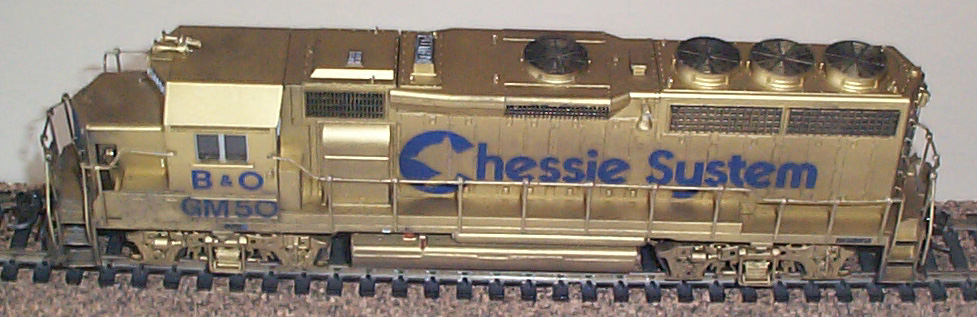
Below is a pic of the right side of the unit. The
sight glass, above the "h" in "Chessie", is the characteristic of Dash
2 type locomotives.
Below is an overhead view of the motor. Notice the
lift rings all along the top of the unit.
Below is a straight profile shot. Unfortunately,
you can see the film on the "Chessie System" decal. This was next
to impossible to hide. It isn't as noticeable in real life, since
the flash from the camera really makes the difference stand out.