I know that B&O 914071 and 914072 were both very similar to the Walthers model with the exception of the B&O cars were missing snow plows. Additionally, all of the C&O and WM ones I have are significantly different. Since MofW equipment tended to stick with the home railroad, it is fine to do one of the two B&O ones for the East End.
Below is a prototype pic of the Chessie Jordan Spreader
I modeled. The photo was taken by Jay Potter.
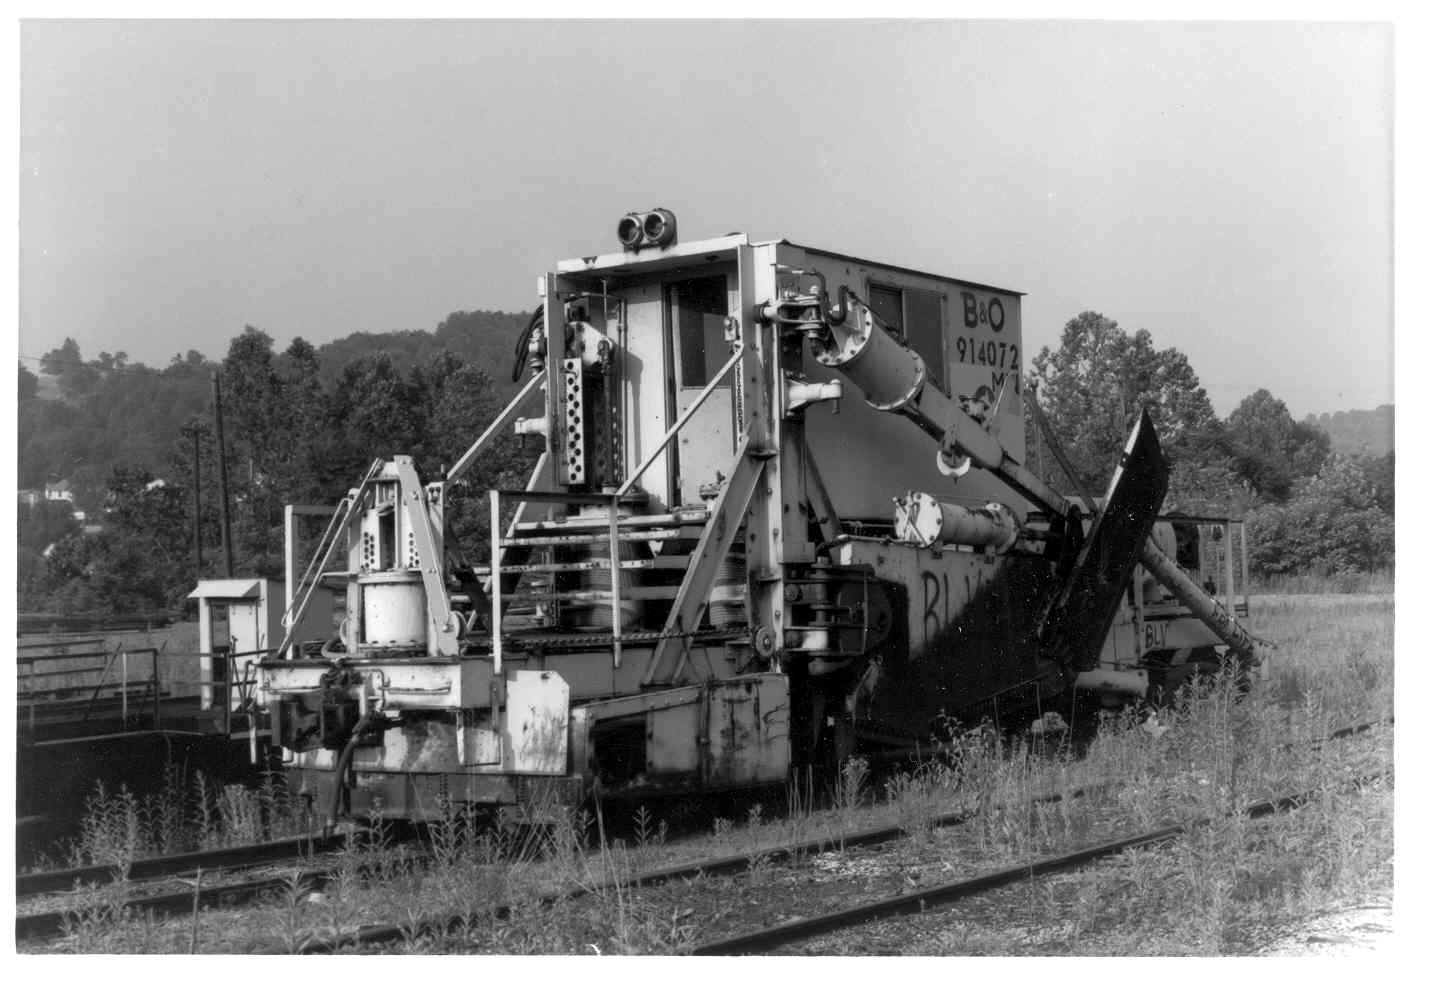
Jay Potter Photo
How to:
1. Carefully follow the directions and assemble
the car. Do not put on the snow plow or any pieces that support it.
Carefully sand off (or use Polly Scale ELO stripper) to remove any markings
on the car. My car came decorated for CSX.
2. Scratch build the hand rails from styrene.
I used strip styrene that I matched to one of the back handrails.
Do not attach the handrails at this time.
3. Glue the given cylindrical shaped piece to the
middle front of the floor of the spreader. Build the triangle support
structure out of pieces of the front handrails given in the kit.
Also put two of the rectangular pieces of the hand rails vertically on
either side of the cylindrical shaped piece (all of these pieces are yellow
in the photo below). Finally, using a piece of scrap glue a brace
from down to the floor (this is the light grey piece in the photo below).
4. Glue on a twin headlight casting on the top
middle of the car. I used a Details West casting, but anyone would
do. Glue on a couple of stirrup steps from your spares box
to the front corners of the car floor (brown parts in the photo below).
5. The next step is the most challenging.
Since there is no snow plow on this car to protect the trucks, these cars
had a simple box built around them. I used scrap styrene to build
these parts. Look at my photos and estimate where they should be.
Make sure you have the trucks handy to make sure the parts you are adding
don't interfere with the trucks movement. Glue on the handrails when
you are done with scratchbuilding the box around the trucks.
6. Spray the entire car with a 50/50 mix of CSX
Yellow and UP Armor Yellow.
7. When the yellow is dry, spray the sides of the
cab part of the car with gloss coat.
8. Decal the sides with the B&O and 914072
lettering. Do not add the Chessie logo yet. I used the letters
from a Herald King set for Chessie covered hoppers, that just happened
to be black. The numbers came off a Herald King set for B&O covered
hoppers.
9. Next try and weather the blades and car to match
the photo. Most of the actual blade is black from dirt and rust.
I added a wash of black to the whole car to simulate grime. I used
several shades of black mixed with oxide red to get the blades to look
right. Also, I added some chalk weathering to the roof. Finally
paint the window frames silver and the exhaust stack black.
10. Tape off around the cabin portion of the spreader.
Do not tape over the decals. The real spreader looked like most of
the sides were repainted when the Chessie logo was added. See photo
below for clarity.
11. Overspray the car with black and roof brown.
Concentrate the black on the hinges. The real car had alot of splatter
from grease in those areas. Use the roof brown to simulate general
grime.
12. I modified the coupler box to make the coupler
sit as far back as possible. The original coulper box is positioned
for the car with the snow plow on the front. Since this is not on
the B&O car, it looks ridiculous in this position. Simply shave
off the peg that the coupler rotates on and glue it 1/8 of an inch back.
Cut the coupler box too so it fits nicely.
13. Remove the tape and apply the Chessie logo.
Mine came from the Herald King C&O Safety Caboose sheet.
14. Seal the car with dull coat.
15. Carefully cut the windows out of sheet clear
plastic. This is a trial and error process that will take some time.
Attach with white glue.
16. You need to decide if you want the blades to
move or not. I decided for them to be permanently in the stowed position.
The car had them in that position 90% of the time. Glue all the hinges
with white glue if you decided to permanently stow your spreader blades.
17. You are done. Enjoy your spreader!
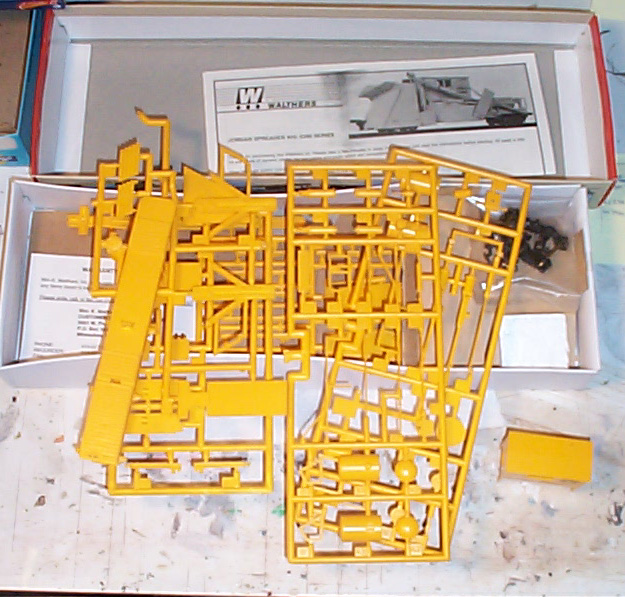
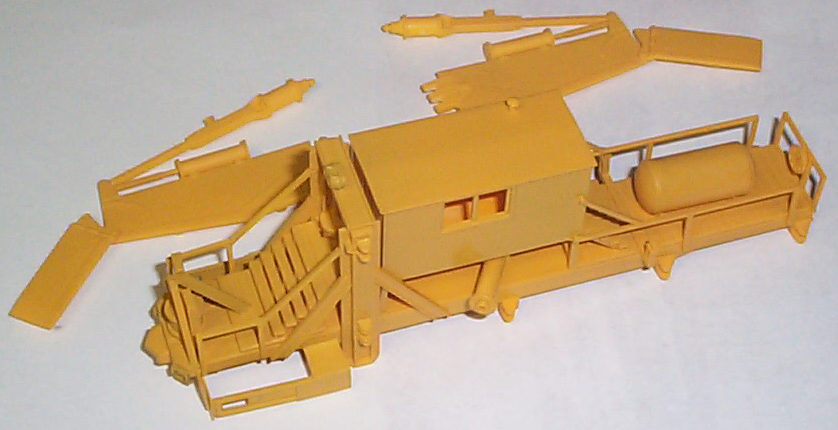
Below is what you get in the box. Notice the photo
on the instructions, that is what the finished car would have looked like
if you built it straight out of the box.
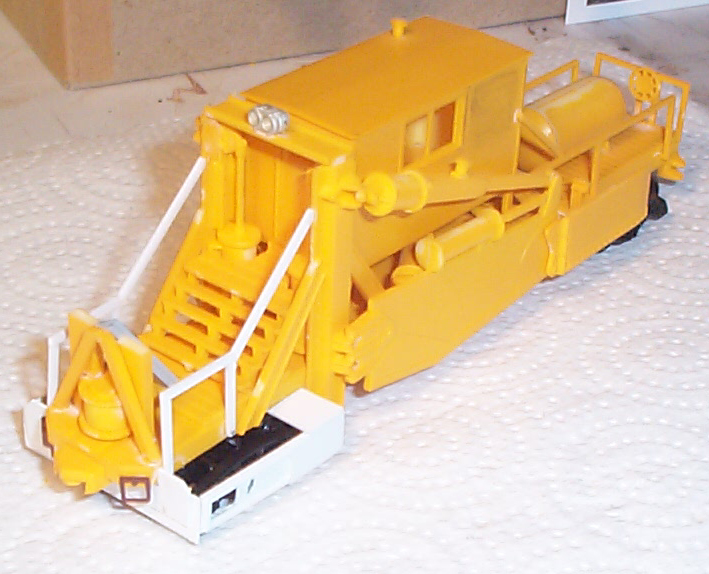
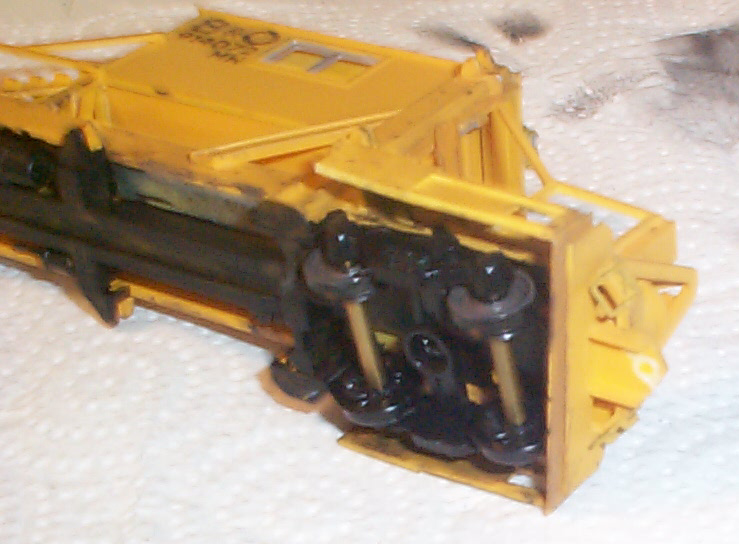
Below is a shot of the car assembled and ready for painting.
Notice the front of the car is significantly modified to better reflect
the B&O car. Just behind the window is where the CSX markings
used to be.
Below is a pic of the spreader painted UP Armor Yellow
and CSX yellow mixed 50/50. Up next decaling.
Below the sides have been taped and ready for an overspray
of black and roof brown.
Below the front coupler needed to be modified. Notice
the original ring was shaved off (the white circle is where it used to
be). It will be attached about 1/8 of an inch back from that location
with super glue.
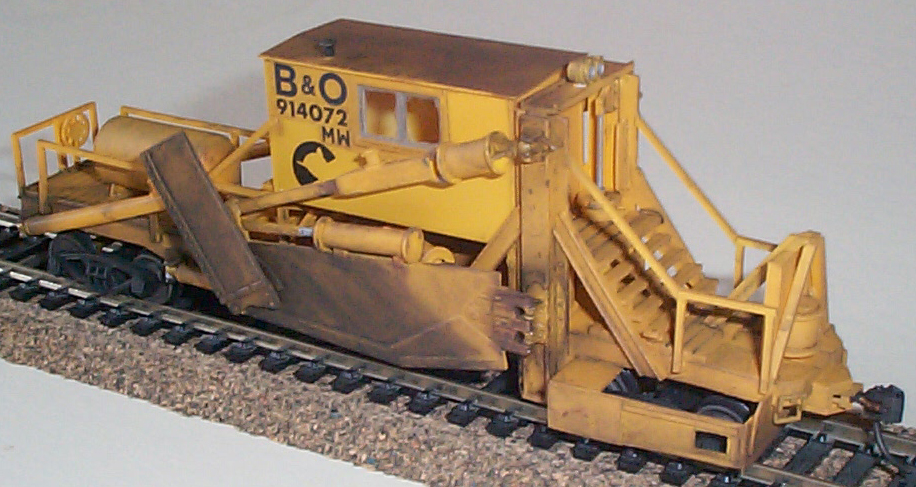
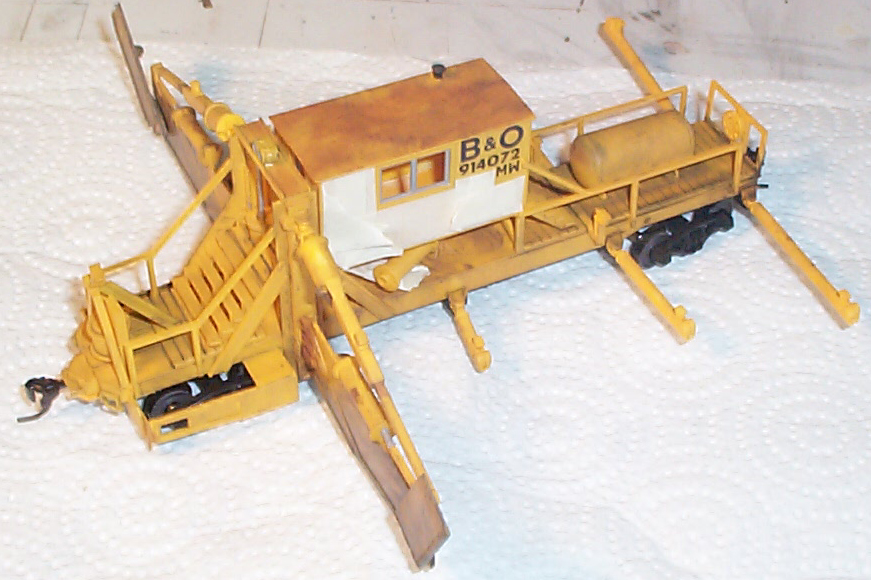
Below is the finished car ready for work.