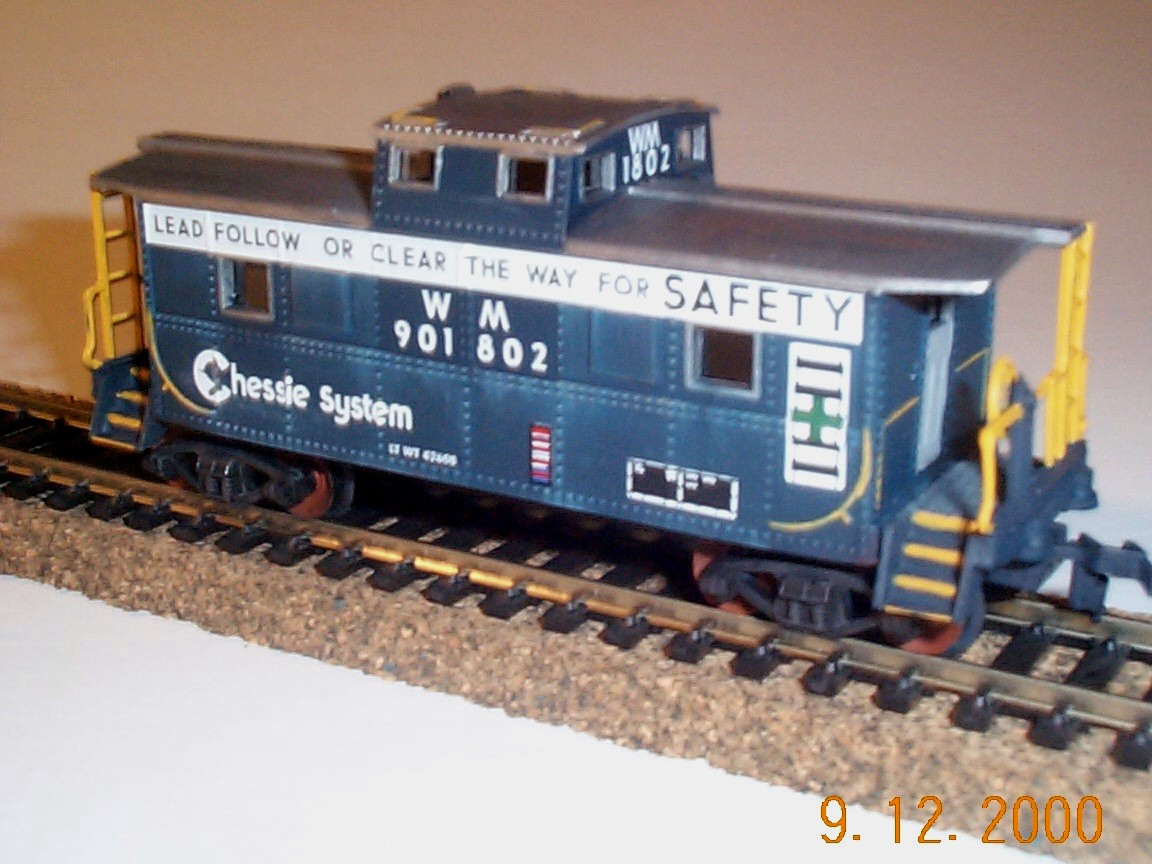
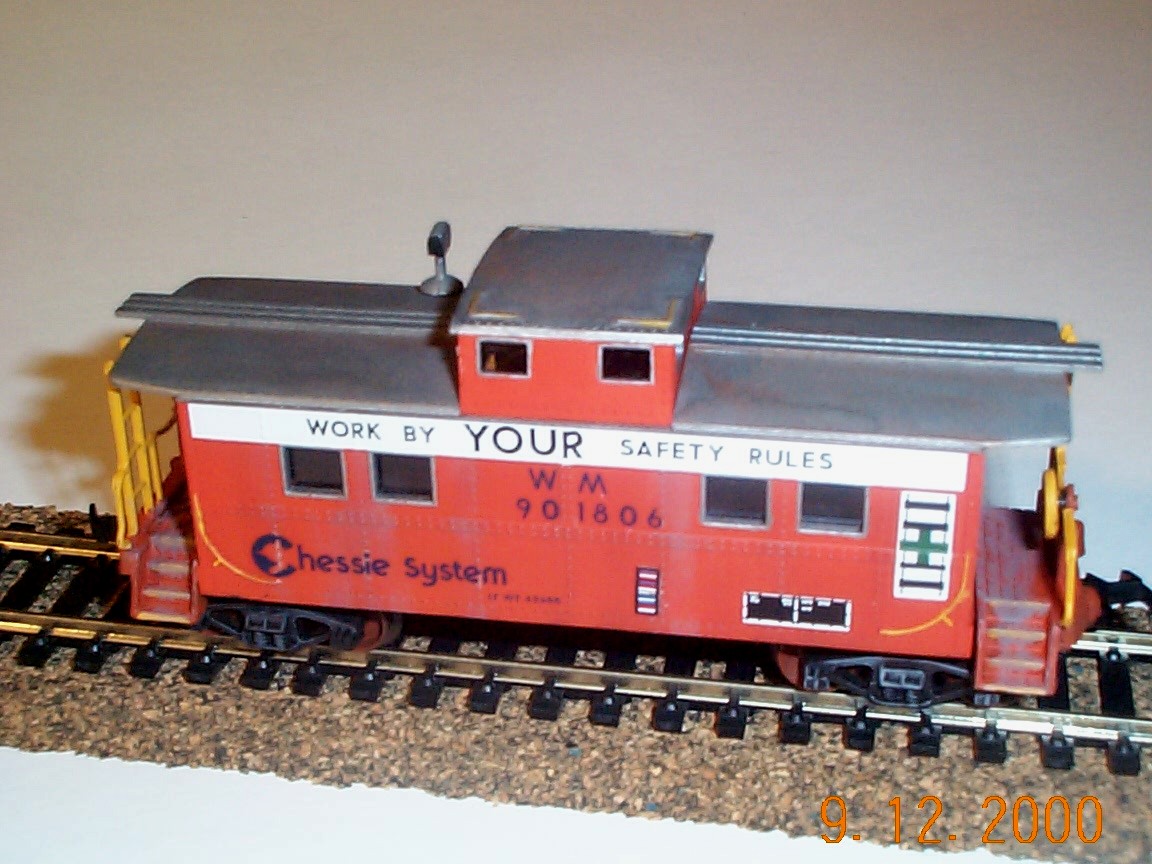
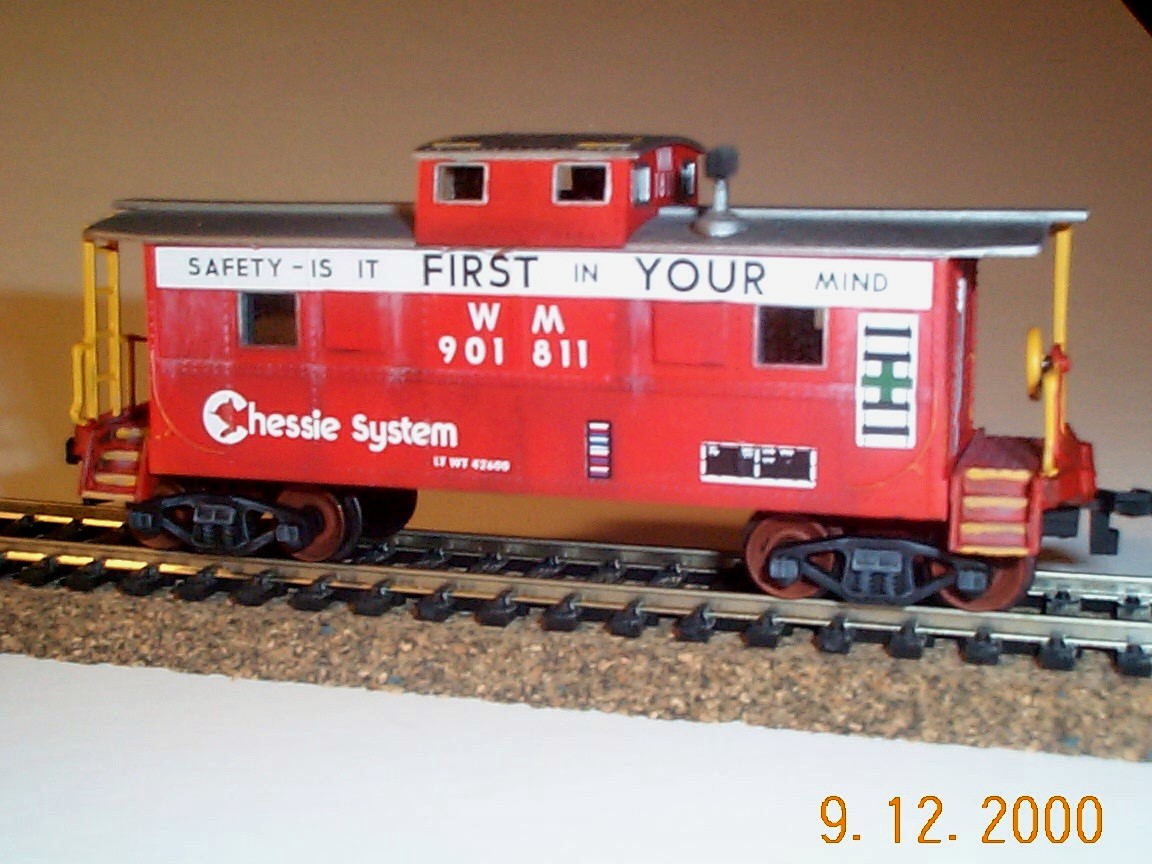
Below are three Dean Heacock pics of the cabins I did.
Each caboose is a one of a kind. There were only four total WM safety
cabeese. There is also a green one, but I have yet to do that cabin.
1802 is really dark blue, this pic almost makes it look black. 1811
shows how these cabins were renumbered into the 90XXXX series. The
original numbers were the four digit numbers you see on 1802 and 1806.
Also note worthy is that 1802 hasn't had any of its windows covered up
like 1811 shows. To save money WM just covered these windows with
metal instead of footing the expense of applying the bulletproof glazing
required by the federal law change.


How to make Life Like WM Cabins:
1. Find the kits. Don't worry about how they
are decorated.
2. Strip them with Easy Lift Off (ELO). This
is great stuff. Just put it on with a Q-tip on small areas or an
old brush on large areas. Wait a few minutes, and wipe off the old
paint. Wash in soap and water, let dry. Use this stuff outside,
as it smells really bad.
3. Separate the cuoplas from the bodies.
One of mine was molded as one piece, so you may not have two parts.
4. Fill in the two middle big windows with sheet
plastic if you want to model the post bullet proof glass timeframe.
Leave them alone if you want the early Chessie Era. I did only 1806
as the early era.
5. Paint the bodies, ends, and cupolas the appropriate
color (blue, orange, and red respectively in this case)
6. Paint the roof, smoke stack, and the top of
the cupola silver.
7. Paint the window frames silver.
8. Paint the doors grey.
9. Paint the end rails and step edges yellow.
Also the grab irons on the sides need to be painted yellow. Don't
forget the 4 on the top of the cupola too.
10. Before you put the decals on and weather the
car you need to decide if you are going to use the 4 or 6 digit road numbers.
I used the 6 digit ones on all my cabins. That means that the original
paint will need to be a faded shade compared to the part renumbered.
Look at my 1802 to see the dark blue square around the road number.
This is made by simply putting a square piece of masking tape on the side,
drybrushing the car with lighter shades of blue and some grey. When
I am satisfied with the "faded" look, I peel off the tape and the square
left behind appears to be new paint that hasn't faded.
11. Apply the decals. I used Microscale's
WM Safety Cabin set. It has all the decals you need except the ACI
cards (that little red white and blue rectangle below the last digit of
the road #). I got these from another Microscale sheet. Use
lots of setting solution on the decals. They will need to be really
soft to cling around the rivets on the car body. The long white decal
with the Safety slogan on it will be the hardest to put on. Take
your time.
12. Seal with clear flat.
13. Glue in clear plastic on the backs of all the
windows and you are done.
14. Weather the rest of the caboose lightly.
The roofs stayed in suprisingly good shape on these cabins, so don't rust
them up too much.
15. Enjoy mine below. Just $5 for the kits,
$5 for the decals, a little paint, and you have 3 nice cabins.