Walthers released a 40' Ortner in late 2000. The only problem is the car is not accurate for the H-061 class. One major change will need to be made to make this kit more accurate for a Chessie Ortner. The change will seem daunting at first, but it is really quite simple. Out of the box the car has 8 panels on the side, the Chessie car had 11. This will need to be fixed.
Walthers offers the car in Chessie and CSX paint. I got mine as a Christmas gift in CSX paint, so I undertook to correct the cars problem since repainting was already neccessary. I run a purely Chessie layout, so CSX cars get backdated to Chessie paint when I get one as a gift.
Below is a Dean Heacock pic of a 40' Ortner.
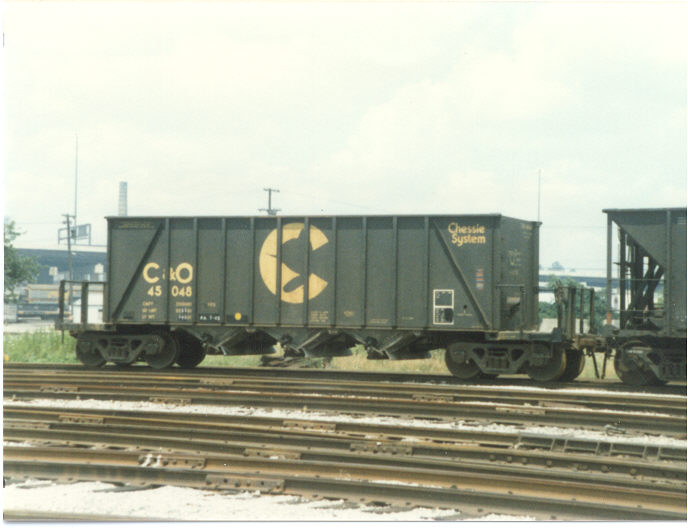
Dean Heacock photo
How to:
1. Remove the hopper from the box and disassemble
it. There are four screws on the bottom that let you remove the weights
and frame from the body.
2. Drill holes in the ends where the grab irons
will go. Be careful on the top grab iron not to drill through into
the inside of the hopper.
3. The weights given will not fit back into the
car once you have inserted the grab irons. They need to be grooved
to allow for the grab irons to extend slightly into the cavity where the
weights go. See my pics below on what this should look like.
I recommend doing this outside or in the garage. I used my Dremel
motor tool and got little specks of metal all over the garage. I
can't imagine what a mess this would make inside.
4. Glue the two inside braces into the car.
This will make painting a little more difficult, but it will make taking
the ribs off easy.
5. Carefully remove the six inside ribs with a
sharp blade. Only take off the six inside ribs, the two on the ends
with the diagonal braces are already where they need to be. Removing
the ribs is actually quite easy since the Walthers car is made of very
soft plastic.
6. Sand the sides smooth.
7. Place strip styrene, cut to the right length,
in line with the two internal bulkheads and the bottom where the hopper
doors meet the bottom of the hopper. This is the exact position that
where two of the original ribs were. These original ribs are seen
in the first pic between the "08" and "11" of the road number, and between
the big "C" and "S" in the big "CSX" logo.
8. Evenly space two other ribs in between these
new ribs. Evenly space two more between the first placed ribs and
their respective ends. This should give you 8 new ribs on each sides
and therefore 9 new panels between the end panels with the diagonal braces.
9. Paint the whole car body, frame, all pieces
and end of the weights black.
10. Spray the sides and ends of the body with gloss
coat. Decal like the car above. I used a hodge-podge of decals
from Herald King and Champ. I suggest using the "Chessie System"
decal from a Chessie gondola set, the "C&O" and "45092" can come from
any set. The large "Ches-C" logo and data from a Chessie Canstock
boxcar work well. I used the consolidated stencil from a Champ set,
but any brand would do.
11. Prime the grab irons with enamel primer.
Add grab irons and paint them black with a brush.
12. Paint the wheel faces roof brown and other
rust colors.
13. Reassemble the car.
14. Spray the whole car with dull coat.
15. Weather the car with light grey inside and
out. These cars hauled mostly rocks and gravel, not coal. Also
give the car a light overspray of black. This will tone down the
brightness of the yellow decals, for a more realistic look.
16. Spray dull coat again to seal in the weathering.
You are done. Enjoy your accurate Chessie Ortner.
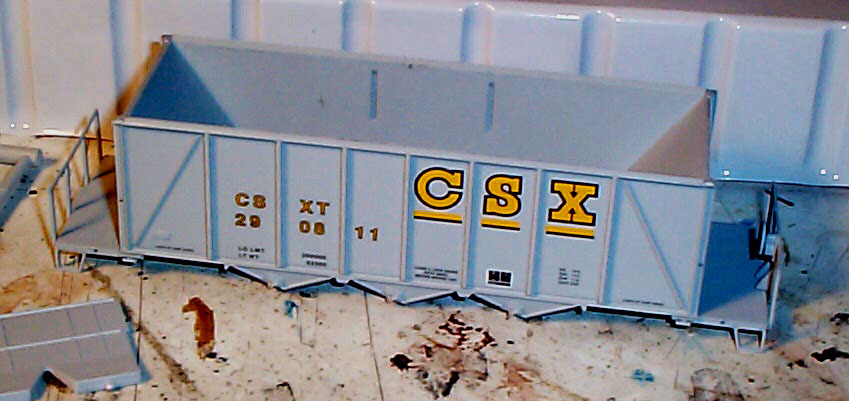
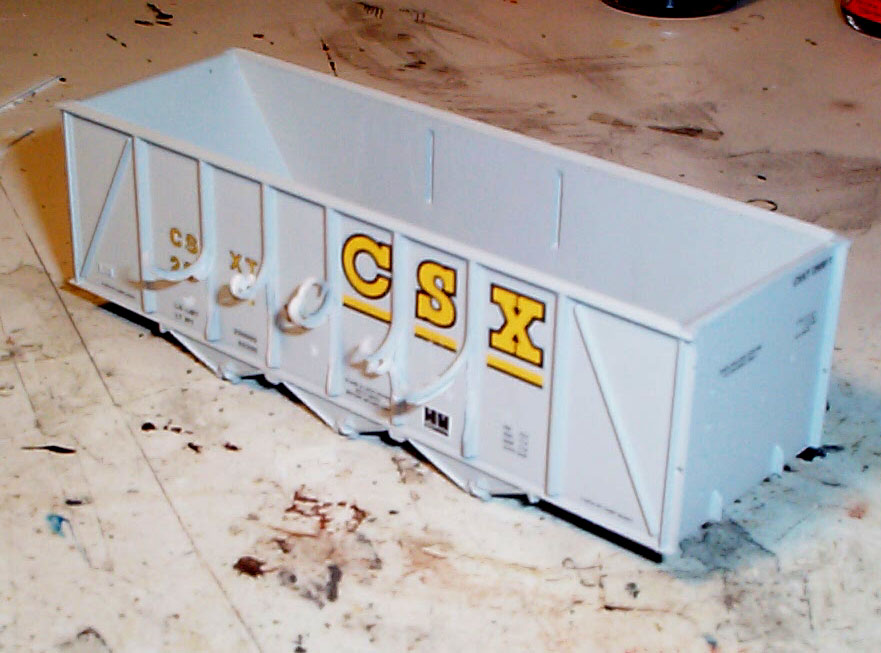
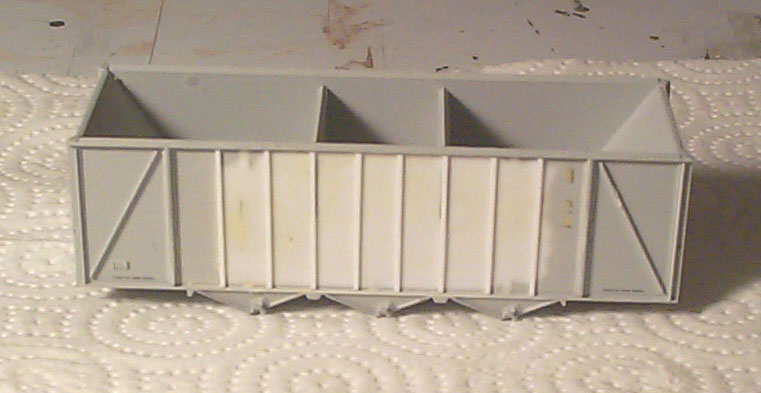
Below are my Ortner pics. The first pic is the hopper
right out of the box. Notice there are 6 panels in between the two
with the diagonal braces. Chessie's had 9 panels.
Below are two pics of the ribs coming off. They
just curl up as you scrape them off. This was really quite easy and
you shouldn't worry about ruining the model when you do it. If you
do gouge the model, just realize these hoppers got beaten up pretty good
anyway, and you are making it look more realistic.
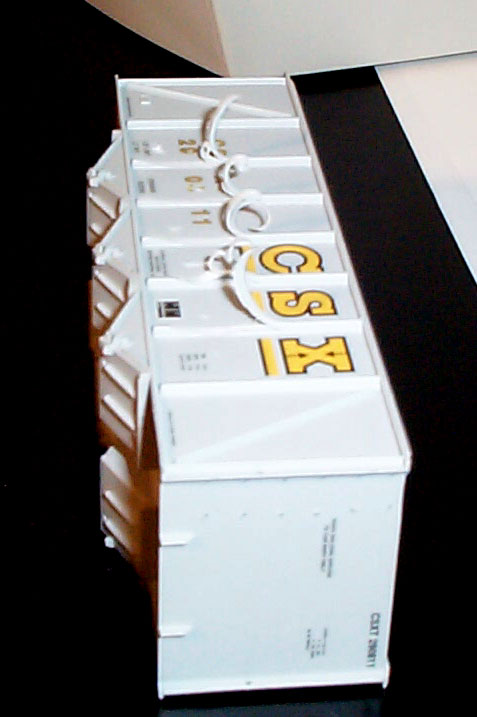
Here is a pic of the hopper with no ribs. You can
see that the second and fourth removed ribs are so thin at the top you
can actually see through the platic. This is where the inside bulkheads
attach to the sides of the car. Don't worry about this. The
new ribs will go right over those holes.
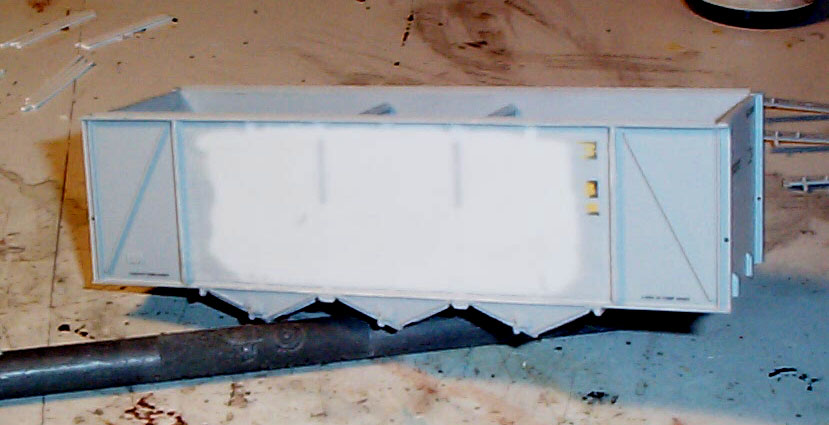
Here is the hopper with the side sanded smooth.
You can see where the plastic is really thin from the inside bulkhead attachments
(those two light grey vertical lines in the middle of the white plastic).
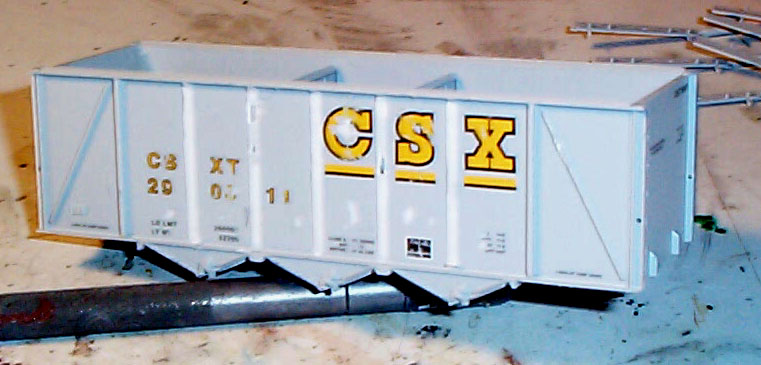
Below is the hopper with the new ribs attached.
The first two placed went right over the thin parts. Notice that
these two ribs line up with the internal bulkheads and the bottom "V's"
in the hopper doors. The remaining new ribs are equally spaced between
these first two placed ribs.
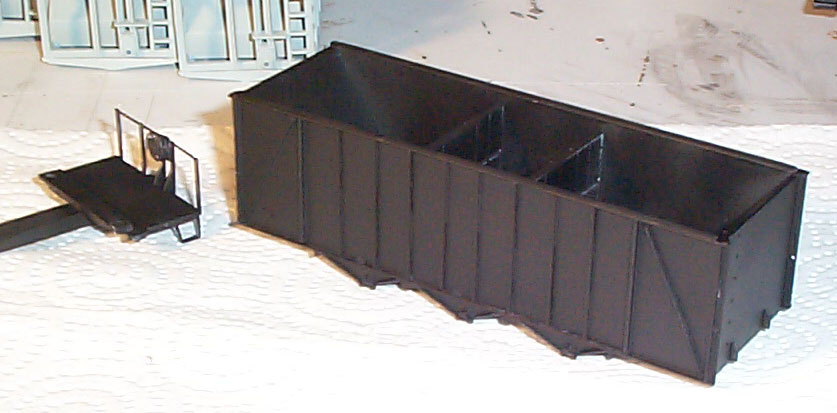
Here is the hopper painted black. It is starting
to look like a Chessie hopper now.
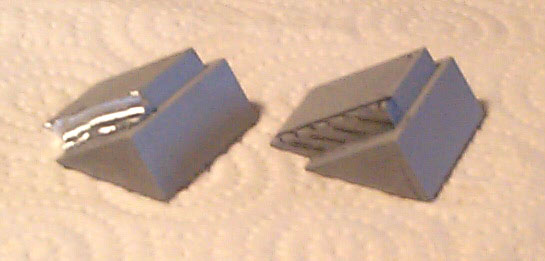
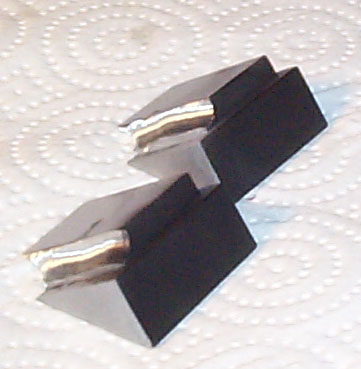
Below are the weights. The one on the left has been
grooved, the second one is marked with hash marks to show which part to
remove. The second pic is of the two weights painted black on the
ends and ready to be put back in the hopper.
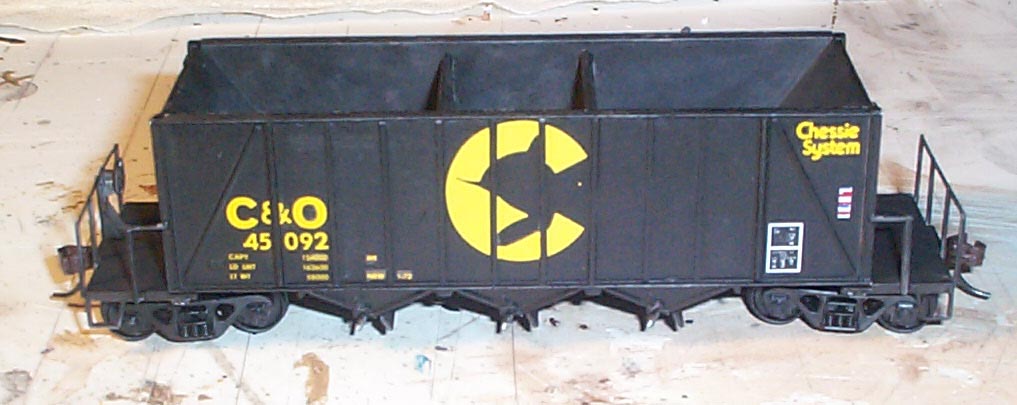
Below is the hopper body completely decaled. The
Ches-C logo is off the Herald King Canstock Boxcar set. It is the
only one I have found that is the right size. I cut about 1/32 of
an inch out of the decal in two evenly spaced vertical lines. This
is done so that the decal still looks circular when put on in three separate
pieces.

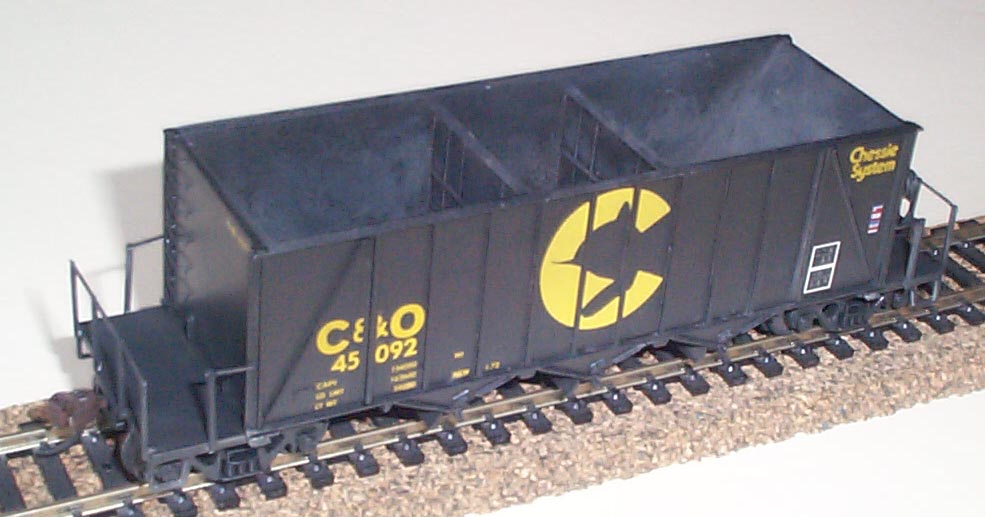
Below is the hopper completely assembled and ready for
weathering.
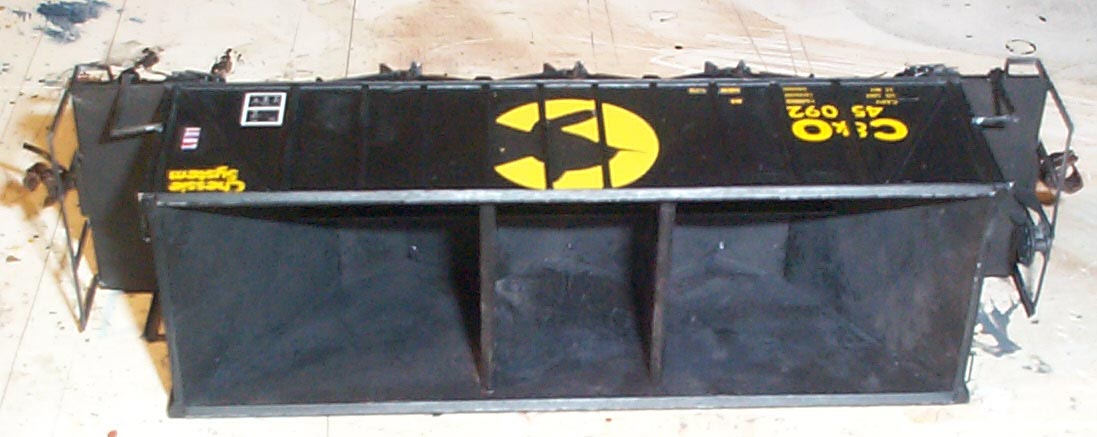
Below is a shot of the inside of the hopper. It
has been weathered with drybrushing shades of grey and roof brown.
It is a very natural look for the inside of a hopper.
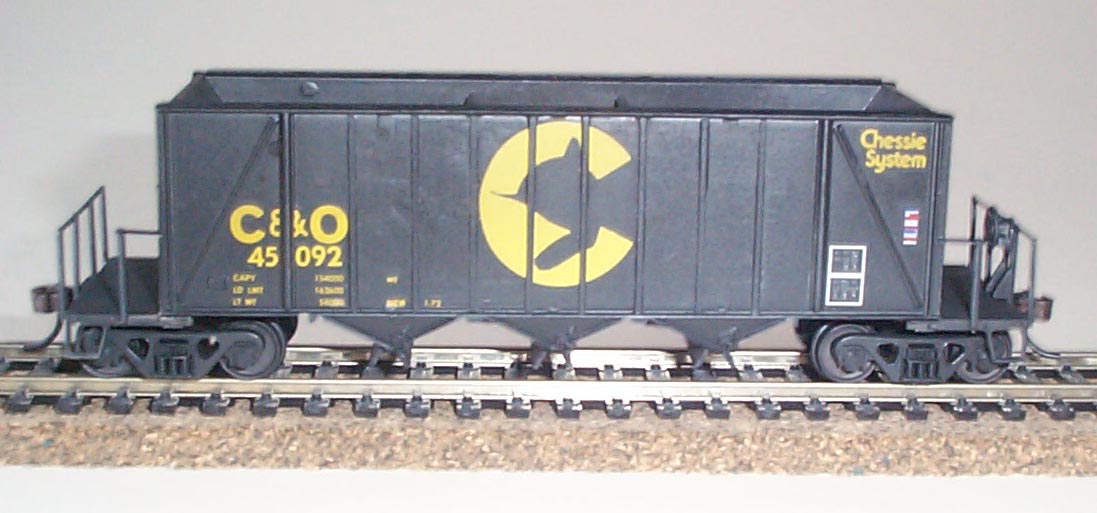
Below are a pics of the finished hopper. What I
found interesting is that on the real car the Ches-C logo was adjusted
so that it looked circular, but the "C&O" letters were not. They
looked like the "&" symbol was cut in half and applied around the rib.
This gave the "&" the appearance that it was way too big.