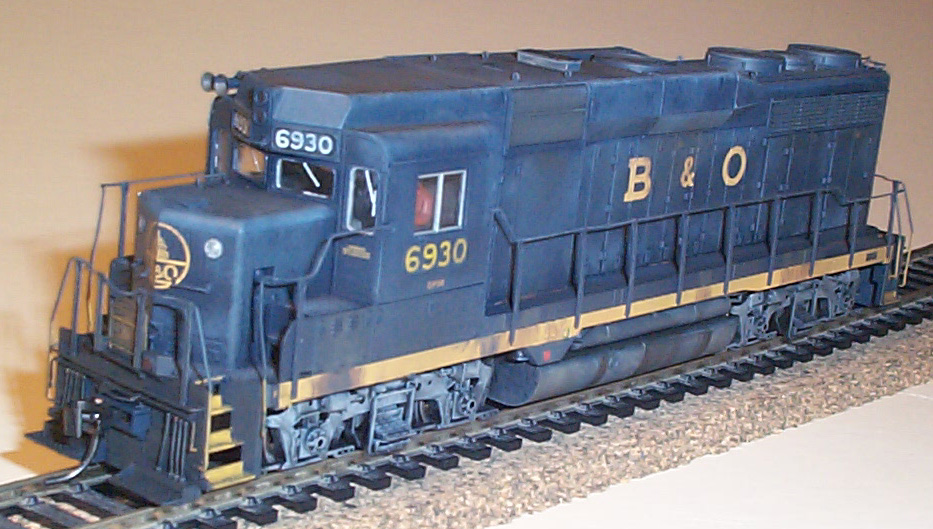
These units go for about $40 a piece. If you find some pick them up. They are great kits. With only a few minor changes and some weathering you can have two accurate GP30's on the line in no time.
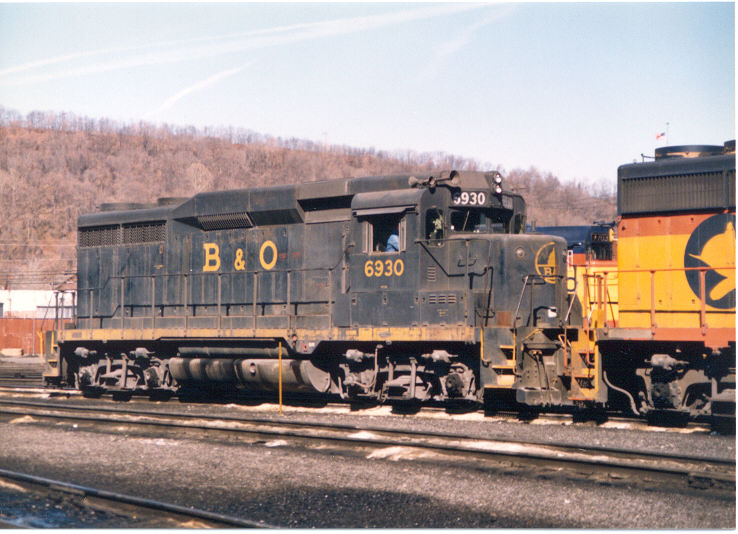
Below are real pics of the two units I chose. Both
are Dean Heacock photos.
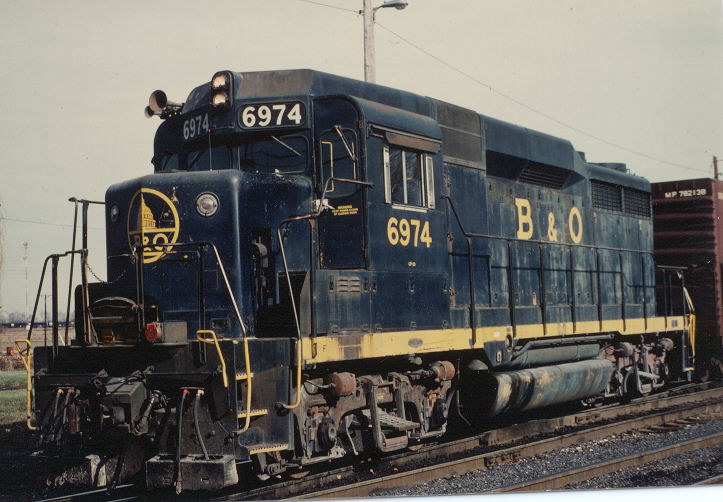
Dean Heacock photo
Dean Heacock photo
How to:
1. Purchase 2 B&O Life-Like Proto 2000 GP30
kits.
2. Do not assemble the kits. Scrape off the
road numbers with a curved blade. It took me 25-30 light strokes
across each number to get them off. Take your time and they will
come right off.
3. Paint over the numberboards with black paint.
4. Mask off around the numberboards and where you
just scraped off the road number. Spray with gloss coat. This
will prepare the surface for decaling. Add Microscale decals for
the road numbers and numberboards.
5. Remove the horn from the middle of the roof.
Put a drop or two of gel type super glue in the hole. When dry, sand
smooth. Don't worry if you get through the paint, we will be painting
the top later.
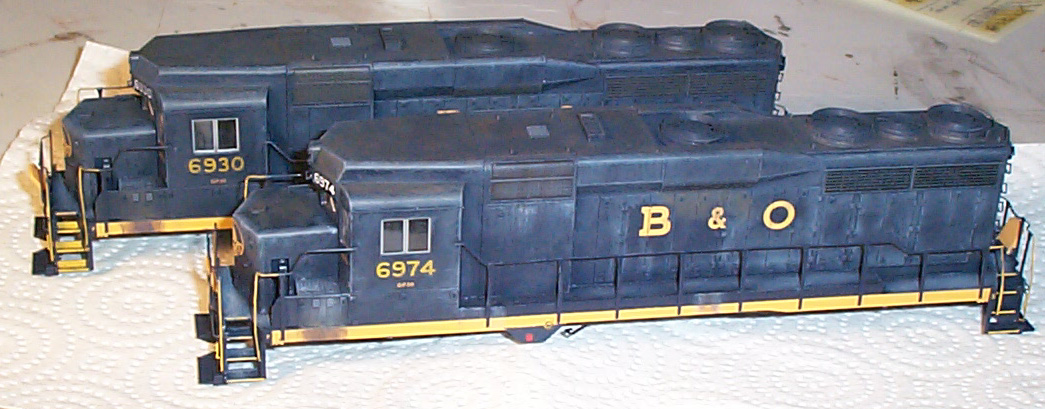
6. Right above the front face of the fuel tank
is a blue piece of the side sill. The Proto 2000 kit comes with this
part painted yellow. As you can see from the real photos above it
should be blue. Note that there is a slight variation in how this
part was painted on these two units. 6930 has the blue painted below
a line flush with the bottom edge of the front part of the side sill.
6974 has the blue painted below a line flush with the middle part of the
side sill. This gives the 6974 blue part a slight angle on the leading
edge of the blue part. See photos below for clarity. Mask off
the appropriate area and paint it C&O Enchantment Blue. I just
brush painted mine. Be sure not to paint over the red fuel cap.
7. Paint the top of the shells C&O Enchantment
Blue. I taped off around the top of the units so as to protect the
yellow printing and windows from overspray. Painting the whole top
gives a nice even look to the roof. It also gives you a reason to
paint the fans. The Proto 2000 fans are a slightly translucent blue,
so painting them makes them appear more "solid".
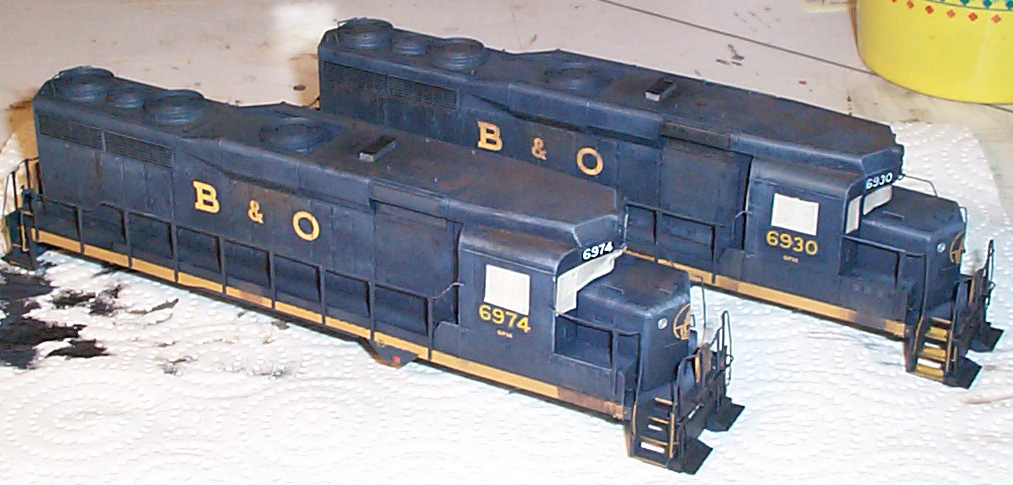
8. Paint the hand rail ends, m.u. hose connection
and uncoulpling levers yellow. Also paint just the step edges
of 6974 yellow. 6930 had the entire steps painted yellow. Look
at the photos above and below for this subtle difference in the two units.
9. Paint the m.u. cap and m.u. hose connection
red. Paint the exhaust on the top silver with the inside black.
10. Paint the fuel tanks on the bases C&O Enchantment
blue. I just did it with a brush. Paint around the class lights
with flat aluminum paint.
11. Drybrush the shells and bases to get the desired
weathering effect. I use C&O Enchantment Blue right out of the
bottle first and add more and more white to the blue, until by the third
coat I am just drybrushing with straight white paint. Dry brush the
truck frames with black and shades of grey.
12. Tape off the windows and spray the shells and
bases with dull coat. The bases are done.
13. Use oversprays of roof brown, dirt, and black,
to simulate road grime. Concentrate the accumulation of the grime
on the pilots and side sill of the locomotive.
14. Assemble the locomotive as per the directions.
15. Drill a hole on the right side of the cab roof
for the three chime bell. Insert it into the hole, hold in place
with super glue.
16. You are done. Enjoy your two GP30s.
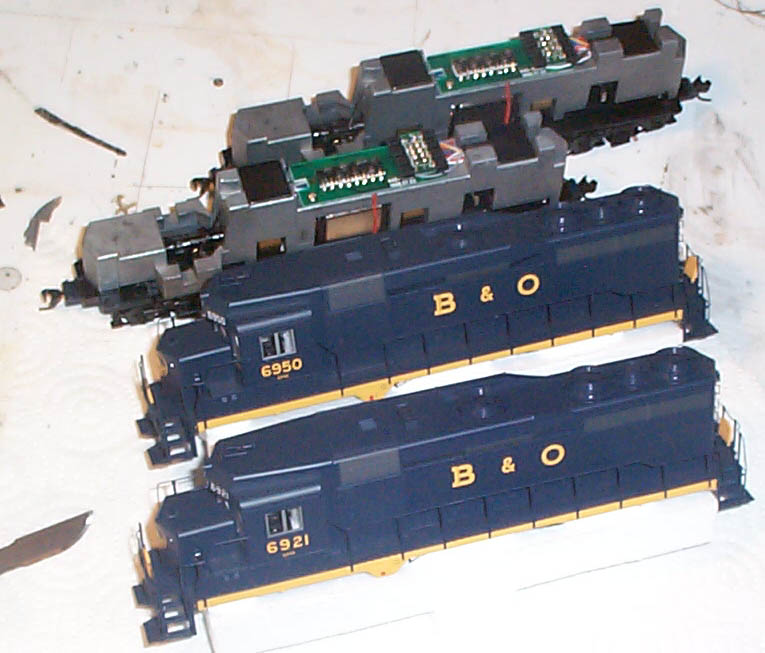
Below are the two kits as they came out of the box.
Note the all yellow side sill. Also, the curved blade I used to scrape
the numbers is on the left side of the photo.
Below is a close up of the area with the road numbers
scraped away. Notice the position of the horns. This is where
they come in the kit, but are not where they are on the real locomotive.
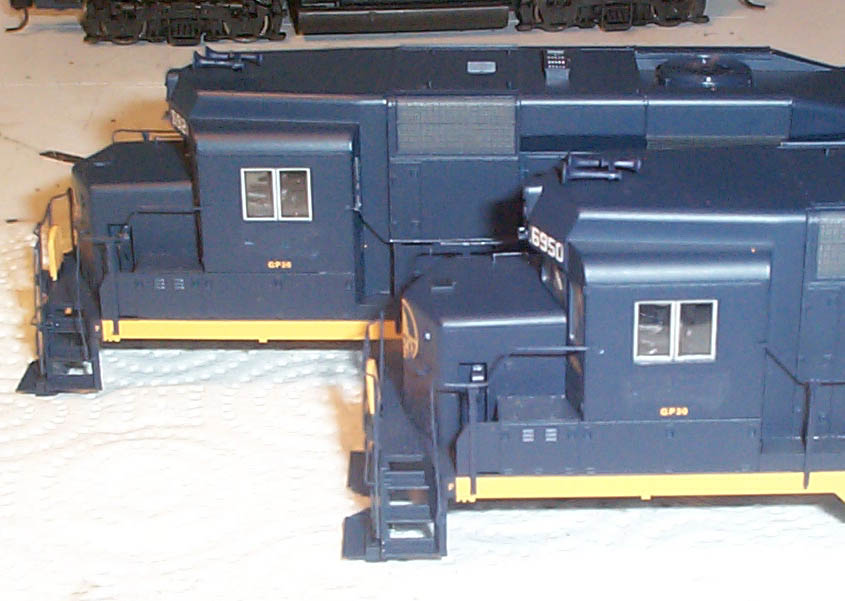
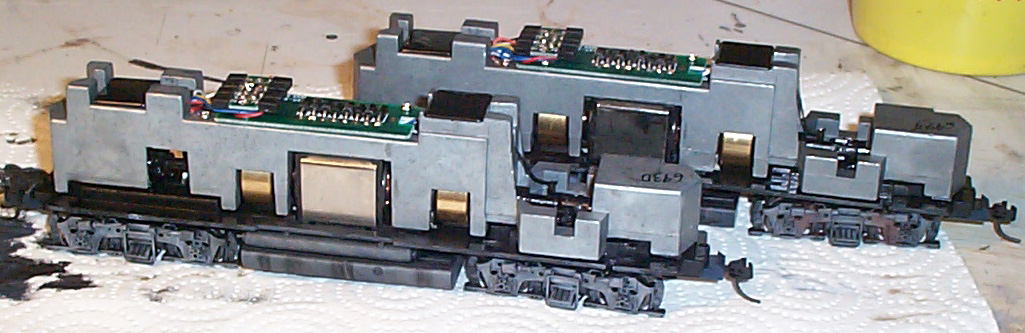
Below is a pic of the kits in work. Note that the
blue has been applied to the side sill underhang. 6930 is the unit
in the foreground. Notice how its blue underhang does not touch the
circle in the side sill, and 6974 in the background does. The numberboards
have been painted black. The horn has been removed, filled in, sanded
and painted.

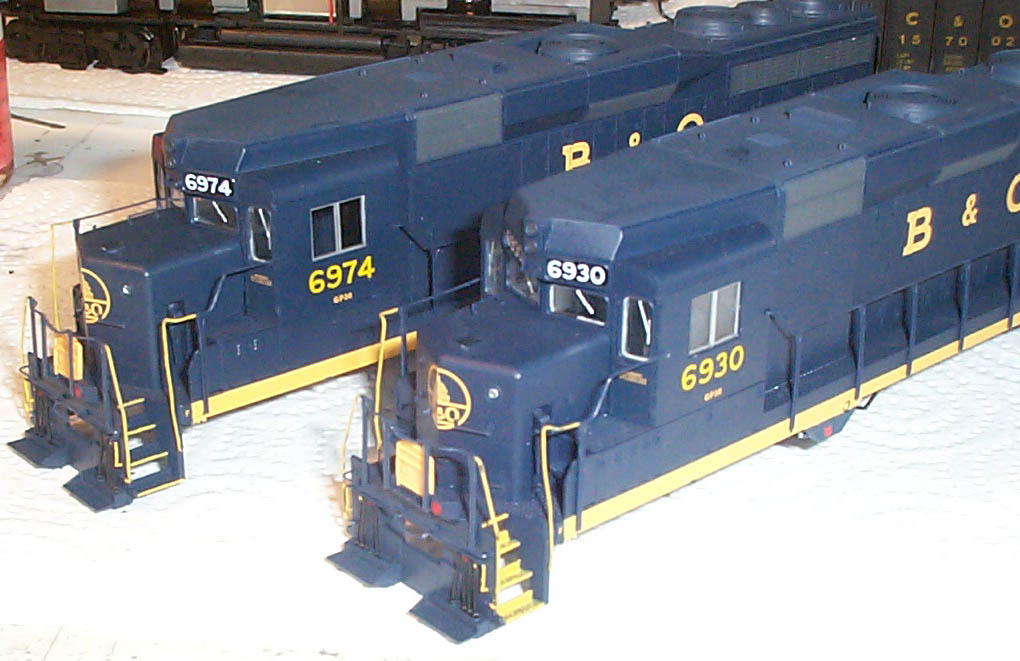
Below is another progress shot. The road numbers
have been added, the steps have been painted yellow (note the difference
in the two), the handrails have been painted yellow, the mu stand cap has
been painted red, and the mu hose connections have been painted either
blue or yellow.
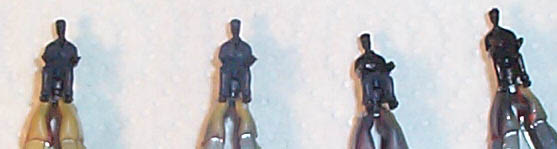
Below are the 4 crew members for the two engines.
They come solid black as you can see, not very realisitic at all.
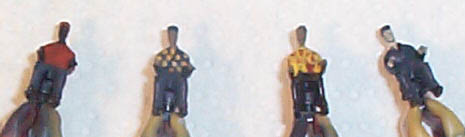
Below are the same 4 crew members painted and ready for
duty. The painting doesn't need to be all that detailed as they sit
behind "glass" in the cabs of the locomotives.
Below are the two bases how they looked coming out of
the box. Note that the side frames and fuel tank are both black to
begin with.
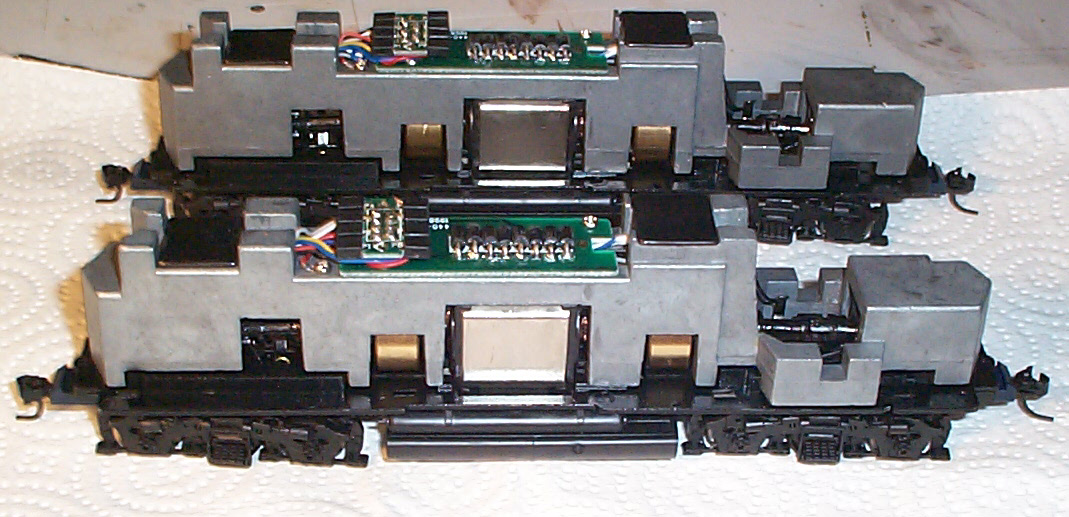
Below are the two bases after being weathered. The
fuel take is actually painted blue and then drybrushed.
Below are the two shells drybrushed and ready for overspraying.
Note how bold the drybrushing looks in this photo and how muted it looks
in the next one.
Below are the two shells after the dull coat and oversprays
have been added. Note that I covered up the windows with masking
tape to protect the window glazing from oversprays. Notice too how
the drop steps are now almost brown with road grime accumulation.
The class lights have been painted silver as has the top exhaust.
Finally, note that I painted too much of the hand rails yellow on these
locomotives and corrected it in this photo.
Below are two photos of the tops of the units. Note
the rusty spots I put on the top with weathering chalks. The roofs
of these GP30 seemed to rust heavily.
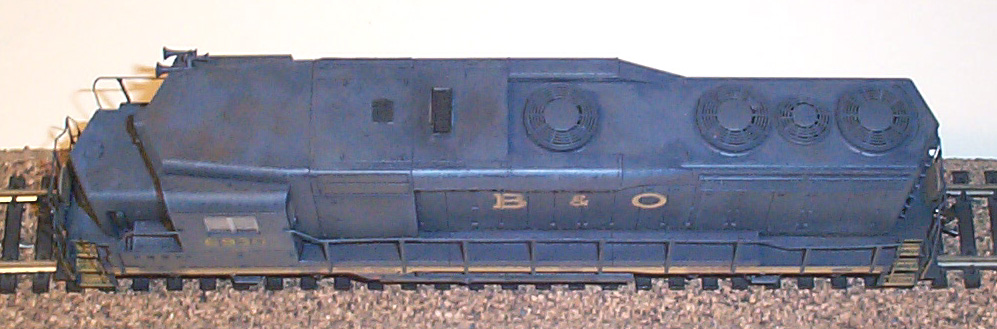
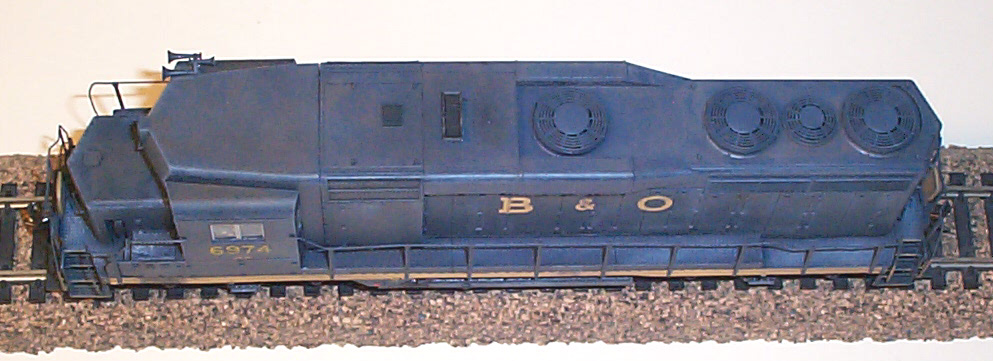
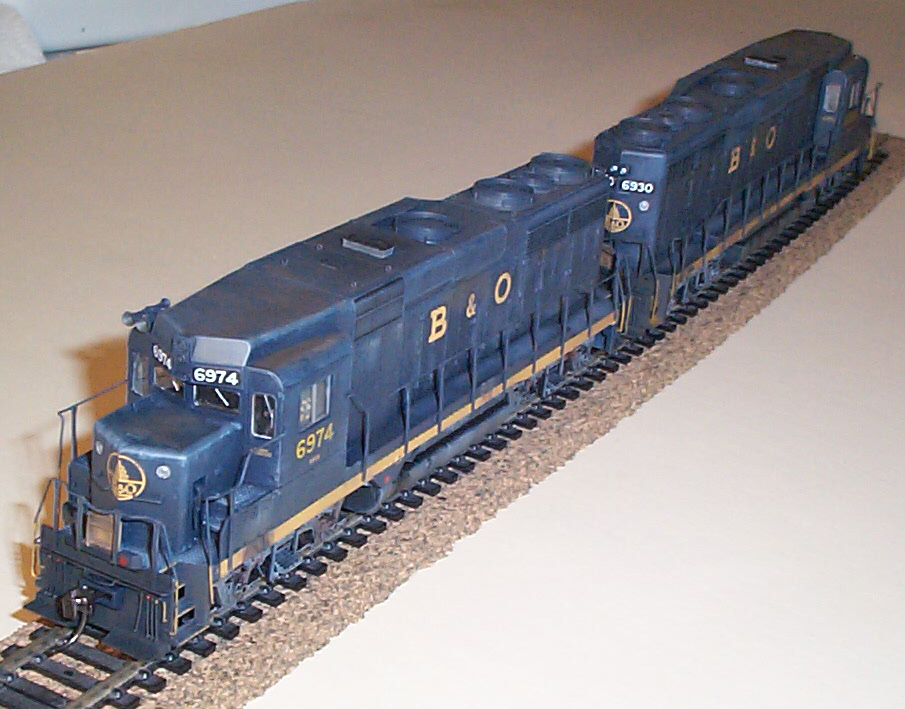
Below is a photo of the two units posing together.
Below is a shot of 6930 from the front. Note how
the trucks appear differnt than the fuel tank or shell. This is typical
on a used locomotive. Also note how the pilot appears darker than
the rest of the shell, which is typical in an old locomotive. Note
how the drop step is practially brown, just like the real locomotive.