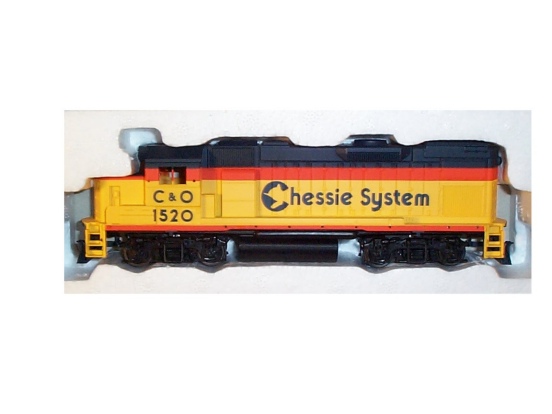
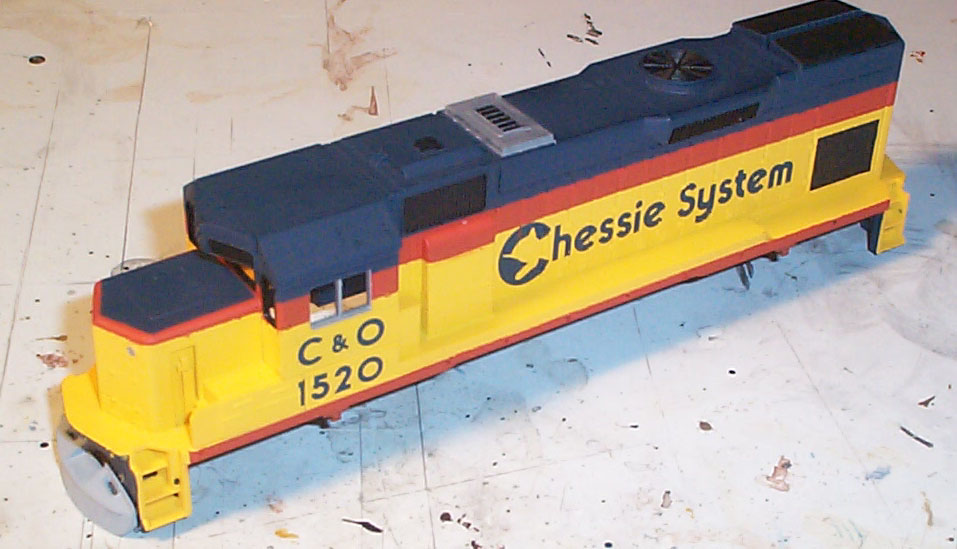
All of the GP15T's were delivered to the C&O, and all were delivered in Chessie colors. The kit comes in #1520. Since it is even, I decided to stick with that number.
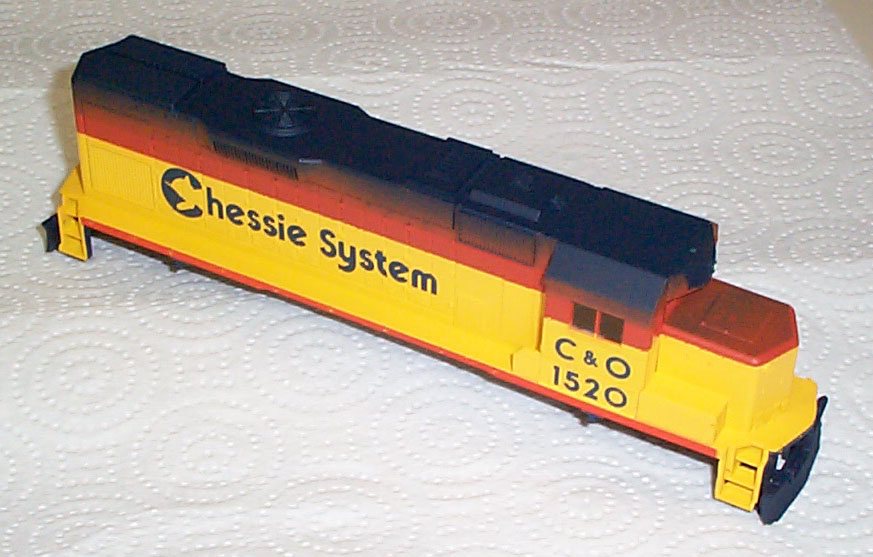
Below is a pic of the real Chessie C&O
#1520.
It is a Dean Heacock pic.
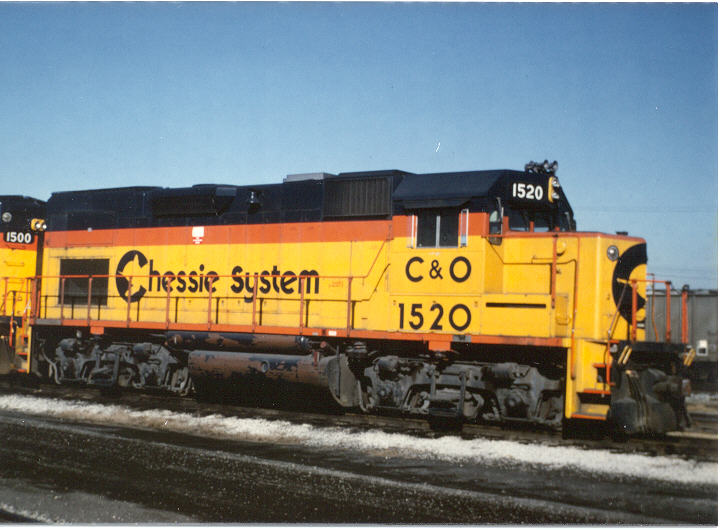
Dean Heacock photo
How to:
1. Remove the kit from the box. Remove the
shell from the base. It just pops off.
2. Tape along the bottom of the orange stripe and
paint over that nasty neon orange with SP Daylight Red. Daylight
Red is really close to Chessie Vermillion right out of the bottle.
3. Tape off around the orange stripe on the side
sill and paint it Daylight Red. I do the orange repainting in two
steps, it is just easier for me in this case. You can do it all
at
once if you want.
4. Tape off around the top of the orange stripe
and paint the top C&O Enchantment Blue.
5. Tape off around the top of the short hood and
paint is blue. Again, I do this twice for ease of taping.
You
can tape off around all the blue and spray it just once.
6. Next snap off the snow plows on the front and
back. Chessie didn't have snow plows on their GP15's they came
with
the rounded "Chessie Rock Pilot". This is (much like a slotted
battery
box cover) a very unique Chessie feature. Details west has the
Chessie
rock pilot as part of its metal detail line of parts.
7. Paint all the vents and the window frames
black.
Don't paint the side window frames, as those will be silver.
8. Paint the side windows and the box on top
silver.
See pictures for clarity.
9. Prime the rock pilot, uncoupling lever, a 5
chime Leslie horn, mu hoses, and side mounted bell with enamel grey
paint.
All are available from Details West or Details Associates. I use
Floquil primer over the metal parts. When dry, paint the horn
silver,
the mu hoses blue at the top, the actual hoses black, and the
connections
at the end silver, and paint the bell and uncoupling lever dark
blue.
The ends of the uncoupling lever need to be painted CSX yellow.
10. Drill two holes just above and slightly
farther apart then the snow plow holes. Attach the rock pilot and
prime it grey. Also drill two holes slightly below the three
little
nubs on the top part of the pilot. This is where the mu hoses
will
go. Drill the holes by the nubs on the front and back
pilot.
There are mu hoses on both ends, but a rock pilot on just the front.
11. Fill in the back two holes where the back
snow
plow used to be. There is only a rock pilot on the front so no
need
for anything on the back. Drill holes for all the grab
irons.
There are little nubs there for them already.
12. Paint the walk way and pilots blue.
Paint
the step edges and handrails orange. Prime all the grab irons,
when
dry, paint them yellow, orange, or blue. See photos below for
clarity.
13. Drybrush UP Armor Yellow on the air intake
grills on the back of the long hood. While you are drybrushing do
the base with black, roof brown, dark grey, and white.
14. Drybrush several shades of C&O
Enchantment
blue mixed with more and more white on the walkways and top of the
locomotive.
15. Spray locomotive with glosscoat.
16. Add decals for slotted battery box, builders
plate, numberboards, and assorted safety decals. See picture for
clarity.
17. Spray with dull coat. Add horn and
bell.
Put on all the grab irons, the handrails, and the uncoupling levers.
18. Weather the orange and yellow parts of
locomotive.
Overspray with dark grey to simulate road grime.
19. Spray with dull coat again to seal in
weathering.
Snap "glass" inot the shell. Snap the shell onto the base, add
couplers.
20. You are done, enjoy your GP15T.
Below is a starting pic and the #1520 with the first
coat
of orange.
Below is a pic of the 1520 with the first of the
blue
painted.
Below is a top pic of 1520. The short hood had
had
its top painted blue. Only the walkways and pilots remain to be
painted.
But before that can happen the snow plows have to be removed and a
"Chessie
Rock Pilot" needs to be added to the front.
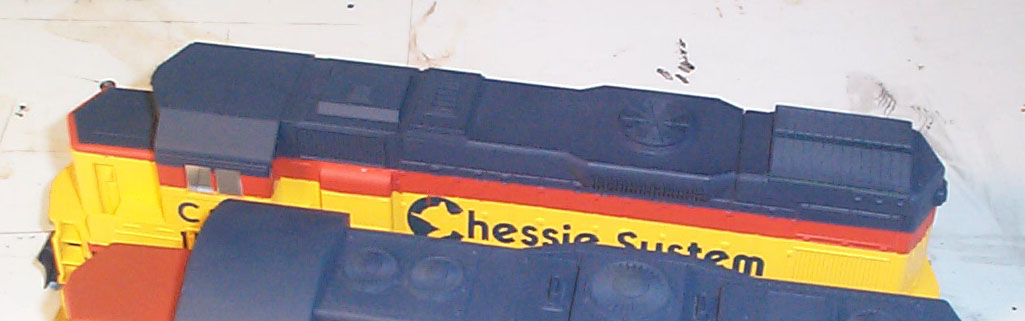
Below are two pics. The first is all the vents
and
windows (with the exception of the side windows) have been painted
black.
The next shows the top vent and side windows painted silver. Also
the "Chessie Rock Pilot" is seen attached to the front and primed grey.
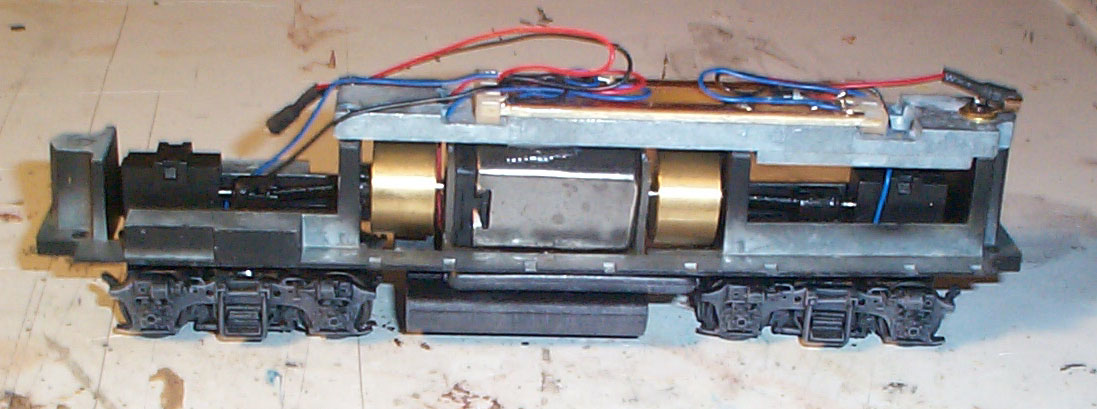
Below is the base as it came out of the box.
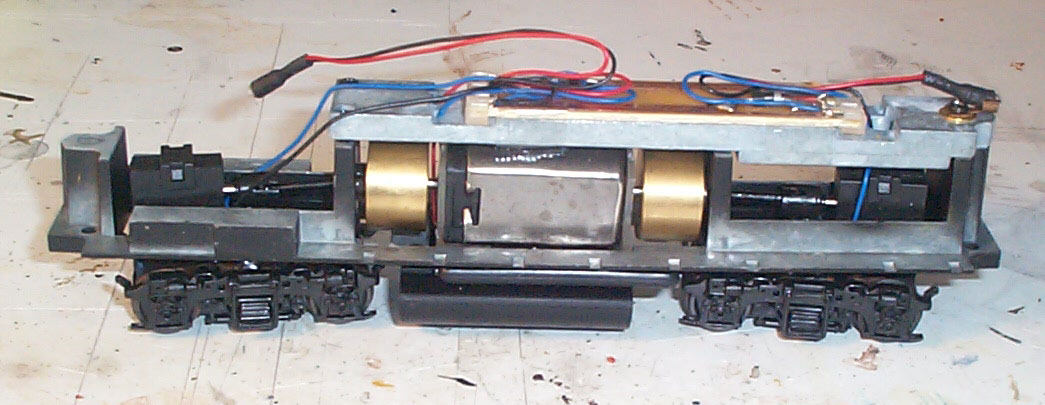
Below is the base after being drybrushed.
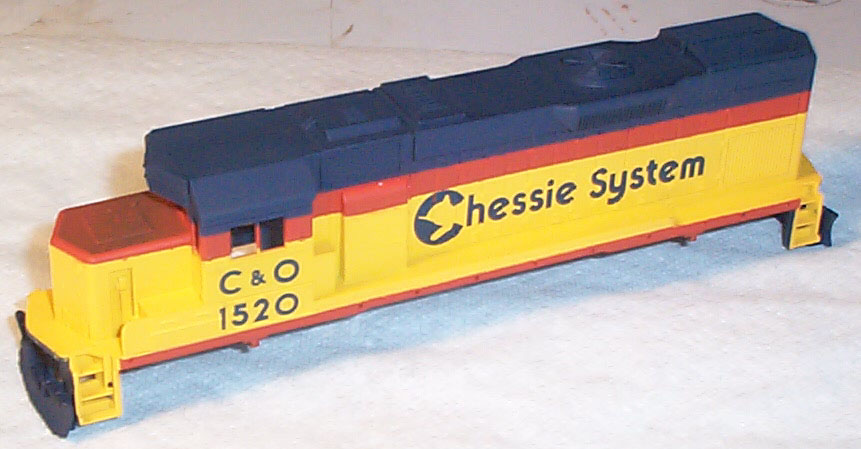
Below is #1520 with all the appropriate decals
added,
the air intake vent on the back has been dry brushed, and some of the
blue
has been weathered. Also the walkways have been painted blue.
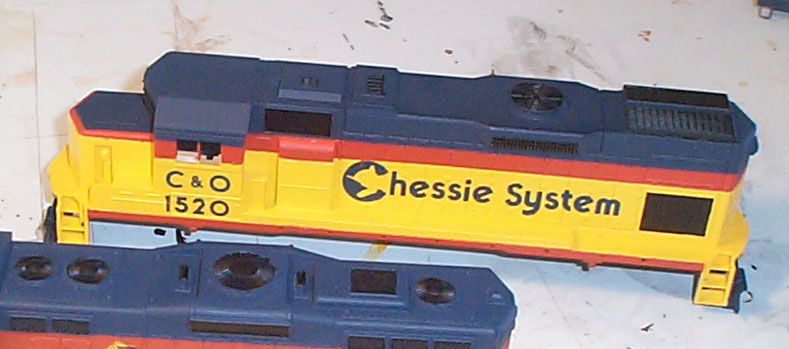
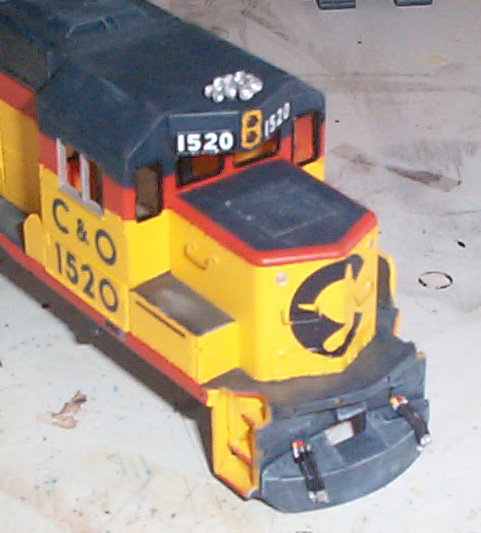
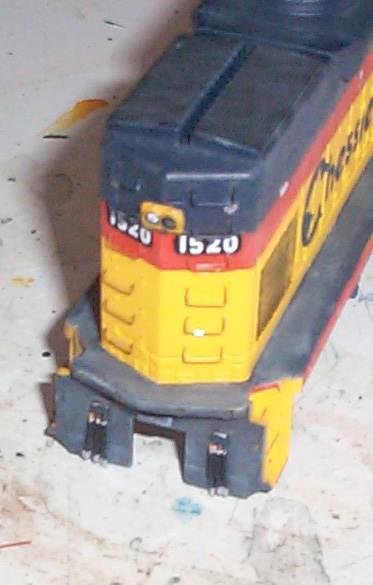
Below are two detailed pics of 1520. The first
shows
the grab iron placement on the front. There are two on the nose
by
the Ches-C logo and one on the right side. The next pic shows the
back and the placement of all the grab irons there. Both pics
show
the placement of the mu hoses.
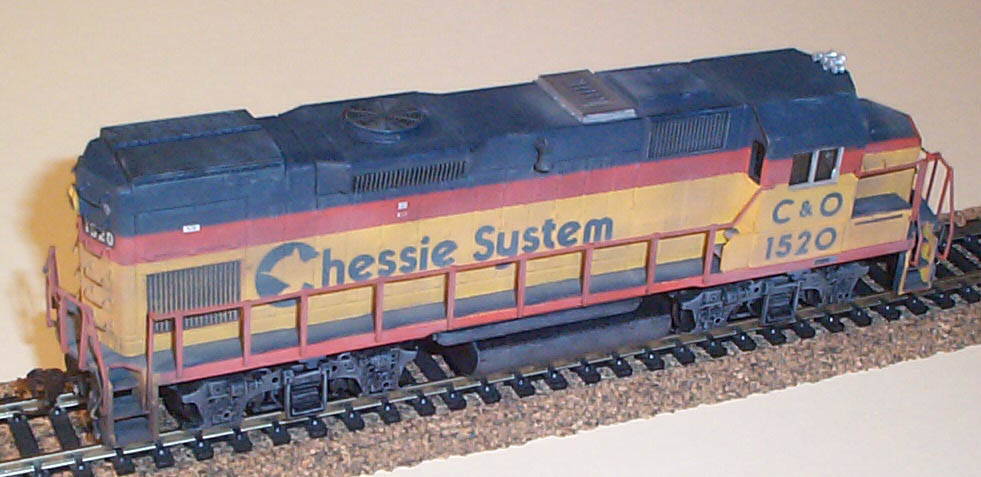
Below is the shell basically done. The horn
has
been added, the mu cables and uncoupling levers are on the pilots, and
the steps have been painted blue. Also the inside of the cab is
light
blue. The vertical surfaces on the backs of the steps should
actually
be yellow, I painted them blue by accident. The horizontal
surfaces
only on the steps should be blue. Up next, weathering.
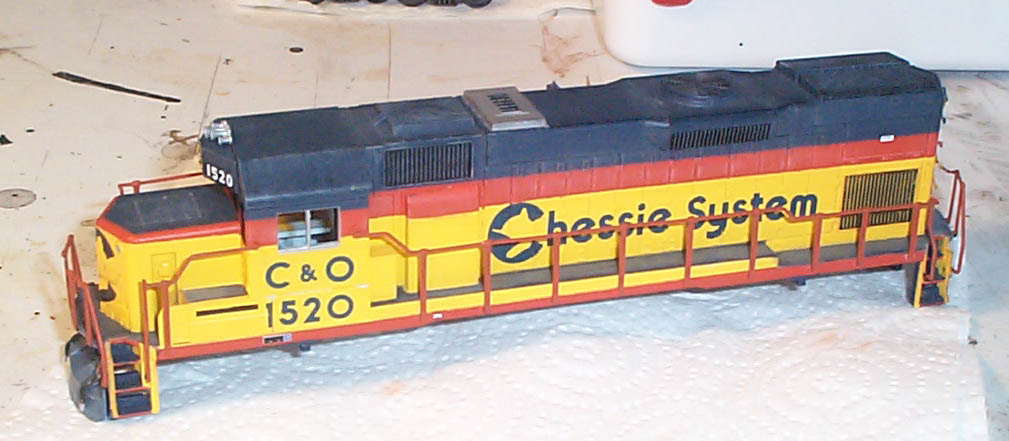
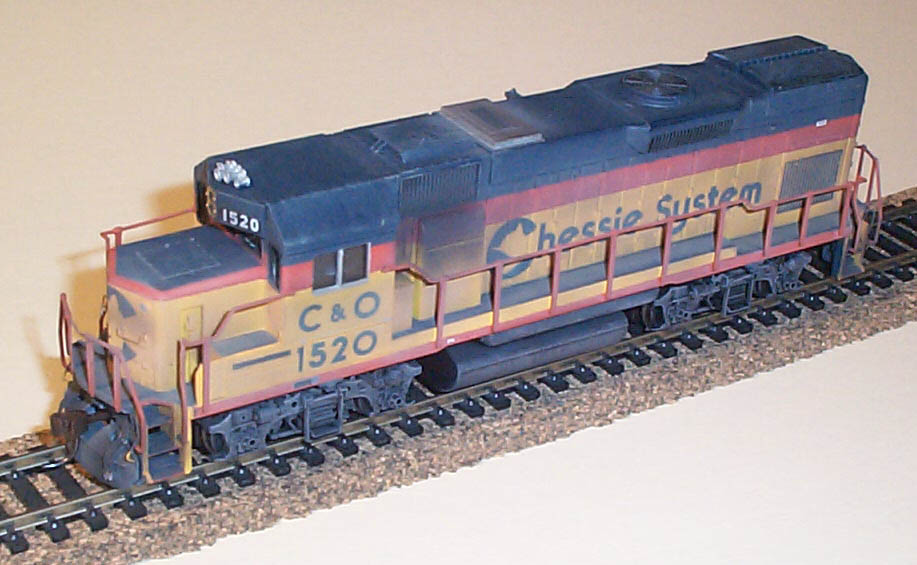
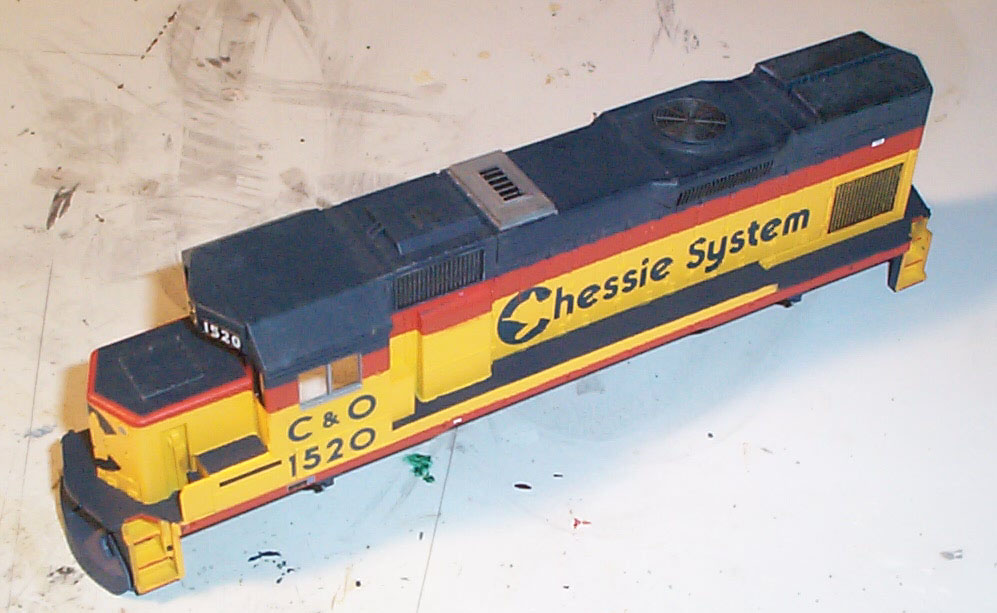
Below are the finished pics of #1520. I
weathered
the car with an overspray of tan, dirt, and black. I concentrated
the black along the exhaust on the left side right behind the cab (a
normal
place for soot) and around the silver exhaust box on the top.
This
now looks like a hard working Chessie engine, a huge contrast to the
starting
pics.