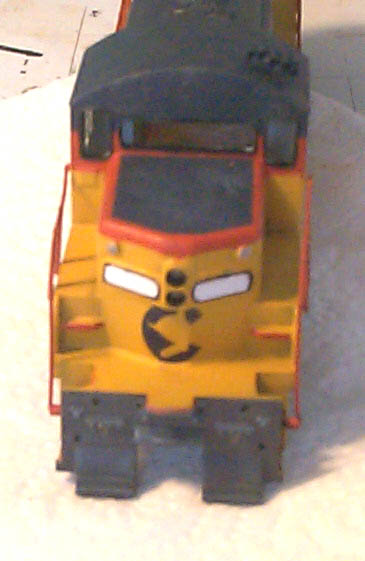
All WM GP9's were chopped nosed. They were delivered with high short hoods but were modified to look like the pic below before the Chessie Era started. They are unique in that they have numberboards on the short hood, not up on the cab above the winshield. This makes for a very small room for the Ches-C logo on the hood.
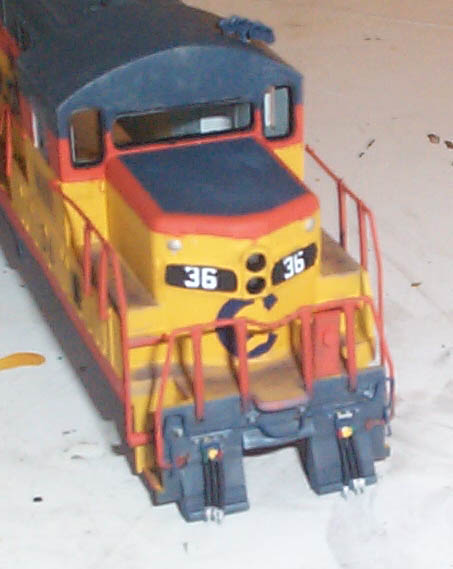
Below is a real pic of #36. It is a Dean Heacock
pic.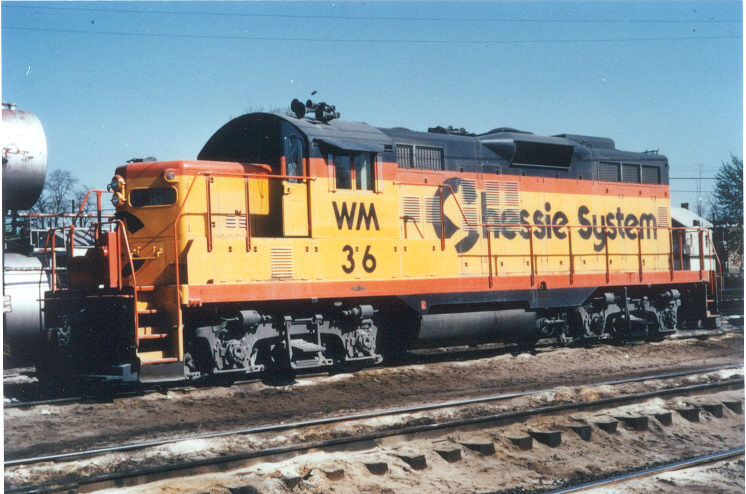
How to make a WM GP9 Chopnose:
1. Remove the shell from the frame. Set aside
the frame. Remove the clear plastic "glass". Remove the two
horns from the roof. Remove the front handrails and back handrail.
Leave the long ones on the sides.
2. Carefully remove the numberboards and headlight
from the cabin with a saw. Do not damage the numberboards or headlight
(see photo).
3. Place a piece of plastic in the hole in the
cab where the numberboards and headlight used to be (see photo).
4. Cut a hole for the numberboards and headlight
in the nose (mine is a little too low, put yours higher).
5. Place numberboards and headlight into hole.
Round off top of headlight so it isn't square.
6. Put bondo or another putty in spaces around
numberboards and top of the cab. Sand to shape.
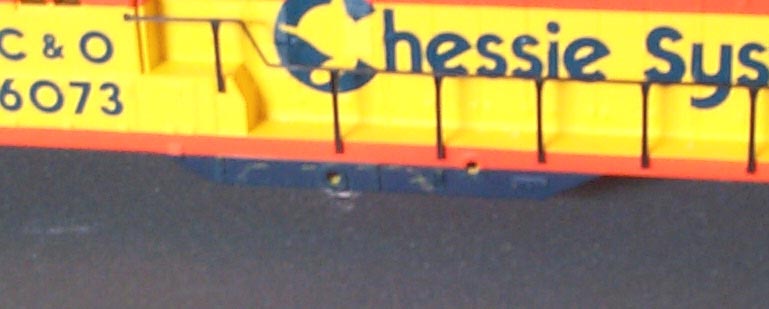
7. Notch the side skirts to look more like the
prototype. (see photo below)
8. Primer the locomotive.
9. Paint the locomotive UP Armor Yellow.
There is no need to paint the top since it will be blue.
10. Tape off where the bottom of the orange stipe will
be on the hoods and cab. Paint above the tape SP Daylight Red, or
"orange" as I call it in this article. Don't forget a small "V" where
the Ches-C logo will go on the long hood. See the pic below for clarity.
Mine was a little off, check yours carefully with the decals you are going
to use.
11. Tape off around the orange stripe on the side sill.
Paint it orange. I paint the orange twice, the upper stripe first
and the side sill last. You can tape around both and paint the orange
just once, but I do it this way because it is easier.
12. Tape off around the top of the orange stripe,
the part of the side skirt that is blue, the ends (or pilots as they are
known) and paint them all C&O Enchantment Blue.
13. Tape off around the top of the short chopped
hood and paint it blue. Again, I do the blue in two steps for ease
of taping.
14. Next hand paint all the hand rails orange.
Set aside the ones not attached.
15. Paint all the vents and window frames
(except the side windows) black. See pictures below for clarity.
Paint the side window frames and the class lights (2 on the nose and two
on the back) silver.
16. Spray the whole shell with gloss coat and apply
decals. I use the Microscale Chessie Hood Locomotive set. The
small Ches-C logo on the hood came from a Herald King Chessie Caboose set.
17. Slide in from the inside of the shell the clear
piece of plastic for the numberboards and head lights. If you are
not happy with how deep the numberboards are on the front, like I was.
Cut and sand two small pieces of plastic and using white glue, glue them
into place. Paint them black and apply the white "36" decals.
18. Prime the detail parts. These parts inclued
the 5-chime Leslie airhorn, a bottom mounted bell, 4 sets of 3 mu hoses
and two uncoupling levers. Paint the horn, bell, uncoupling levers,
and mu hoses mounting brackets blue. Paint the rest of the mu hoses
black with silver tips. Where the mu hoses meet the mounting brackets
paint one hose end green, one yellow, and one red.
19. Drill a hole in the left side of the cab roof
for the horn. Drill two holes in each pilots (just under the the
little sets of three nubs) for the mu hoses.
20. Find a small rectangular piece of plastic from
your spares box, or cut one out of a sheet of styrene yourself. Mount
a mu cap on it from a details associates mu stand set. (see pics
for clarity). Mount one on the front walkway and one on the back
walkway. These mu stands were unique to the WM GP7s and 9s, so putting
on your WM model is a must. When they are dry paint them orange.
21. Paint the inside of the cab light blue.
I use Tamiya Japanese Blue.
22. Grind off the small vertical piece of metal
on the frame. This part will not allow the frame to meet with the
shell since the new numberboard piece in the nose of the shell blocks it.
23. Weather the shell lightly along the bottom
with tan and black to simulate road grime.
24. Seal the weathering with dullcoat.
25. Snap the "glass" back in the shell.
26. Snap the shell onto the frame, add the couplers.
You are done. Enjoy your GP9.
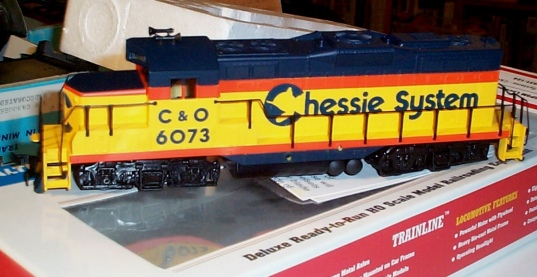
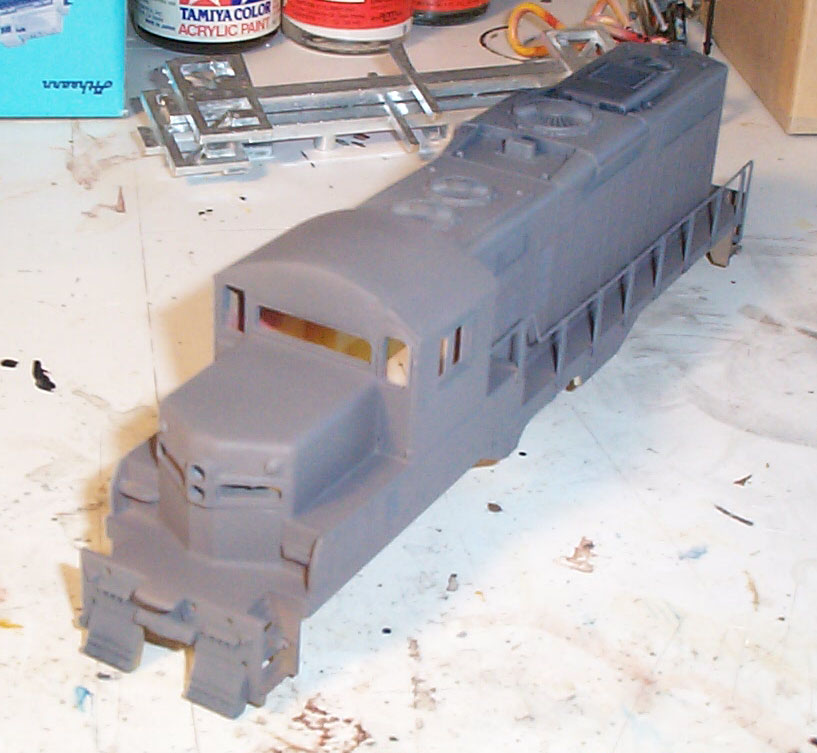
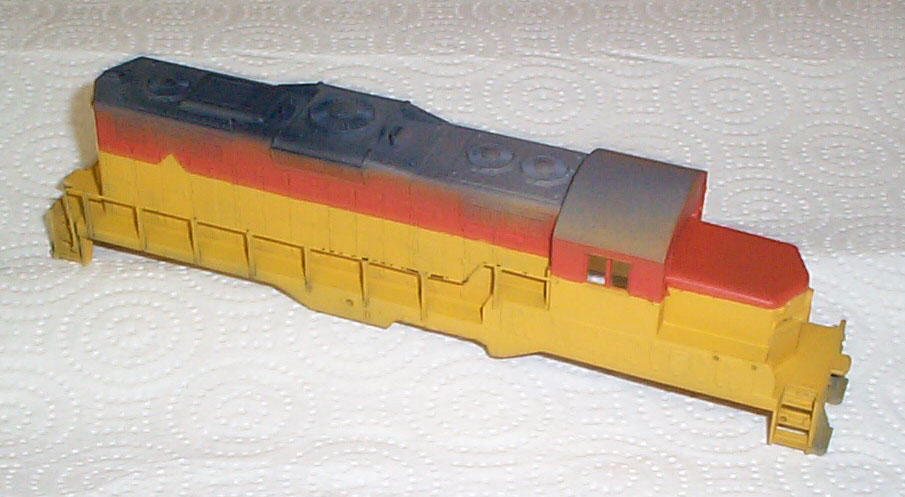
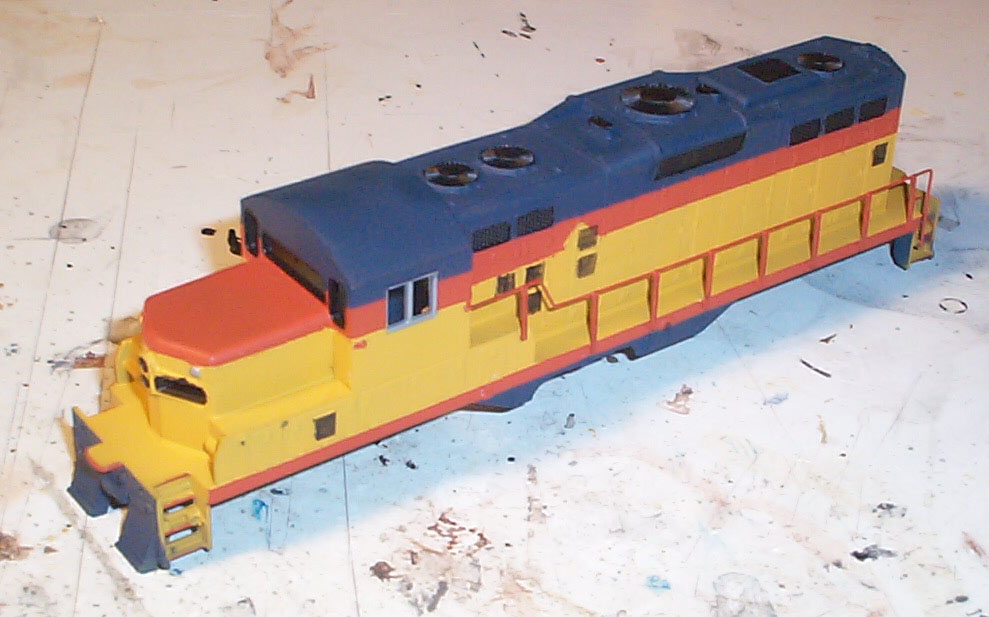
Below are inwork pics. This pic is the GP9M right
out of the box.
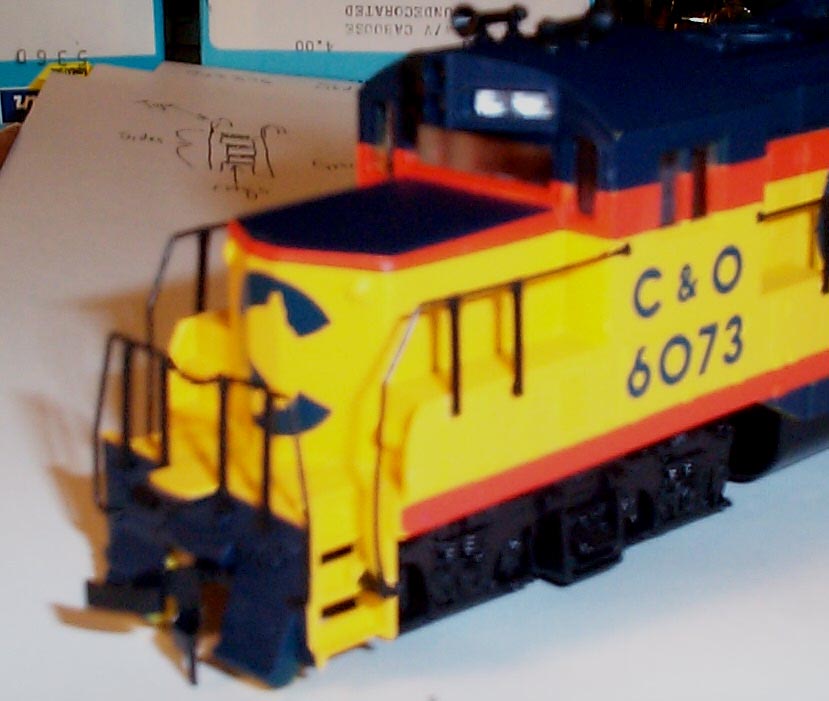
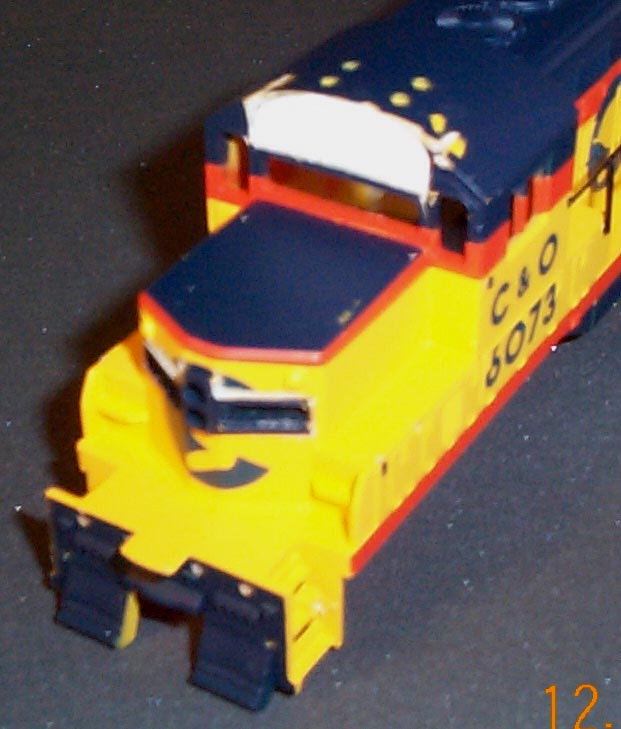
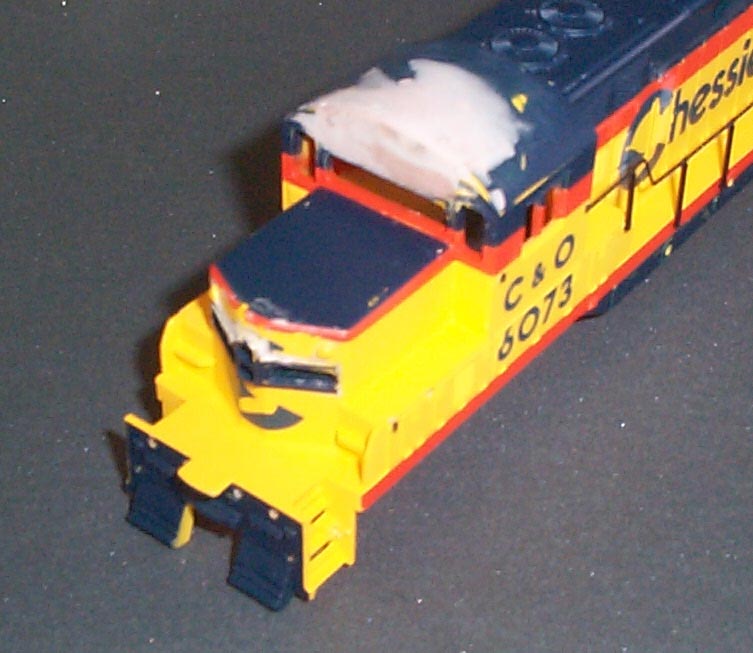
Below are the cab modifications. First what the
nose looked like out of the box. Second the numberboard/headlight
piece has been removed and placed in the hole in the nose. Third
the bondo has been applied and smoothed into shape.
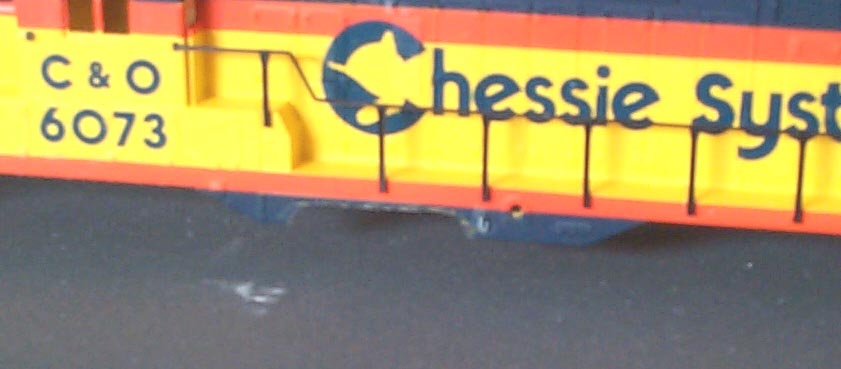
Below is a pic of the side skirt right out of the box,
and then what it looks like after I notched it to look more like the prototype
pic above.
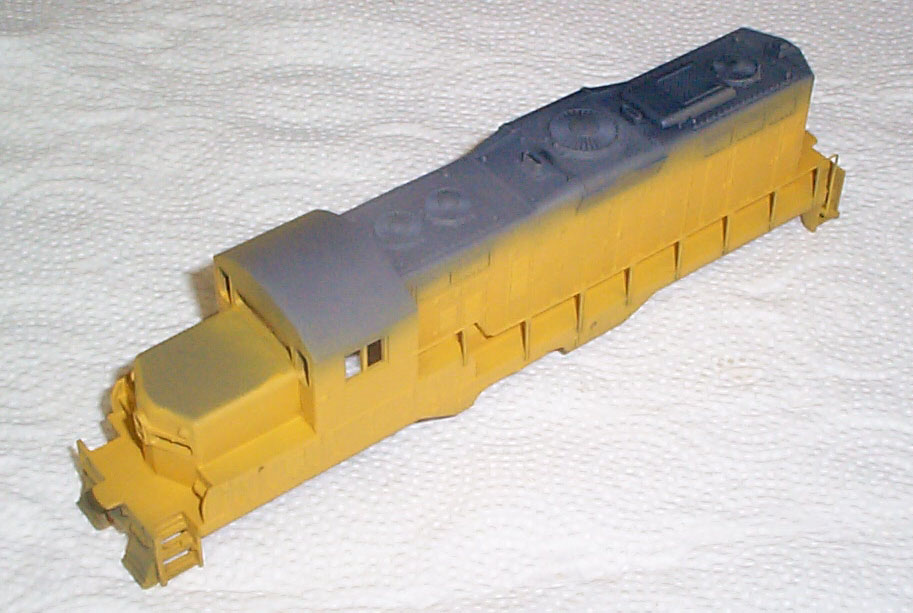
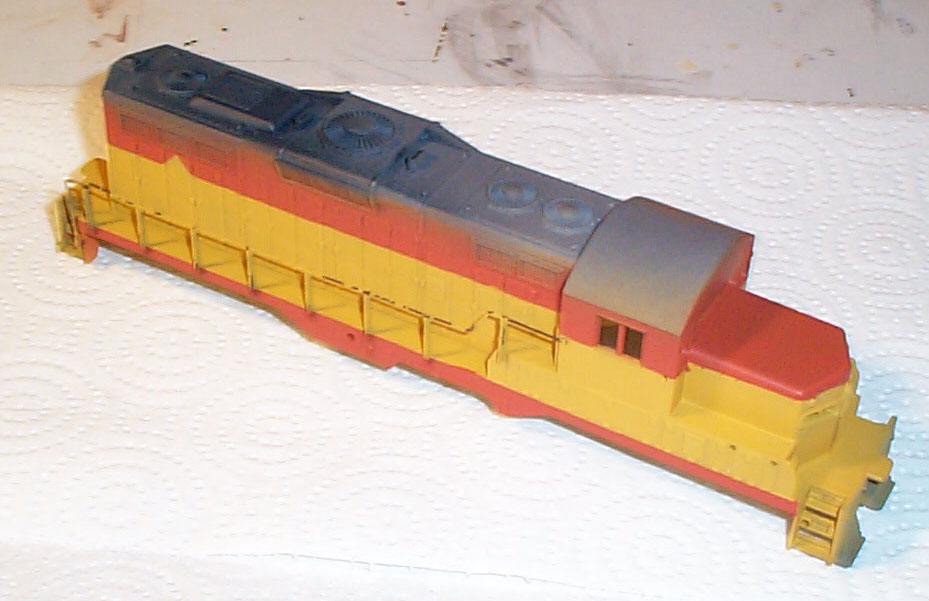
Below are pics of 36 primered and then the yellow applied.
There is no need to paint the top yellow since it will eventually be painted
blue. The walkways are yellow on this unit, so paint them too.
Be careful around the handrails. Make sure you get good coverage
behind them on the walkway and long hood.
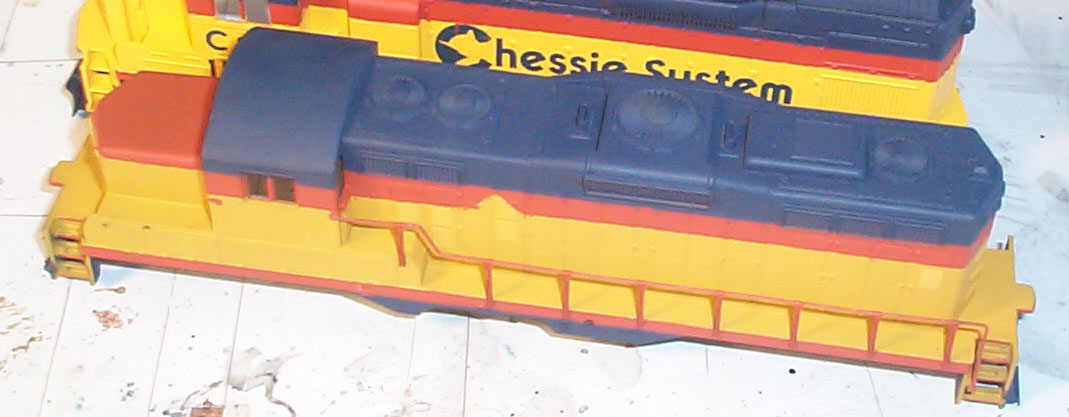
Below-left is 36 with the first coat of orange.
The side sill has not been painted yet. It makes it much easier to
tape twice than try and tape both stripes at once. Notice the yellow
"V" in the orange stripe for the Ches-C logo. Below-right is the
36 with the sill painted orange. Up next is painting the blue color.
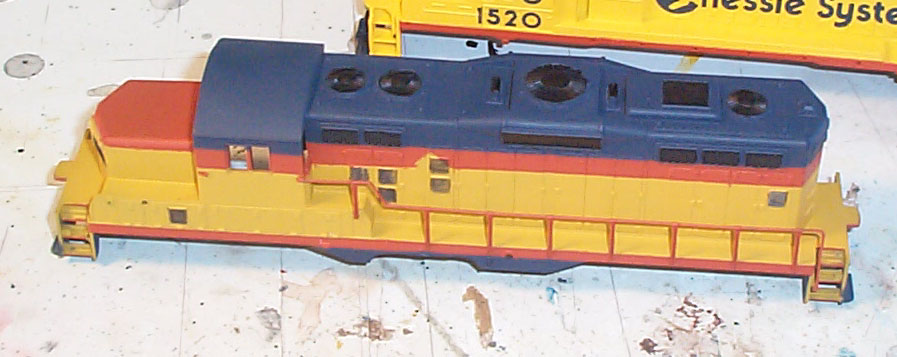
Below is a pic of 36 with the first of the blue painted
on the top and the side skirt. The handrails have been painted orange
by hand. The blue on the short hood is left to go. The walkways
will remain yellow.
Below the vents have been painted black. Next up,
drybrushing. GP7 and 9's vents on the long hood doors always stick
out, that is why I painted them black. Other models don't seem to
be so pronounced, and I only give GP7's and 9's this treatment.
Below is a pic of 36's shell now with the silver painted
on the class lights and the side windows.
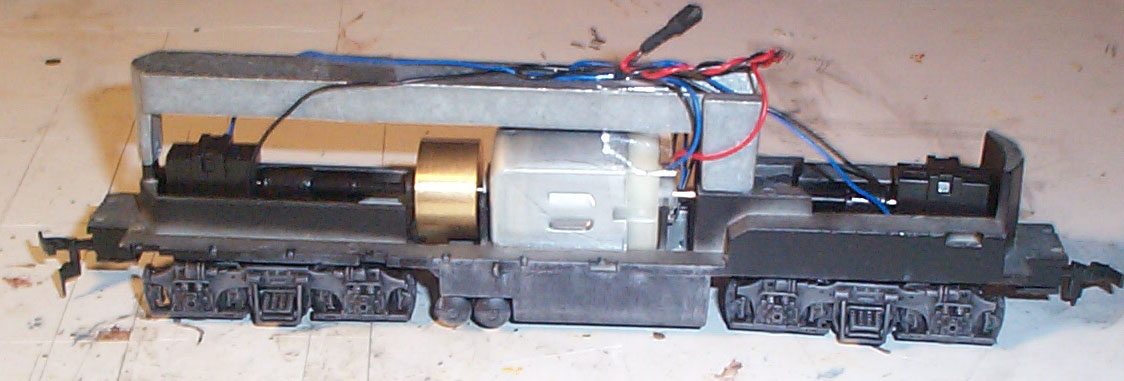
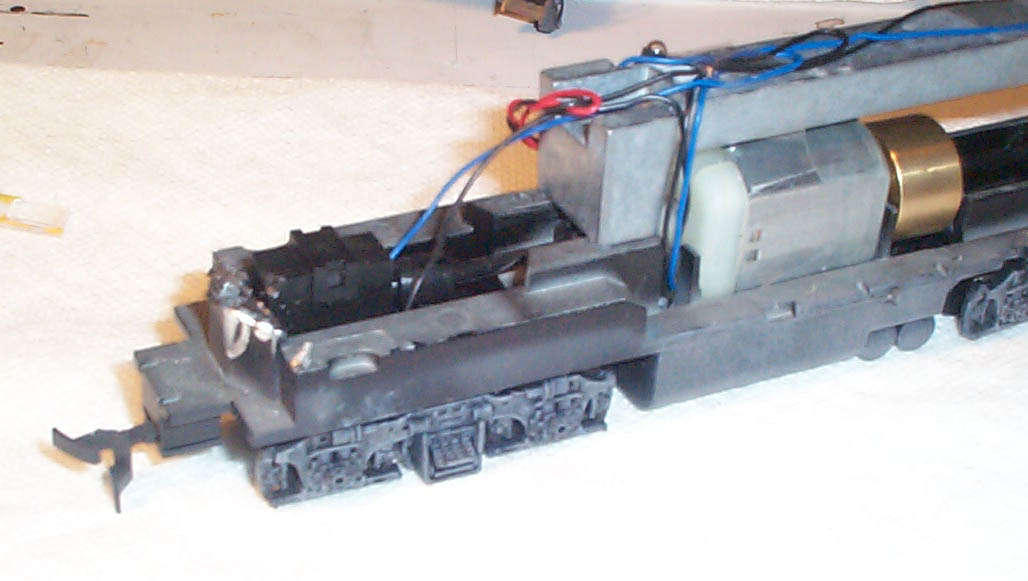
Below is a pic of 36's base as it came out of the box.

Below is a pic of the base after drybrushing
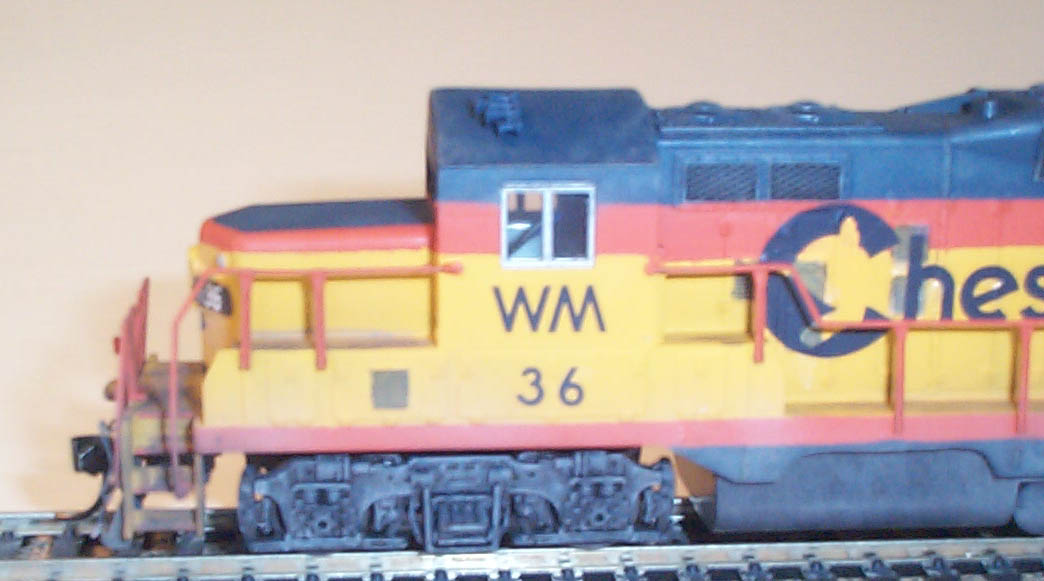
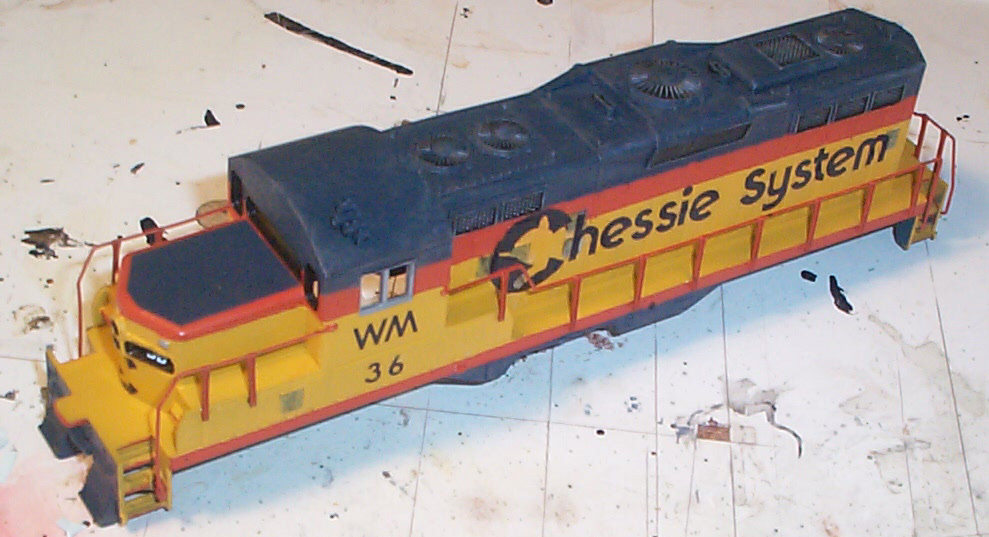
Below are two pics of WM #36. The first shows the
decals applied. I was not happy with the way the front numberboards
looked (as seen in this pic) so I filled them with plastic and reapplied
the "36" numberboard decals. The second pic shows the homemade mu
stand. The brown piece of plastic is from my scrap box and I added
a mu cover to it from details associates mu stand detail parts. You
can also see the two holes I drilled in the pilot for the mu hoses.
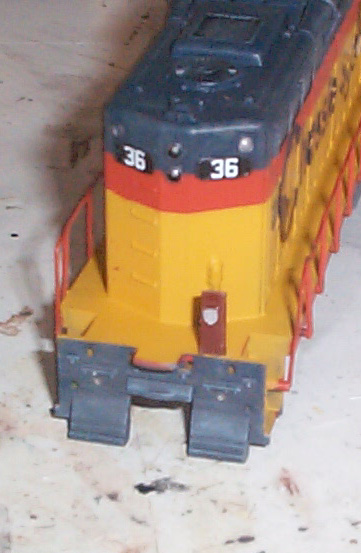
Below are two pics of the reworked numberboards.
The first shows the white plastic pieces I sanded to shape and glued in
the holes. The second shows them painted black and the new "36" decals
applied. Also note that the mu stand is attached and painted solid
orange. This second pic also gives a good look at the mu cables and
un coupling lever.
Below is a pic of a final modification to the frame that
will be neccessary if the shell is to fit on the frame. The front
has a piece of metal that used to stick up in front, right behind the coupler.
I ground it off with a moto tool. Compare to pics above to see the
part that is missing.
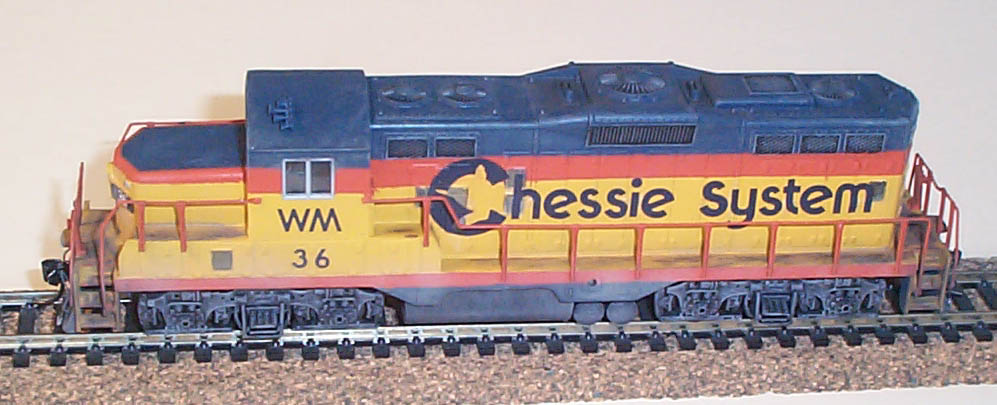
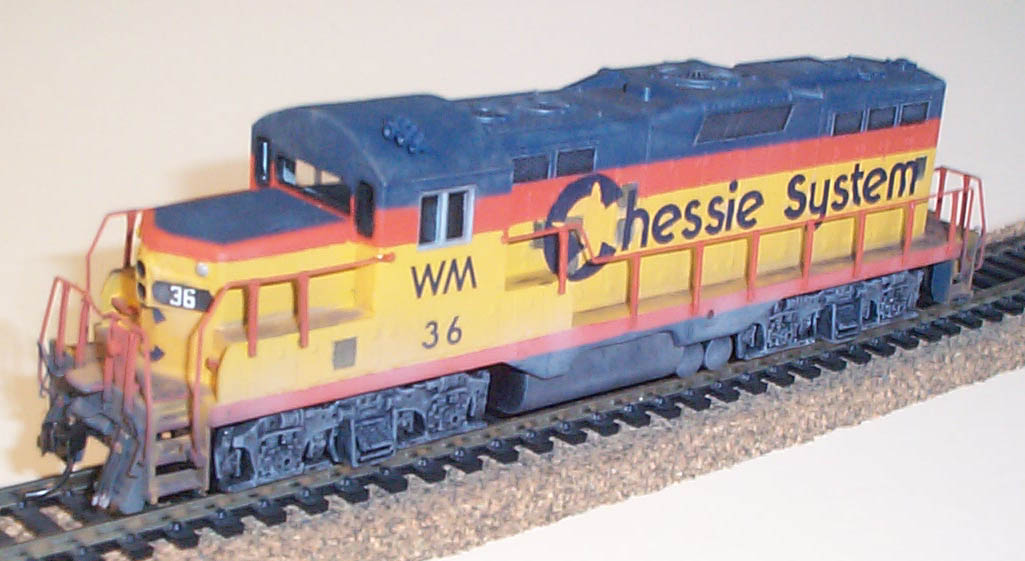
Below are the finished pics of #36.