I purchased an undecorated Athearn gondola at a train show for $2 and figured it would be a good starting point for a WM coil carrying gondola. One thing you will find out if you buy secondhand kits is that sometimes they don't come with all the parts. I bought this kit and found out later it did not have the weight with it. This lead me to put some weight in the car in a rather unique way. You won't have to do what I did, if your kit comes with the weight in it, like it should.
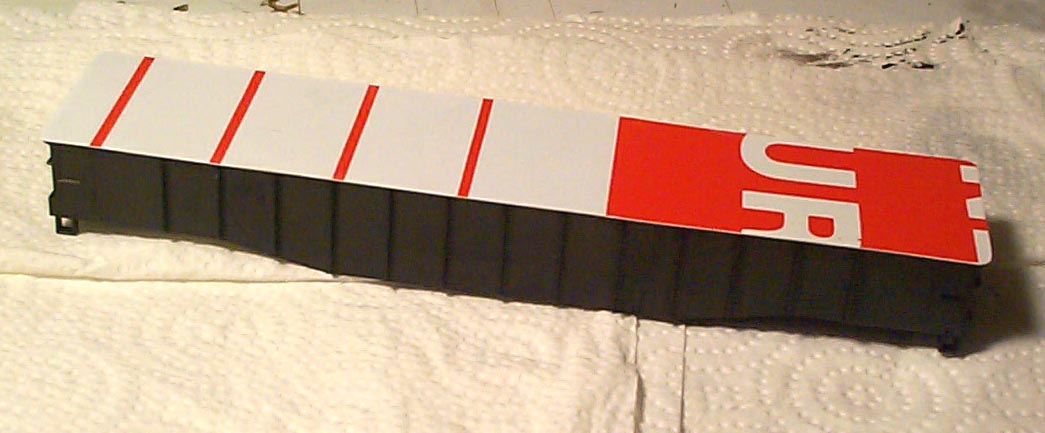
Below is a pic of the real WM coil carrying gondola I
used as a guide for this project.
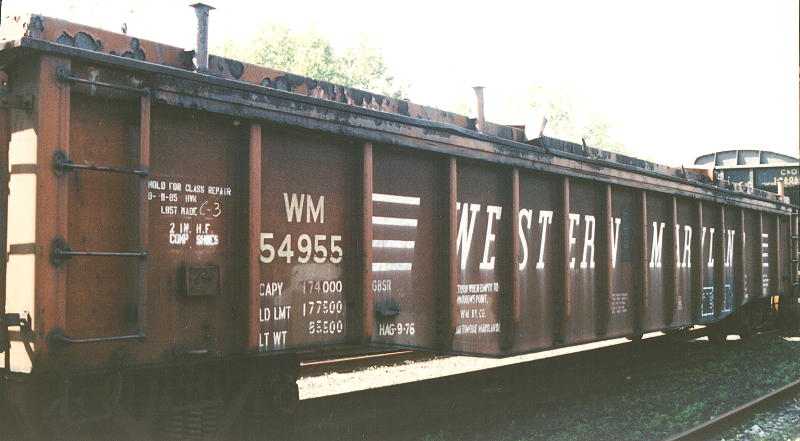
Gary Overfield Photo
How to:
1. Purchase an undecorated Athearn gondola kit.
Pour BB's into the car and cover with white glue. This was needed
because my kit was bought secondhand and did not have a weight.
2. Scratch build a top for the gondola from sheet
styrene and parts from your spares box. I started with a long sheet
covering the whole car. Then built a single piece of 2-ply sheet
plastic that was sanded to look like three separate "hoods".
Glue this piece to the the long sheet already on the car. If you
want your hoods to come off and have a weight for your car, you will not
want to glue the top on. Since my car is filled with BB's, I just
glued the top on. Don't forget to make the center brackets for each
hood. I made mine out of spare window frames and sheet styrene.
Paint them special oxide red and glue them on when you assemble the car.
3. Paint the car and top special oxide red.
4. Paint the areas around the consolidated stencil
black on both sides.
5. Spray the car with gloss coat.
6. Apply Herald King WM gondola decals. Don't
forget to apply the "WM 54955" on the side of each of the three tops.
It is just visible in the real photo above. I got my decals at the
same train show I got the kit. You can find them occassionally on
eBay.
7. Apply the consolidated stencils on the black
squares painted earlier. I use Champ decals, but any would do.
8. Spray the car with dull coat.
9. Lightly streak down from the white letters with
white paint. See prototype photo for the exact look.
10. Weather lightly by overspraying the car with
dark grey mixed with tan along the bottom.
11. Assemble the car as per the directions.
12. Paint the wheel faces rust colors.
13. Spray the whole car, inside and out (if you
are leaving the top removable) with dull coat. You are done, enjoy
your gondola.
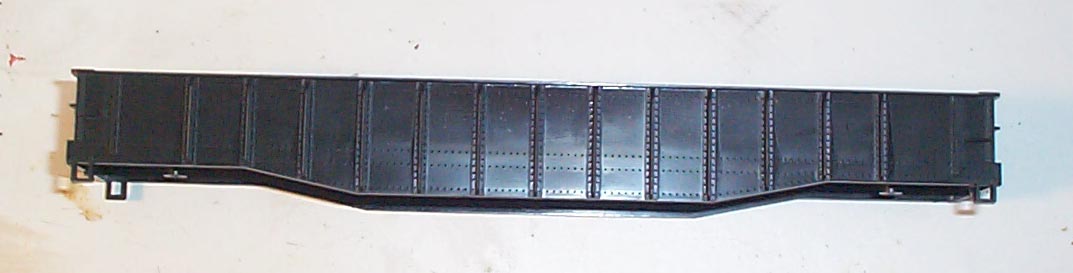
Below is a pic of the car as it came out of the box.
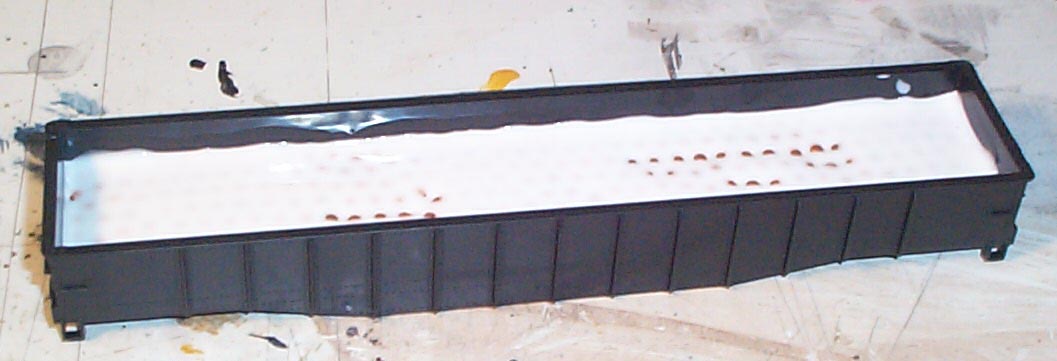
Below is the gon with the BB's and white glue just put
in. The white glue will dry clear in about 24 hours.
Below is the gon with the first piece of the top glued
on. I used spare plastic from an old plastic sign. You can
find them in hard ware stores for next to nothing. This one used
to list "Store Hours". You can still see the bottom of the "R" and
"E" of "Store" and the "U" & "R" of "Hours". It doesn't look
pretty now, but it sure beats paying an arm and a leg for Evergreen styrene.
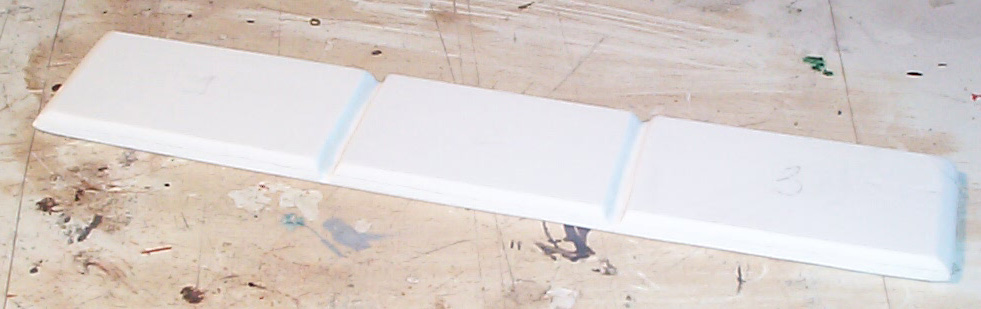
Below is a pic of the top of the hoods ready to be attached
to the car. The tops are two pieces of plastic glued together and
then sanded to the shape you see here.
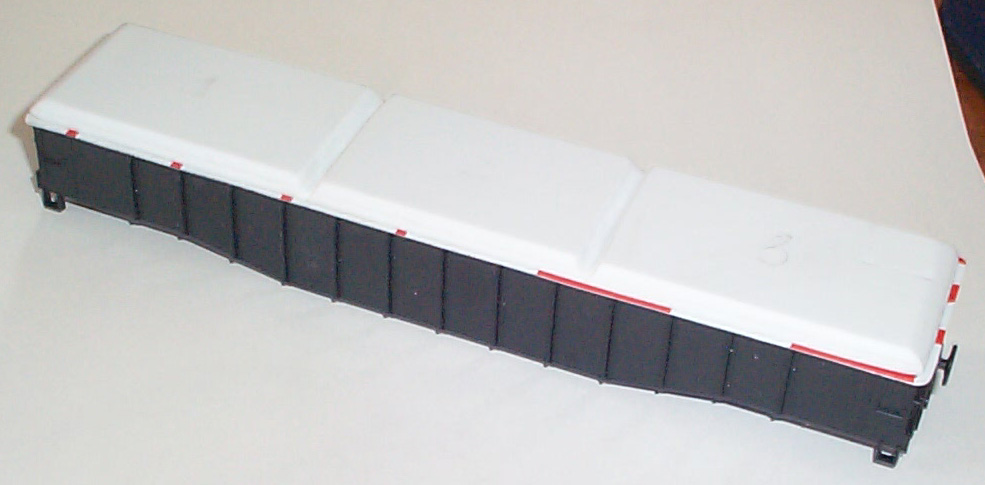
Below is a pic of the top of the hoods attached to the
car and ready for painting.
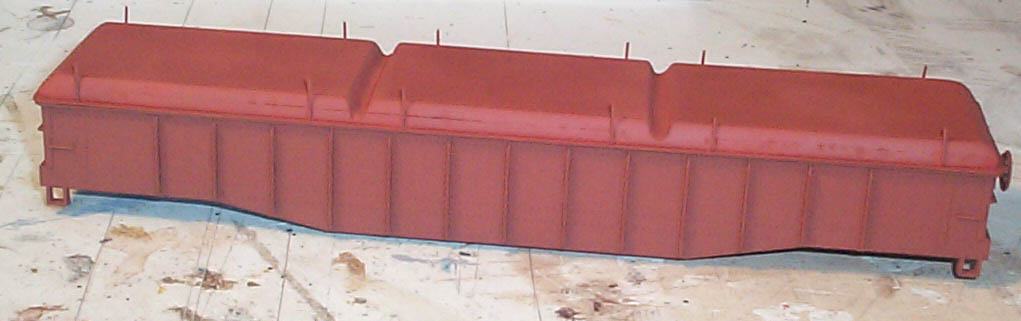
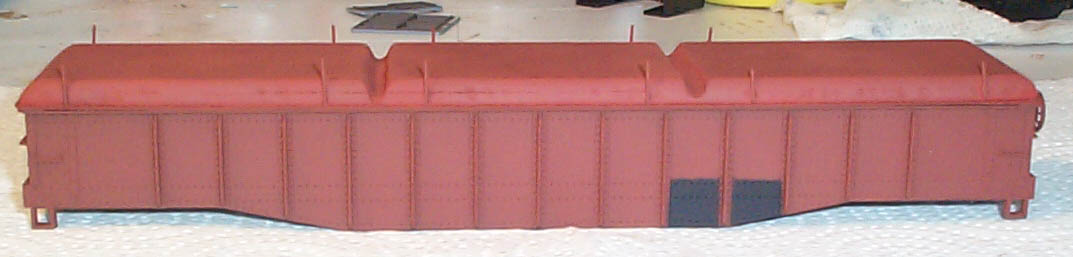
Below is the coil gon painted special oxide red.
Notice I added the little posts on each of the three hoods. I have yet
to add the middle support, but will before the project is done.
Below is the coil gon with the two areas painted black.
These will eventually be the backgrounds for the consolidated stencils.
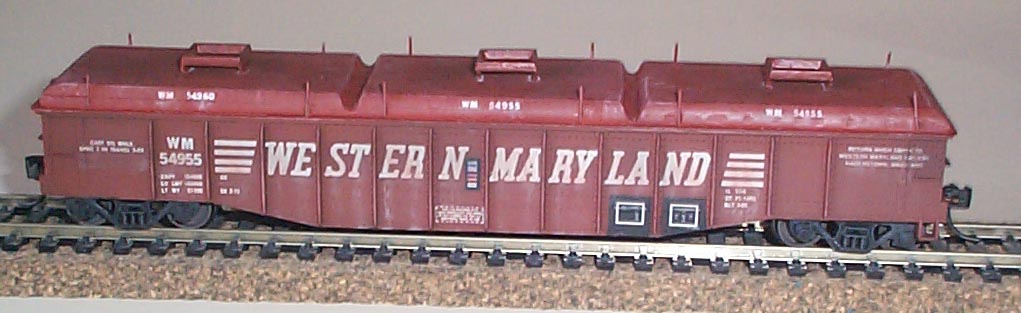
Below is a pic of the finished gondola. Notice that
two of the three hoods has "WM 54955" on it and the one on the left has
"WM 54960". Hoods get swiched around all the time, so I put one of
the hoods off another car for a bit more realism. Also, realize that
each of the decals you see here are individual, that is 98 total decals.
This project takes some time to get it right.