On the prototype, the
engineer notches up the throttle, the prime mover starts ramping up in speed,
the generator is able to generate more power, this power transmits to the
traction motors and the loco starts pulling.
Once the tractive effort is applied to the rails, the force is applied
to the 5,000-10,000 tons of train, and slowly accelerates. All this takes time and delays the startup
of the train from when the throttle is originally moved. Energy has to be put into the train to start
it moving, slowly at first, and then more quickly. All the while, the prime
mover is screaming along. When stopping, the opposite happens. Shut
off the power, and the momentum of the train will continue to carry it
forward. Until friction, either by the brakes or by the train itself,
overcomes the momentum, the train will continue to roll.
Typically most model RR's
like to just spin the knob and the train respond immediately. And without momentum, you cannot simulate
the sound of the momentum. The reason
the engine does not 'load up' before moving is because there is no way the
prime mover sound 'knows' that you intend to move before you spin the knob and
expect the loco to move. Or said
another way, you need momentum to simulate a heavy locomotive.
One solution is, as you
mentioned, do manual notching.
Basically this allows you to adjust the prime mover sound manually while
running the loco. Not very fun, and not
very realistic. A lot of function key
pressing is required to play with the sound, not something a real locomotive
engineer would ever do. Besides, if the
operator gets busy, they will tend to not do the manual notching and all the
realism goes away.
The other option is to set
up momentum so that there is enough time for the prime mover spools up before
the loco start to move. Simulating this takes tweaking a number of CV's
in the TSU. There are CV’s on a DCC
decoder to simulate this. This applies
to both startup/speed up of the train (acceleration), and slowdown/stopping of
the train (deceleration). With high CV
3 and 4 settings, the prime mover has to spool up before the train really gets
going, and similarly, the prime mover will spool down to an idle before the
train stops. The Tsunami can reproduce
these effects very nicely.
When programming these
values, you need to ask yourself whether you want the train to stop on its own
when the throttle is shut off, or do you want to require another function –
BRAKING – to be required to slow the train.
If you want the train to stop on its own, just select a CV4 value that slows
the train in the distance you like. If
you want braking, you will need to set CV4 to a very high number, then set the
braking function (CV61 in the TSU) to slow the train at the desired braking
rate.
As was mentioned, there are
2 key variables that one needs to play with to set momentum:
CV3 - Acceleration
CV4 - Deceleration or baseline braking rate
Additionally, if you want to
use the braking feature, you will have to activate the brake function on the
TSU - CV61. This CV basically "accelerates" the deceleration
rate, or in other words, reduced the deceleration factor as a ratio of the
deceleration value in CV4 to what you program in CV61.
So putting it all together,
to make this all work, program a reasonably high number in CV 3 to simulate the
weight of starting a train, put an incredibly high number in CV 4 to simulate
the train coasting, and pick a value in CV 61 that will let you stop your train
in a realistic distance. Some numbers I use:
CV3 - 65
CV4 - 175
CV61 - 250.
-----------------------------
***
UPDATED!!! *** READ ON!
I often have newby operators on the GNW. These settings work OK IF people are used to
them. We have had a few run-away trains
and the brakes were simply not effective enough to stop the train in a
reasonable time. So operators were
simply hitting the “E-Stop” button to stop trains – not exactly realistic. SO… I went through ALL my road locos and now
use these settings:
CV3 - 65
CV4 - 60
CV61 - 160.
Much more controllable, and still offers enough lag
to let the prime mover spool down while coasting to a stop. Brakes provide good control in switching and
around yards.
-----------------------------
On a TSU, speed tables will
have to be activated make CV61 work. I like to use a value of 50 which
gives me 28/128 speed steps, normal direction, DC not enabled and speed curves
active. Note that the braking function
is programmed into F11 on the TSU, somewhat awkward to get to on most
handhelds. I remapped that over to F7 to make it easier to get to when
operating, and it matches the default programmed location on QSI locos.
(CV41=128).
Here's how it looks in a
video when you put it all together. Note that I did not use manual
notching or hold the brake to get the throttle to sound realistic. The
locos are programmed to be run like a regular loco - and respond as if they
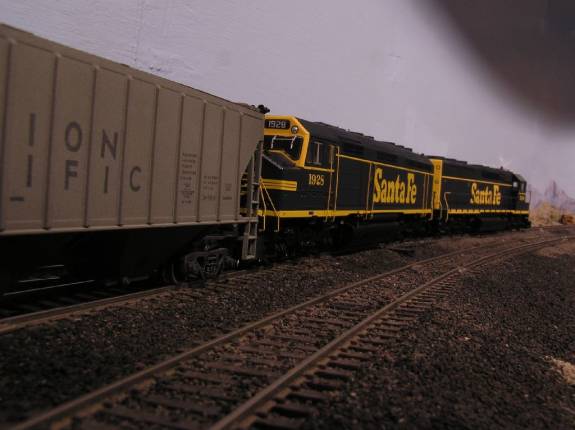
each weighed in at 250,000 lb...
http://www.youtube.com/watch?v=AgyV2lP0L7I
Sorry for the low quality of
the vid. I hope to redo it sometime. Note how the locos coast into
the yard. I am turning F7 on and off to modulate the braking and stopping
of the train; no throttle at all - it's just at zero when I get near the yard.
One other key for this to
work right is that the starting voltage and slow running characteristics have
to be tuned. There are a number of procedures for this, and before you
mess with setting up momentum, you will have to get that tweak done. Check out my other pages on the website for
setting up a decoder for slow speed.
Keep in mind many operators
do not like a lot of momentum in their locos as they want it to stop when the
kill the throttle. That is a tradoff on these settings. With
the momentum set prototypically, you will not be able to stop on a dime, just
like the real thing! I like the added challenge of it. It adds
'train handling' to 'railroad operations' on the layout. I like that.
Others do not. Initially I had both yard switchers and road locos set up
for this and my crews went on strike. Now I have just my road locos set
up with this and the yard engines have minimal momentum - CV 3 and 4 = 15 or
20. It works OK for that. It also slows people down when
running a train - no one wants to plow through another train or miss their
stop. Again, I like this and I feel it results in more prototypical
operations. Your mileage may vary.
One other point. On
the prototype, notch 1 actually does not spool up the prime mover, only connect
the generator to the traction motors. In this mode, only 'idle' power is
transmitted to the traction motors. This is usually enough to move the
loco around the engine yard or stretch the slack. TSU's used to have
their decoder set up so it would allow going into speed step 1 without spooling
up the prime mover. From emails dialogs with them, I understand they got
a LOT of complaints from people who ~felt~ it did not sound realistic to have
the loco move without the PM notching up. All the newer TSUs notch up as
soon as you come off speed step 0. Too bad. I still have a couple
of those older decoders and I tell you, I love hostling those engines around
the yard where they don't change pitch or sound when just creeeeping
along. Lot's of good memories watching that action on the prototype
growing up....
Hope all this made sense.