Back to the JLS Railroad How-To Archives
Ballasted track greatly adds to the realism of your railroad. In my opinion, it is a must. There is nothing more unrealistic then having track laid straight on a board or floor. Now, ballasted track adds to the realism, but, if done incorrectly can greatly add to the stress of maintaining a large railroad. The following How-To will explain the right and wrong ways to ballast track.
1. The first step in ballasting track is where to get the ballast and how much to get! I purchased my ballast from Scenic Express (1-800-234-9995). They sell a very nice blend called, oddly enough, G-Gauge Blend. Very nice stuff, easy to color and apply. The people at Scenic Express are very nice and helpful as well. How much should you buy, well, that depends on the size of the layout or area to be ballasted. The standard, prototypical way to apply ballast is in a mound around the track, about 1" wider (on either side) then the track itself.
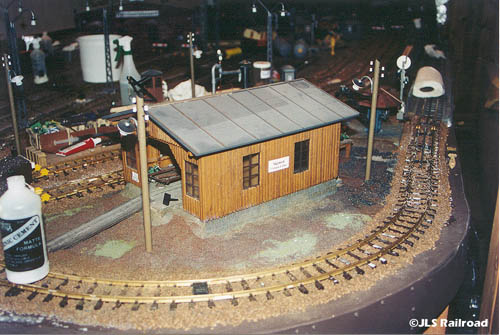
For my H-Yard project, I used about 400lbs of ballast. There is a photo of the Yard further down on this page, compare it's size to your project to make a decision on the amount of ballast you'll require. The H-Yard has about 300 or so feet of track, however, you need more ballast around turnouts. If you are unsure of how much to buy, talk to Scenic Express, they're extremely helpful. Just keep this in mind, what ever you think you need, buy more, trust me, you'll use it. The ballast itself comes in 50lb bags or smaller.
2. Once you have the ballast, you need to paint it. More often then not, railroad ballast is a weathered brownish, rusty color. What I did was take Floquil Rail Brown, and Floquil Rust paints to Home Depot and had them color matched into 1 gallon containers of Behr Flat Latex paint. To paint 400lbs of ballast needed about 2 gallons Rail Brown and a quart of Rust (the rust was used for highlights and detailing, more information on that later). Before any painting begins, you should thin the latex paint 1 part paint to 3 parts water, it works great. The method of painting was to place about 10lbs ballast in a big spaghetti strainer, pour paint through the strainer and with your hands (yes, in the wet paint, so surgical gloves are a good idea) mix the ballast with the paint thoroughly, while the excess paint drips out through the strainer into a holding basin. You will have to do this 2 to 3 times. After paint has stuck to all the ballast, spread out the ballast on a black plastic bag, laying it as flat as possible (spread it out thinly, not in mounds). It will take about 2 days to dry depending on the humidity.
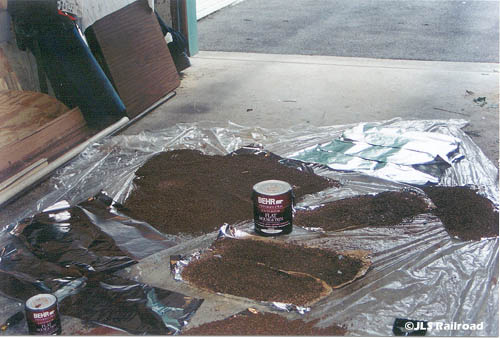
3. Now you have painted ballast, ready to apply to the layout. Take the dry ballast and "dump" it right on top of the track to be ballasted. Then, take a disposable 1/2" or 1/4" paintbrush (found at Home Depot or any hardware store) and work the ballast into the ties of the track, smoothing it out and mounding it up along both sides of the track. Make sure the ballast doesn't mound up inside the track, up against the rails. You must be sure that no ballast will interfere with any locomotive or rolling stock as it moves about the newly ballasted trackage.
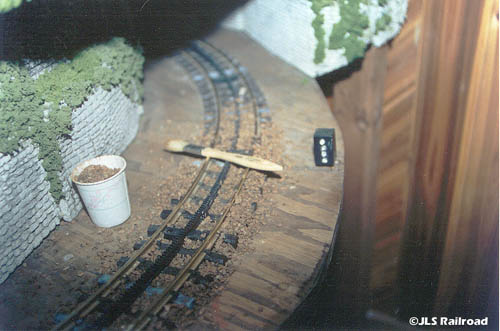
4. Gluing down the ballast is the hardest task, and yet the easiest. Before gluing anything, run or push some locomotives and cars over the ballasted track, make sure the ballast won't interfere with the trains at all. Especially check turnouts. Gluing is not fun. Take a 1 gallon container or normal Elmers White Glue, dilute it 50% 50% glue and water and add a cap full of hair shampoo (make sure the hair shampoo doesn't have a strong perfumed odor). Now, you have turned 1 gallon Elmers White Glue into 2 gallons usable ballast cement. I used 3 1/2 gallons of Elmers White Glue (7 gallons ballast cement) for my 400lbs ballast, so, you need alot of glue. To glue down the ballast, simple pour the ballast cement into a small cup and then pour it on the ballast, all over the track. Do not pour it straight out of the 1 gallon containers, it will come out to fast and upset your ballast. Beware, glue will drip through any small holes in the table! Lay PLASTIC garbage bags down on the floor, do not use newspaper because the ballast cement will glue the newspapers to the floor (rug or cement!). Make sure you use ample amounts of ballast cement, it takes alot to glue down rock. The hardest part about gluing is the turnouts. Beware! if you dump glue on the LGB turnouts, you'll have fun "degluing" them to get them to work again! It can be done though, so, you might have no choice but to get glue on them. What I did to aid in avoiding that situation was to fill a syringe with glue, then "inject" it onto the turnouts, keeping glue away from all the moving parts, only gluing the ballast. Once dry, AND all scenery products have been applied, get ready for a workout to clean the track. Total drying time for the ballast will be about 2 days.
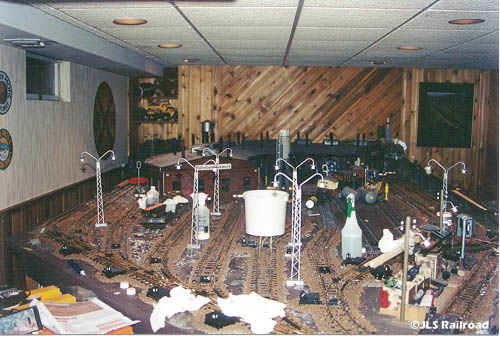
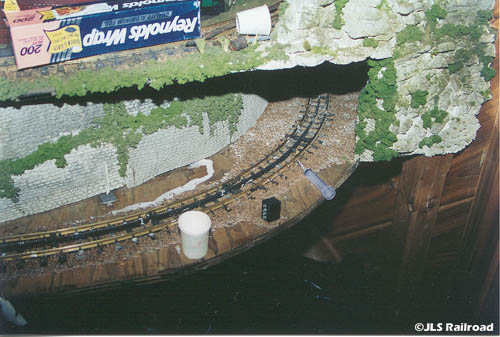
5. Once the ballast is dry, it is time to check and test your turnouts. Check them all, make sure they move freely and there are no problems. If they don't move at all (standard LGB turnouts), which is likely, I suggest a dental pick, tooth picks, and a nice Xacto knife and start scraping. Don't worry though, they'll work again, it'll just take a few minutes to "deglue" the mechanisms. Don't panic. As for non-LGB turnouts, I have no experiance with them, so, if you have any information, let me know and I'll add it in.
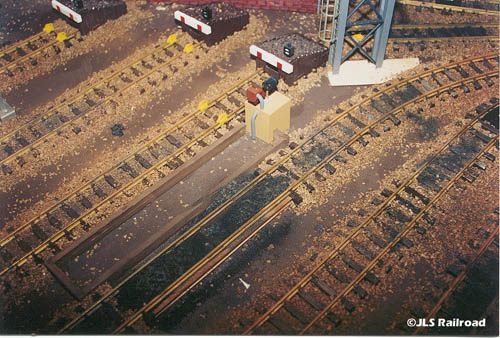
6. Detailing the ballast is the most important thing. Right now, all your ballast is the same color, that isn't good. Remember you bought that quart of Behr Rust flat latex paint, well, it is time to use it. Dilute it 1 part paint to 4 parts water, put it in a spray gun and get to work. Lightly spray RANDOM sections of ballast. What I mean by random is a little bit here and a little bit there, not an entire 5 feet section of rust color, maybe 6" here, and 3" there. This is just to add variance, trust me, it makes the difference between ballast and "Wow! That looks so real!" Aside from the Rust, mix Floquil Grimy Black with 2 parts water to 1 part paint (no need to color match it, use it right from the floquil bottle, you don't need much), put it in the spray gun, and get to work. This will be dark. If you over do it, it'll look like garbage. A little here and there, no more! Blacken the ballast where engines (especially steamers) would sit for a while, such as signals, coal depots, ash pits, etc... Look at the below photo for an example.
7. Now it is time for scenery. I use Woodland Scenes Scenic powders and Scenic Cement. The color is up to you, the amount of foliage is up to you. Sprinkle scenery right up to the ballast, in some locations, right up onto the ballast. Low bushes and grasses growing up through the track and ballast look great. At this point, you should be done, all except for cleanup that is. Get yourself a few LGB # 50040 track cleaning blocks, a small "Bright-Boy" just isn't going to cut it. Once you have the 50040, start scrubbing, alot, and hard. It'll take time, alot of time. Just make sure you don't upset your scenery or ballast while cleaning, that is why I'd wait a few days, until everything is completely dry. LGB's track cleaning locomotive is perfect for this. A word of advise, have a few friends over to help clean the track, you'll need the help. It is well worth it though, especially when you sit back and look at what you have accomplished.
