Basic Track Work
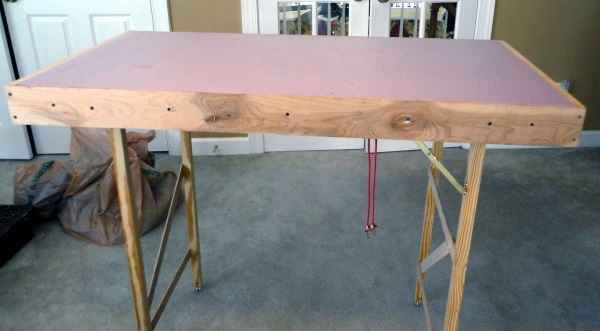
As I stated earlier, I had available a complete lightweight NTRAK module frame with "foam on luan" surface existing, so I had a big head start! I first started putting together available (1970's purchase) Atlas sectional curves in the appropriate radii (standard 9.75" and 11"radii) to accomplish the two 180 degree turns at both ends. I then "pinned" these radii in place. Then I moved Atlas turnouts (1970's purchase) here and there to get the fit and the operational plan desired. I ended with eight turnouts (all I had), six of which were close to the child operator to allow better vision of actuation. I pinned the turnouts in place, then used old Atlas (1970's) flex track and various sectional track to fill the gaps and construct the spurs. We had originally planned two full loops for the track plan, but in actually doing, the inside loop became incomplete, re-joining the outer loop through two turnouts. In hindsight, I don't know there is any real difference as it meets our objectives of both simple and more complex operation. And all track/turnouts were available. The newer Atlas turnouts are somewhat different now, but I believe could still be used in a similar design.
Electrical
Electrical feed to the track is provided by 20 gauge feeders from 12 gauge bus wire. The feeders are approximately every two feet of track.
Sectional track joiners were soldered every other joint, staggered side to side, to aid in conductivity, yet be easily removable.
Turnouts are electrically activated by old Atlas push/slide buttons. The kids love to push buttons and these certainly meet that need. The buttons and the corresponding turnout are numbered 1 through 8 to allow operator to determine which button to push/slide. The buttons are mounted on the side of the module in close proximity to the throttle control.
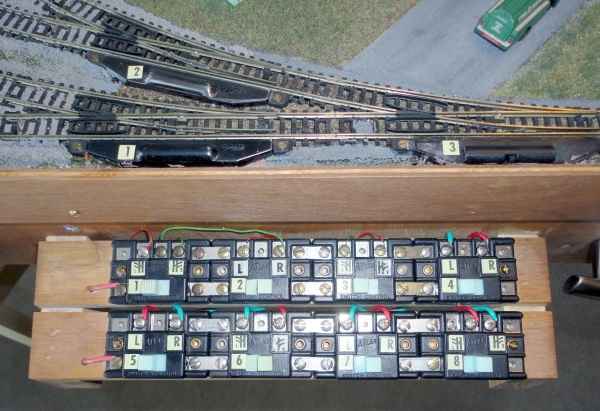
Atlas Slide Switch Buttons for Turnout Control
Power for turnouts is provided by an old Bachmann throttle acquired in 1972. The turnouts are actuated by DC power, augmented by a DC storage capacitor designed specifically for this application (designed by Jim Kalenowski, another club member) to provide a powerful DC "zap" to switch the turnout. The capacitor is mounted under the layout module.
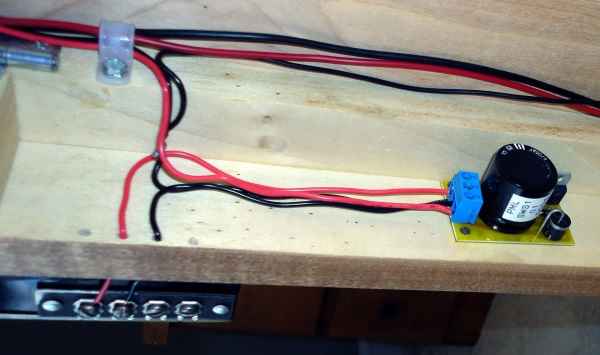
Turnout Capacitor Discharge Capacitor
An existing Digitrax Zephyr Command Station/Booster was used for DCC power, mounted in a custom box which is mounted to the side of the module. The necessary "wall wart" and wires are bundled and bungied to fit in a minimal bracket on the side of the Zephyr box.
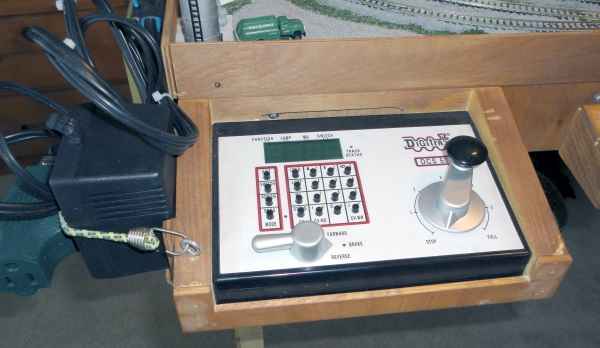
Digitrax Zephyr Command Station/Booster
Scenicking
I had no real plan for scenery (a cardinal sin according to many) for the Junior Engineer Layout. I did know:
I didn't desire everything to be parallel, and I didn't desire "flatlandia"
So my first scenery effort was to do an angled "T" for the highways. The highways were done with Woodland Scenics Smooth-It using the foam boarder method. The "T" was placed to provide sufficient areas on all sides to allow placement of buildings, etc. I made an early decision not to attempt to do paved cross-overs.
Most of the scenery is fairly ordinary, using available kits, but are nicely constructed.
The elevations have some interest. Most are done by laying plaster cloth over bubble wrap which was included in train products from on-line vendors! The bubble wrap was layered in basic shape and held by blue painters tape.
My favorite scene is the wood-yard operation. There was no attempt to make it "technically" accurate, just an attractive view for the kids and parents. The whole scene started by accident! A large hole had been created by the spilling of Super-glue on the foam surface of the module. Most know that Super-glue is very aggressive in dissolving EPS. After filling the whole with Woodland Scenics Mold-A-Scene plaster, some plaster was left over. My mentor on this project, club member Paul Ohegyi, said "don't waste it". Not knowing what to do with the plaster, I made two "blobs" of the stuff on the layout. By serendipity, these blobs ended up being in exactly the right place to do the "chip" piles of the wood-yard! The chip-effect is accomplished by sprinkling two "wood chipped colored" ballasts on the plaster piles after cutting the necessary groves for the shovel tracks. The bucket shovel is a Railway Express kit. The log loader is GHQ (kit). The truck is Classic Metal Works. The fence located between the wood yard and the neighboring house is also of note. The fence was hand-built by Mr. Ohegyi and is technically the most accurate item on the Junior Engineer Layout.
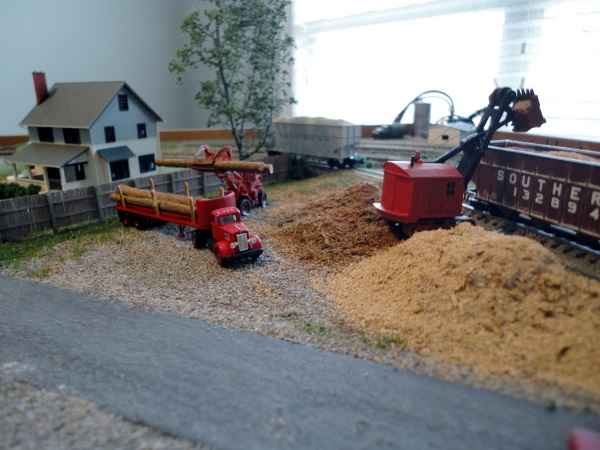
Wood Yard
The photo doesn't do it justice. Other scenes are shown below.
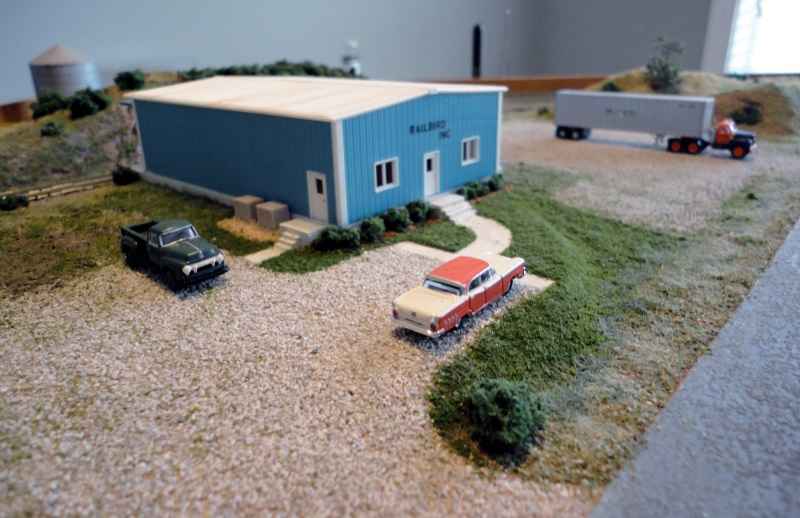
Trucking Depot
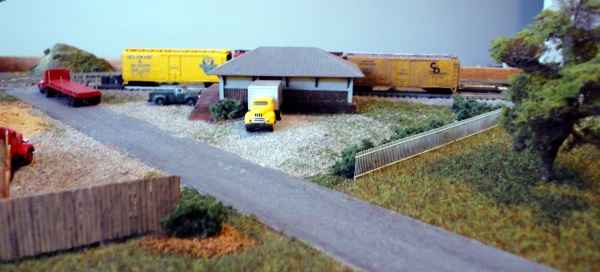
Frieght Depot
Transportation
The JEL is a normal 2' by 4' module and is transported as any other module would be. A carrying handle is attached for convenience. The layout is light enough to carry like a big briefcase.
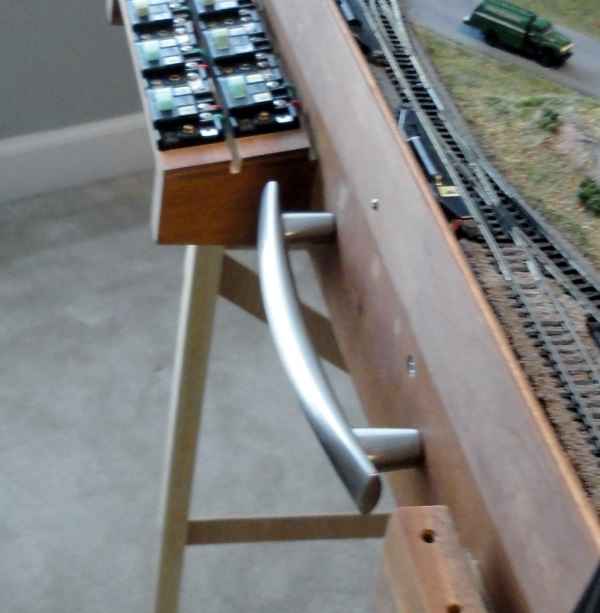
Carrying Handle
Other Important Items
Some of us dislike the Atlas turnout, partly because of the non-prototypical appearance. In this use though, they actually work well because they allow a train to run through an improperly set turnout without derailing the train. With eight turnouts, they occasionally are set wrong, even with the most observant Senior Engineer. Too many derailments are not a good thing (as we all know), and the Atlas turnouts limit some derailments. We have had minimal derailments using the JEL.
Because the track-work must come close to edges, a stained wooden 1" high guard rail is incorporated to encircle the entire layout. The 1" guard rail is high enough to prevent locomotive-to-floor engagement (not a good thing!), but not high enough to obstruct vision or manipulation (by hand) of rolling stock. The locomotives which are run on the JEL have their max speed set by CV to be approximately 60 MPH. This will not allow children too much speed, should the Senior Engineer become distracted talking with parents. Of course, most children wish to go faster. An explanation they are going "60 mph" and that 60mph was as fast as the locomotive would go (GP7 or RS2-3), quiets the desire to go fast.
| 


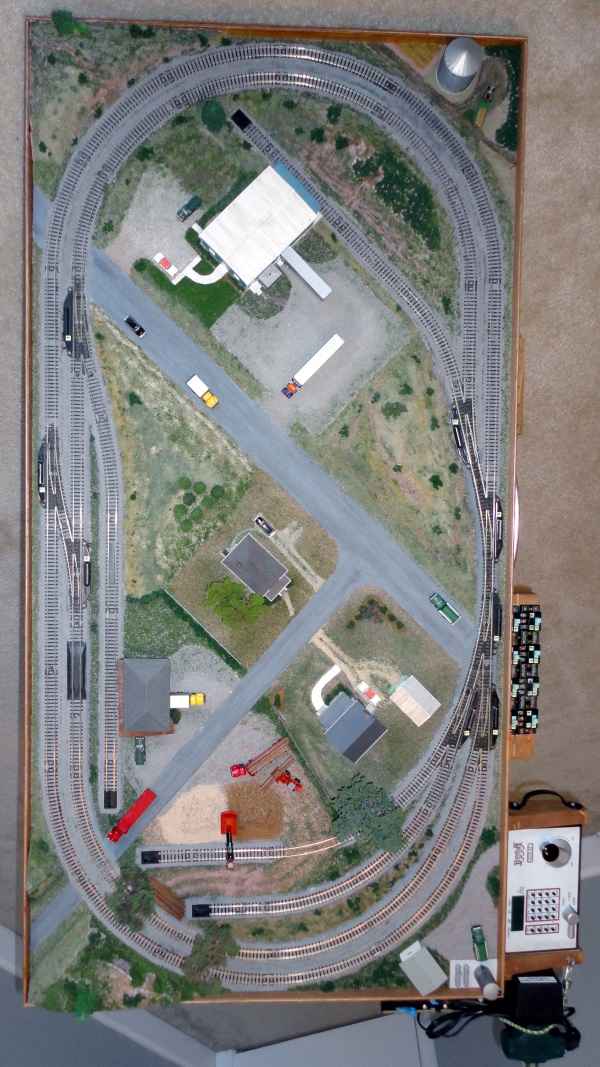 Simple Track Plan