Restoration
|
|
Early in my signal restoring days, I spent
hours scraping, chipping and chemically stripping the layers and layers of
paint found on old signals. Chemical
strippers never seemed to penetrate the old paint on the cast iron pieces, so
I was usually relegated to chipping and scraping. Then I discovered sand blasting. For less than $50, I can have the outside of the signal
sandblasted. The results are
tremendous. Compare the sand blasted
signal to the scrapped and chipped mast mount. Before I send the signal to the sand
blaster, I mask the rope gasket with duct tape and instruct the sand blaster
to try to avoid blasting the gasket.
To date, I have not had any problems. Once blasted, I apply Krylon gray primer and
black semiflat paint - inside and out.
I was using Rustolium spray paint, but found this was far harder to
work with due to its considerably longer drying time. Also, since my signals will always be
inside, the extra rust inhibitive benefits were not needed. The rope gasket is simply wire brushed and
left in its natural state. Often, the steel front adjusting bolt and
nuts have rusted together and are not salvageable. In this case, I drill out the pin holding the bolt into the
signal case and unscrew or cut and drill out the bolt. Because the part of the adjusting bolt
which screws into the signal case has a smaller diameter than the rest of the
bolt, to make a new adjusting bolt, you need to combine two different size
bolts. I join these two bolts by
tapping the end of each bolt and screwing a threaded rod made from an even
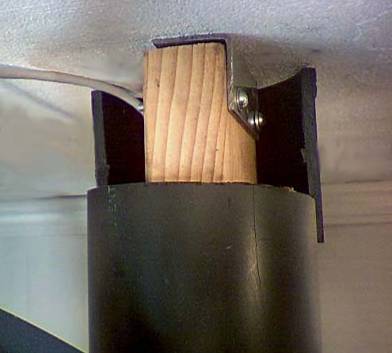
smaller bolt into each end. I support the signals on 4 inch black
plastic pipe. To provide necessary
strength, I insert a 2x4 and a couple of smaller boards. The 2x4 inside the pipe is attached to the
floor by drilling a hole in one end of the 2x4 and placing the 2x4 over a
concrete anchor bolt sticking out of the floor. The top of the 2x4 is attached by regular bolts and lag bolts
to the ceiling rafters by a stair step angle iron which has been cut to size
and drilled. A coupler is inserted
onto the bottom of the pipe before raising it for a more finished look. I also attach a coupler to the top of the
pipe after the 2x4 has been attached to the ceiling. I cut the ceiling coupler into two
different sized pieces. The larger
one is held in place by its natural spring action. The smaller on is attached with a screw. Wires for the signal are run from the
ceiling down the pipe and out a small hole cut in the side of the pipe. I attach a conduit between the pipe and
the signal for a finished look. The
pipe is not painted. Any markings on
the pipe can simply be removed with fine steel wool. I have used paint stripper on the targets
and visors with success. After
pounding out the dents and creases, these are primed and painted black as
well. I control the signals with a microcomputer
I have programmed and various electronic components. For those electronicly inclined, I use a
L298 dual H-bridge driver for the internal mechanism and a TIP120 npn
darlington for the light. I prefer 12
volt 9 watt signal bulbs for the searchlights due to their low power
consumption and exacting filament placement.
I need more, so please let me know if you have any of these bulbs for
sale.
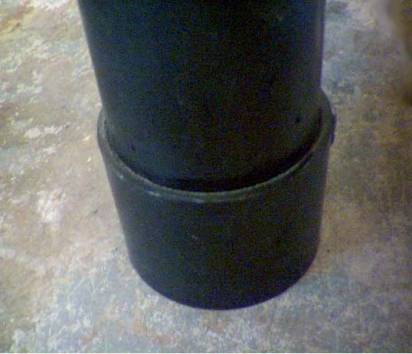
Above. Bottom of post. |
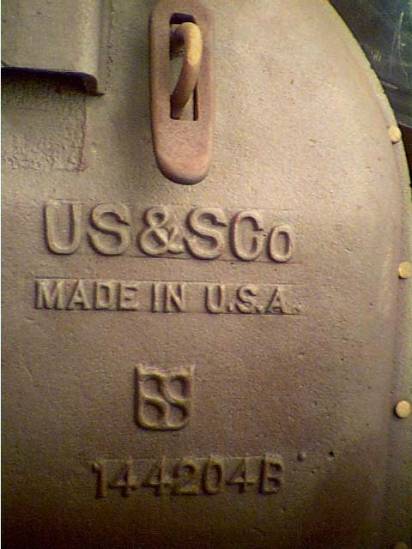
Above. Sand blasted back door. Note the natural cast iron finish and the brass rivets which hold the rope gasket in place.
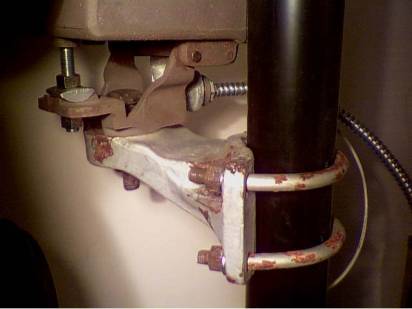
Above. Signal restoration in progress. Note the new front adjusting bolt. The flexible conduit attaches to a hole in the post. The cable to the signal runs across the ceiling and down the post to the conduit.
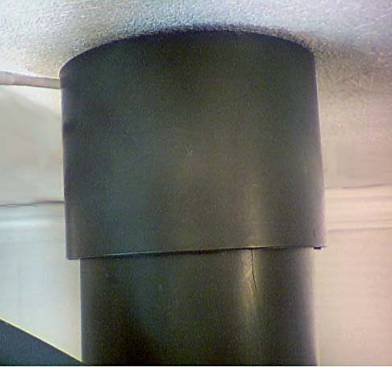
Above. Views of top of post where it connects to a rafter in the ceiling. The back one-third of the cover is attached with a small screw. The larger portion of the cover (not shown) simply clips in place due to its natural spring action. The cable is eight wire solid conductor networking cable. I normally run the current for the lights through more than one wire to minimize line voltage drop due to the relatively high resistance of the small wire. |