That
brilliant modeller from Melbourne, Oz, Dave Fletcher has been running a
series on MyLargeScale.com
outlining his method of scratch-building locomotives.
Fletch starts with a commercial chassis or drive and converts it into motive
power that has the rest of us drooling all over our keyboards. His latest
chapter in his Masterclass series involves tenders, the fuel tank of the
engine as he calls it. And one of the things he goes into great detail
on is the air tank which was frequently added to older locos when they
had their brake systems upgraded.
Well, the more I looked at his photos
and read his article the more my brand new Annie sitting on the shelf caught
my eye. One of the few criticisms that has been aimed at Bachmann's Anniversary
10-wheeler is the use of the old, original tender which doesn't equal the
new loco's brilliant level of detail and quality. While Bachmann did use
updated details on the rear step and trip-levers, the body of the tender
hadn't changed since the original radio-controlled models were released
ten or more years ago. So armed with Fletch's information I figured it
was time to grab the razor saw and make a mess of the work bench.
Click on the pix for an enlarged version:
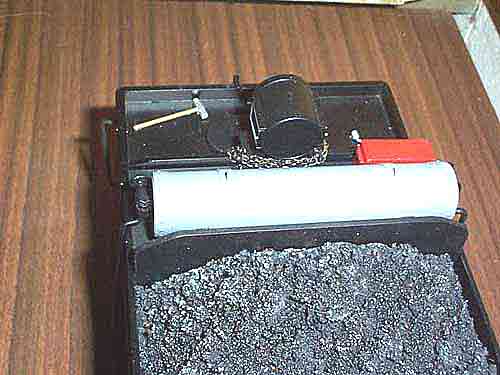
The
airtank is constructed from 20mm. electrical conduit pipe. I cemented 20
thou. Evergreen styrene caps to each end and then trimmed them to size,
finally sanding them to a slightly rounded contour.
The
rivet bands around the end-caps are embossed 10 thou styrene strips, the
rivets made by tapping with the end of a 1mm drill bit on the reverse side.
These are cemented in place using PVC primer.
The
coal load was shortened 3 scale feet (using Scalecard's 1:20.3 scale rule)
and then the plastic load was covered with crushed BBQ charcoal held in
place with copious applications of spray adhesive. (Don't
use this stuff in confined spaces! The high might be interesting but the
after-effects are pretty nasty on the guts!) I
made a platform from two pieces of 60 thou Evergreen styrene cut to fit
the width of the coal bunker. The horizontal piece requires notching to
clear the plastic tube on which the back-up light is mounted. 10 thou styrene
rivet strips were added to the upright piece to match the existing straps
on the rear deck behind the water (battery)
hatch.
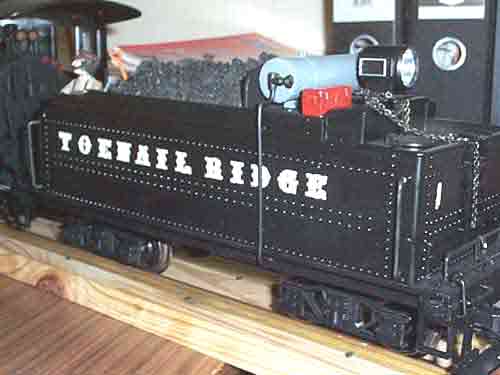
Piping
to the end caps of the tank was added using brass rod bent to shape. The
valves on the tank ends are castings stolen from an old 10-wheeler with
dress snaps added as stop-cocks. The bottom ends of the pipes insert into
holes drilled into the chassis.
I made the mounting straps
from strips of styrene held to the H-beam base with brass nails drilled
into holes. The lift rings are brass loops inserted into drilled holes
in the tank. That neat little toolbox came from a $2 toy, BTW! You can see the stopcocks (dress-snaps)
on the tank ends pretty well in this view....(For an article on using dress snaps for valves
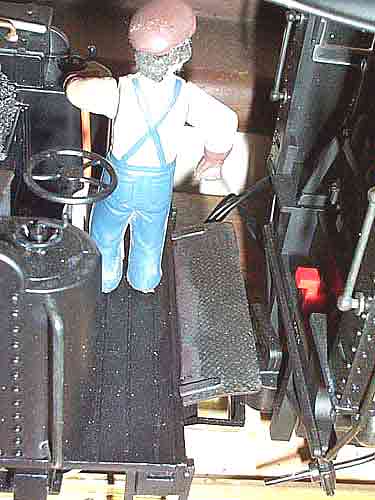
etc, click here: ) While
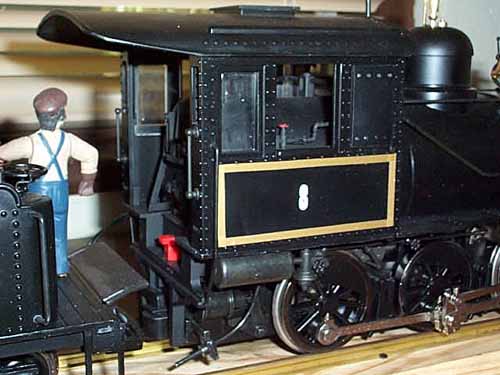
waiting for glue to dry I also added a skirt between tender and loco cab. This is a plastic piece salvaged from
an old AMT General kit. It has a really nicely detailed diamond tread on
it and the hinges are well simulated. The skirt is just glued in place
above the tender coupling.
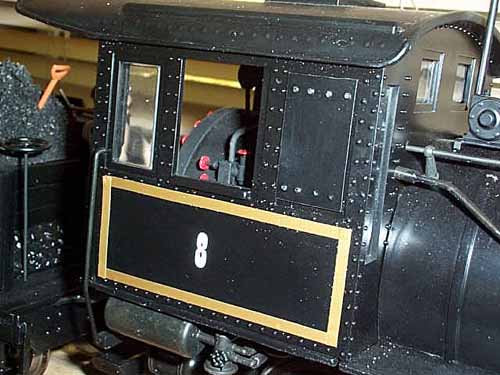
You
may have noticed in that last pic that my Annie cab has had one of the
windows blanked off. I liked the more modern look which this gives to the
loco, similar to the Bachmann Climax cab. The insert is 20 thou styrene
with embossed rivet detail. In case I didn't like it or change my mind
later the insert is just stuck to the original glazing using a loop of
Scotch tape.


 The
airtank is constructed from 20mm. electrical conduit pipe. I cemented 20
thou. Evergreen styrene caps to each end and then trimmed them to size,
finally sanding them to a slightly rounded contour.
The
airtank is constructed from 20mm. electrical conduit pipe. I cemented 20
thou. Evergreen styrene caps to each end and then trimmed them to size,
finally sanding them to a slightly rounded contour.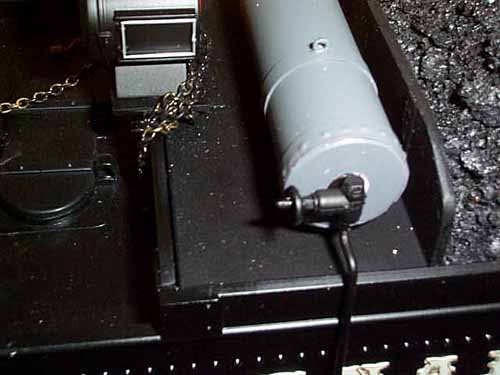 The
rivet bands around the end-caps are embossed 10 thou styrene strips, the
rivets made by tapping with the end of a 1mm drill bit on the reverse side.
These are cemented in place using PVC primer.
The
rivet bands around the end-caps are embossed 10 thou styrene strips, the
rivets made by tapping with the end of a 1mm drill bit on the reverse side.
These are cemented in place using PVC primer.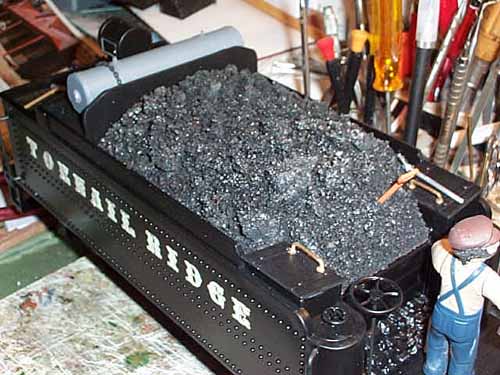 The
coal load was shortened 3 scale feet (using Scalecard's 1:20.3 scale rule)
and then the plastic load was covered with crushed BBQ charcoal held in
place with copious applications of spray adhesive. (Don't
use this stuff in confined spaces! The high might be interesting but the
after-effects are pretty nasty on the guts!) I
made a platform from two pieces of 60 thou Evergreen styrene cut to fit
the width of the coal bunker. The horizontal piece requires notching to
clear the plastic tube on which the back-up light is mounted. 10 thou styrene
rivet strips were added to the upright piece to match the existing straps
on the rear deck behind the water (battery)
hatch.
The
coal load was shortened 3 scale feet (using Scalecard's 1:20.3 scale rule)
and then the plastic load was covered with crushed BBQ charcoal held in
place with copious applications of spray adhesive. (Don't
use this stuff in confined spaces! The high might be interesting but the
after-effects are pretty nasty on the guts!) I
made a platform from two pieces of 60 thou Evergreen styrene cut to fit
the width of the coal bunker. The horizontal piece requires notching to
clear the plastic tube on which the back-up light is mounted. 10 thou styrene
rivet strips were added to the upright piece to match the existing straps
on the rear deck behind the water (battery)
hatch.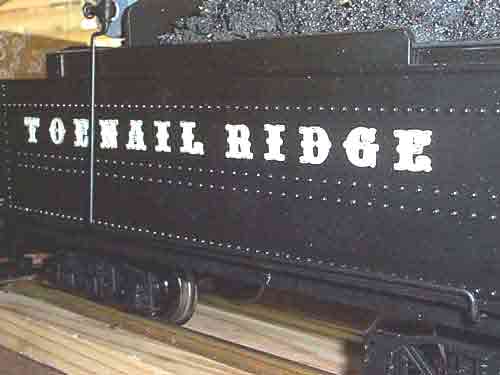
 Piping
to the end caps of the tank was added using brass rod bent to shape. The
valves on the tank ends are castings stolen from an old 10-wheeler with
dress snaps added as stop-cocks. The bottom ends of the pipes insert into
holes drilled into the chassis.
Piping
to the end caps of the tank was added using brass rod bent to shape. The
valves on the tank ends are castings stolen from an old 10-wheeler with
dress snaps added as stop-cocks. The bottom ends of the pipes insert into
holes drilled into the chassis.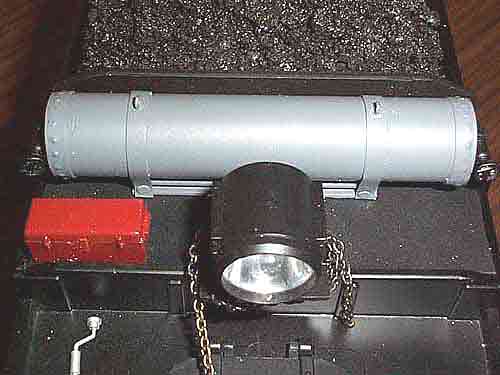 I made the mounting straps
from strips of styrene held to the H-beam base with brass nails drilled
into holes. The lift rings are brass loops inserted into drilled holes
in the tank. That neat little toolbox came from a $2 toy, BTW!
I made the mounting straps
from strips of styrene held to the H-beam base with brass nails drilled
into holes. The lift rings are brass loops inserted into drilled holes
in the tank. That neat little toolbox came from a $2 toy, BTW!
 While
waiting for glue to dry I also added a skirt between tender and loco cab.
While
waiting for glue to dry I also added a skirt between tender and loco cab.
 You
may have noticed in that last pic that my Annie cab has had one of the
windows blanked off. I liked the more modern look which this gives to the
loco, similar to the Bachmann Climax cab. The insert is 20 thou styrene
with embossed rivet detail. In case I didn't like it or change my mind
later the insert is just stuck to the original glazing using a loop of
Scotch tape.
You
may have noticed in that last pic that my Annie cab has had one of the
windows blanked off. I liked the more modern look which this gives to the
loco, similar to the Bachmann Climax cab. The insert is 20 thou styrene
with embossed rivet detail. In case I didn't like it or change my mind
later the insert is just stuck to the original glazing using a loop of
Scotch tape.


