


| Making Miniature Trees Tom Fassett |
||
| I have been looking for a better way to make trees and decided to try a mixture of Woodland Scenics Poly Fiber and Course Turf. The Poly fiber is much finer than what I had been using and lets more of the underlying "trunk" show through. Most of the trees I make are what you would expect to see in the southwest so the foliage is not as thick as what you would find in a typical forest. You can, though, add more ground foam for a thicker look such as with Oak or other hardwood trees. This method also works great for "scrub" type trees and bushes like you would find in a more barren or windy climate. |
||
|
|
||
| Here are the basic tools and ingredients I use. The green material on the right is the Poly Fiber, the green in the dish is Course Turf. I use a variety of "trunks" made from various weed branches and bushes. The tall one in the middle is from a small bush I found in southwestern New Mexico, northwest of Lordsburg. I don't know what it is but it looks just like a miniature hardwood trunk. The different parts of the bush yield different types of trunks. The branches on the right are from a local weed found throughout the desert, and the branches on the left are from a citrus tree. I will explain the use of the tools later. | 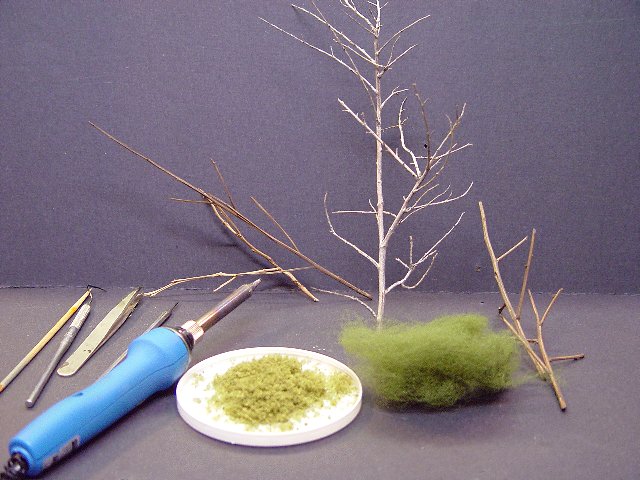 FIGURE 1 |
| Here are the ingredients in the package. I like the Duro Spray Adhesive best as it dries very transparent and has very good adhesion. | 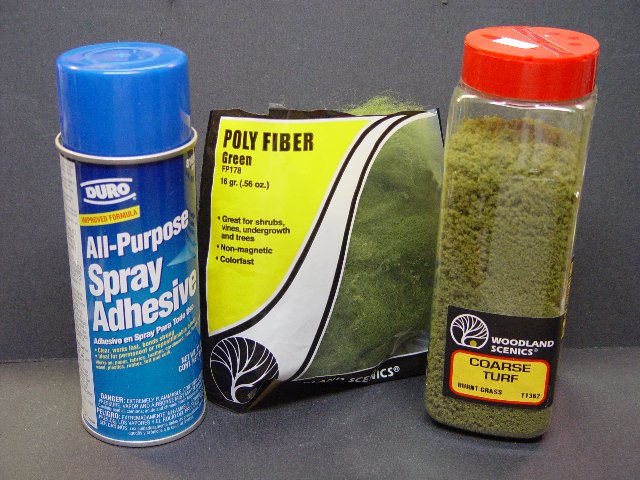 FIGURE 2 |
| I begin making a tree by cutting off a section of branch and trimming it to a basic tree shape. This is the New Mexico bush and it is already the perfect color. Some of the "trunks" are too light so I spray them with the air brush using a mixture of Tamiya acrylic Flat Black and Hull Red, heavily diluted with water. This gives me a good approximation of bark. I poke a small hole in a piece of foam to hold the piece while I work on it and to keep my fingers away from the adhesive spray. | 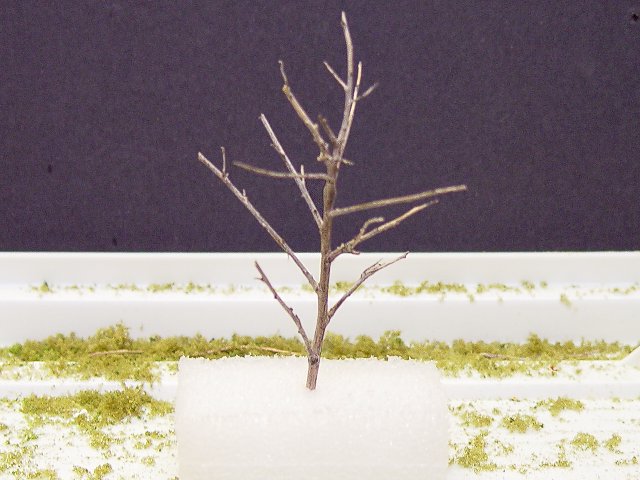 FIGURE 3 |
| Now it is time to start adding the Poly Fiber. First, spray a light coat of the spray adhesive on the trunk, leaving the part below the lowest branch free of adhesive. Then, tear small bits of Poly Fiber off the clump and drape over the trunk. I usually start at the end of a branch and stretch it inward. I then take a dentist's pick and "weave" the fiber around the branches. Wrapping individual strands around branches gives it a lot of strength and gives the adhesive something to hold on to. I also try to keep the thickest part around the individual branches instead of hanging out in mid air. I then "rat" the clump to give it some body and keep it from being too thick. Those who do not know what "ratting" is, ask any women who was around in the 1960s and 1970s. This was what many women did to their hair using a brush or a comb to make it look fuller--kind of like a birds nest. Basically, the clump of fiber is this way when it comes out of the package--all intertwined. I work with the fiber so it is evenly distributed without thick clumps. | 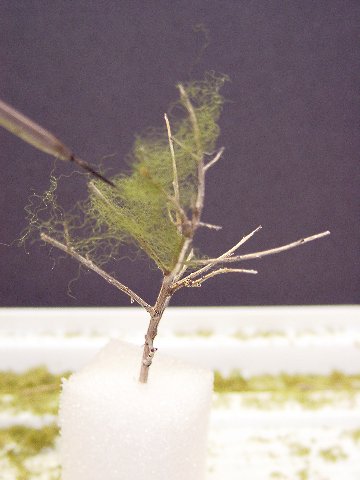 FIGURE 4 |
| Here is what the tree looks like after adding the Poly Fiber. | 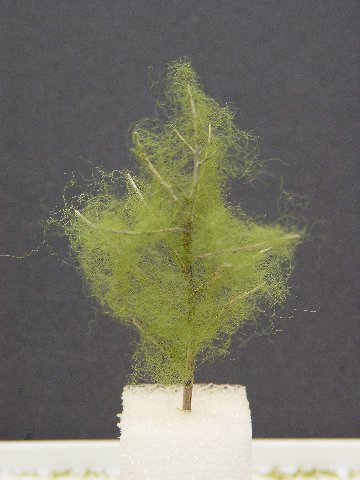 FIGURE 5 |
| The next step is to make "holes" in the fiber and to remove all the little stringy "hairs" sticking out. I do this with an old soldering iron. This step requires a quick and light touch or you will end up with melted blobs all over your tree. Keep the soldering iron tip clean by constantly wiping it on a damp sponge. This is the same process used when soldering. Also make sure you do this with good ventilation--trust me, the melting fibers stink and the fumes are probably not good for you. I "trim" the excess fiber between the branches to give the tree less of a spherical look. If you look at a real tree, the heaviest growth is around the branches, not between them. I also poke a few holes here and there so the trunk shows through. | 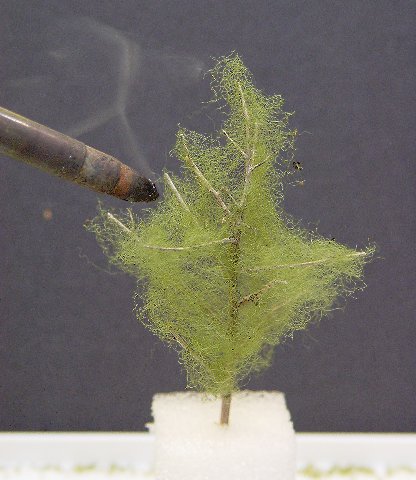 FIGURE 6 |
| Now it is time to add the "leaves." Notice how the fiber has been greatly reduced from the previous step. Once again, spray the tree with a very light coat of adhesive. Then, shake on the Course Turf, taking care not to get too much on the tree. You can just keep adding small amounts until you are satisfied with the thickness of the foliage. I use a color of Course Turf called "Burnt Grass" as it seems to match the kind of trees found in the areas represented by my layout. I have experimented with all the other colors and each has its own advantage in different environments. As a final step, I usually hit the tree one more time with the soldering iron to reduce the "evenness" of the foliage and to expose little areas of trunk. Once again, use a very light touch with the iron. | 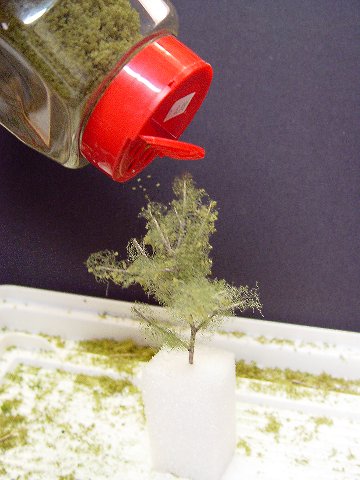 FIGURE 7 |
| Here is a close-up of the completed tree. This one is about 5 inches tall. | 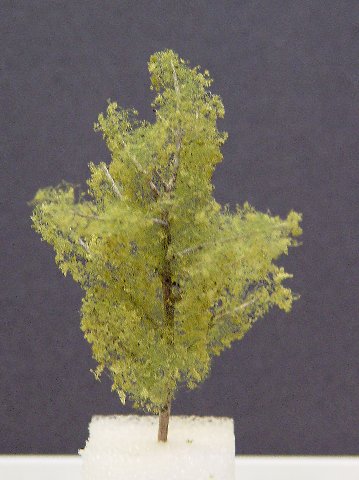 FIGURE 8 |
| Here is the tree mounted on the mining module of the layout. My layout is HO scale, but the track here is N gauge for mining cars so you can get a better idea of the scale of the tree. |  FIGURE 9 |
| Here is a collection of finished trees ready to be added to the layout. There are various "trunks" and colors of Course Turf represented here to approximate different types of trees. The trees on the right are more typical of Cottonwood or Ash and the smaller trees on the left are meant to represent Ironwood and similar "desert" trees. | 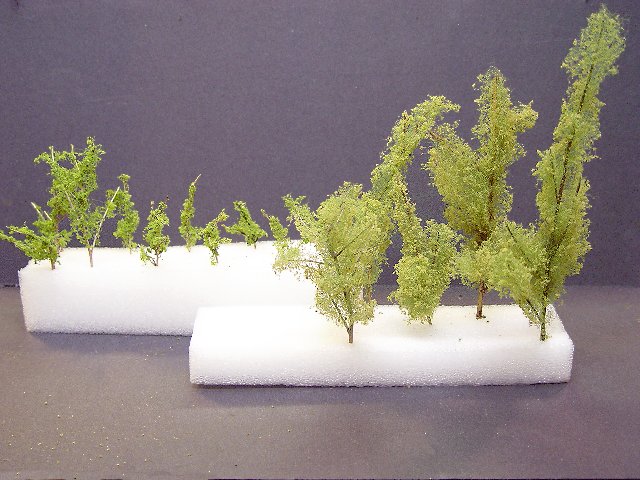 FIGURE 10 |
|
Enjoy, |


