


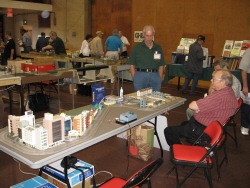
This page shows the steps in setting up a basic EasyTrolley N-gauge trolley layout. This layout was set up at the Mass Transit Modelers Convention and Trolley Meet at Rutgers University in New Brunswick, New Jersey (USA) in 2007. Bob Dietrich was kind enough to take some of these photos. Setup takes only about ten minutes, from opening the boxes to running the cars.
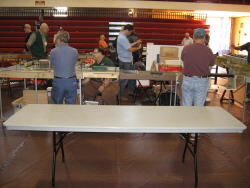 |
Step 1: The table. Using the tables provided by the organizers is a lot easier than dragging your own tables or modules around! Rutgers University provided a very fine table, with a smooth and level top, with the usual 30 inches of width. This one is 8 feet long. |
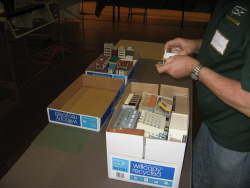 |
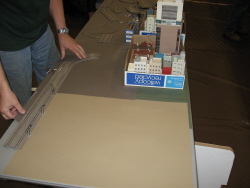
Step 2: Unpacking. I brought the entire setup in two boxes made to hold photocopy/printer paper, plus a flat valise to hold the colored art paper that I use to cover the table. Most of the space in the boxes is for the buildings, but the power unit with voltage adapter, the track and street sections, and the model trolleys all fit in, too. |
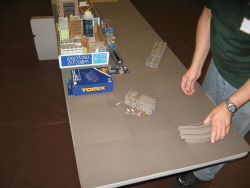 |
Step 3: Covering the table. I use colored paper sold in art supply stores to cover the table. The brand I use is called Mi-Teintes, and it comes in 19 inch by 25 inch and 8.5 inch by 11 inch sizes. I use the medium "#429 Felt Gray" color under my city areas, "#336 Sand" (a light tan) in the loop/carshop area, and "#448 Ivy" green under suburban or rural areas. I overlap the pieces back to front (to minimize seeing the edges from the front) and place small pieces at angles in loop areas. In this picture I have roughed this out and am sorting the street and track pieces. |
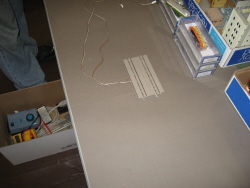 |
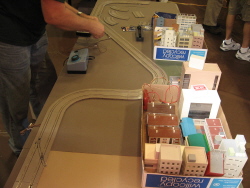
Step 4: The power leads. A street section with power leads built into it goes in the middle of the layout. The idea is to have all turnout switches (points) diverge away from this track, to the left and right of it. That way the power-routing function built into the Tomix Mini-Points can be used to start and stop cars on various branches and loops. I throw the turnouts/points manually, so this is the only wiring needed to the layout! |
 |
Step 5: Lay the track. - Here the right-hand end of the street, with loop and carbarn leads, is being laid out. The pre-assembled street sections are simply pushed together, just like HO slot car track, into whatever layout shape you want. |
 |
Step 6: Power connection. The main street is fully assembled, and I am connecting the power supply unit to the power leads through a simple control box containing two double-pole, double-throw, center-off toggle switches. Each switch controls one side of the double-track street, permitting separate On/Off/Reverse control. This rudimentary control, along with the power-routing of the turnouts/points, allows two or more cars to be run at once, if they run at similar speeds and are kept well-separated. |
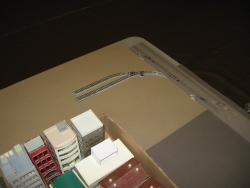 |
Step 7: Carbarn area. These are the carbarn tracks, that fit within one of the return loops. |
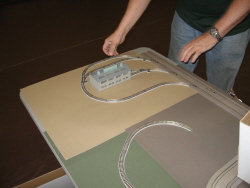 |
Step 8: The loops. The Tomix carbarn (engine house) building fits right over the tracks. Now the loops are being assembled. Note how the street continues right past the loops, so it is always possible to add more to the layout with other people's pieces. Multiple tables can be arranged together in any pattern. I put insulated rail joiners in carefully chosen spots of each loop to separate the two directions of travel electrically. |
 |
Step 9: Buildings. Just fine-tune the colored paper, place the buildings to form a downtown and suburbs, and everything is done. Put some cars on the track and start running them! It's not uncommon to move buildings around during the day, trying out different arrangements. The modern cars, track and controls work extremely smoothly. I usually clean the rails lightly with a soft, rubbery Life-Like track cleaning eraser. (I find the similar "Bright Boy" too abrasive.) I have a Minitrix wheel cleaner present, too, back where I display the Tomix packages and so on. |
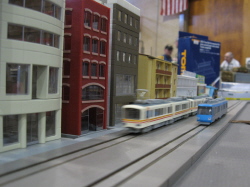 |
Step 10: Enjoy! I like to sit out front to run the layout. That way I get the same view as people who stop to watch it, they can see the simplicity of the controls, and I can converse easily. I place a number of seats for people to sit, so that they get the low-angle close-up view that looks best. The buildings act as a theatrical backdrop to the cars acting on-stage. Here is some visiting equipment operating on the layout. The lighting in the building was not very bright, so this action picture is a little blurred. At the end of the show, packing up will take only about 20 minutes. |


