Along The Line
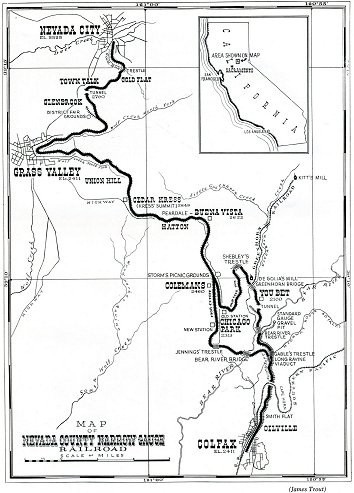
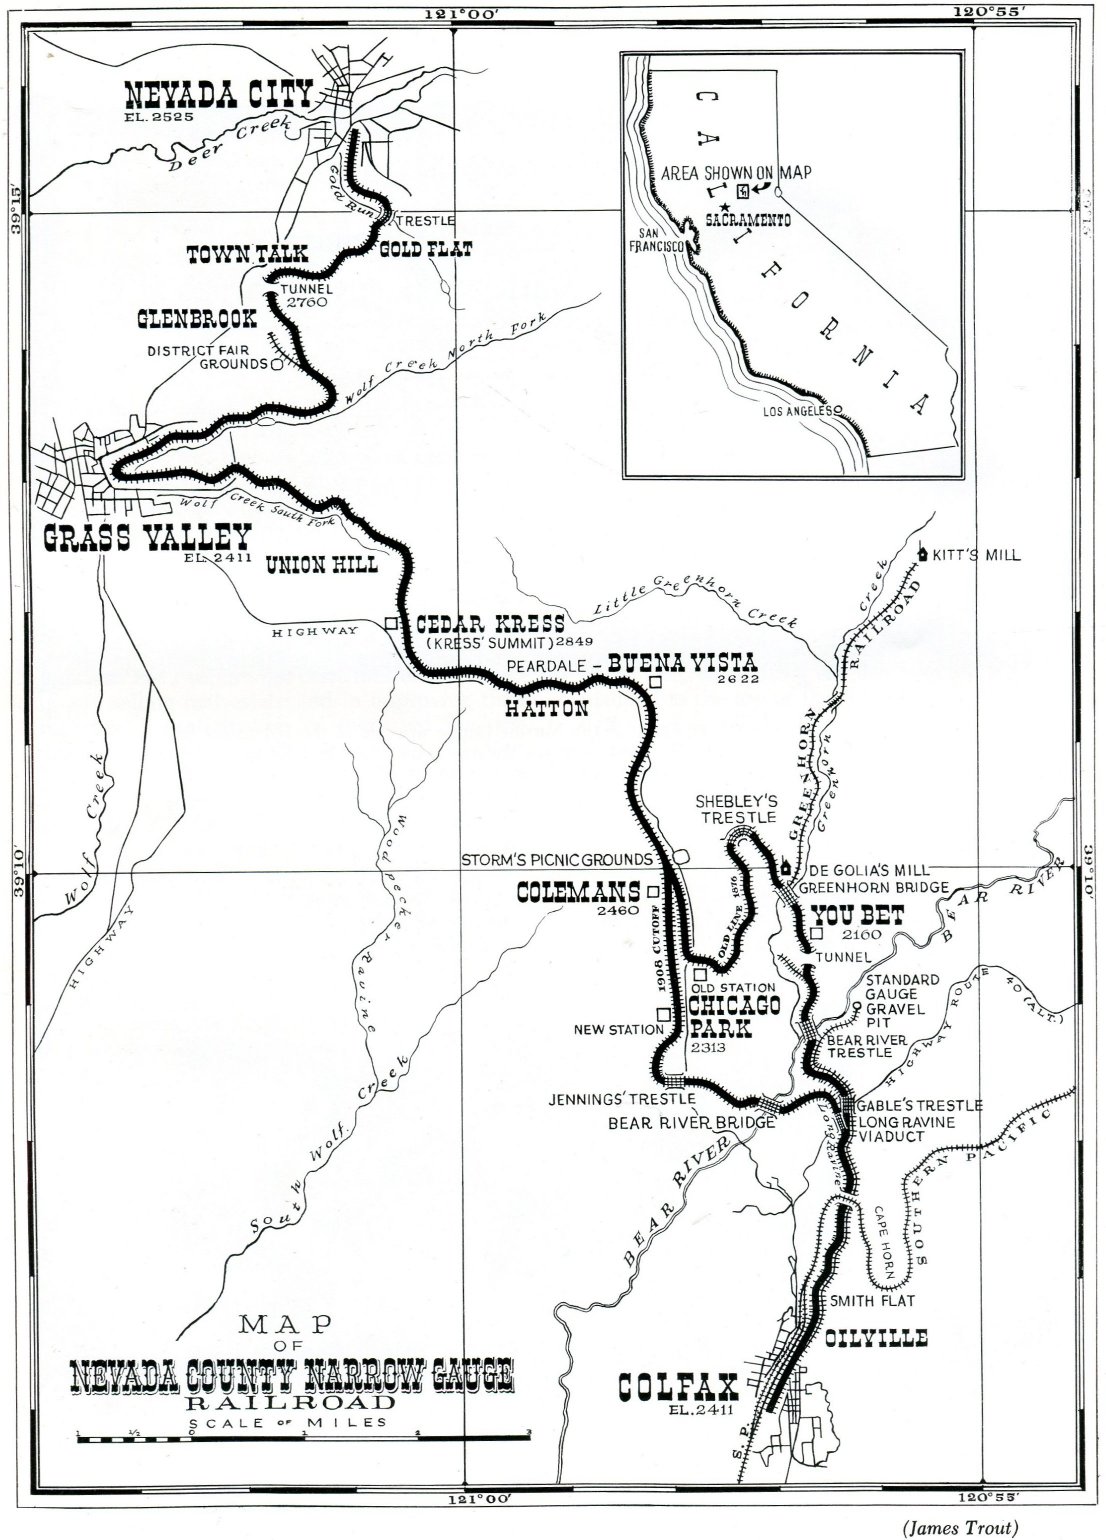
James Trout map
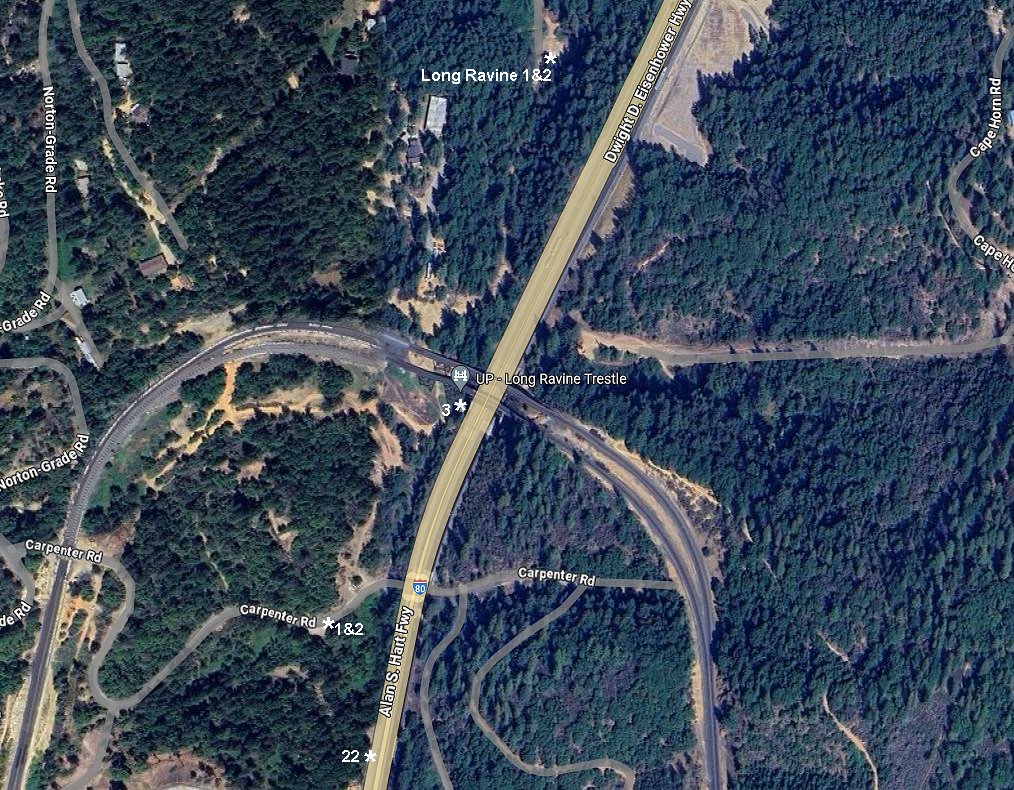
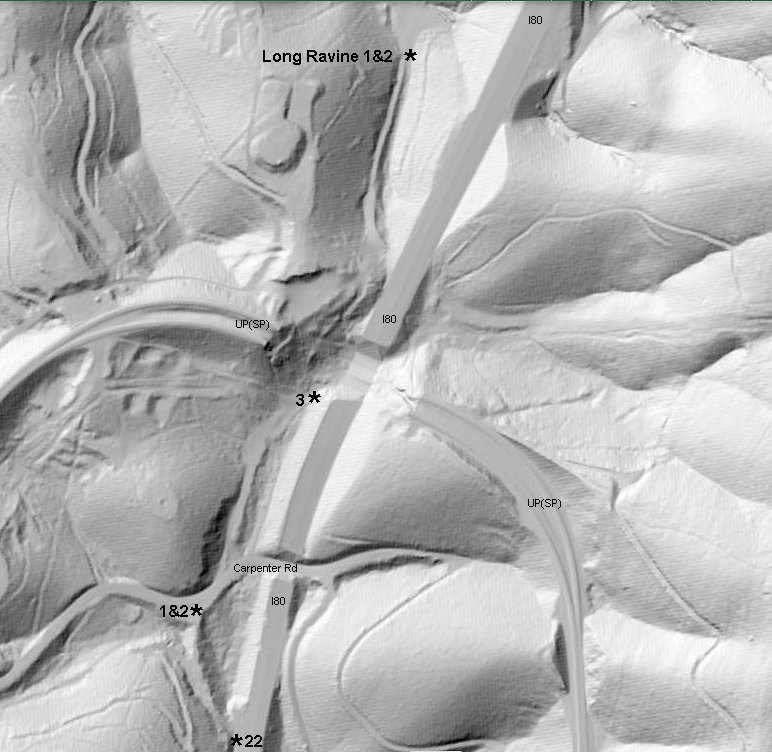
Follow along the NCNG mainline with the following images. Each section has a satellite view, map,
or lidar image marked to correspond to each photo in that section.
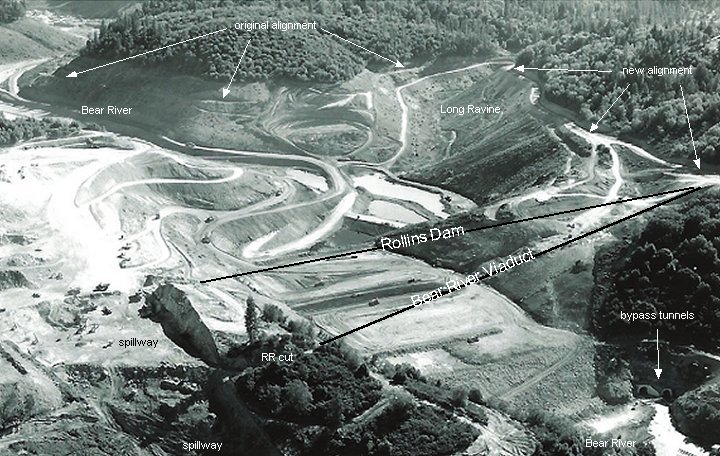
Note, between 1901 and 1908 the mainline between Long Ravine and Coleman was built on a new
alignment. This alignment is seen to the left on the map above,
with the original route across the Bear River canyon to the right. Major features of this new line
include the Long Ravine Viaduct, the Bear River Viaduct, and Jennings Trestle.
The original alignment was left in place as the You Bet Branch until 1910.
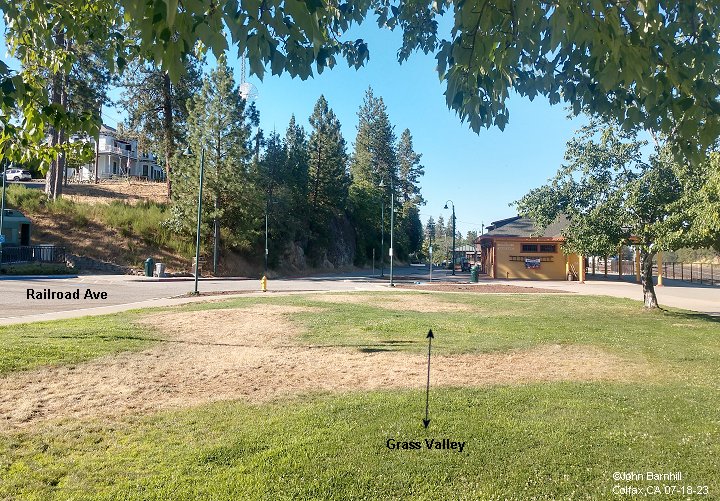
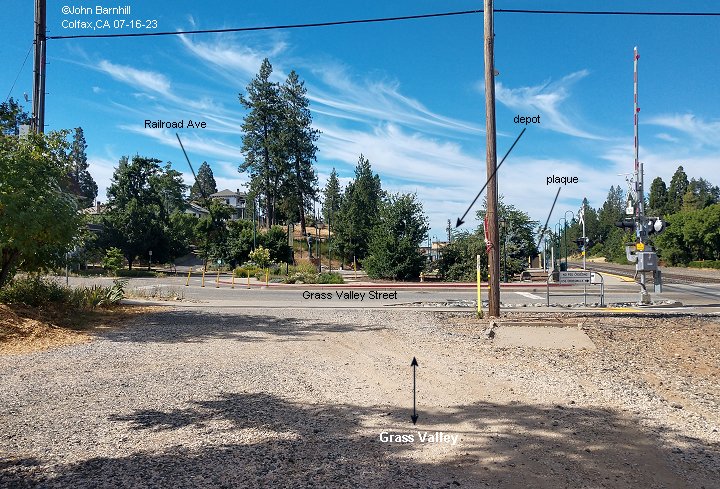
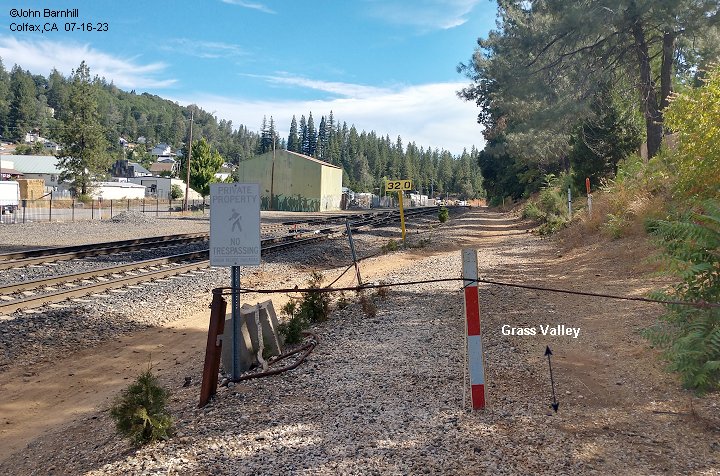
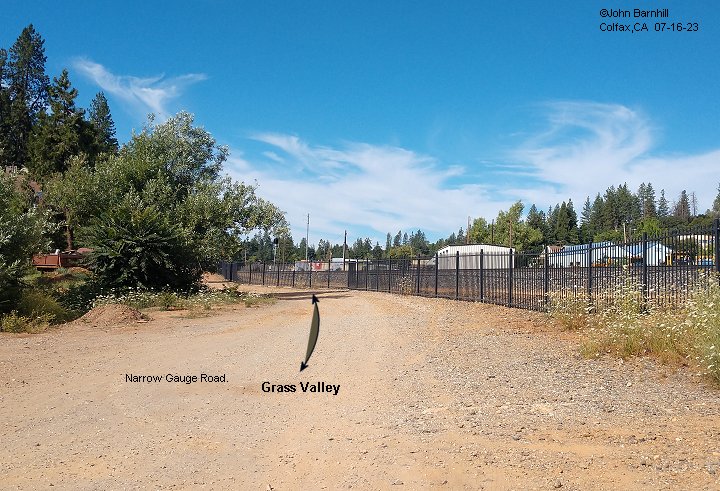
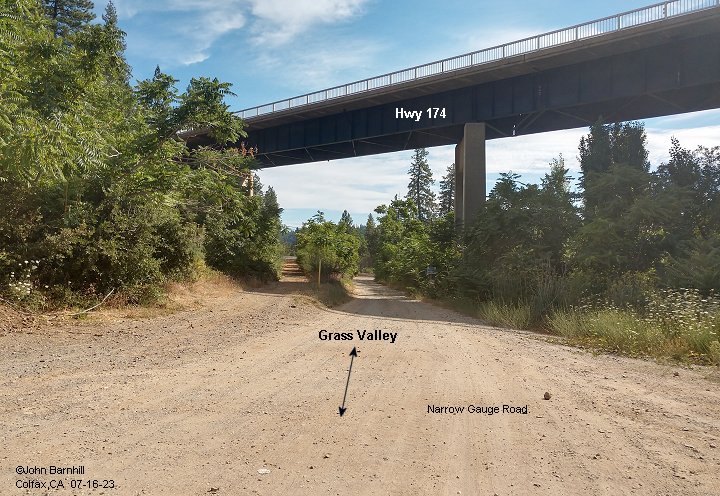
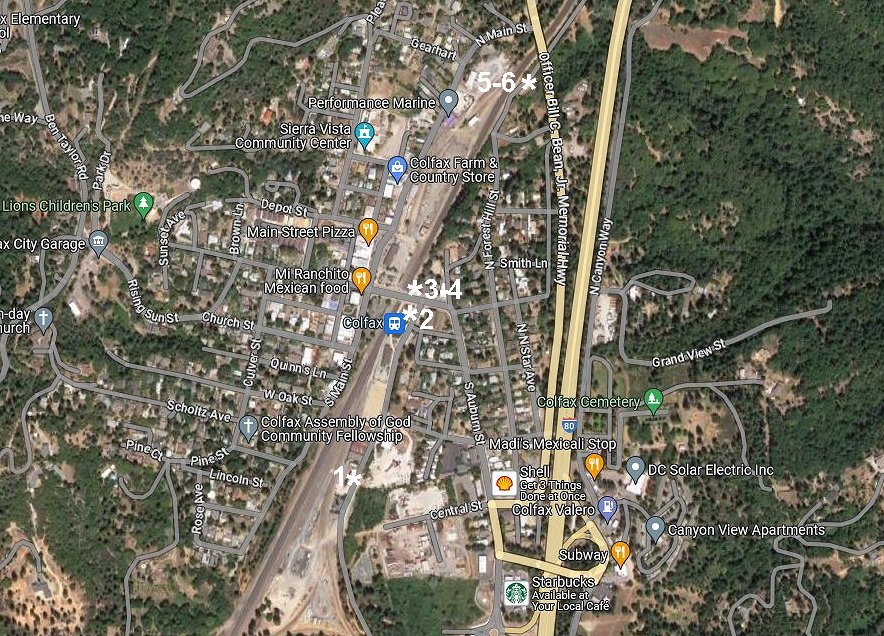
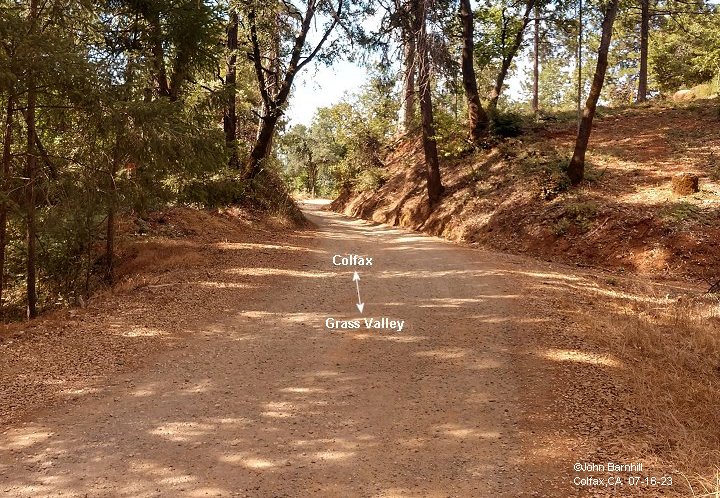
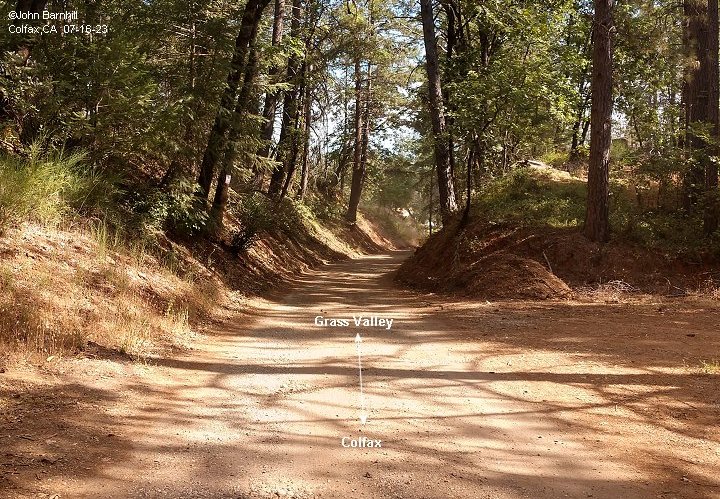
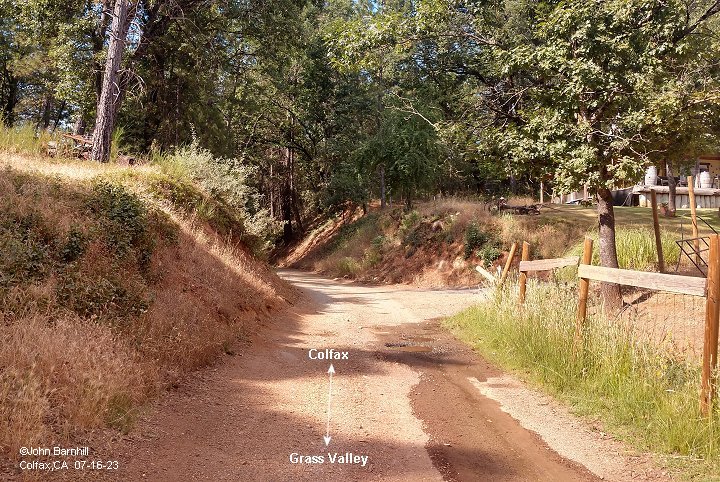
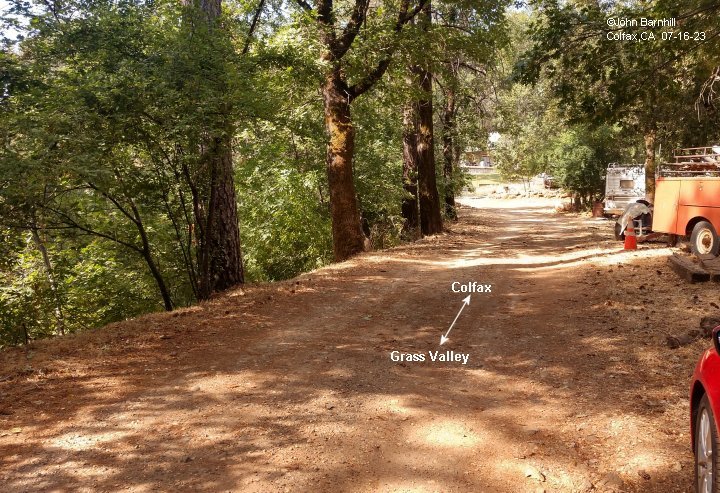
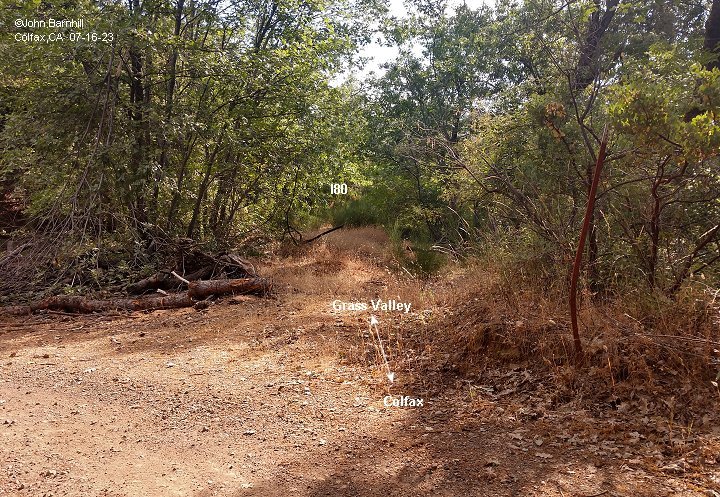
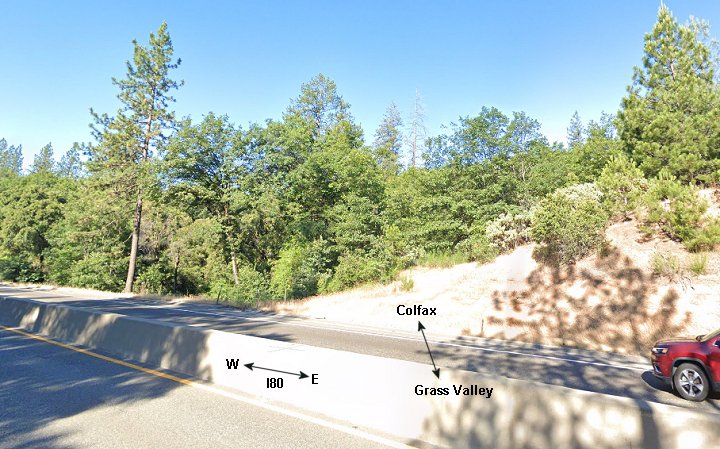
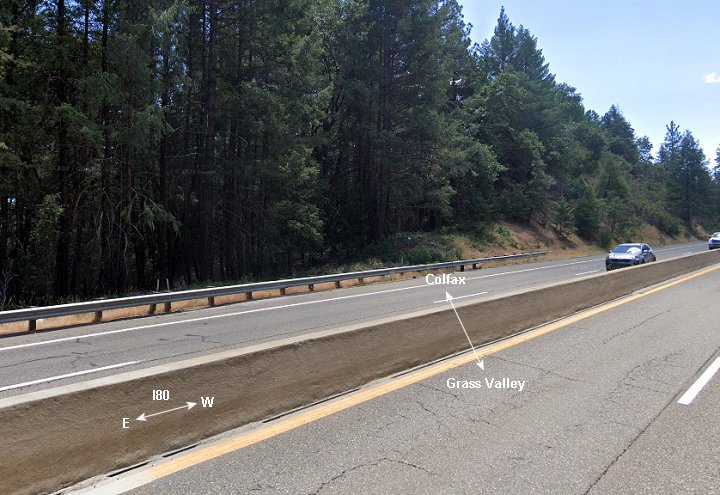
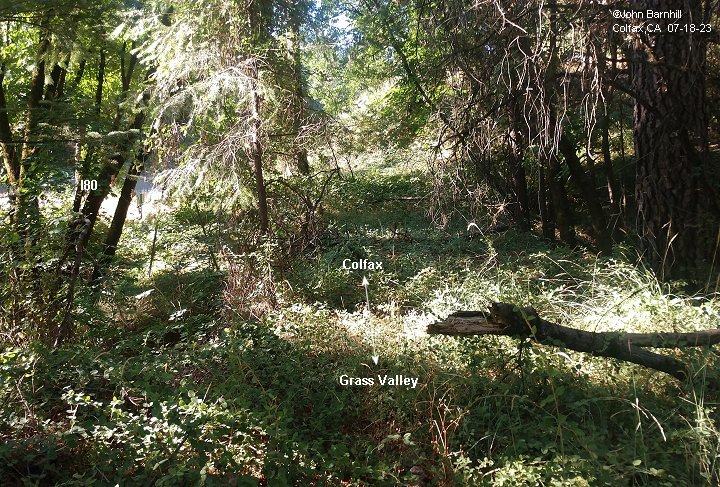
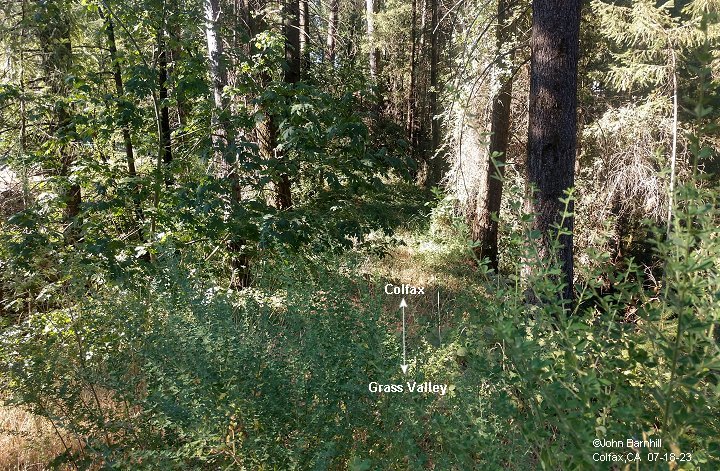
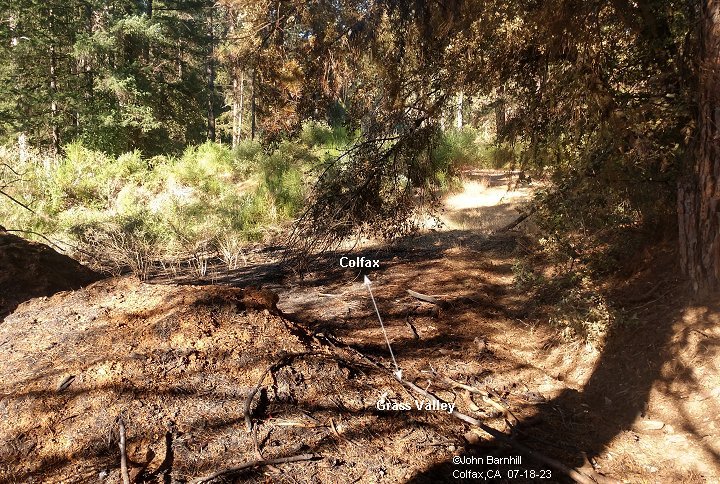
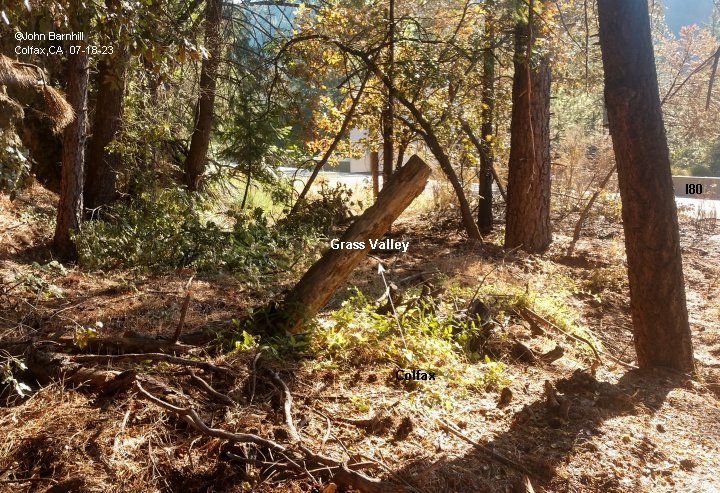
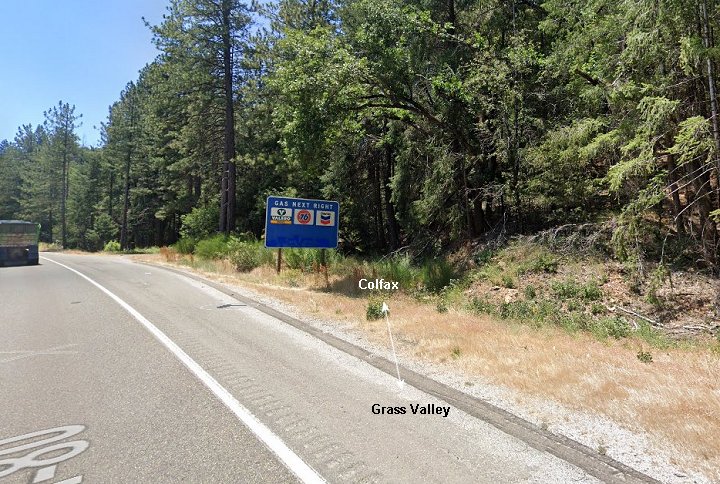
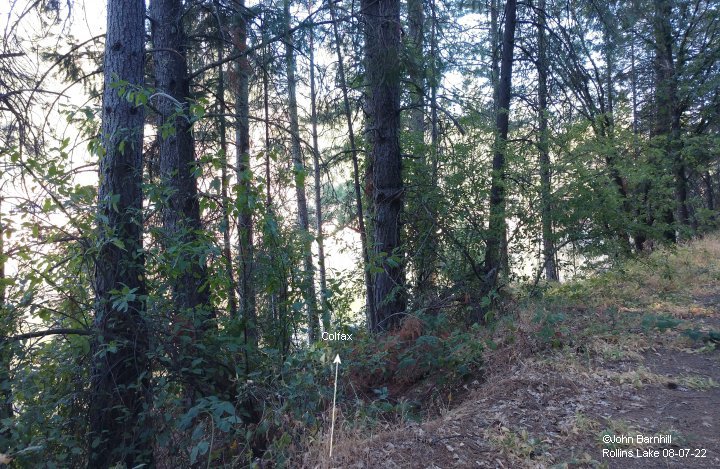
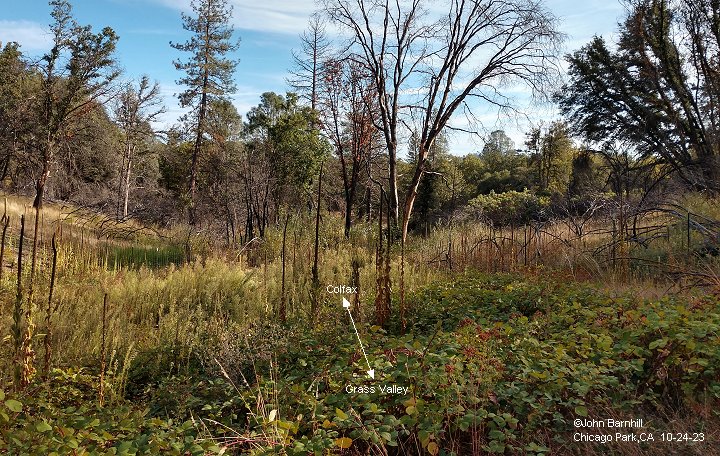
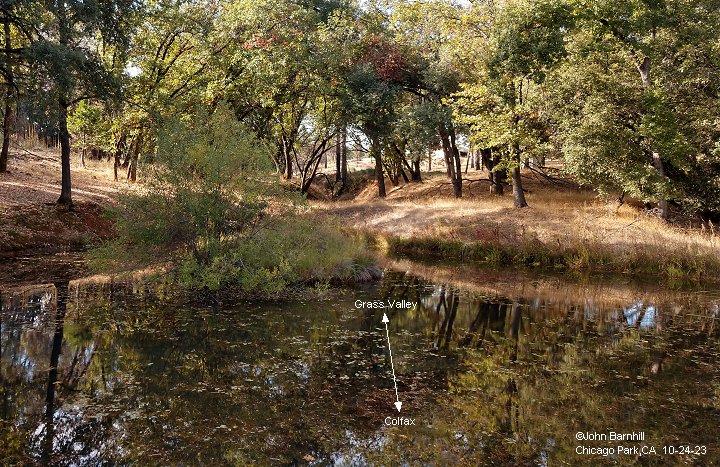
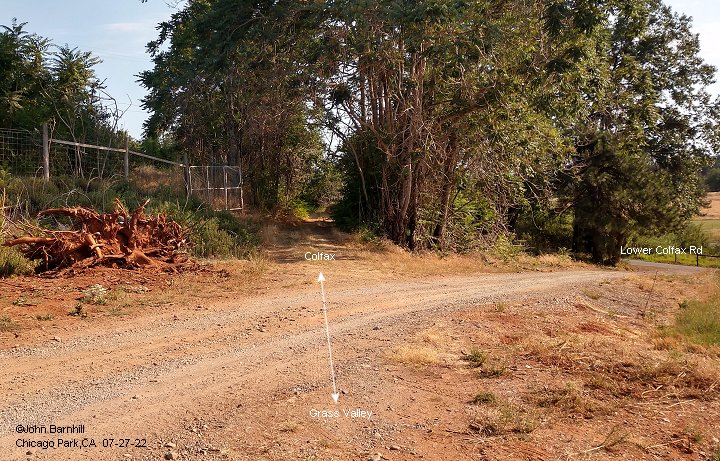
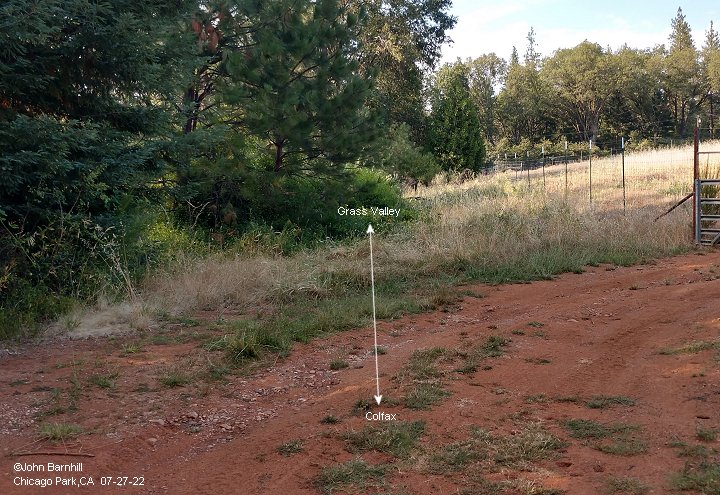
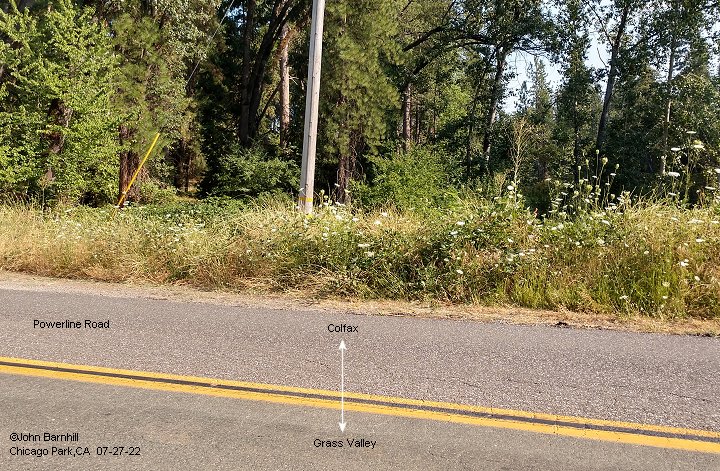
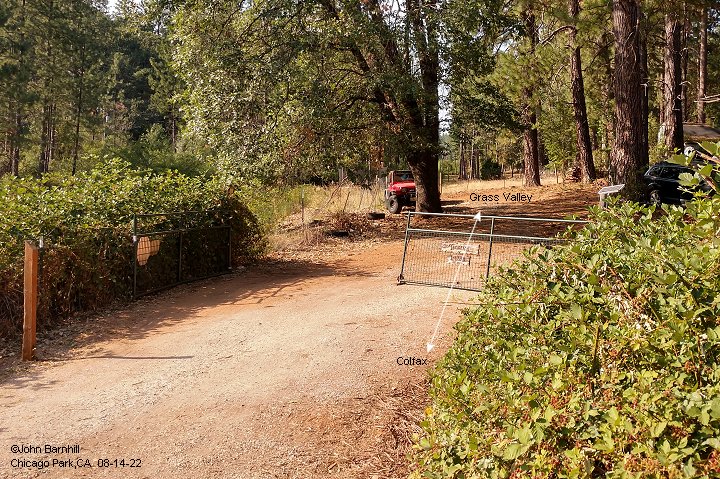
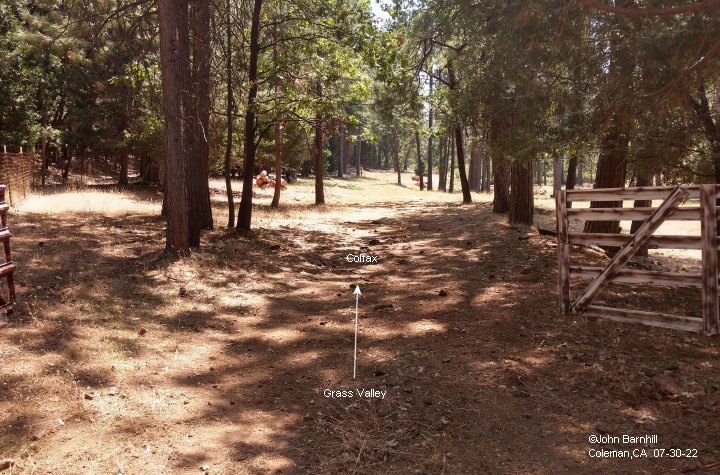
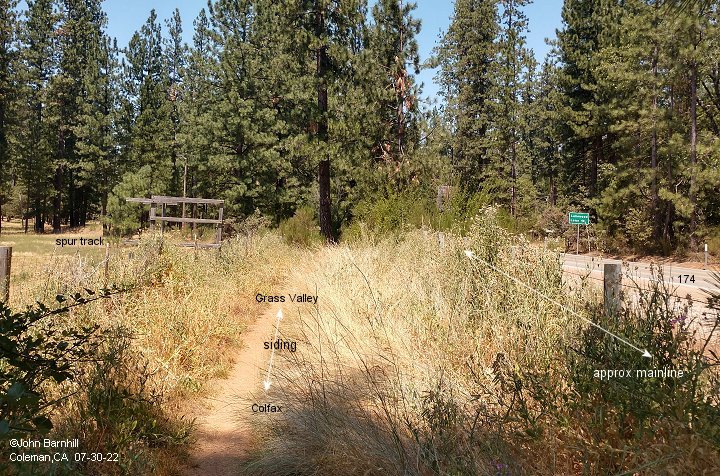
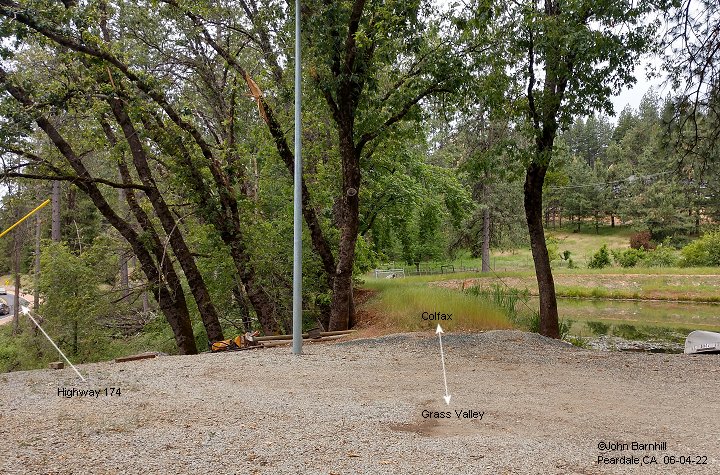
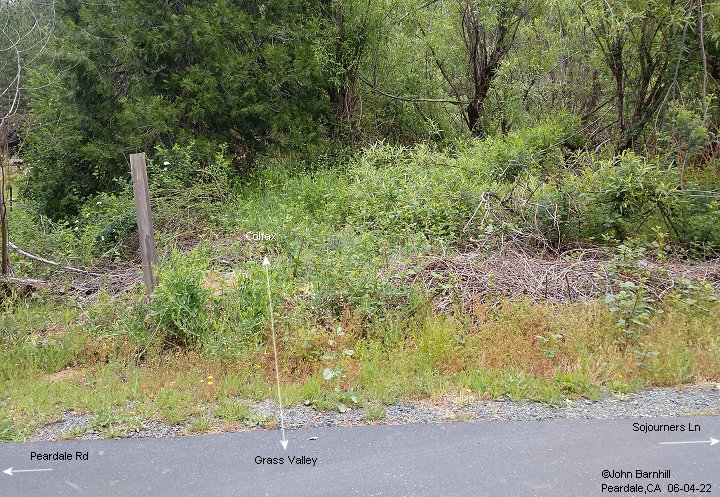
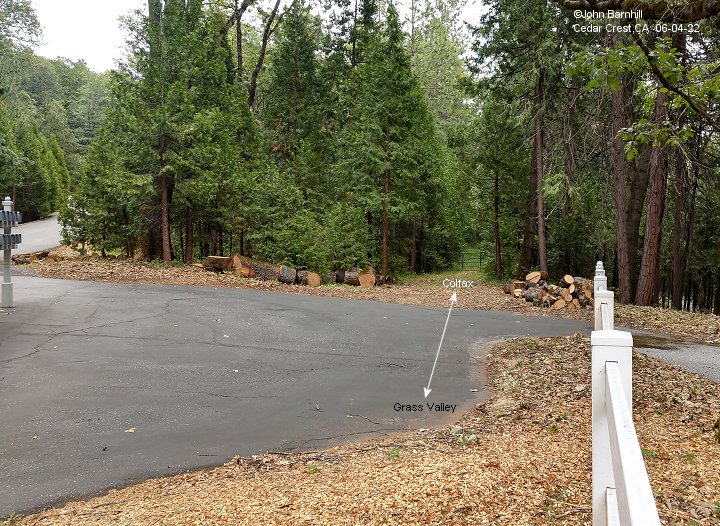
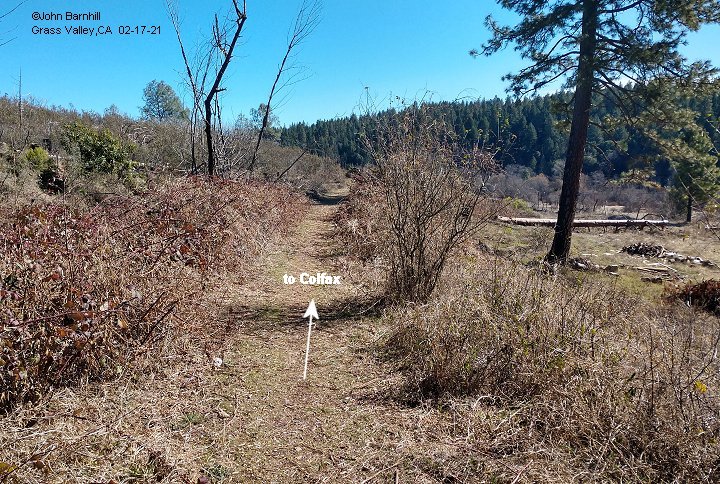
Colfax
1. Standing near the end of the line looking north. The Colfax Fruit sheds are on the left with the depot just beyond.
2. Colfax depot area. The famous hill seen in many photographs is on the left.
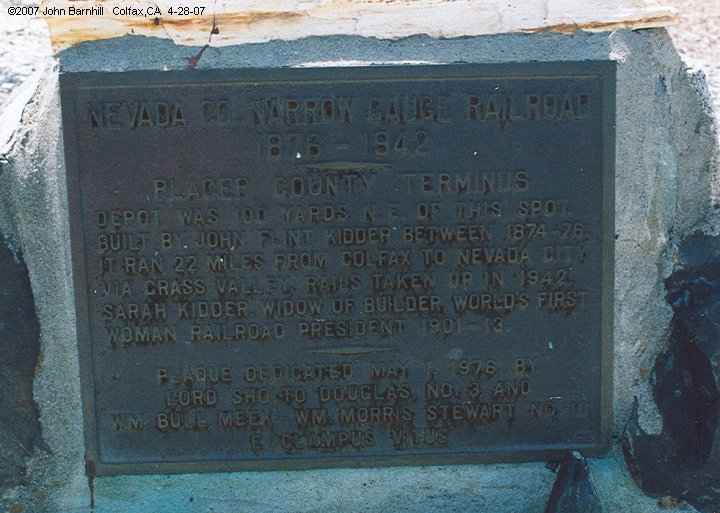
3. Same view but across Grass Valley St. 3A. An image of the NCNG plaque indicated in photo 3.
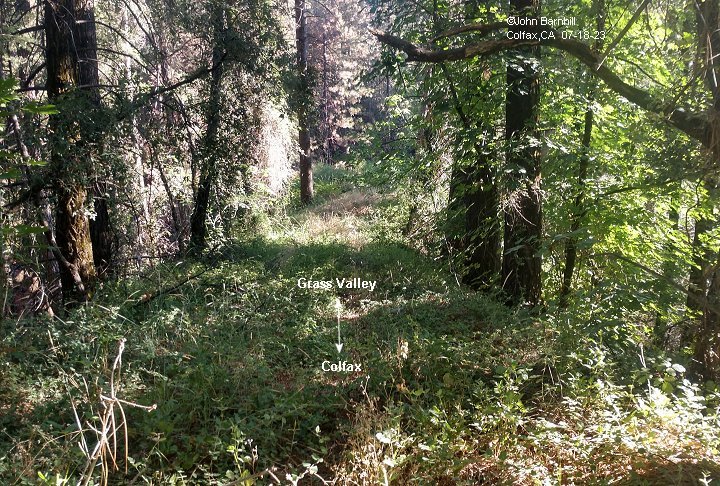
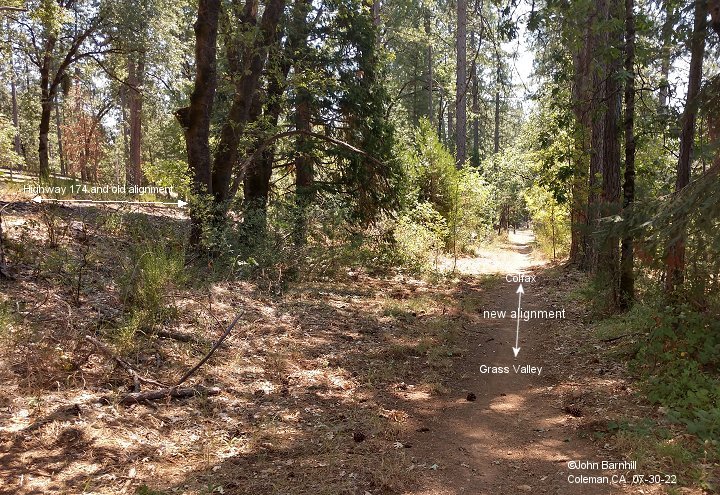
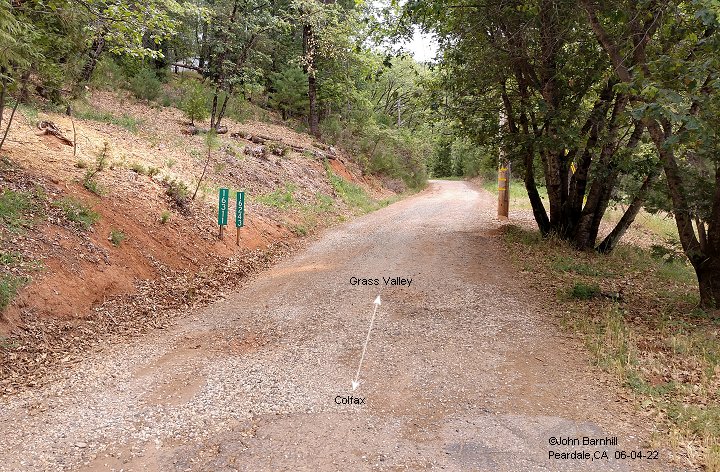
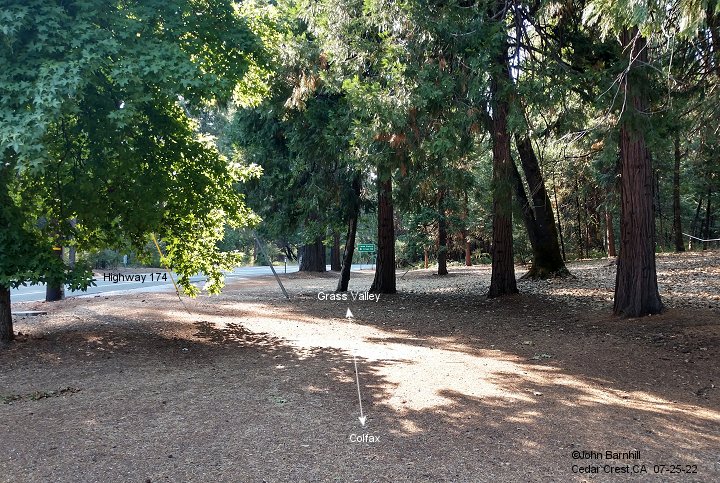
4. View heading north towards Narrow Gauge Road and Oilville beyond.
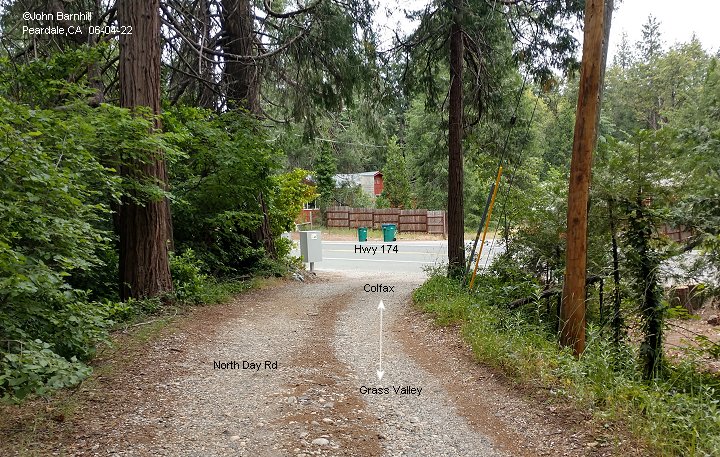
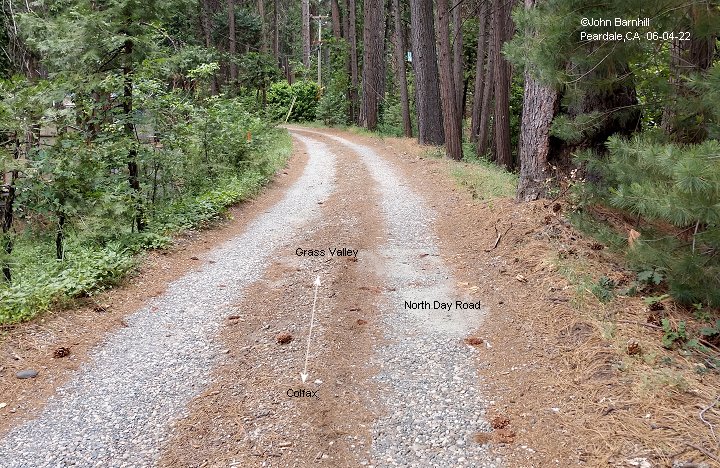
5.-6. These views are taken at the beginning of Narrow Gauge Rd. Just beyond the Hwy 174 bridge is Oilville.
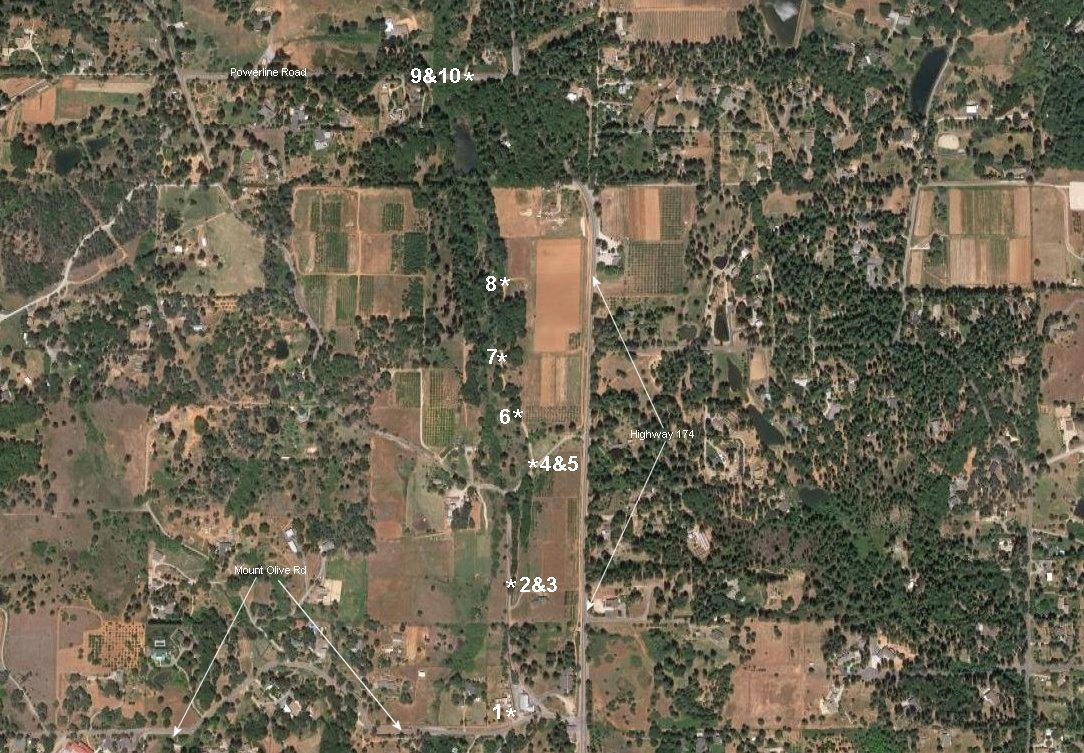
7. Google satellite view of Colfax marked with photo locations.
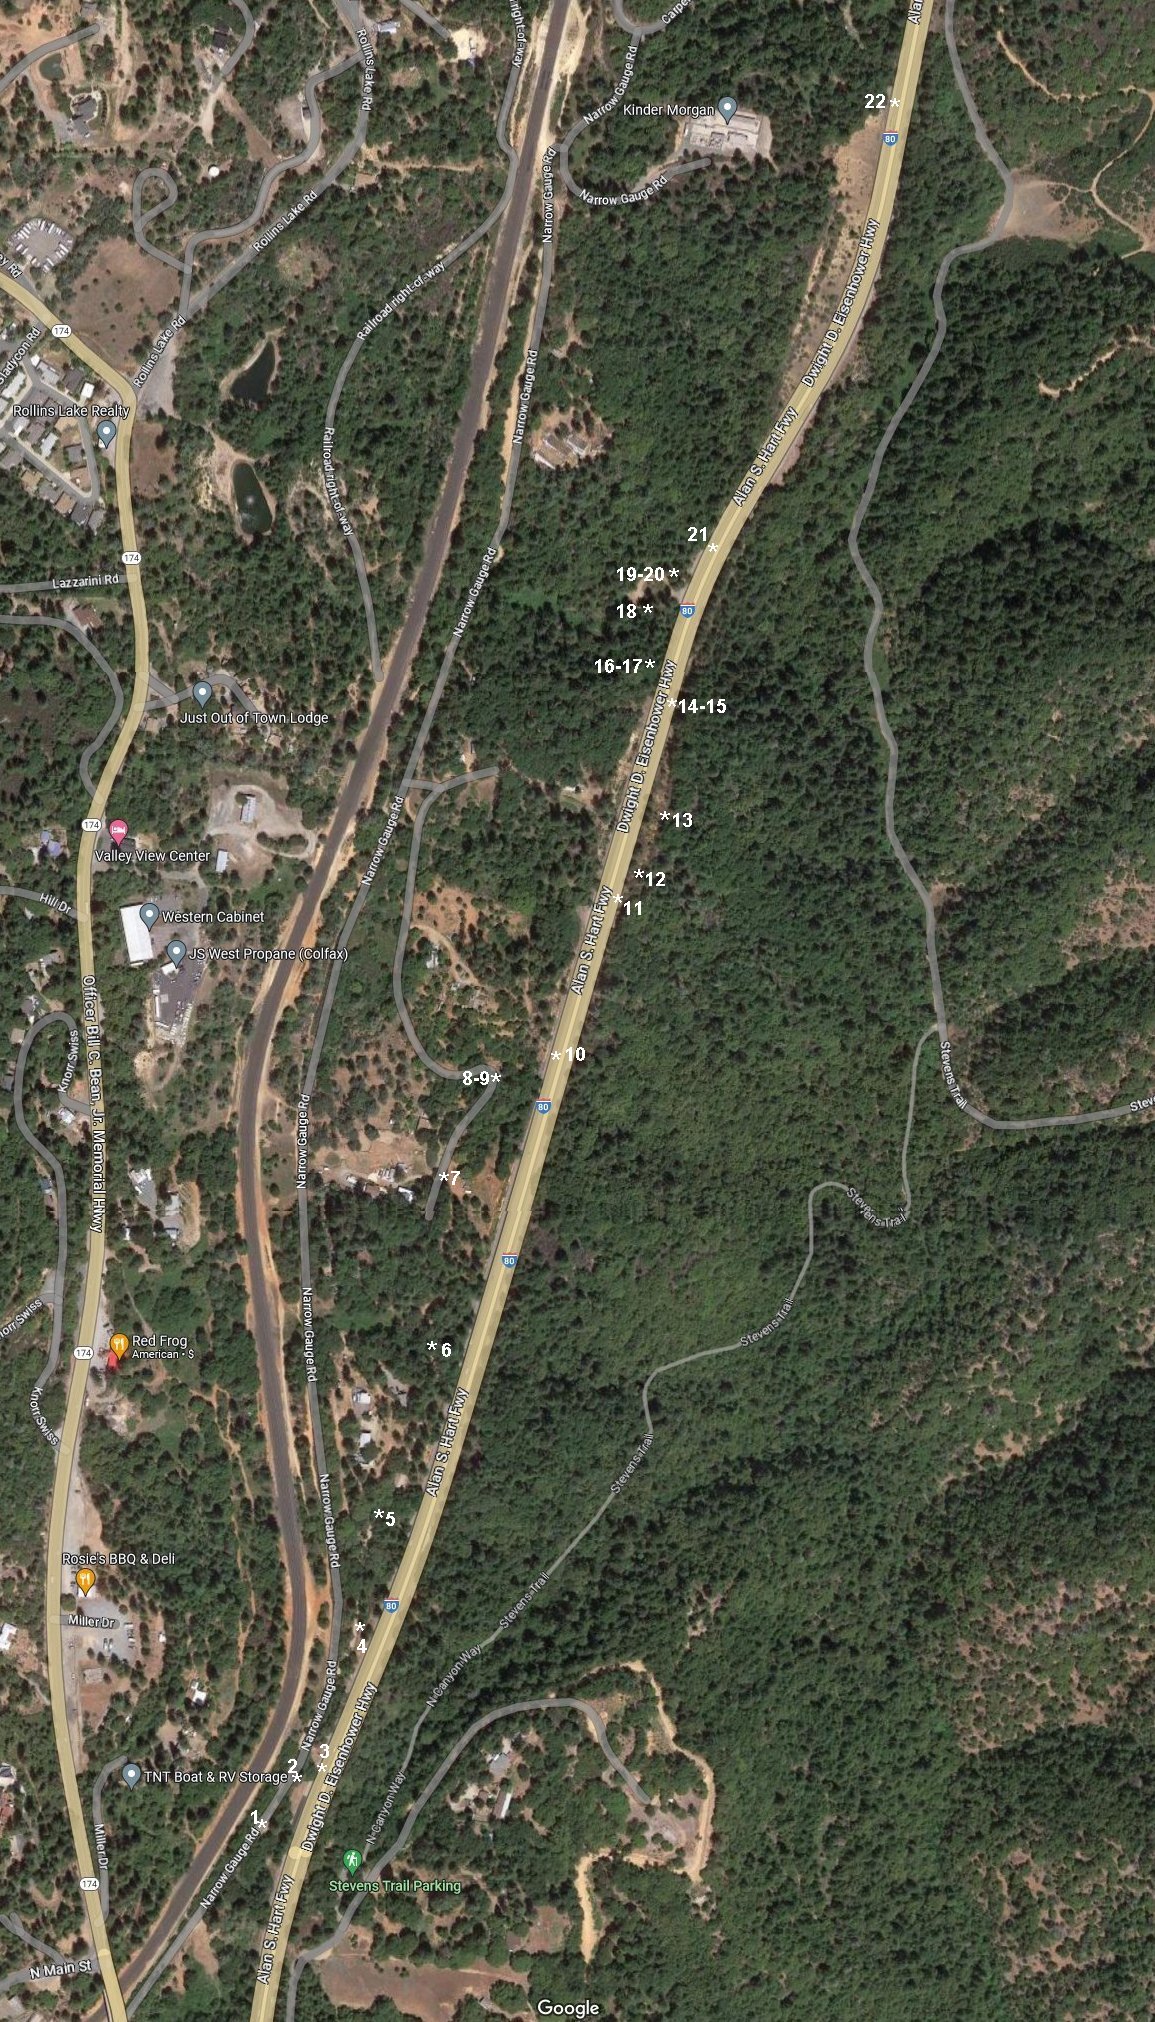
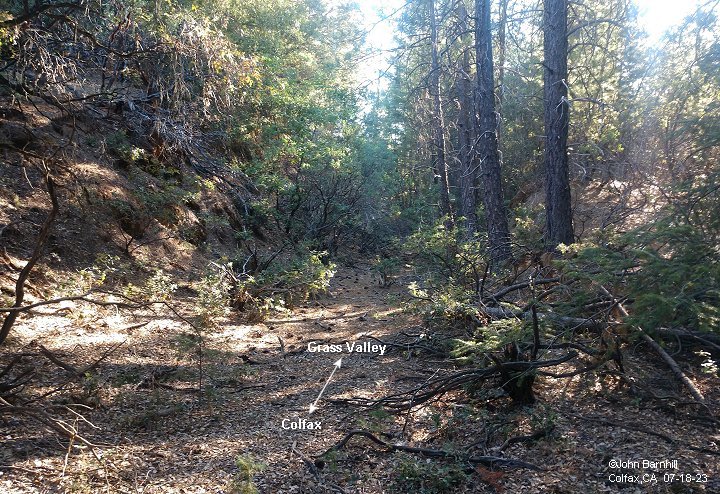
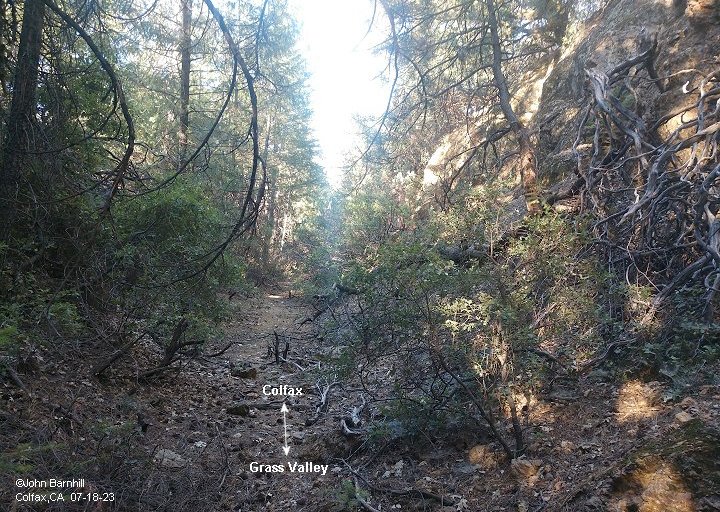
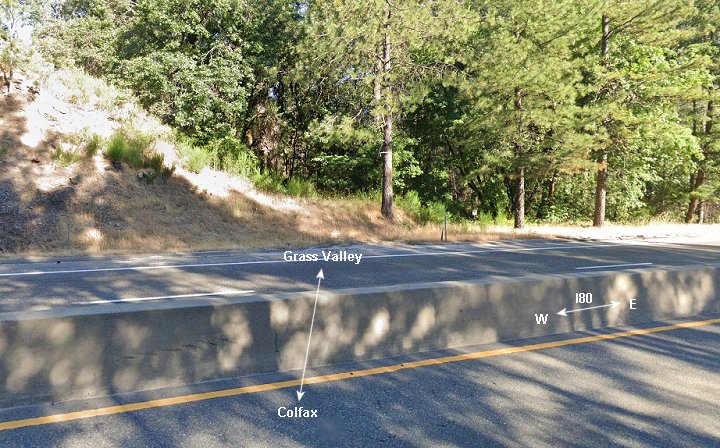
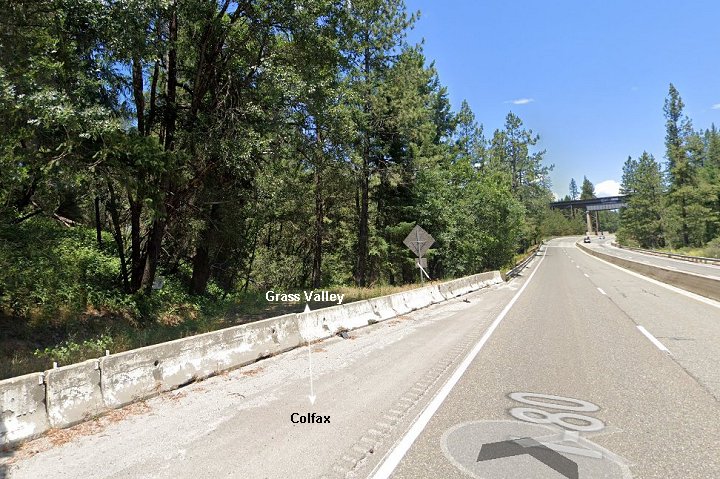
Oilville to Carpenter Road
Parts of this portion of the line follow along Narrow Gauge Road. Beyond this, many sections were destroyed during construction of Interstate 80.
Oilville once had a siding for the unloading of oil and its own turntable.
1. Looking back towards Colfax from Oilville.
2. This is the site of the Oilville turntable. It was wiped out by Interstate 80 construction.
3. Google street view of the turntable site from I-80.
4. Leaving Oilville heading towards Carpenter Road and Long Ravine is the first small cut through a hill.
5.-7. Image five looks back through the small cut. Images six and seven view the following larger cut.
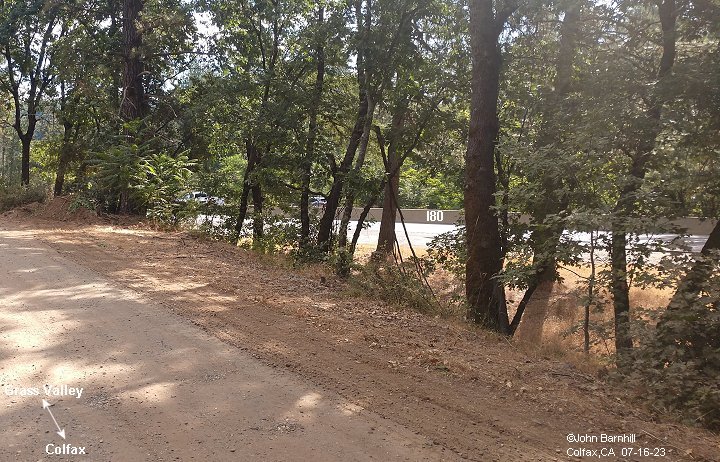
8. Looking towards the larger cut from where the railroad leaves Narrow Gauge Rd and intersects Interstate 80.
9. This is where the railroad starts to overlap the freeway.
10. Google street view looking back towards image nine.
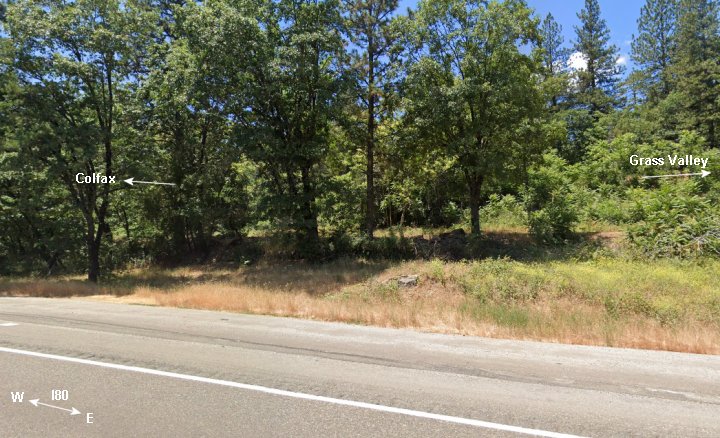
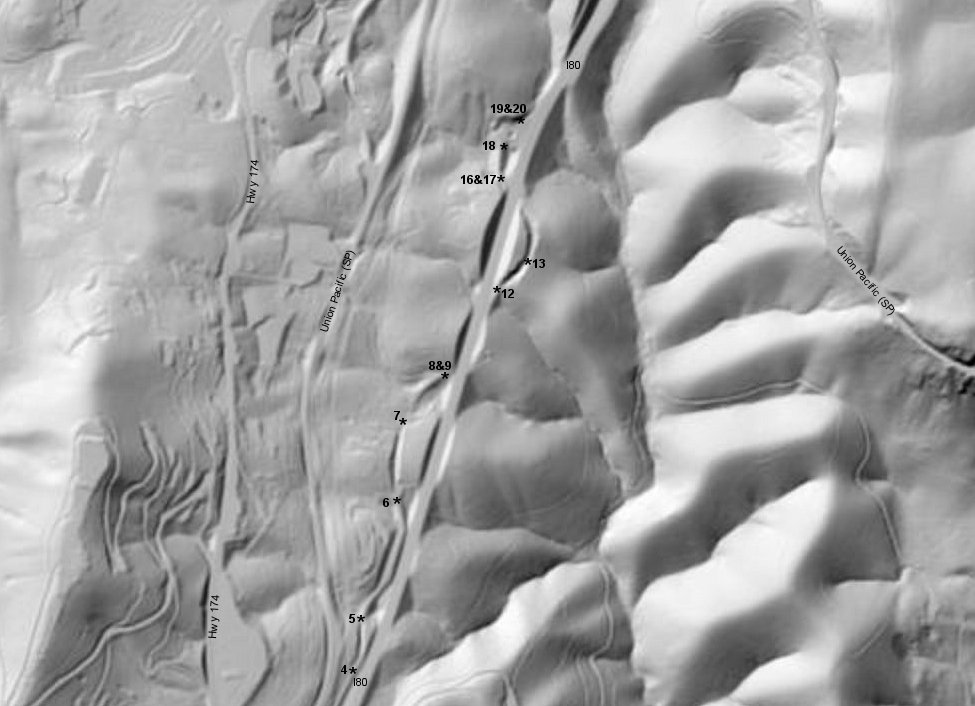
11.-13 A short distance east and across I-80, a large cut remains.
14. Another street view back towards the large cut. The railroad crosses the freeway here.
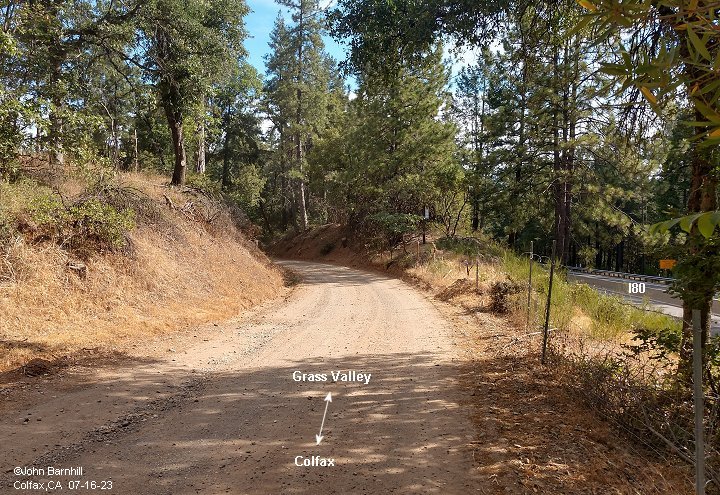
15. Opposite street view from image fourteen. The line ran on a huge fill on the north side of the freeway.
16.-18. Views along the large fill.
19. Looking westward back towards the fill.
20. Opposite view from image nineteen looking once again towards I-80.
21. Street view looking towards the previous few images.
22. Looking from Interstate 80, this point leads to a fill continuing to the first photo in the next section.
23. USGS lidar image of the portion of the right-of-way. Photo locations are indicated.
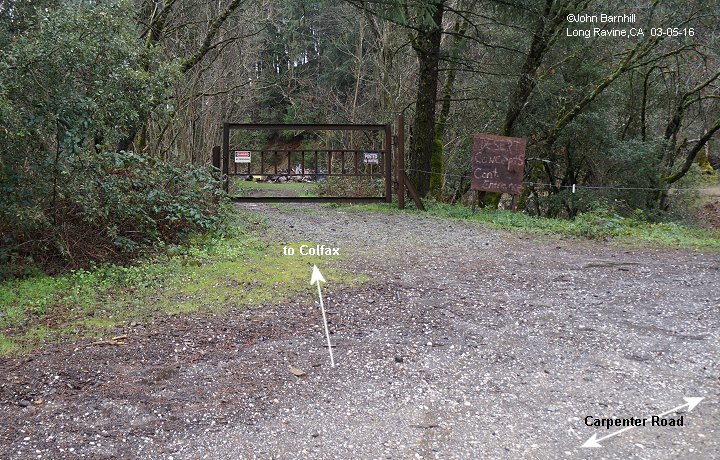
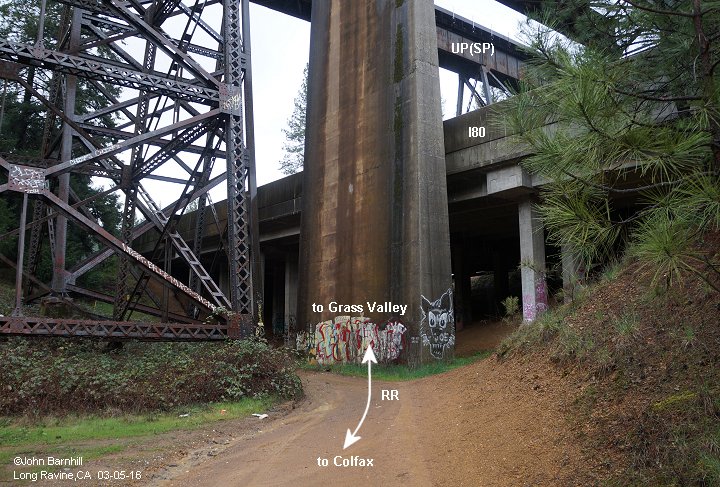
Carpenter Road
1.-3. These three images were taken on the Carpenter Road side of Long Ravine. Image one looks back towards image 22
in the previous section. Image 3 looks towards images 1 and 2 in the next section.
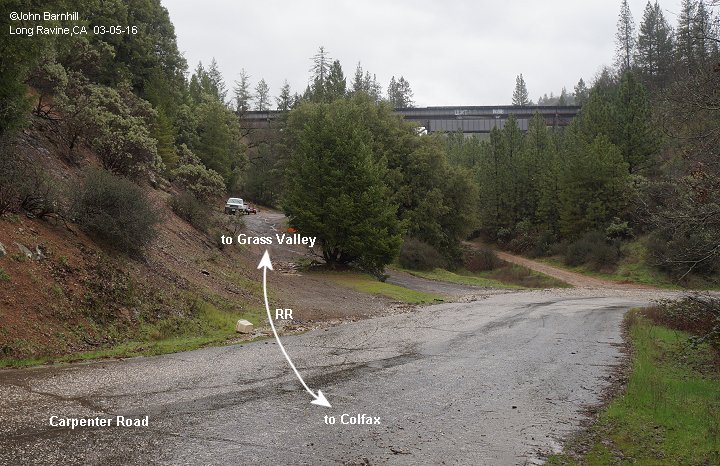
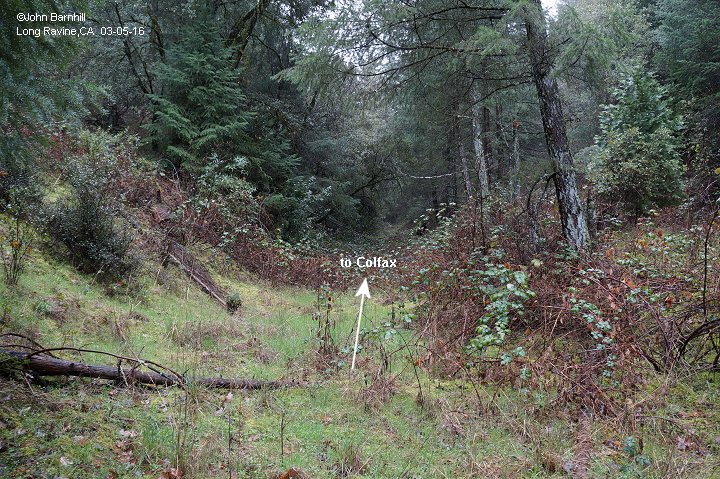
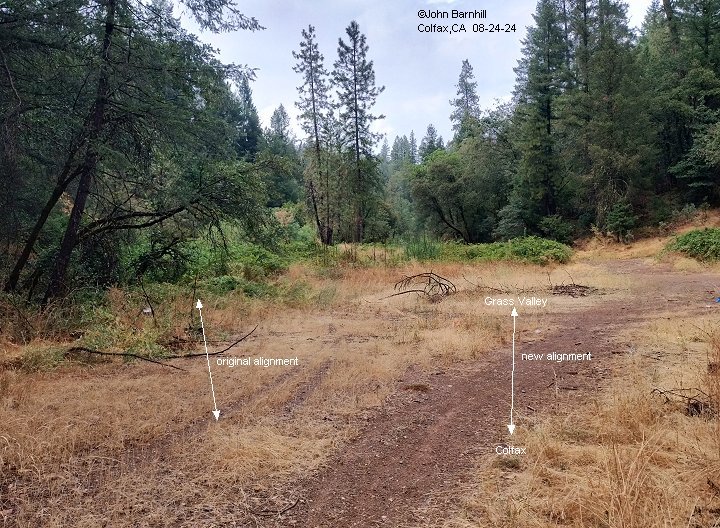
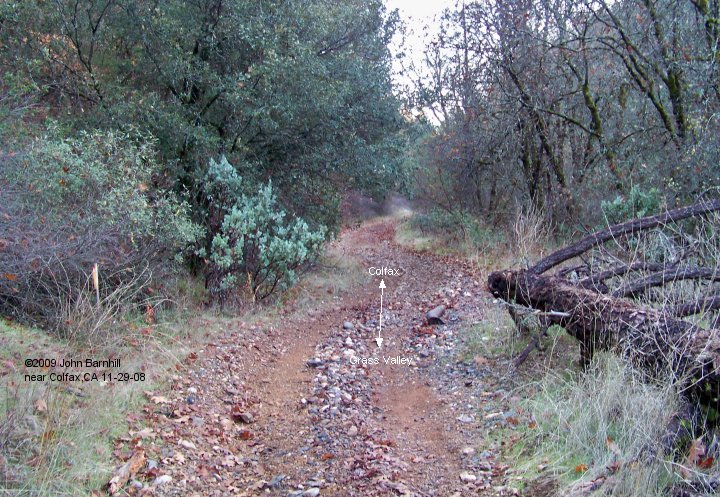
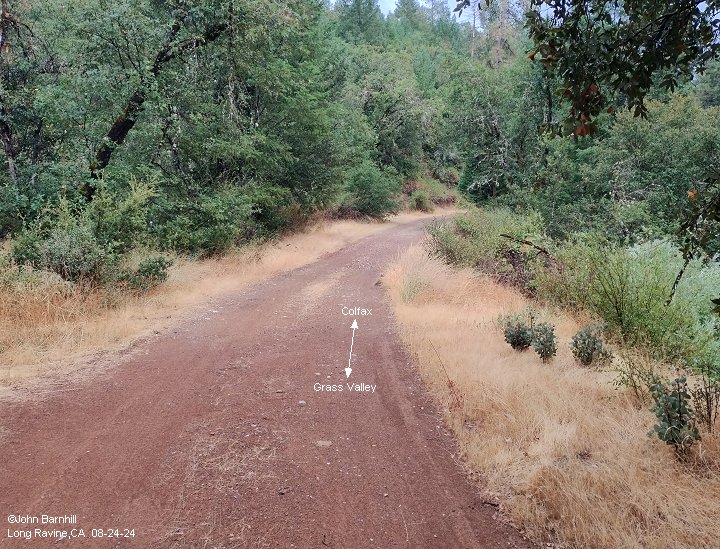
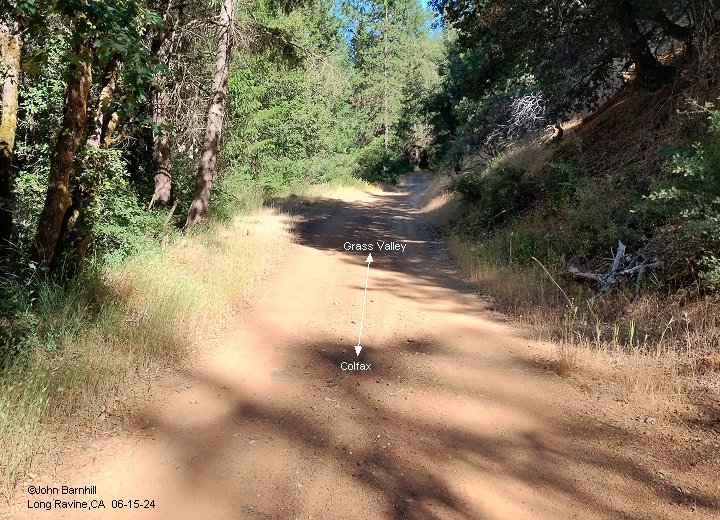
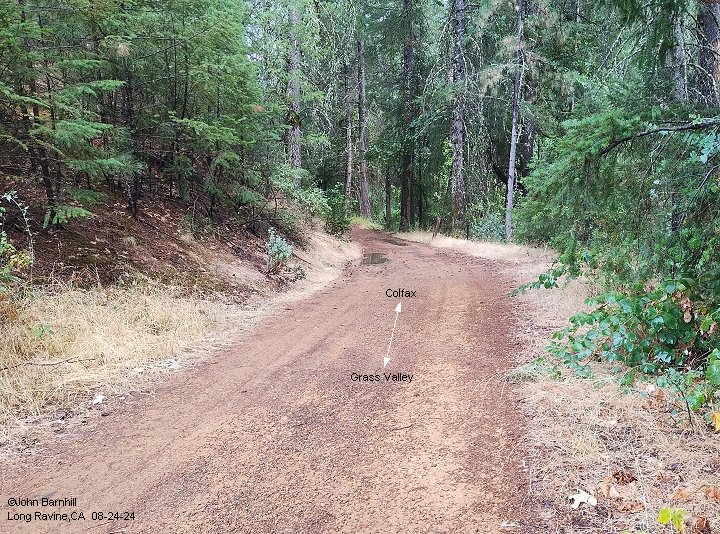
Long Ravine
1. This large cut leads towards Colfax and the images in the previous section.
2. Opposite view of image 1. This is where the original grade and the new grade diverge.
3. A little ways north of the image 2 looking back towards Colfax.
4. View is towards Colfax across a good sized curved fill.
5. Looking towards Grass Valley in the opposite view of image 4.
6. Southward view towards Colfax.
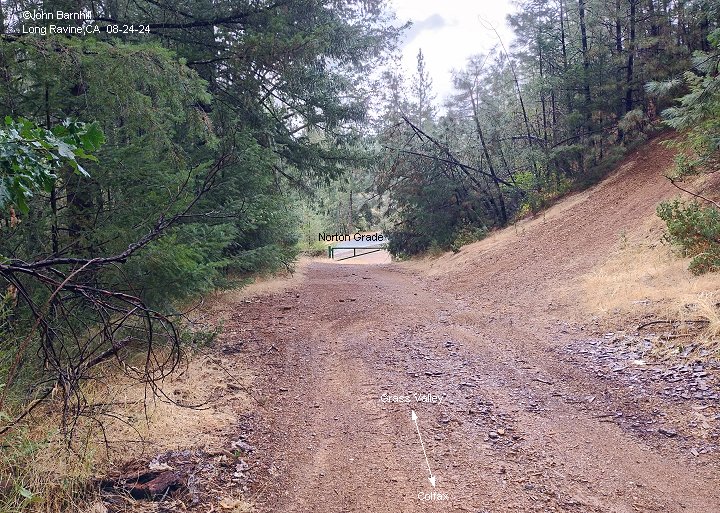
7. Opposite view of image six. The hillside and right of way were quarried out between here and the next image to use as fill for the new alignments of Norton Grade Rd and Highway 40.
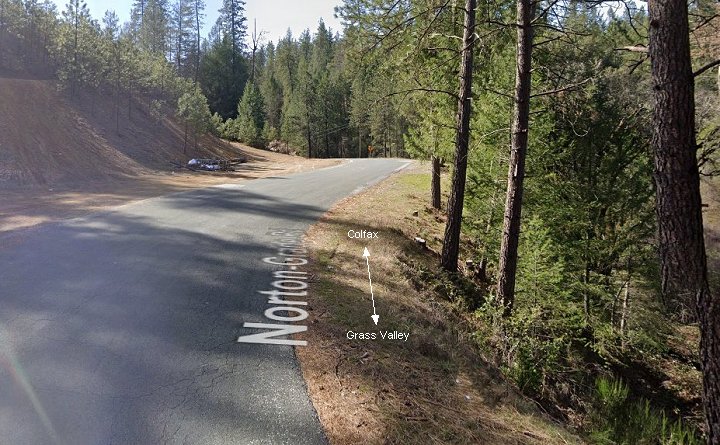
8. Google street view along the current Norton Grade Rd alignment looking back towards image 7. The hill on the left has been quarried out for fill obliterating the new railroad grade and burrying the original railroad alignment.
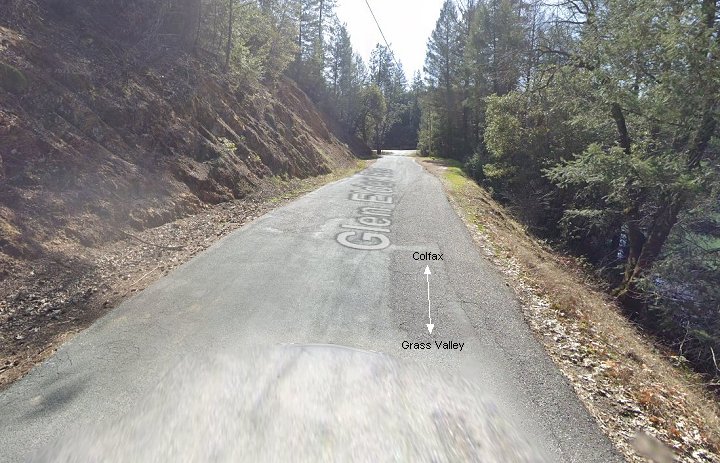
9. Opposite Google street view from image 8 looking along Norton Grade Rd towards Glen Elder Rd and Rollins Lake.
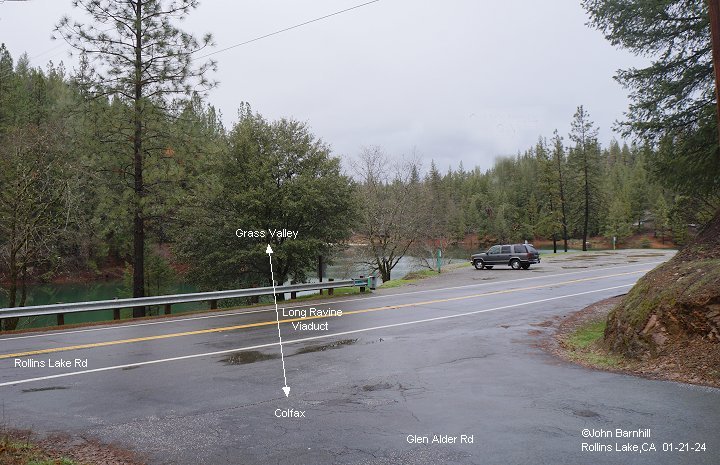
10. This Google street image looks towards Colfax at the intersection of Glen Elder Rd and Rollins Lake Rd.
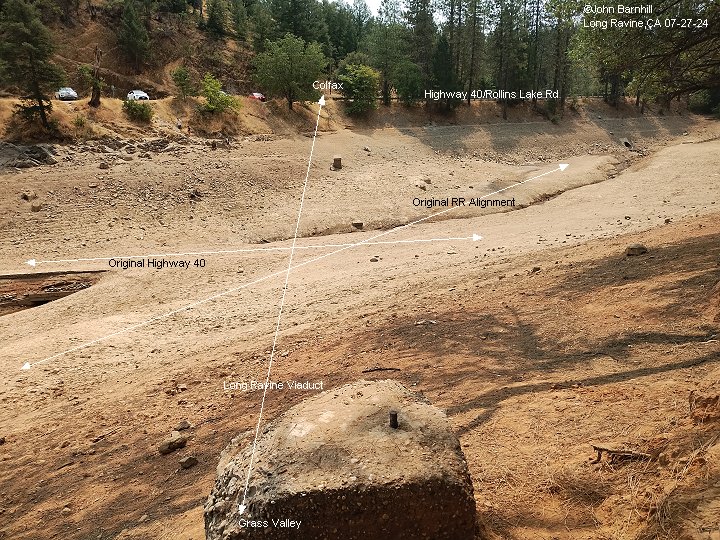
11. Same location looking towards Grass Valley across the Long Ravine Viaduct.
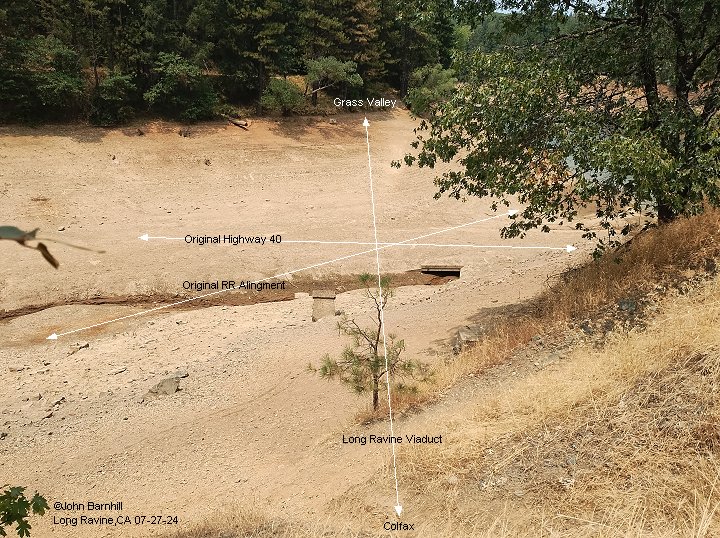
12. A closer look of the Long Ravine Viaduct site during low water.
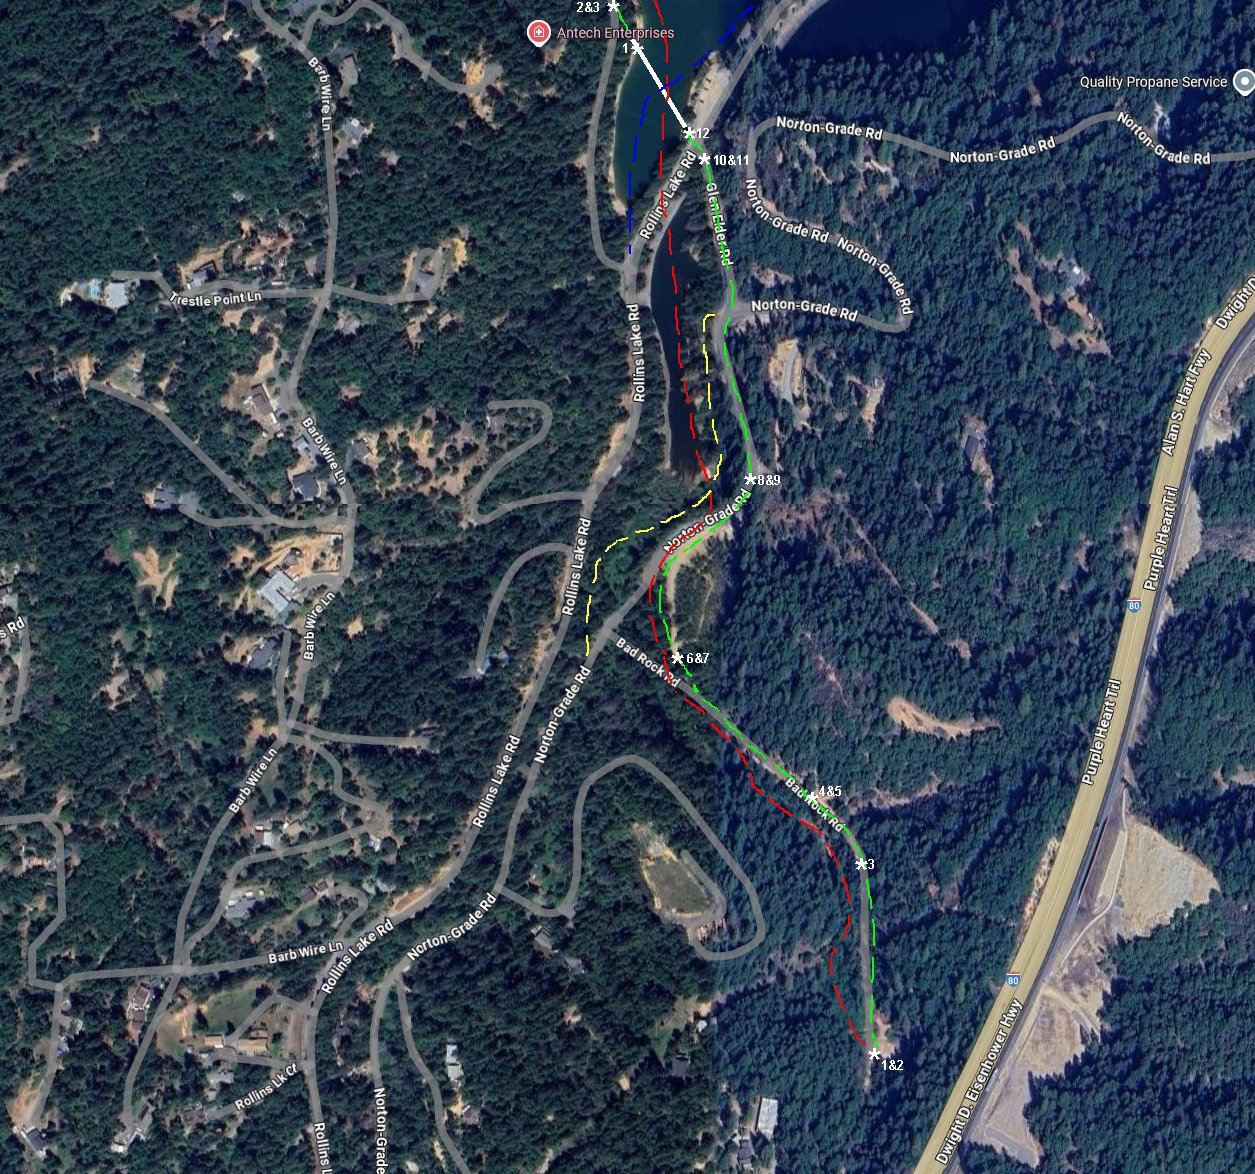
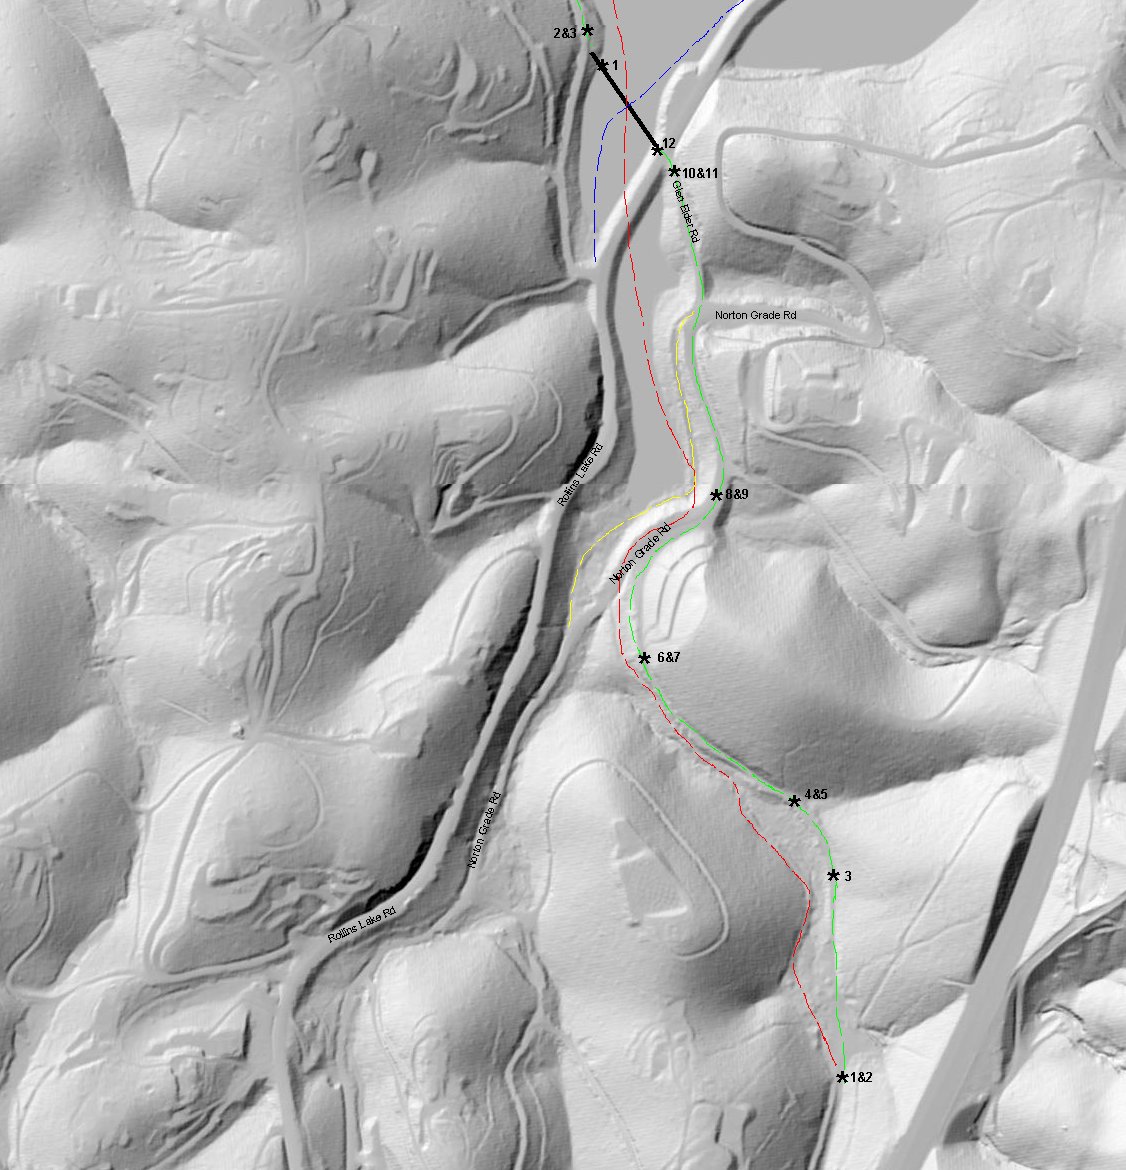
13.-14. Google satellite and USGS lidar images marked with photo locations. The Green line is the new railroad alignment, followed on this page.
The Red line is the original aligment. Yellow line indicates the original Norton Grade Rd and the Blue line is the original Hwy 40.
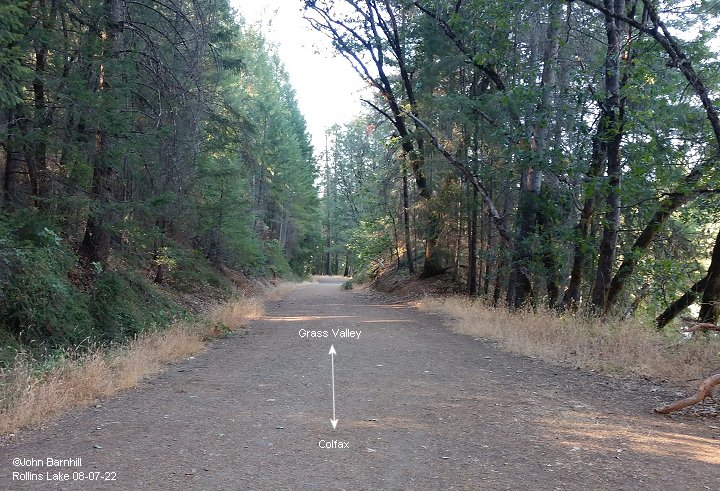
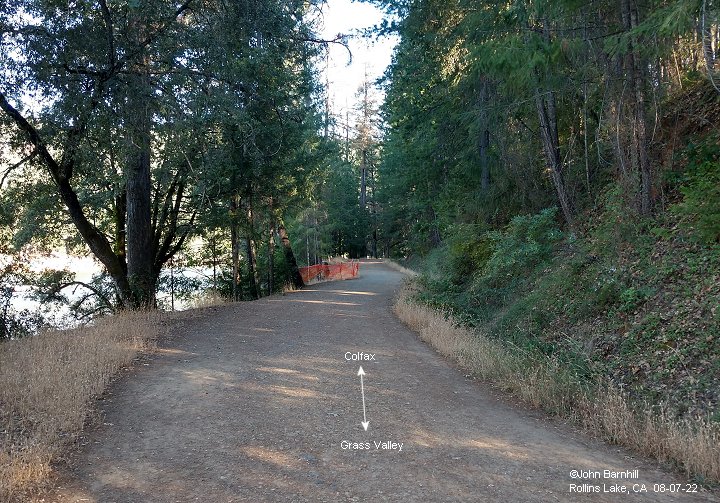
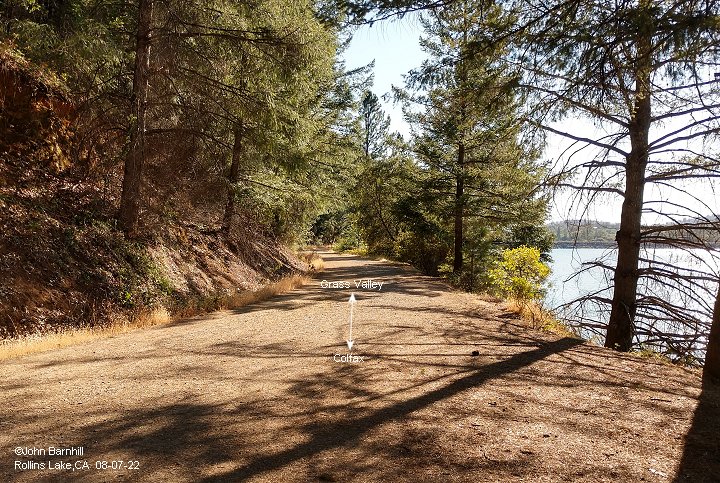
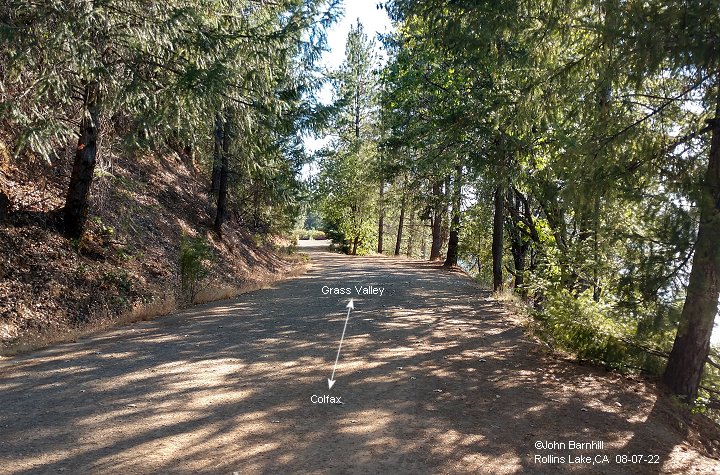
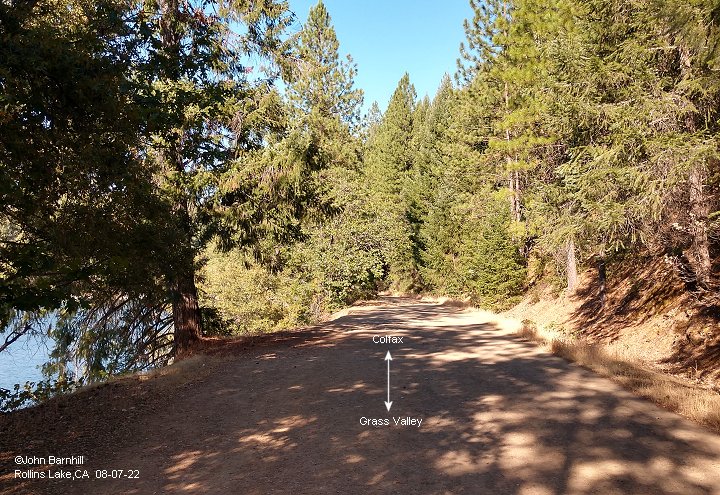
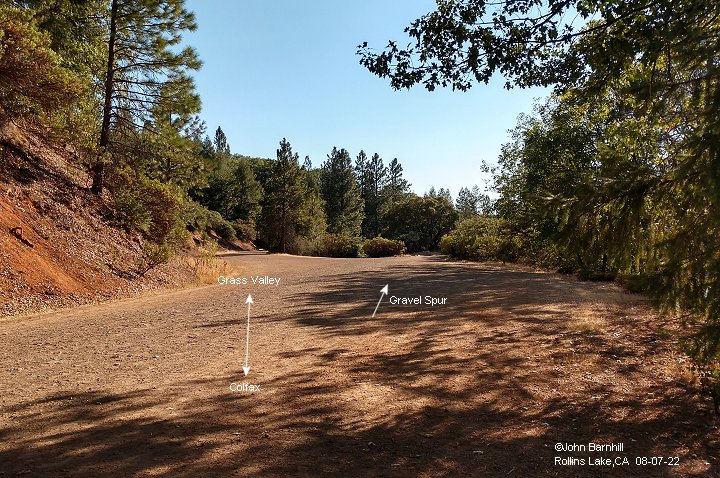
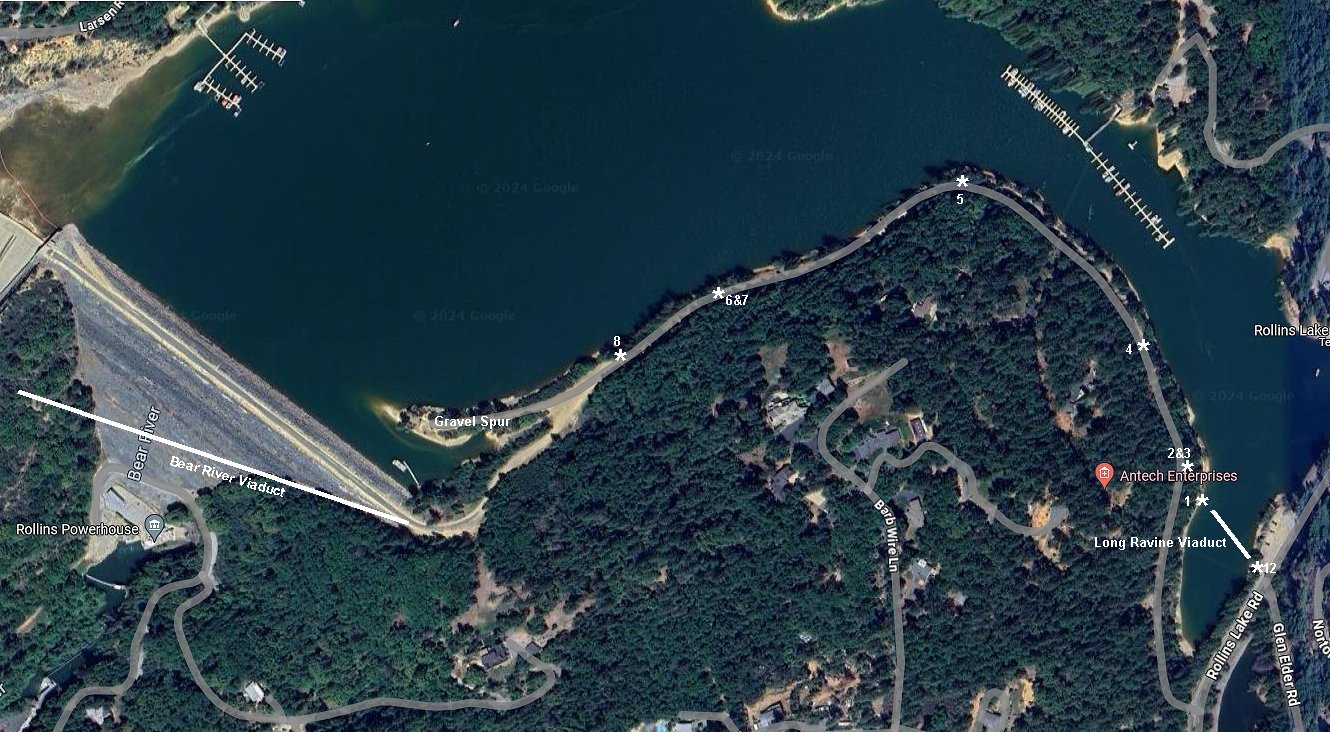
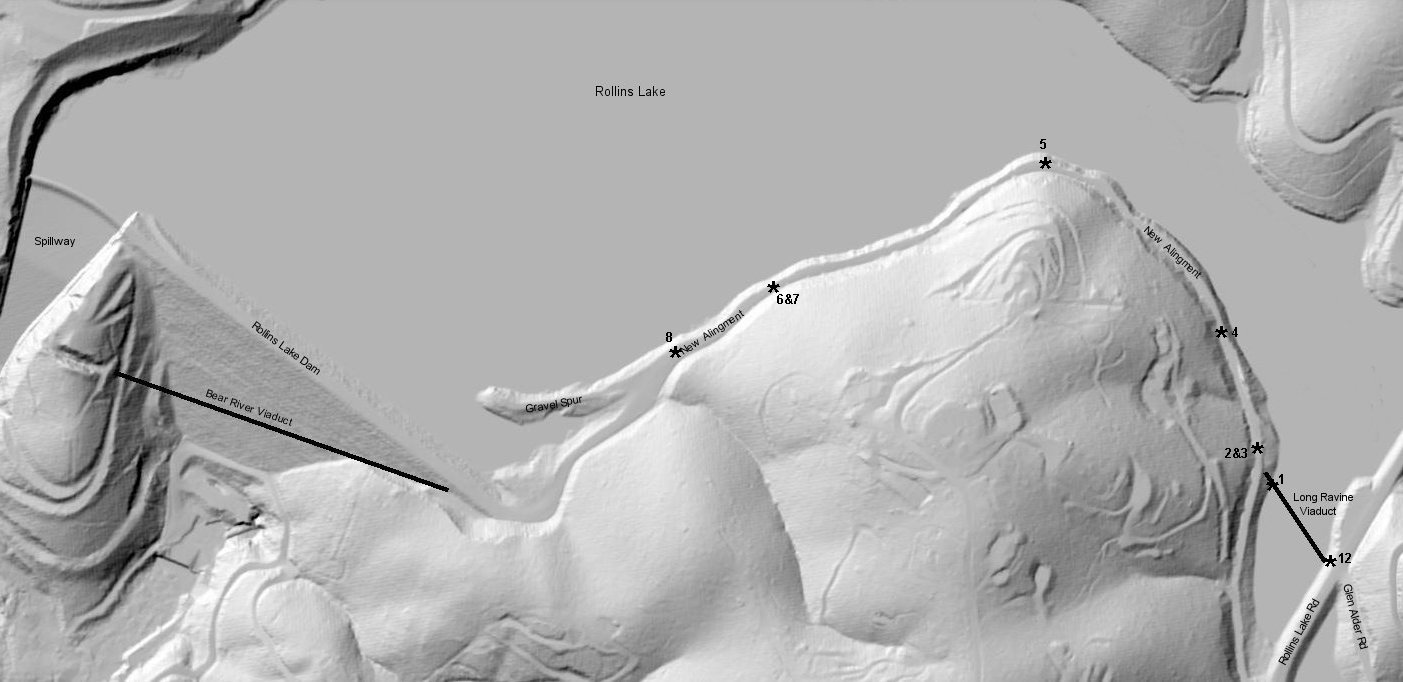
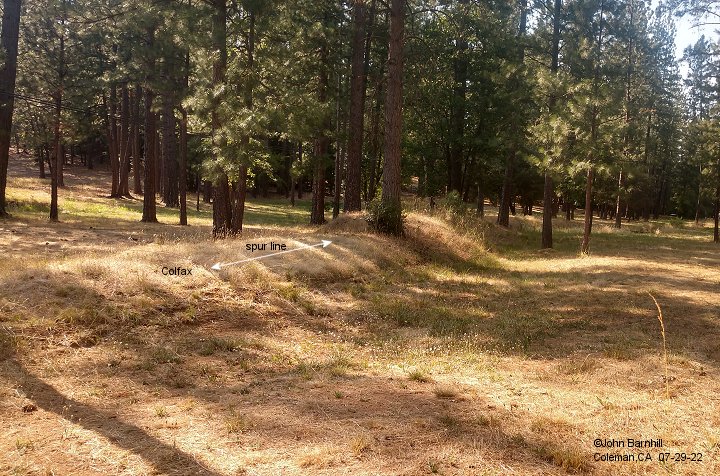
Along Rollins Lake
1. Low water view from the opposite side of the Long Ravine Viaduct from image 12 in the previous segment.
2.-8. These images follow along the "new" right-of-way towards Rollins Dam and the site of the Bear River Viaduct.
Just around the bend in image 8, the railroad would enter onto the Bear River Viaduct.
9. NID image of Rollins dam construction site marked with several features.
10.-11. Google satellite and USGS lidar images marked to show photo locations.
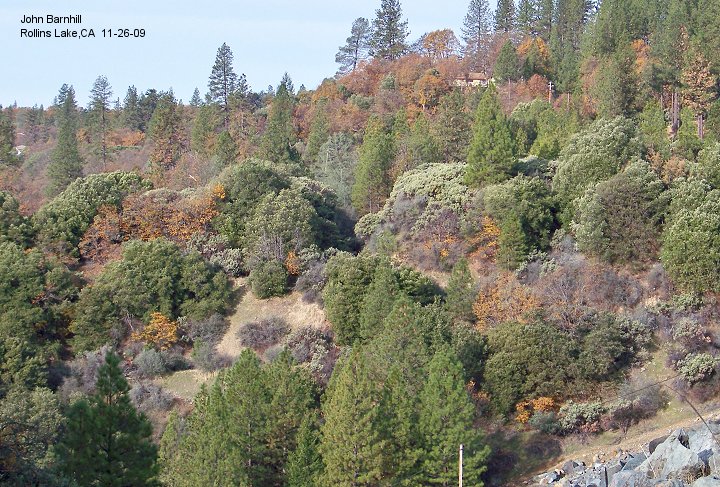
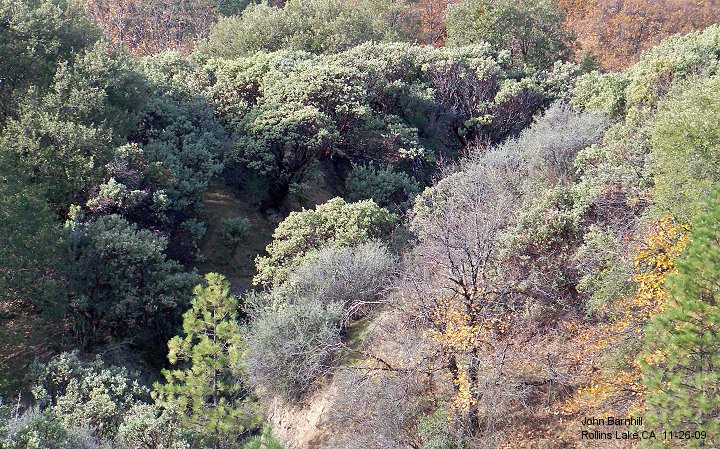
Cut at Rollins Dam
On the new alignment, the narrow gauge crossed a tall steel bridge over the Bear River. The Rollins Lake dam was
built almost in the same spot. At the north end was a very large cut and it is still there. Photo 1 is taken from the
south end of the dam. The cut can be seen in the hill just to the left of the other end of the dam. Image 2 is a closer
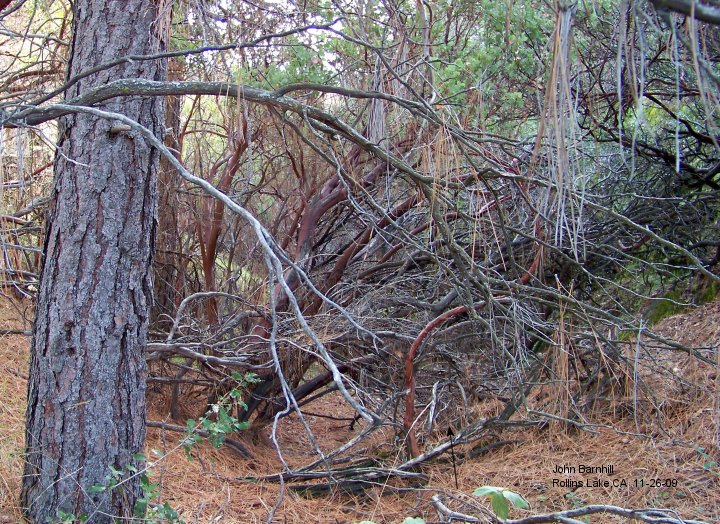
view. Image 3 was taken within the cut showing how full of vegitation it is. Image 4 looks from the end of the cut and
what would be the beginning of the Bear River Viaduct to the south end of the dam. This cut is shown quite well on the
USGS lidar images in the previous section as well as the next section of images.
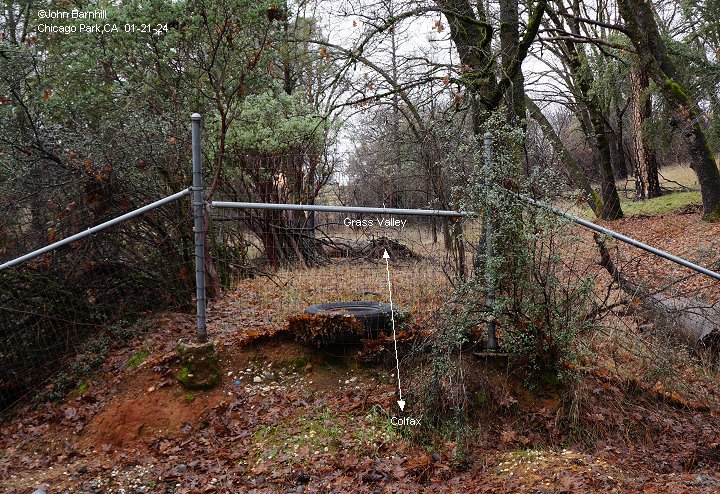
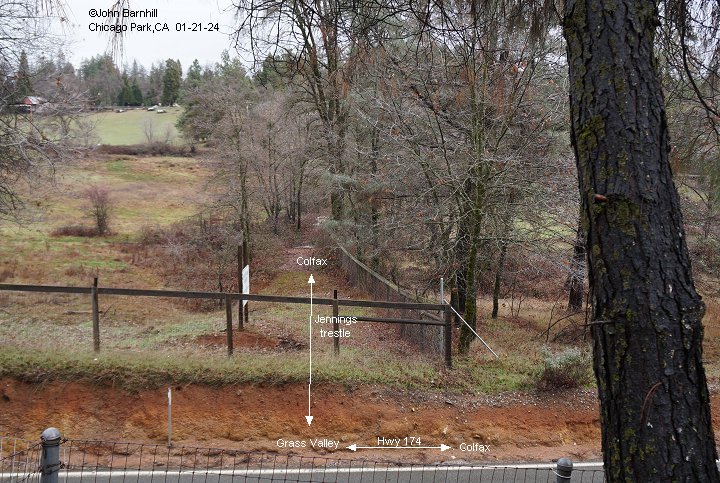
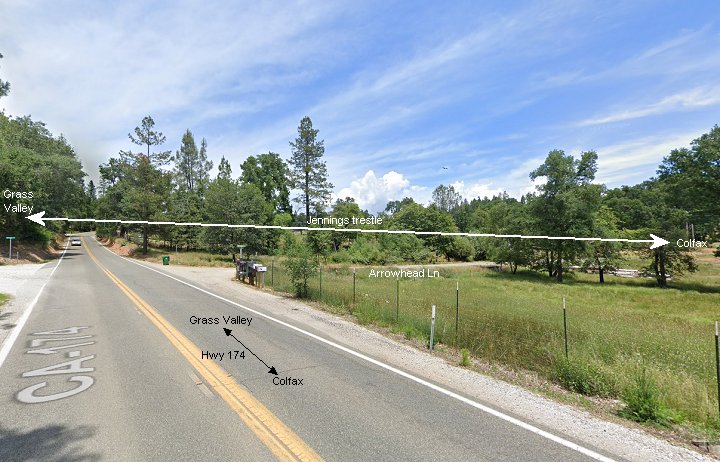
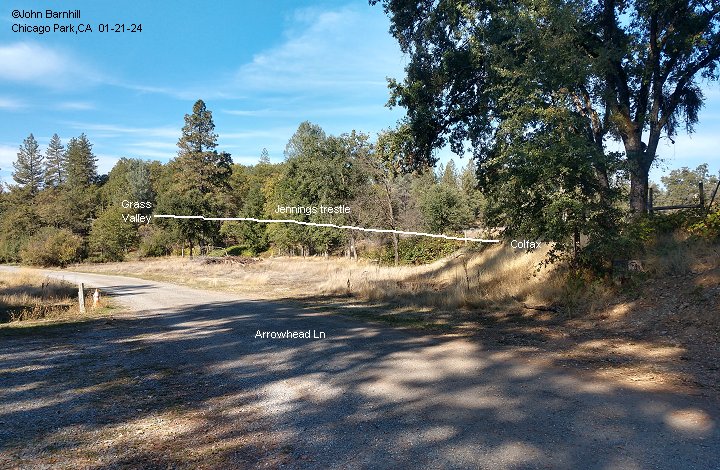
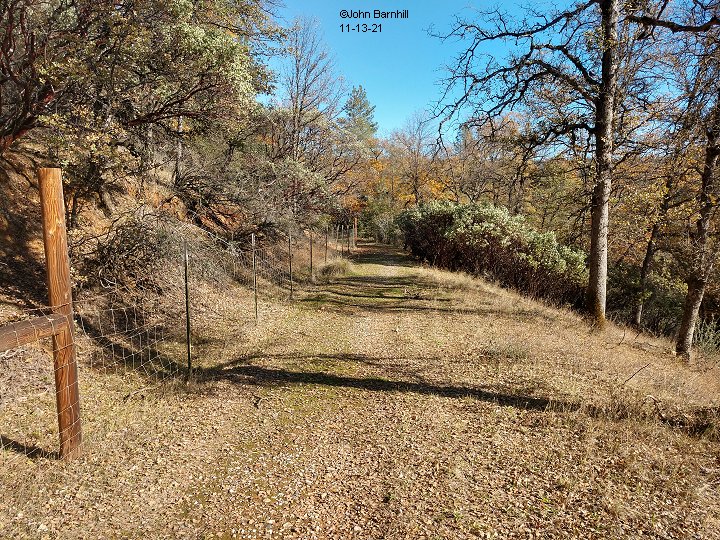
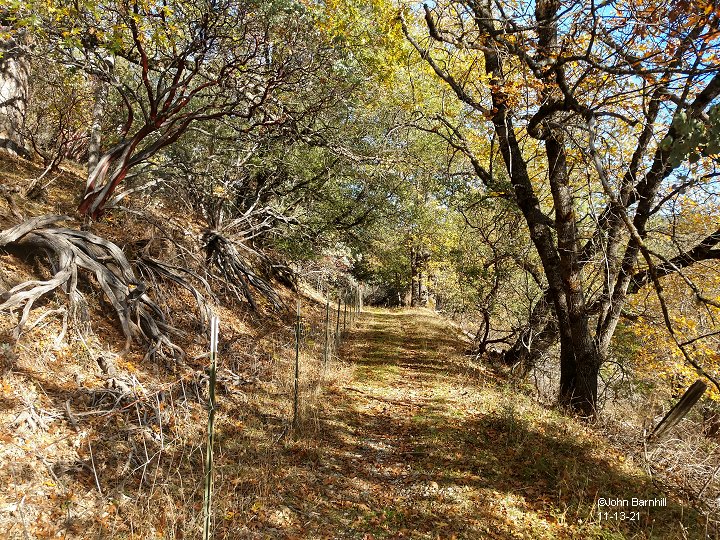
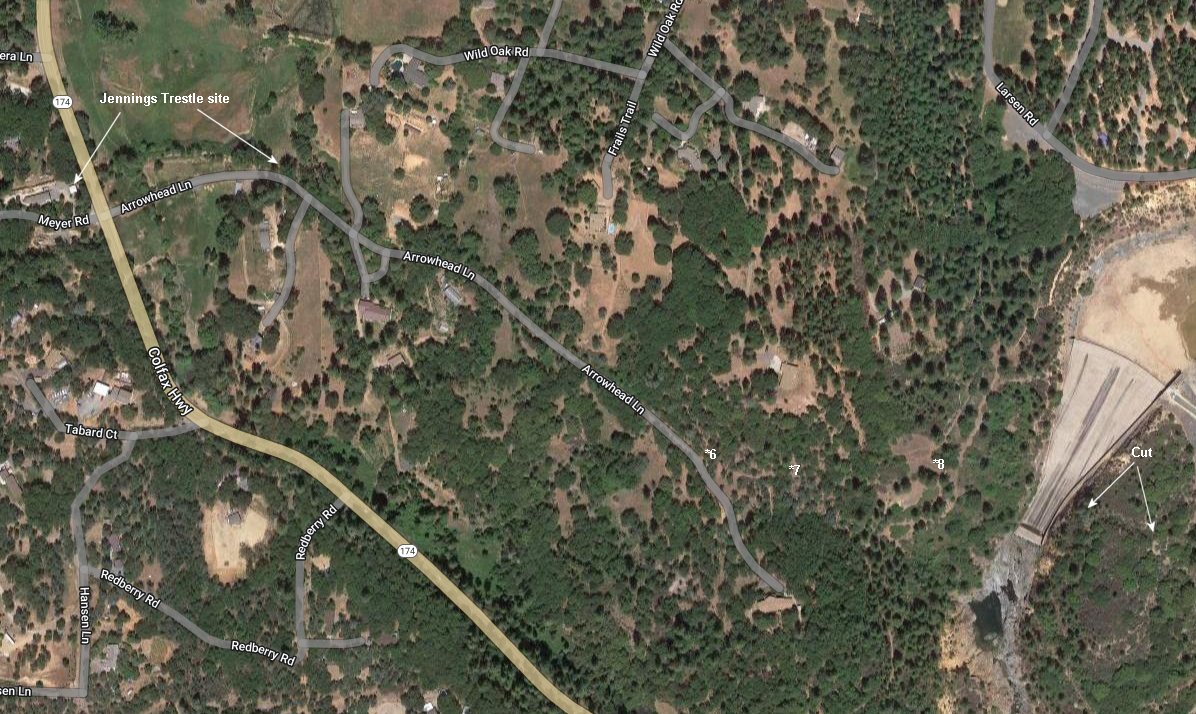
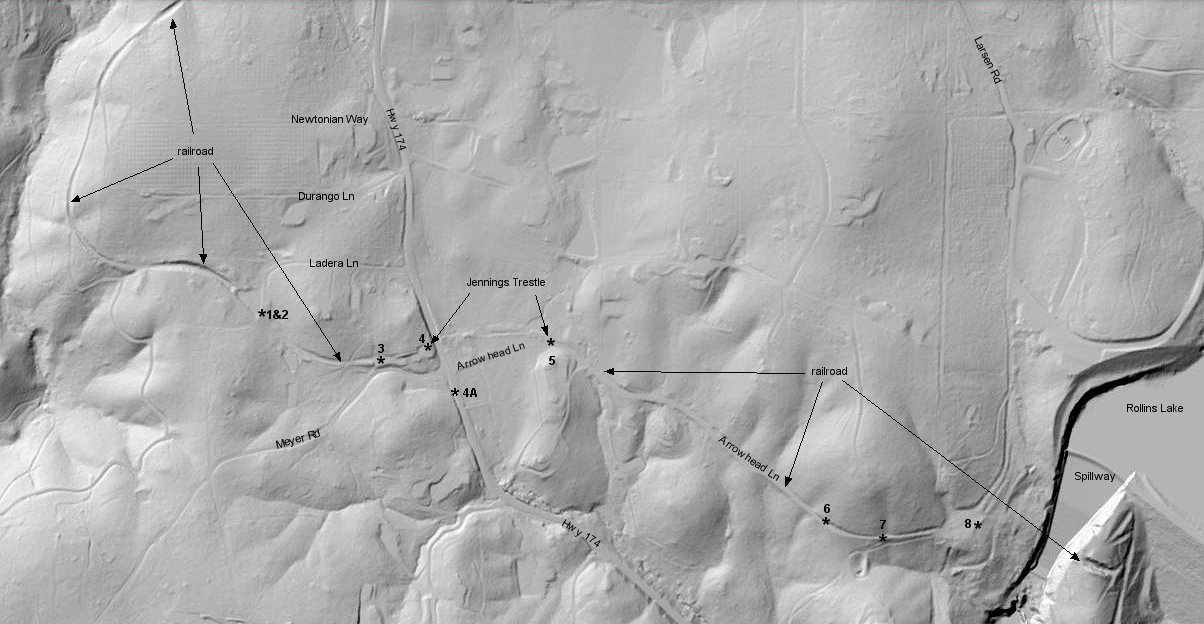
Jennings Trestle and Arrowhead Lane Area
1.-2. North of the Jennings Trestle site at Ladera Ln, image 1 looks towards the trestle and eventually Colfax while image 2 looks north.
3.-4. Taken on private property with permission, image 3 looks north from near the end of the trestle while image 4 looks across the trestle site.
4A. Google street view from Hwy 174 looking north marked up to show where Jennings Trestle stood.
5. Taken at the southern end of the trestle where the line separates from Arrowhead Ln. View looks railroad north.
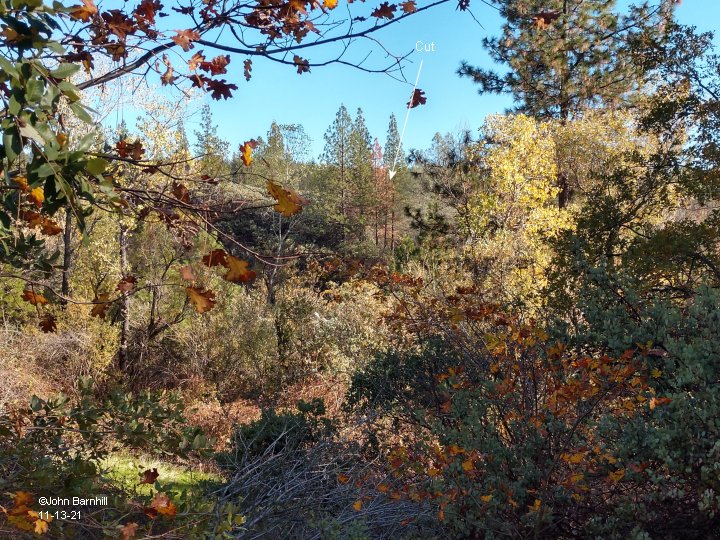
6.-8. These images follow the line from Arrowhead Lane to the spillway for Rollins Lake. Image 8 shows the opposite side of the cut
as in the previous section of photos. Directly past this cut was the steel Bear River Viaduct.
9.-10. Google satellite and USGS lidar images marked with photo locations.
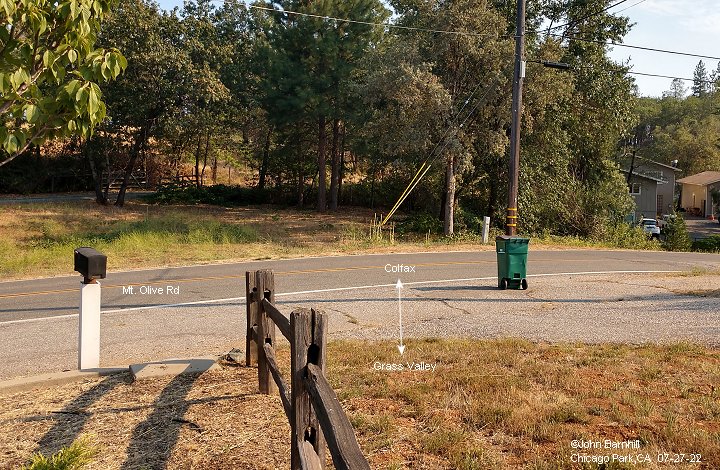
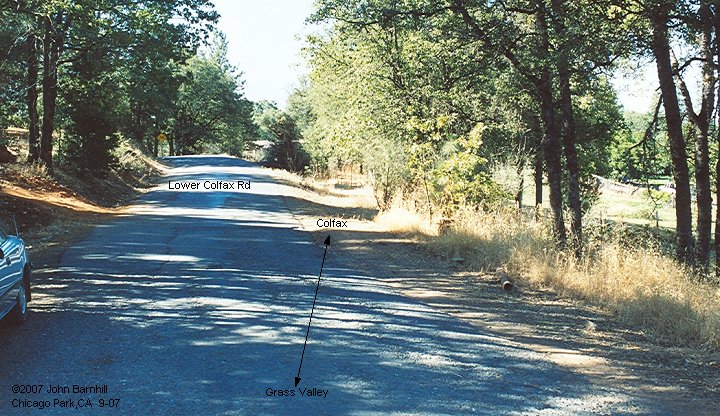
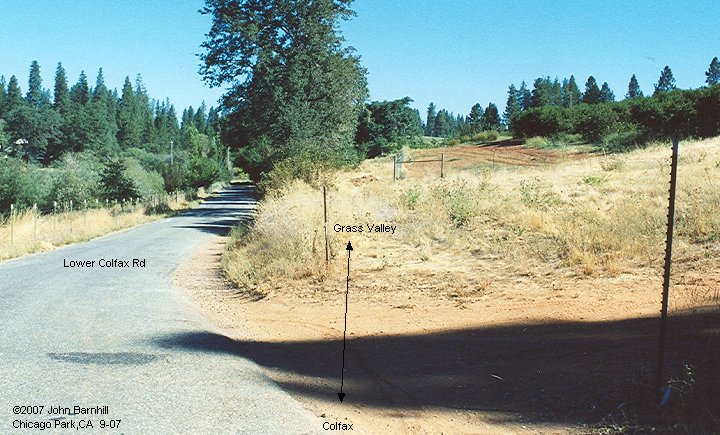
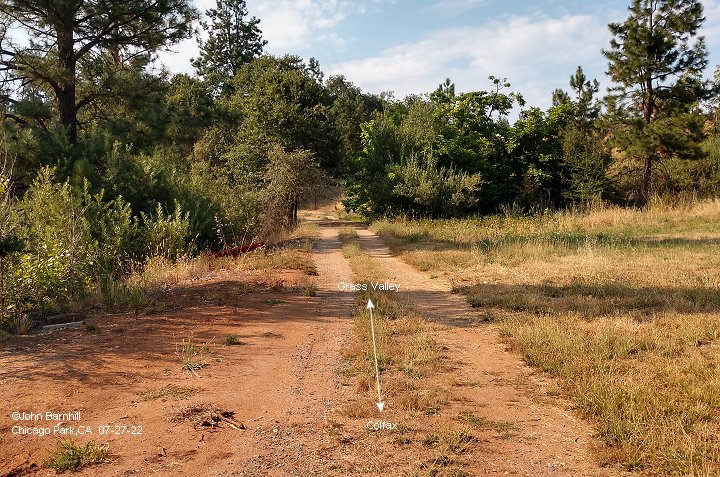
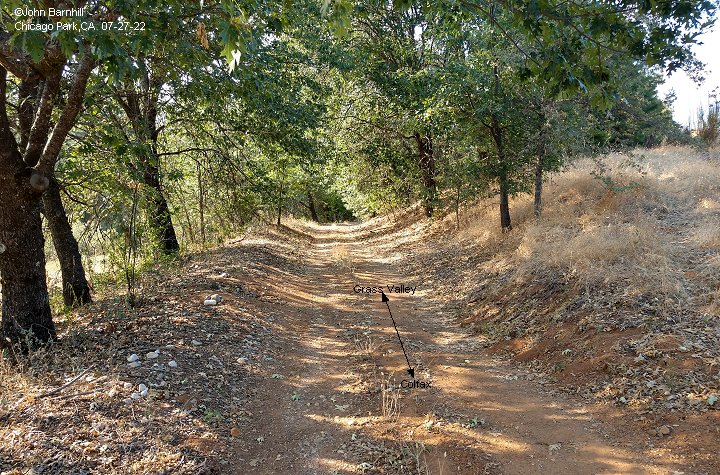
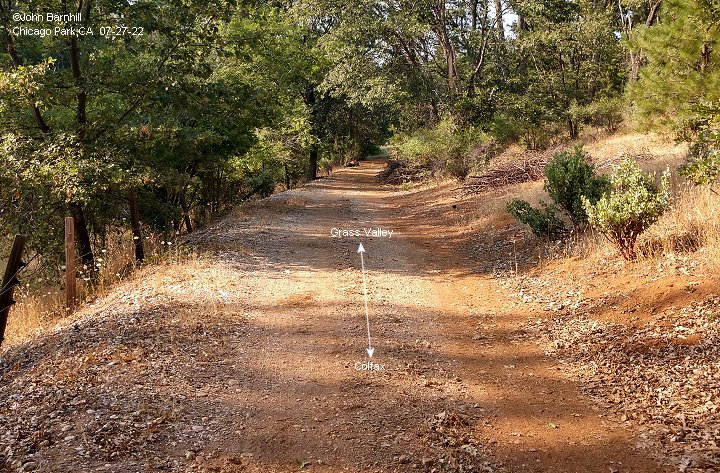
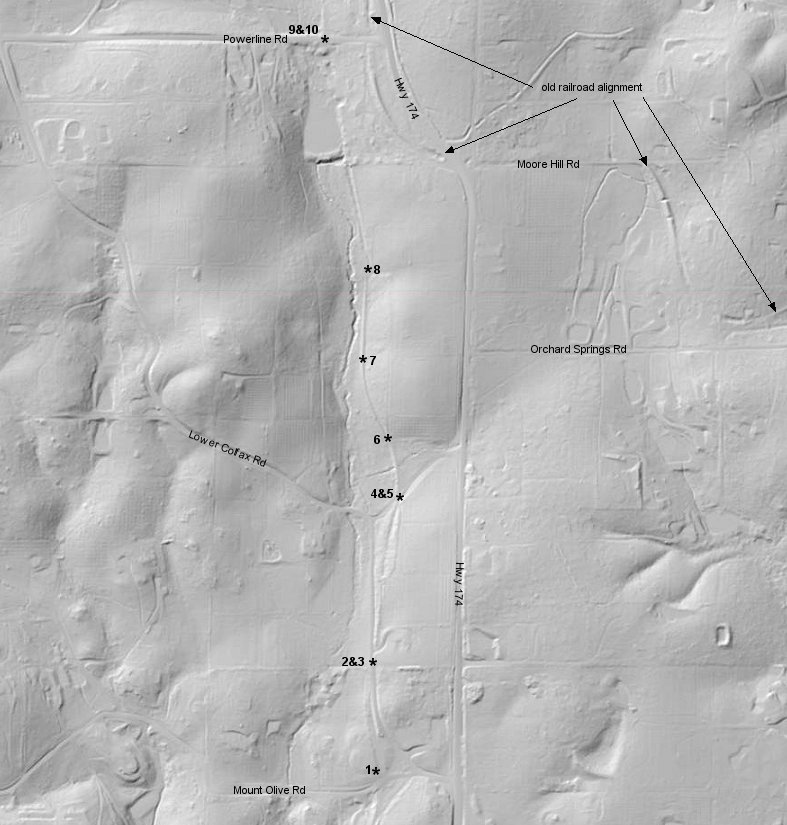
Chicago Park
Image one looks across Mt. Olive Rd towards Colfax. Images 2 and 3 are the crossing of Lower Colfax Road.
Images 9 and 10 are views at the crossing of Powerline Rd.
11. Google sattelite view marked to indicate photo locations.
12. USGS lidar image marked to indicate photo locations.
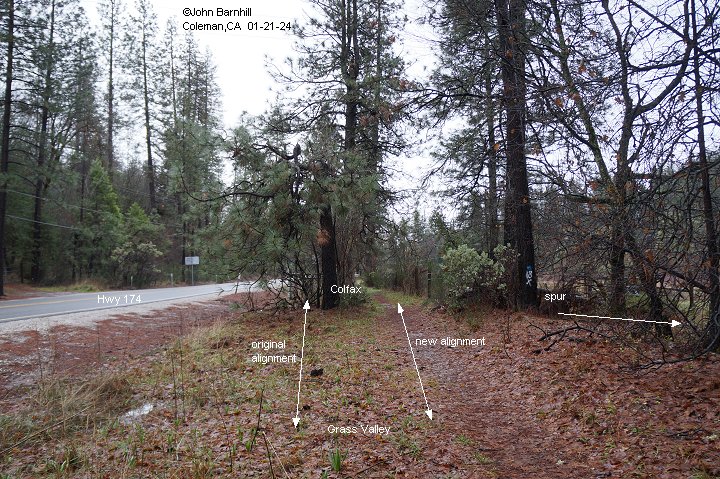
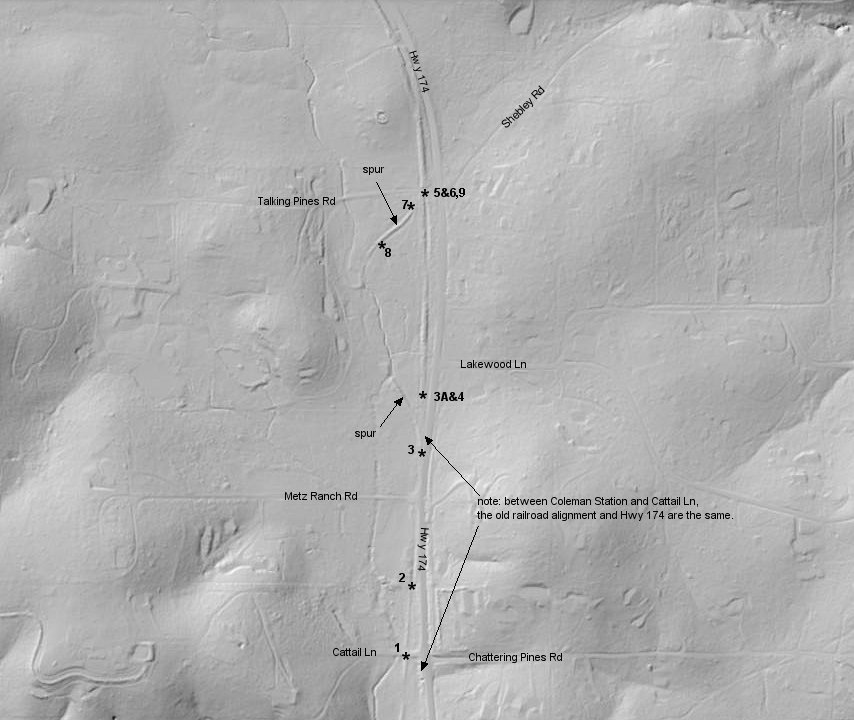
Coleman
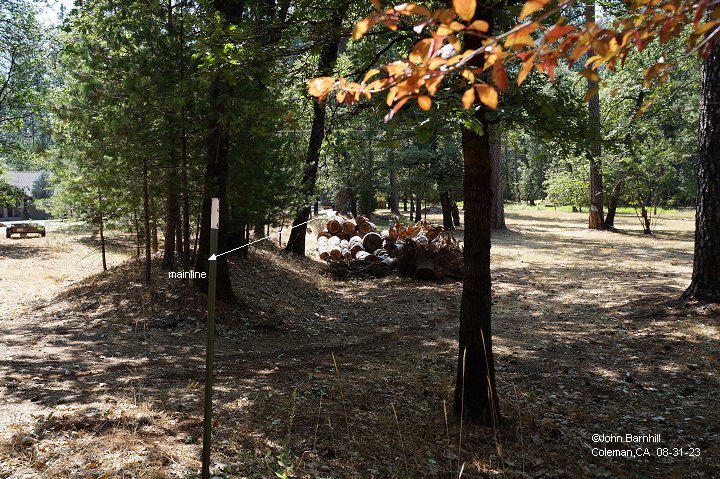
1. View looking towards Colfax at Cattail Lane. 2. Just north of Metz Ranch Rd looking to the south.
3. Looking towards Grass Valley, this is the approximate site of Coleman passenger shelter. There was a siding and a spur here.
3A. Opposite view of image three from the other side of the station site. This is where the original alignment and the new alignment diverged.
4. This is the spur fill as seen from the approximate station site.
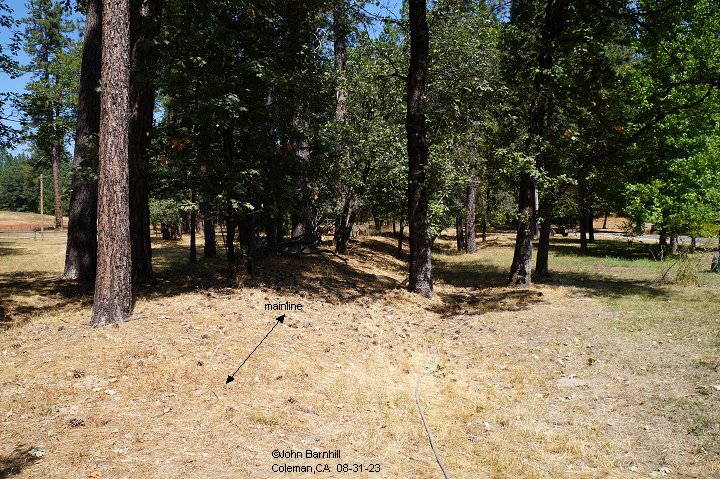
5.-6. Views of the right of way at Talking Pines Road. 5 looks south while 6 looks north.
7.-8. Another spur leaves the main at Talking Pines Rd as well. This is private property and photos are taken with permission.
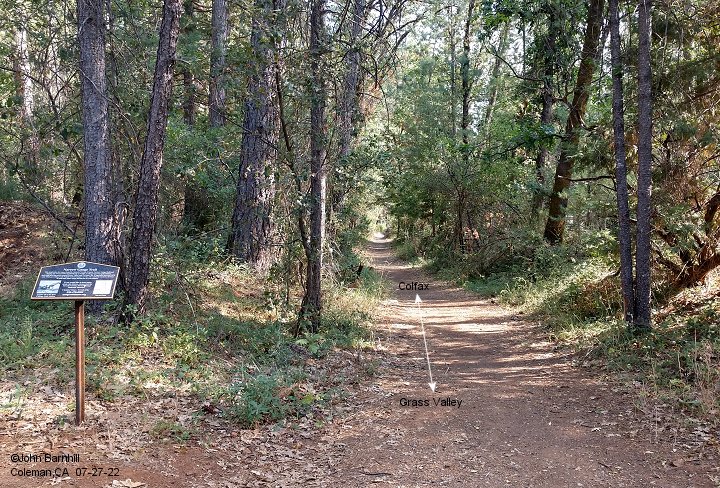
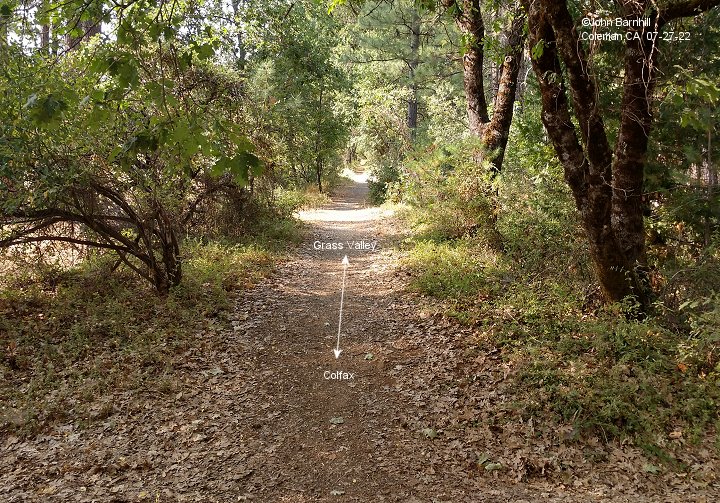
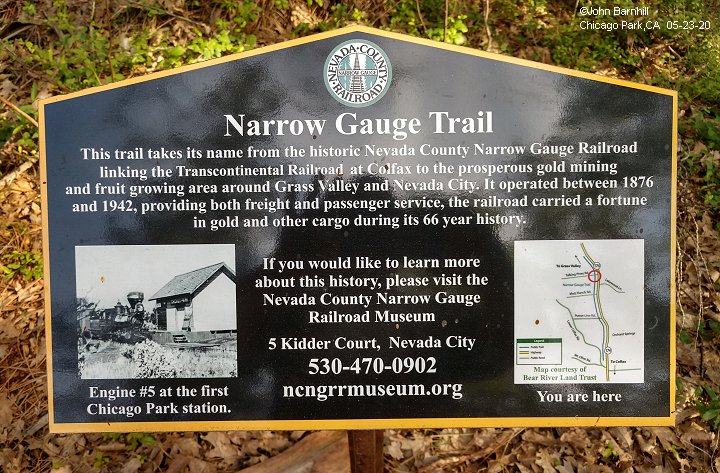
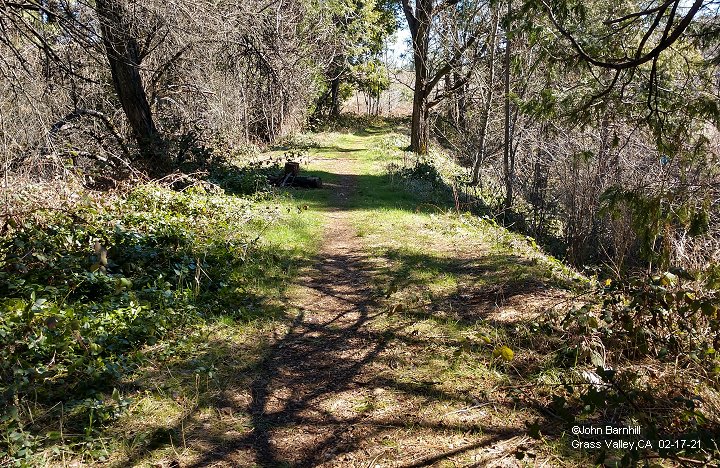
9. The right of way between Maple Way and Powerline Road alongside Hwy 174 has been used as a "sidewalk" for many years.
This section has now been designated the Narrow Guage Trail. Trailhead sign and parking are at Talking Pines Road.
10. Google satellite view marked with photo locations.
11. USGS lidar image marked with photo locations.
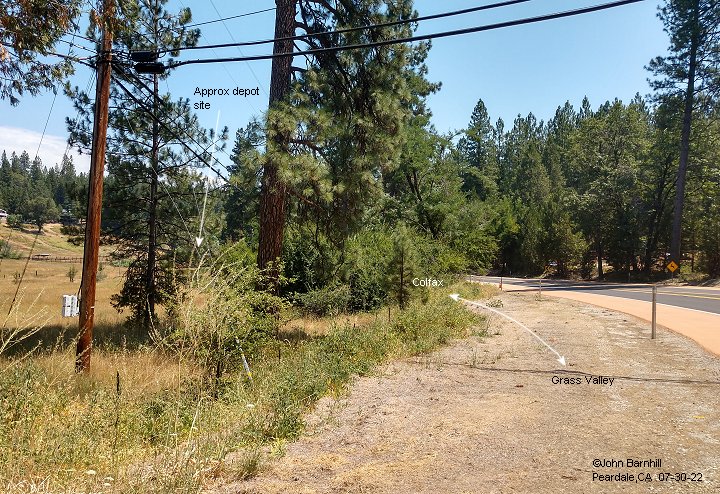
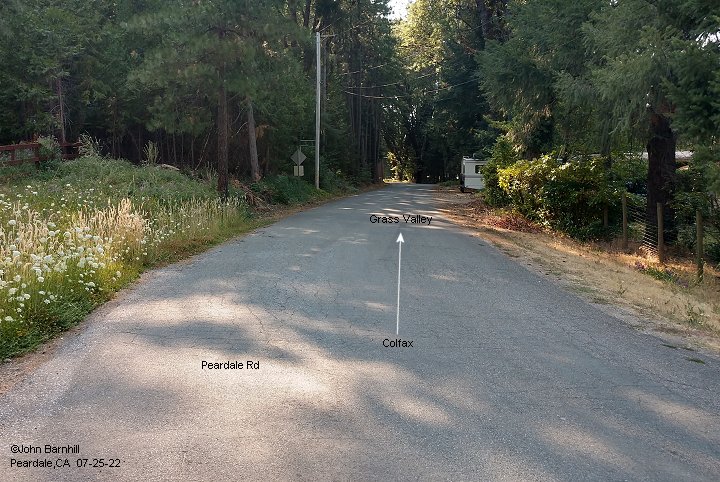
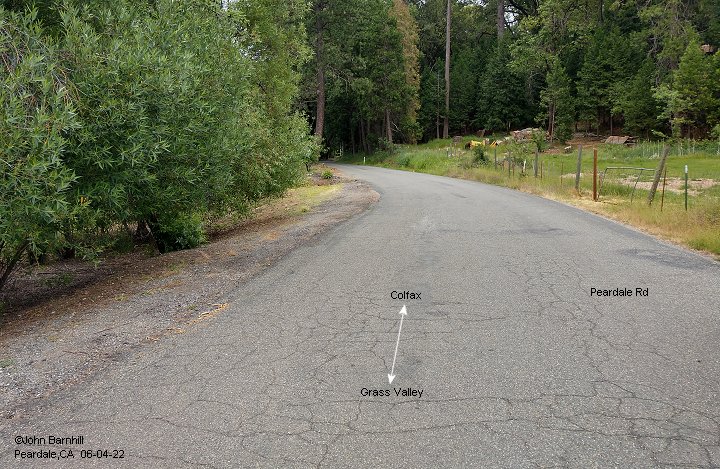
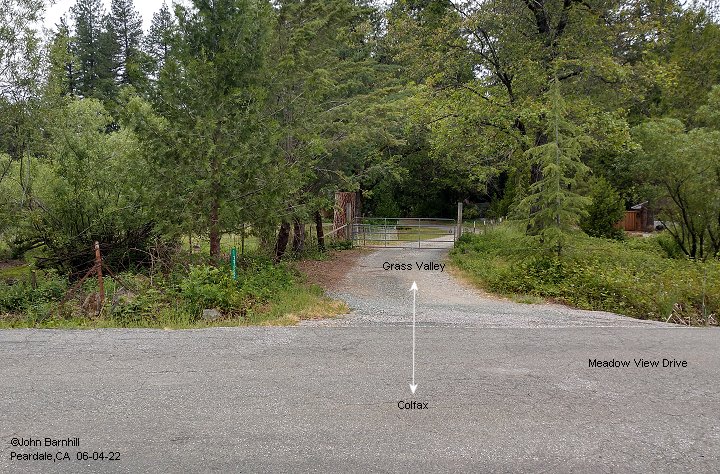
Buena Vista/Peardale
1.-2. These images located at Sunshine Lane just uphill of Highway 174 and just south of where the line crossed the highway.
In image one, the fill forms a dam of a pond.
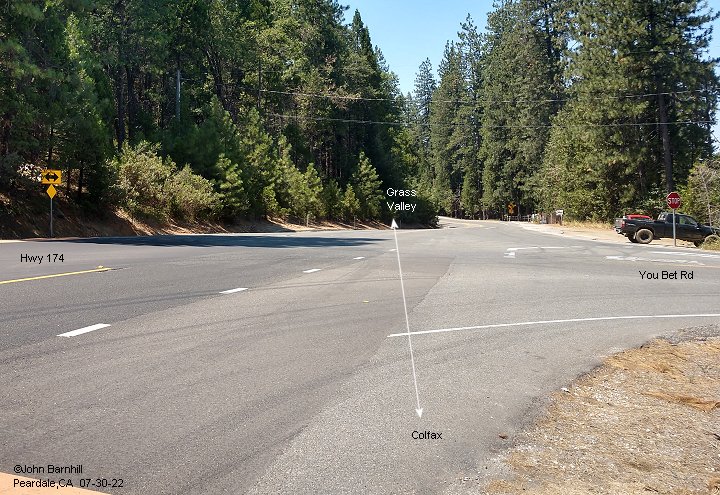
3.-4. The right of way crossed over Highway 174 at the intersection with You Bet Road. Just railroad south of here was the Peardale depot.
5.-8. Images along Peardale Road which was once the right of way.
9.-10. Once again the railroad crossed Hwy 174 at N. Day Road.
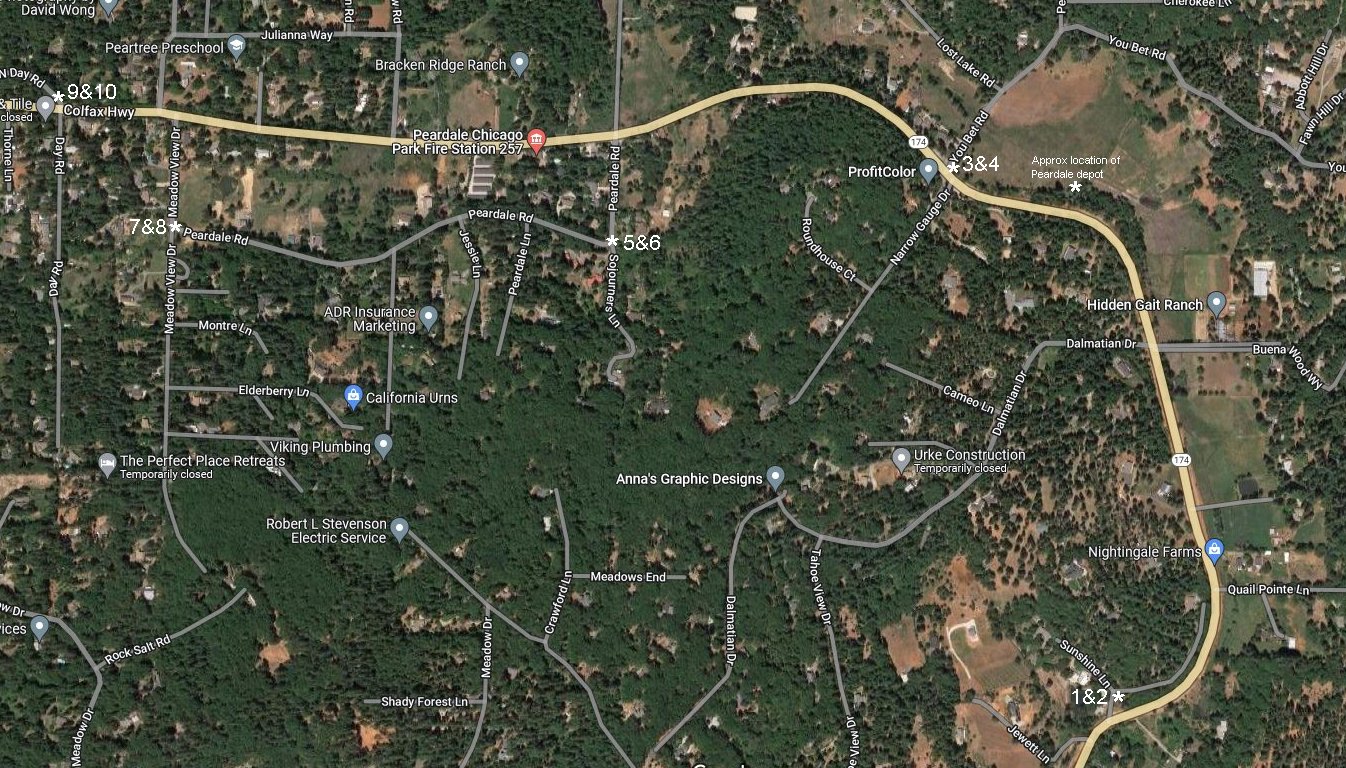
11. Google satellite view marked with photo locations.
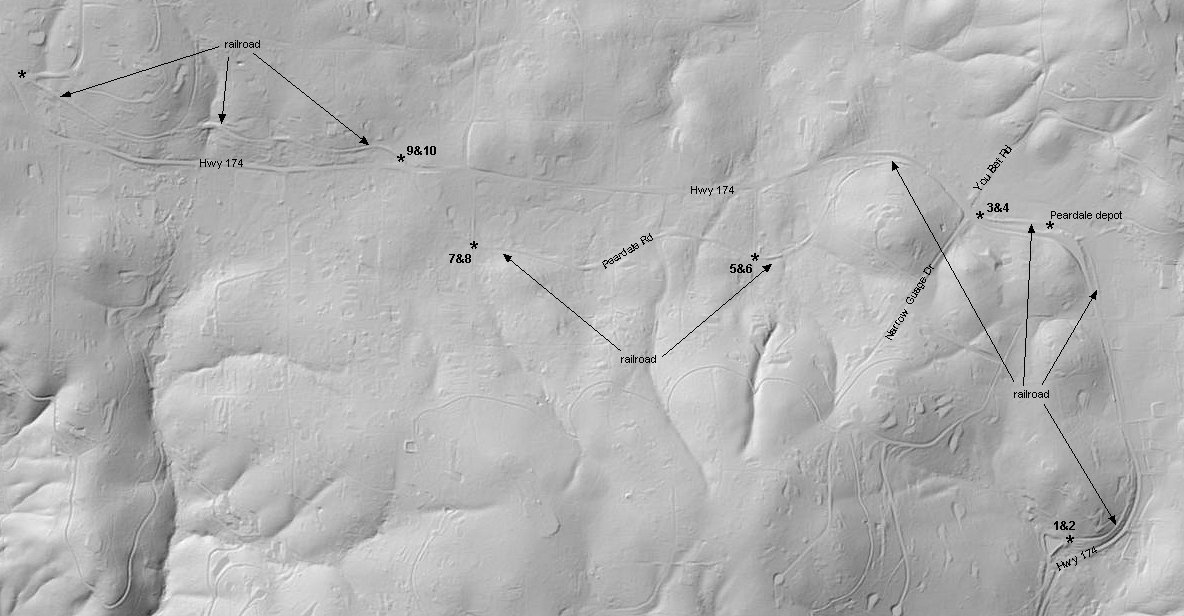
12. USGS lidar image marked with photo locations. Note, asterisk on far left is location of image 1 and 2 in next section.
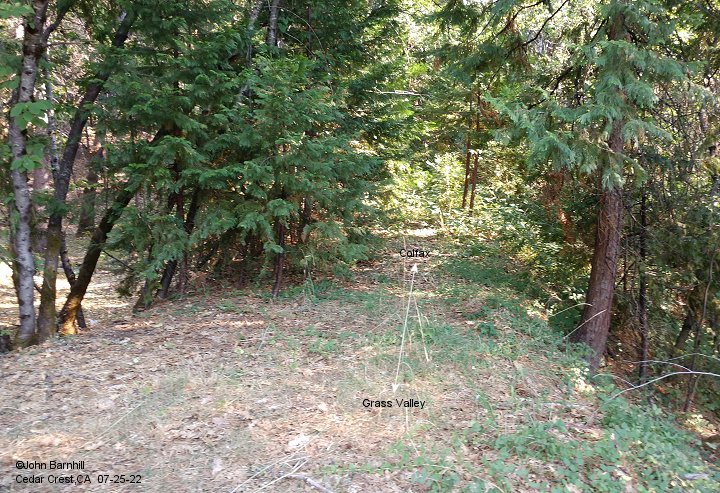
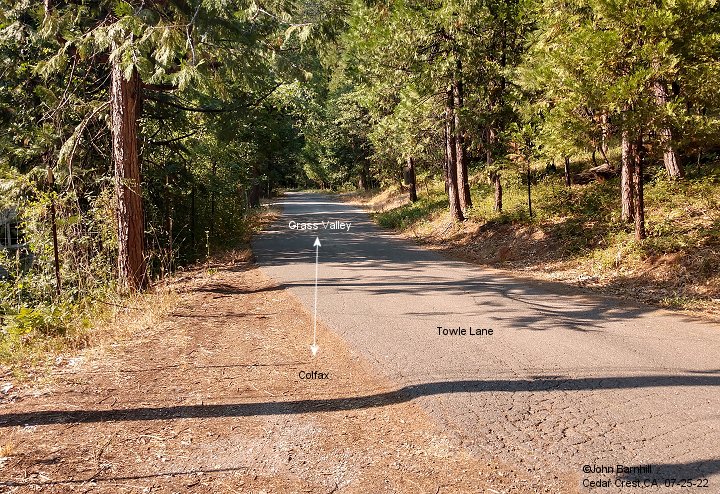
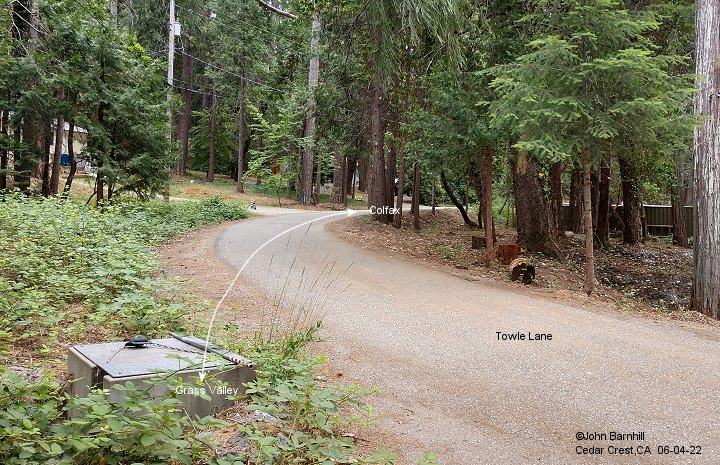
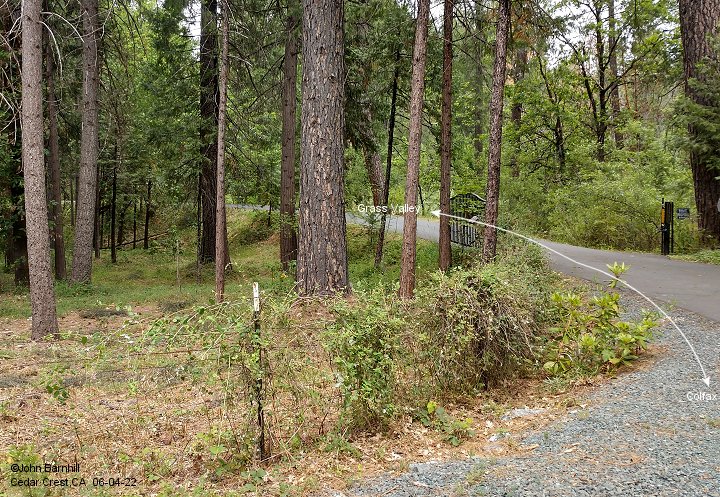
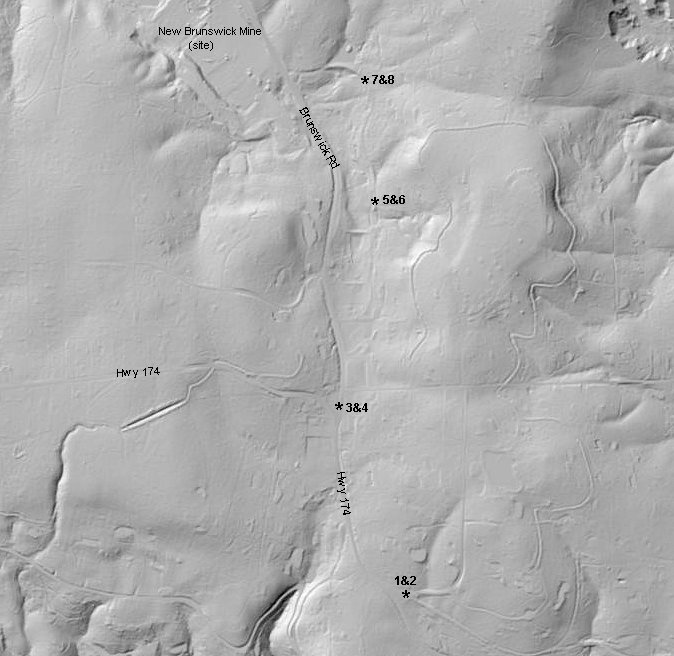
Cedar Kress (aka Kress' Summit)
1.-2. are located at Live Oak Lane and Highway 174. Between here and the summit, the right of way ran where the present
north bound or Grass Valley bound lane of the highway sits.
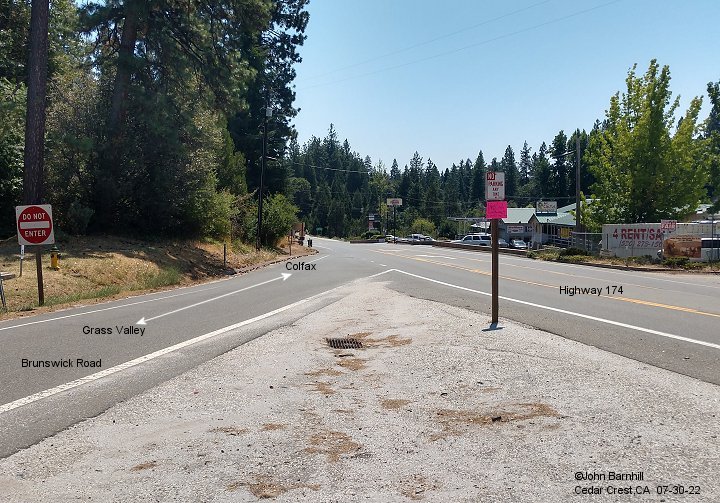
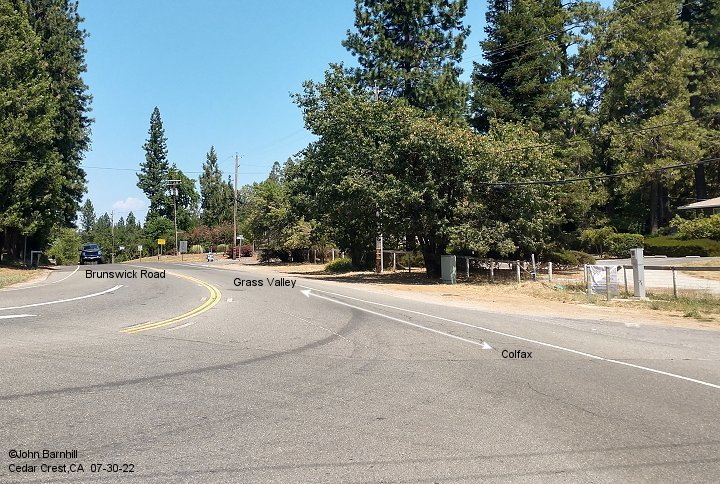
3.-4. are taken at the summit, the intersection of Brunswick Rd and Highway 174. A small bus stop type passenger shelter once stood here as well.
5.-8. On the northern slope of the summit, these images are taken along Towle Lane.
9. Google satellite view marked with photo locations.
10. USGS lidar image marked with photo locations.
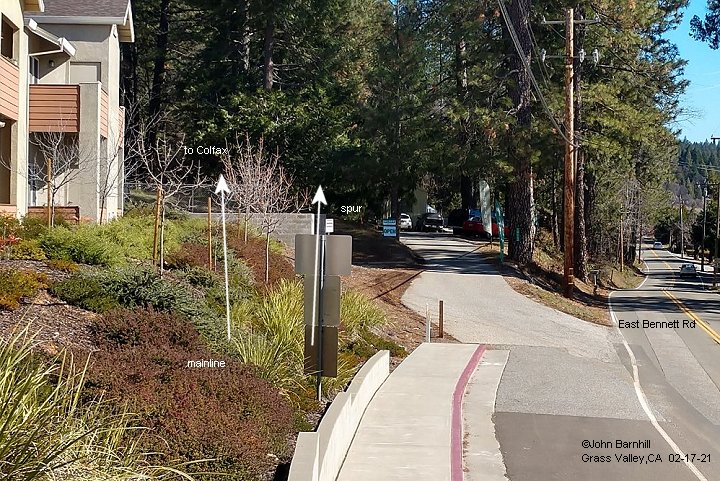
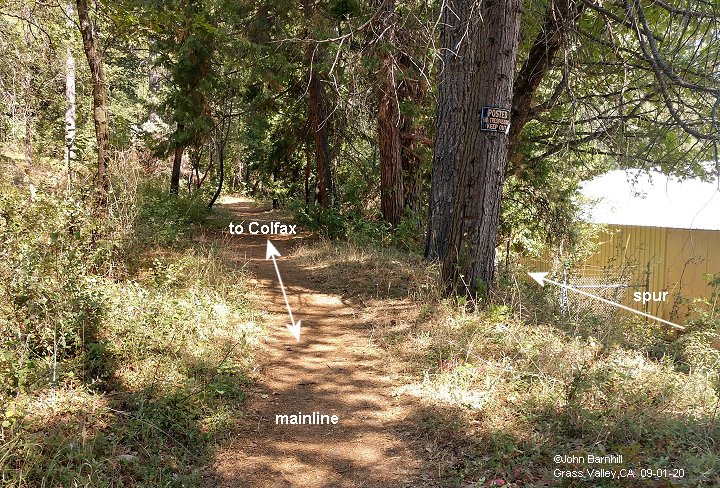
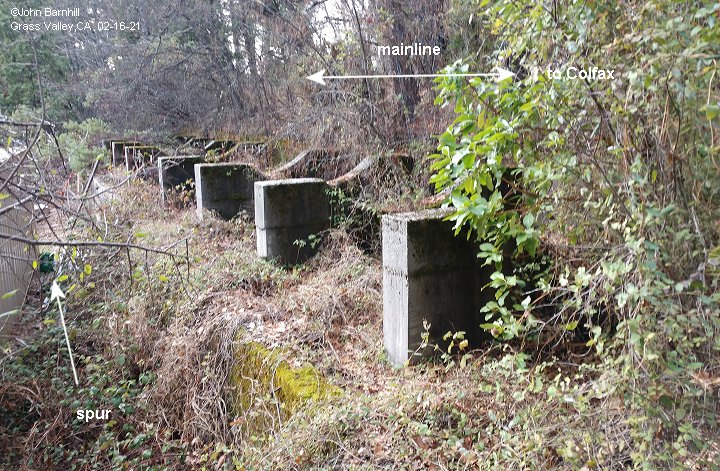
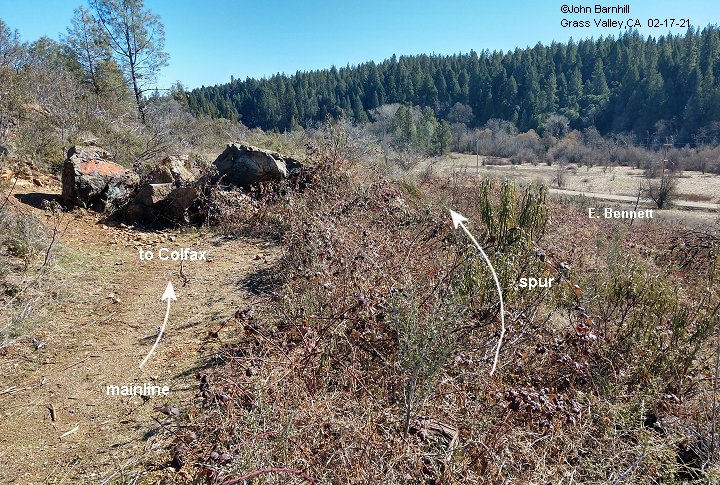
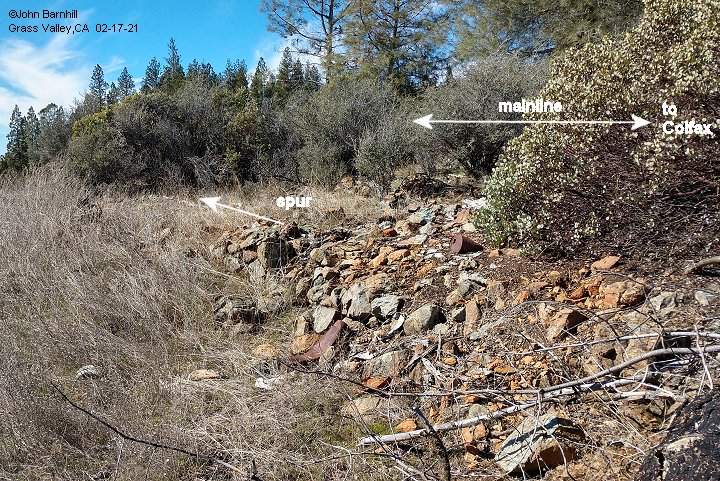
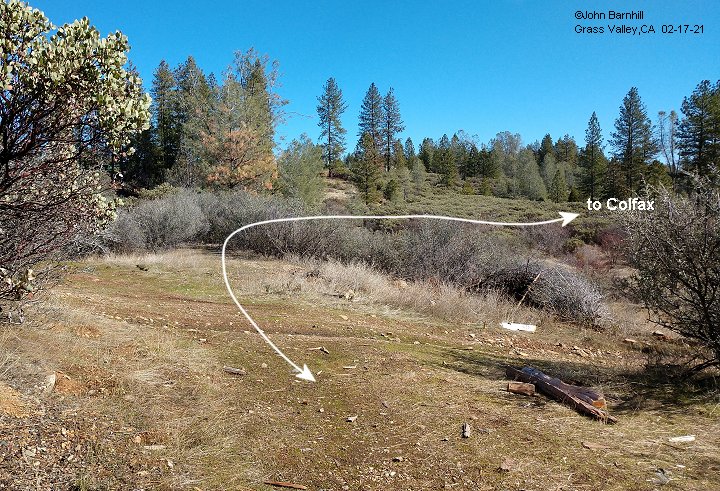
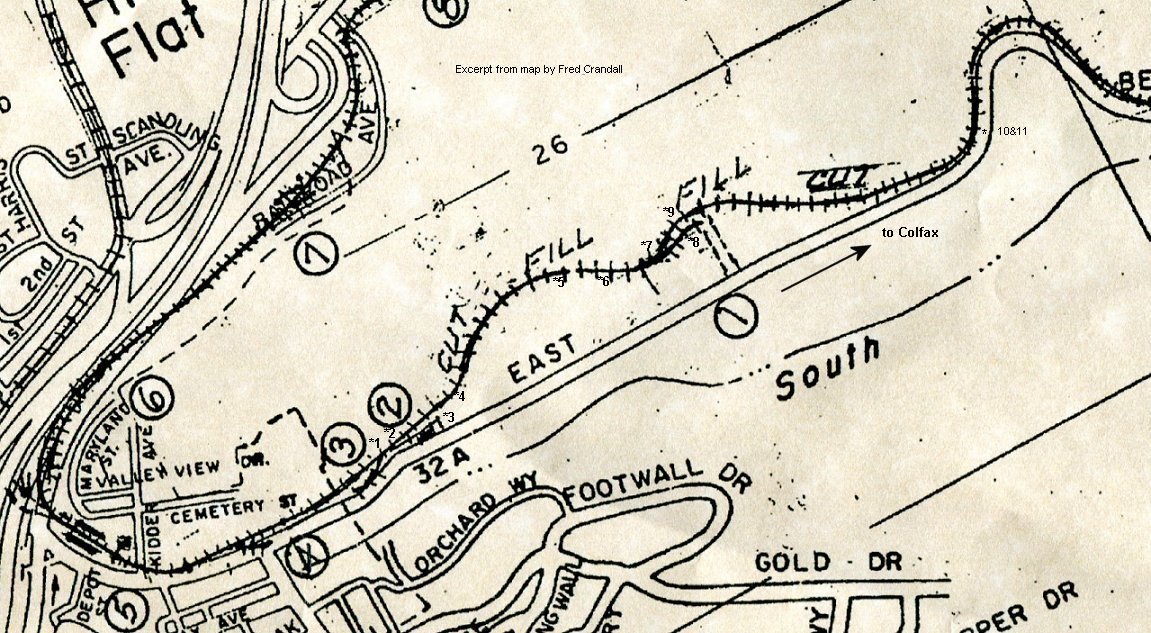
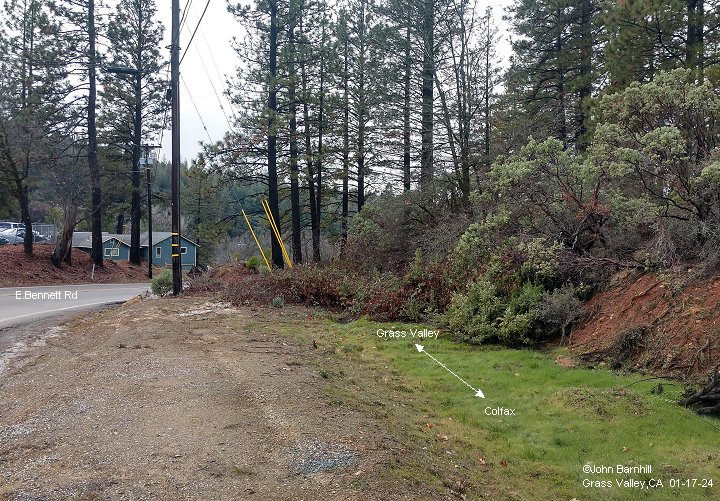
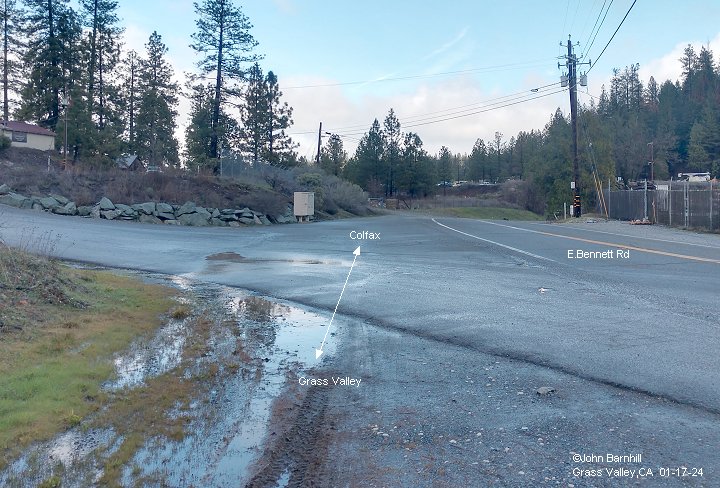
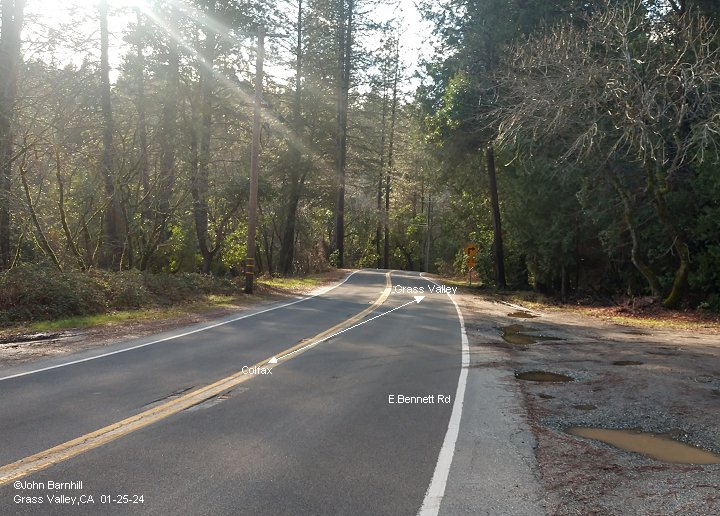
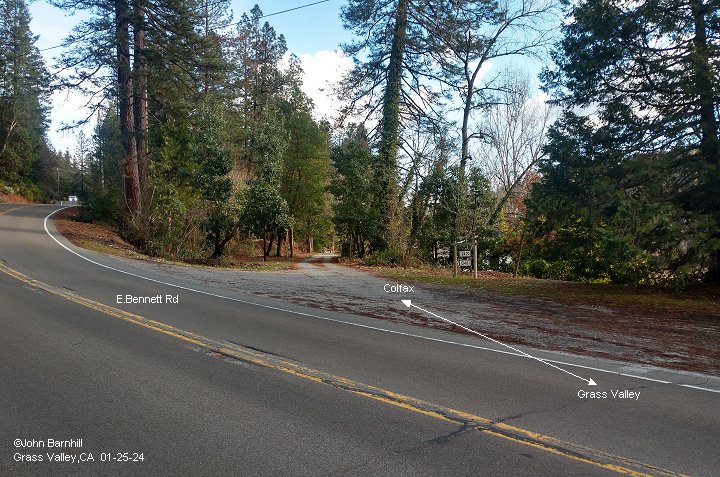
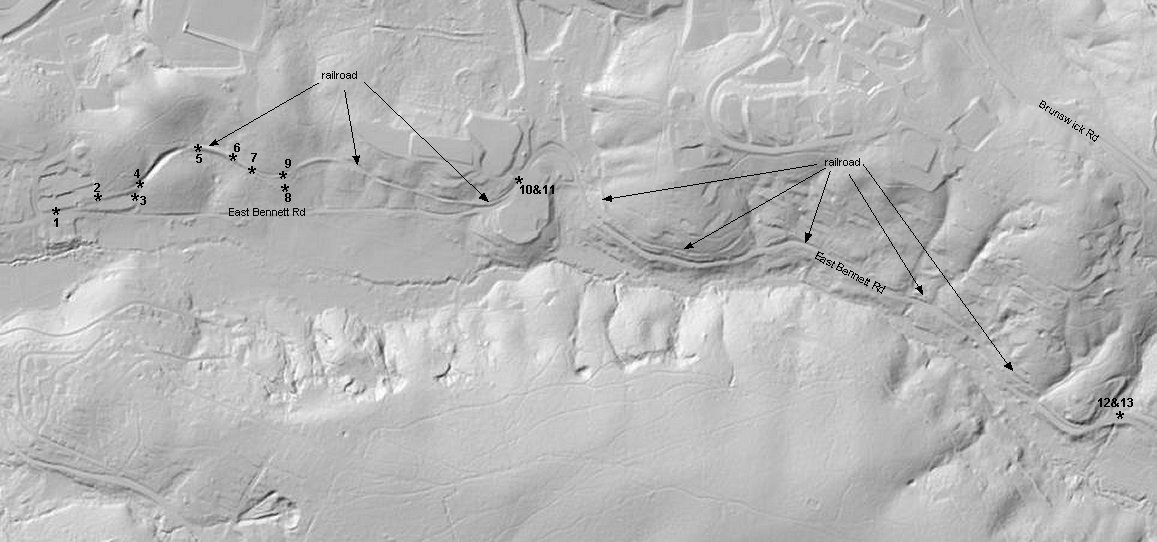
East Bennett Road
1-3. The Alpha Hardware Spur is described as 300' long to the oil tanks at the end. Built 1939. Photo 3 is of the tank saddles
that still stand. Currently the site is occupied by Platt Electric.
4. Just east of the end of the spur on the mainline is a large cut.
5. Heading towards the east, the cut empties onto a fill.
6. The right of way continues eastward from the end of the fill. The Powder Spur splits from the main near here.
7. The Powder Spur was 350' long and used to unload black powder cans for the nearby mines. It is very hard to see in the image.
8. Near the end of the Powder Spur, though hard to see, these rocks are piled up by human hands. View looks back towards Grass Valley.
9. This view is from a similar spot as 8 but along the mainline looking towards the east.
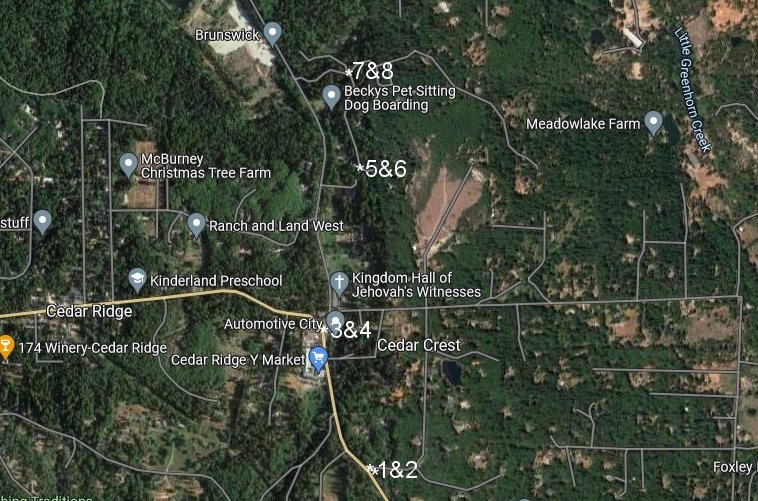
*. Excerpt from a map by Fred Crandall. Powder Spur is marked by a circled '1'. The Alpha Hardware Spur is marked by a circled '2'.
The map is also marked with corresponding numbers for the accompanying photos.
10.-11. Near the big horshoe curve about halfway through E Bennett Rd's length.
12.-13. This is the grade crossing at the top of E Bennett. where the line exits the
Brunswick mine property and continues down E Bennett towards the Grass Valley yard.
14. USGS lidar image marked with photo locations.
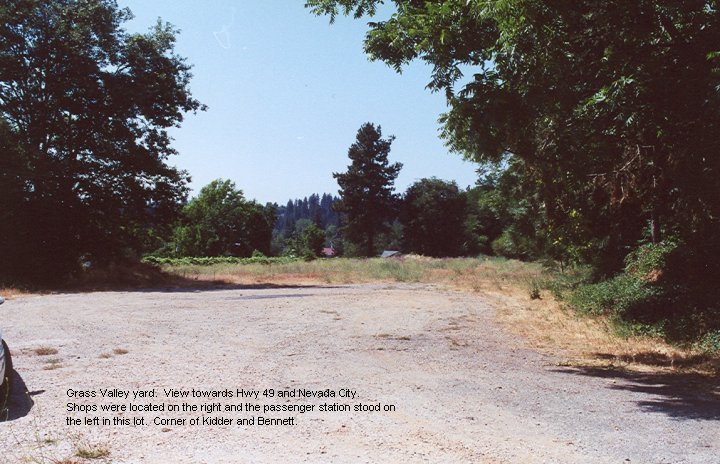
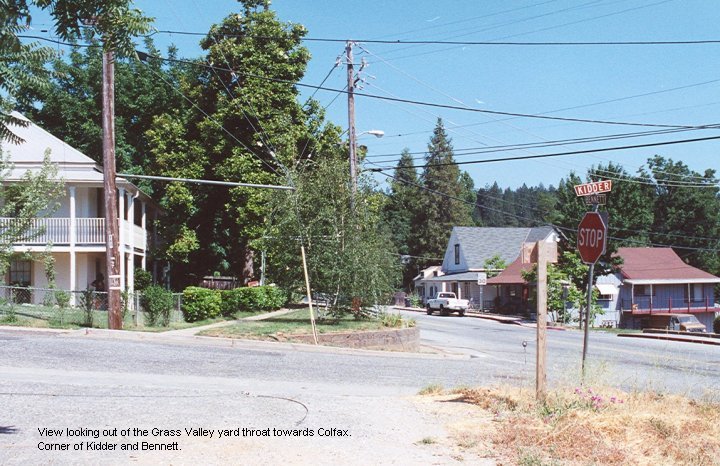
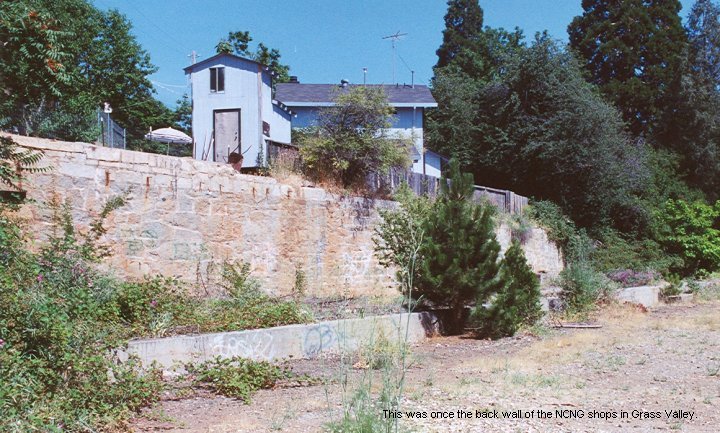
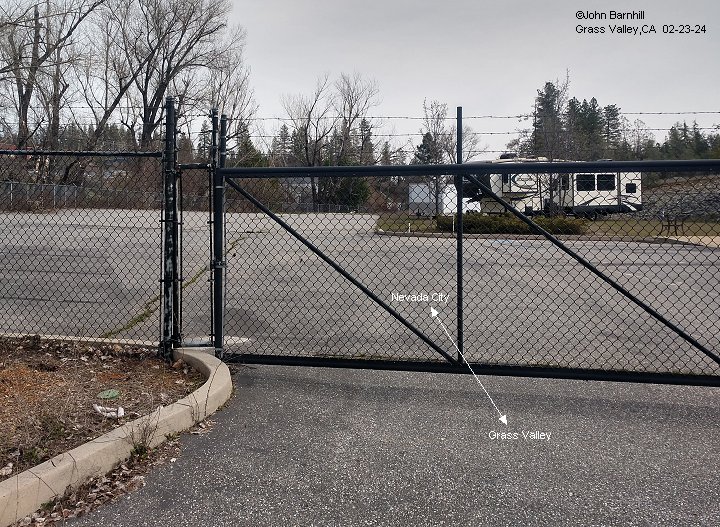
Grass Valley Yard
1. This was once Grass Valley yard located at the corner of Kidder and Bennett.
2. Looking out the entrance of Grass Valley Yard towards Colfax.
3. The back wall is all that remains of the Grass Valley railroad shops.
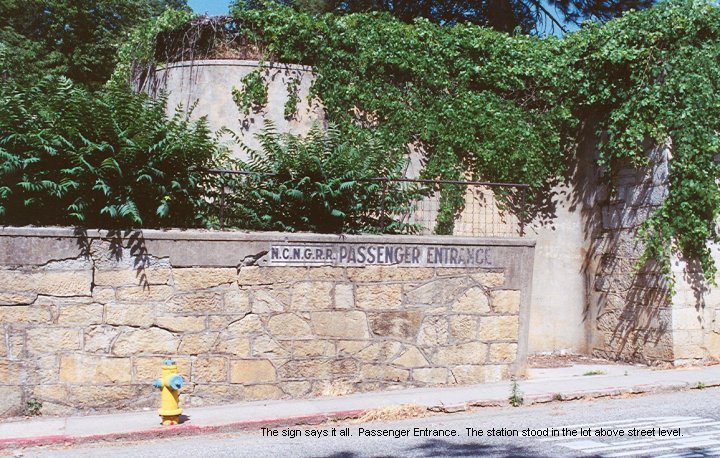
4. The Passenger Entrance on Bennett Street in Grass Valley.
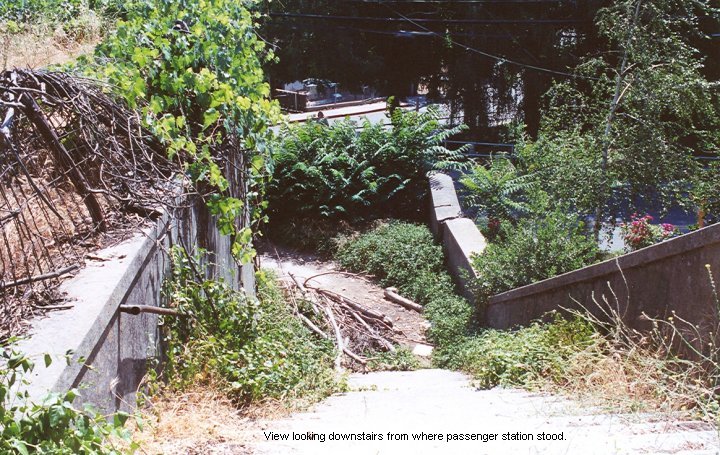
5. Looking back down the stairs from the yard level where the station stood.
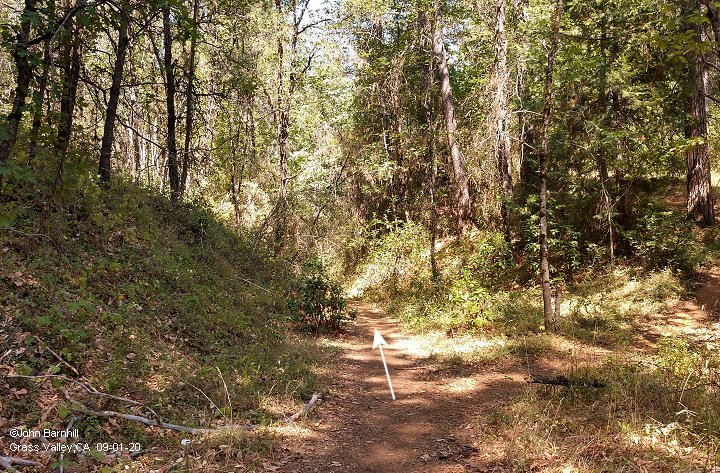
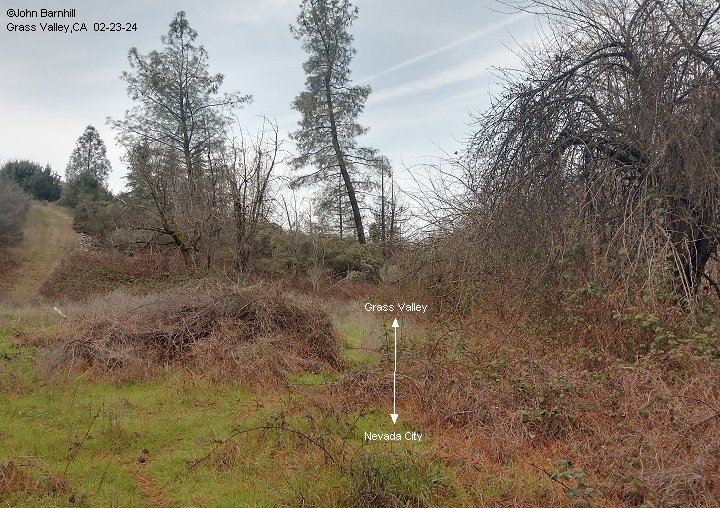
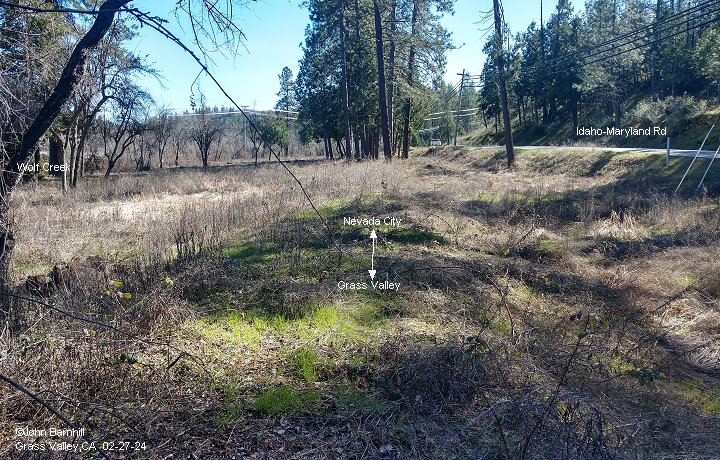
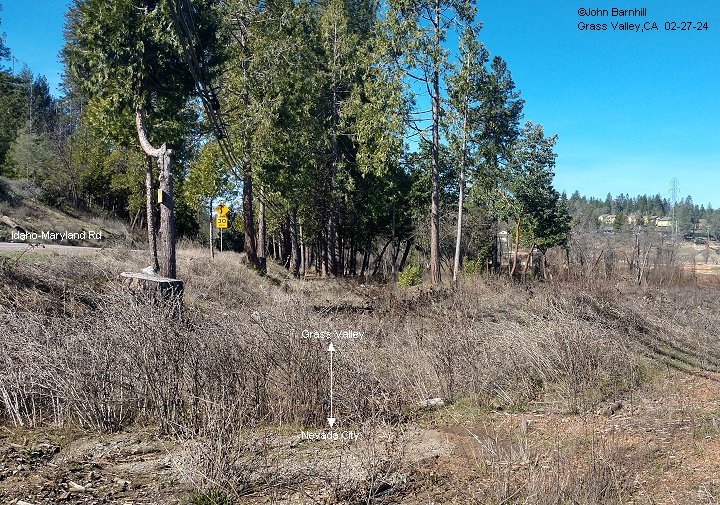
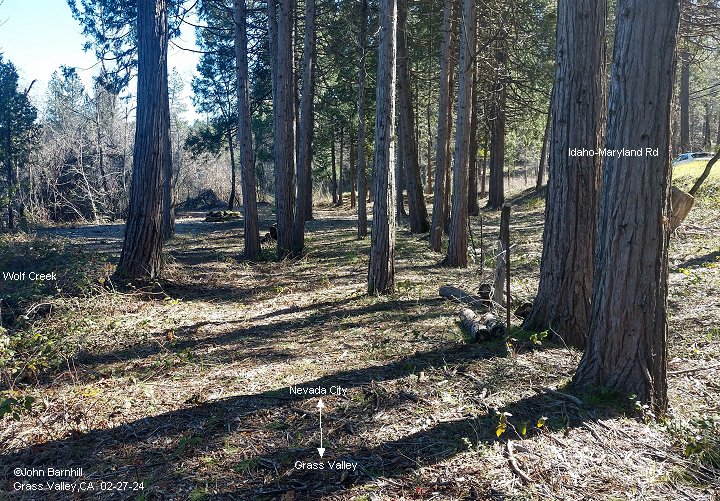
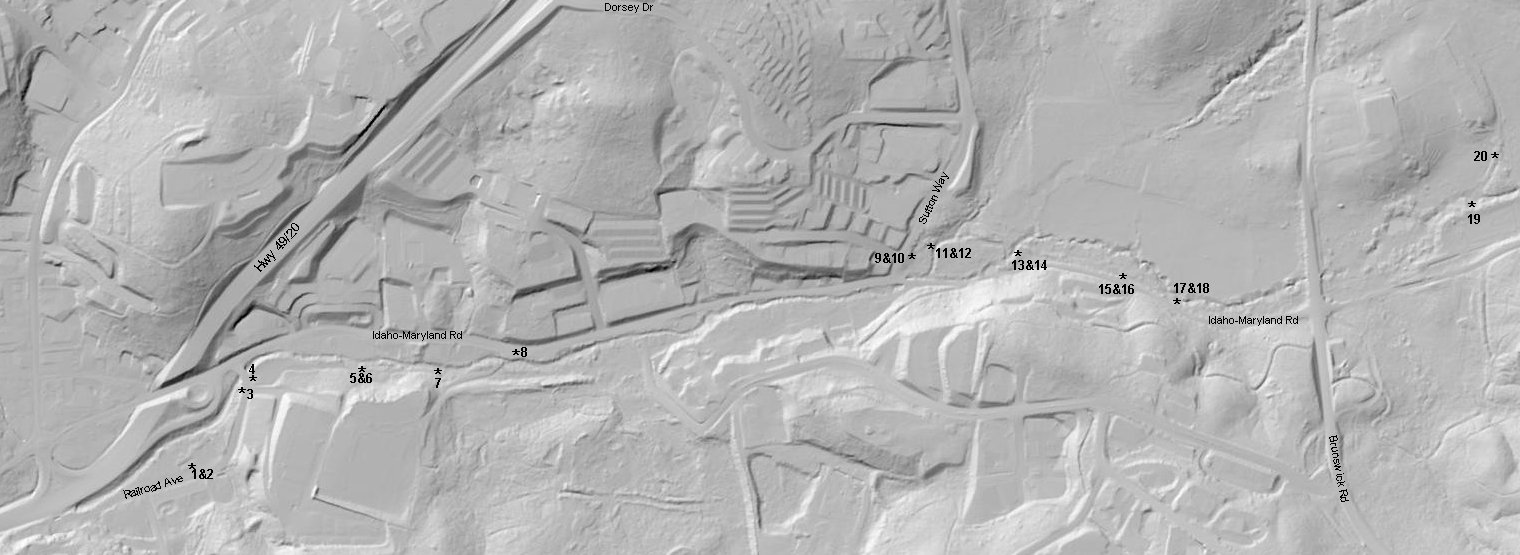
Idaho-Maryland Rd
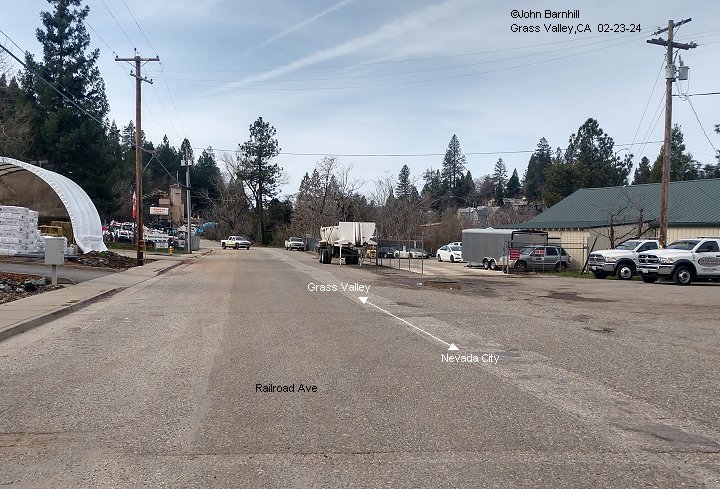
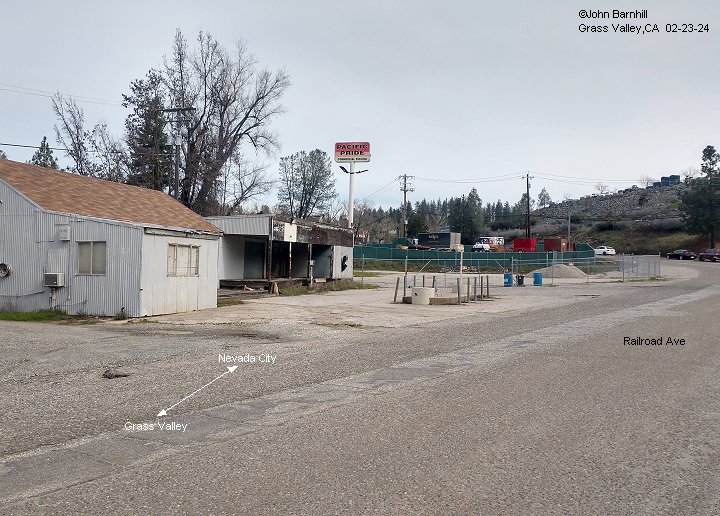
1.-2. Leaving the Grass Valley yard towards Nevada City, the line ran along Railroad Ave passing through the site of the old Gallino Dairy.
A couple of the buildings still standing date back to the dairy. Image 1 looks back towards the yard that lies just around the hill in the
background. Image 2 faces the opposite direction.
3.-4. These opposite views are taken near the intersection of Railroad Ave and Idaho-Maryland Rd. Image 3 looks back across the site of the dairy.
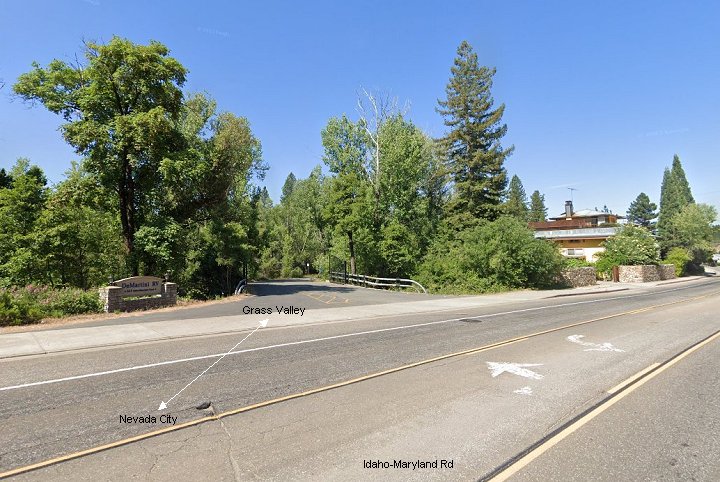
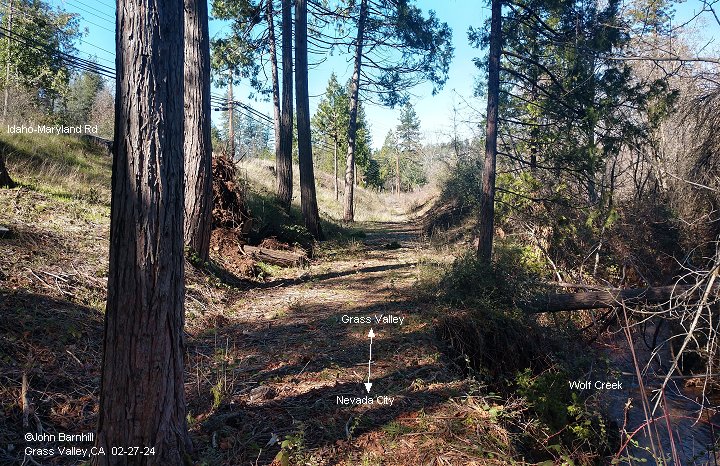
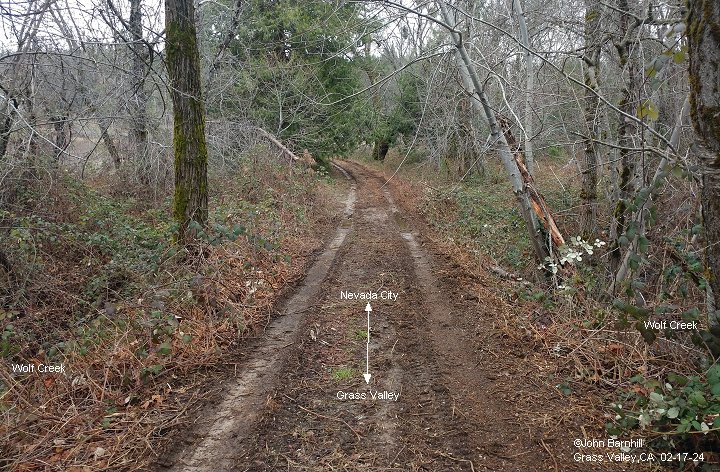
5.-6. This section of line runs below DiMartinni RV on the south side of Wolf Creek.
7. Still on the south side of Wolf Creek near the Idaho Mine looking back towards the previous two photos.
8. Google street view of the approximate crossing of Wolf Creek. From here to Sutton Way has been completely wiped out by modern construction.
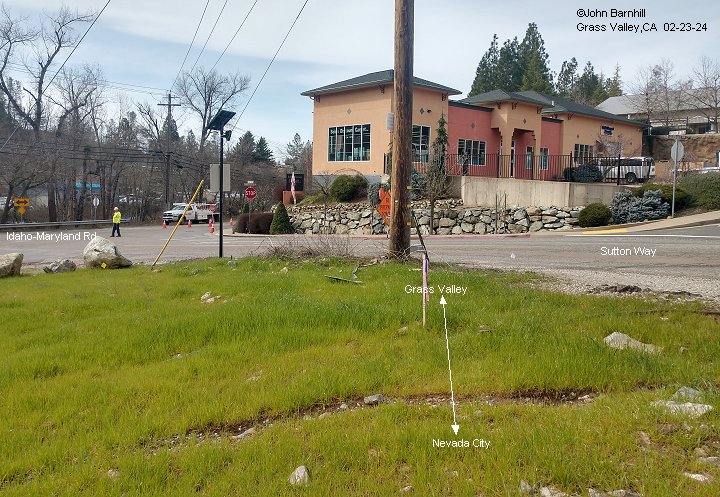
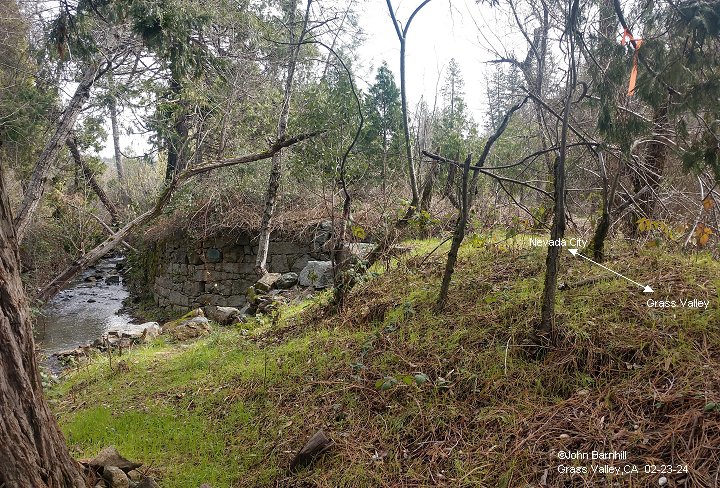
9.-10. Opposite views near the intersection of Sutton Way and Idaho-Maryland Rd. A bridge site crossing a Wolf Creek branch sits just eastward in the trees.
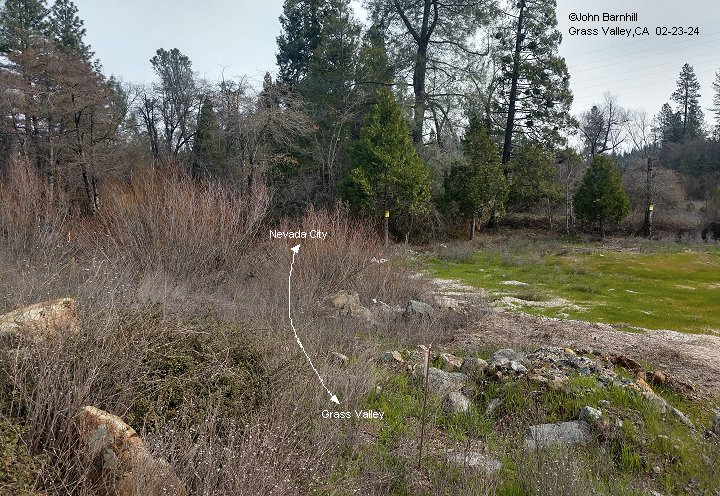
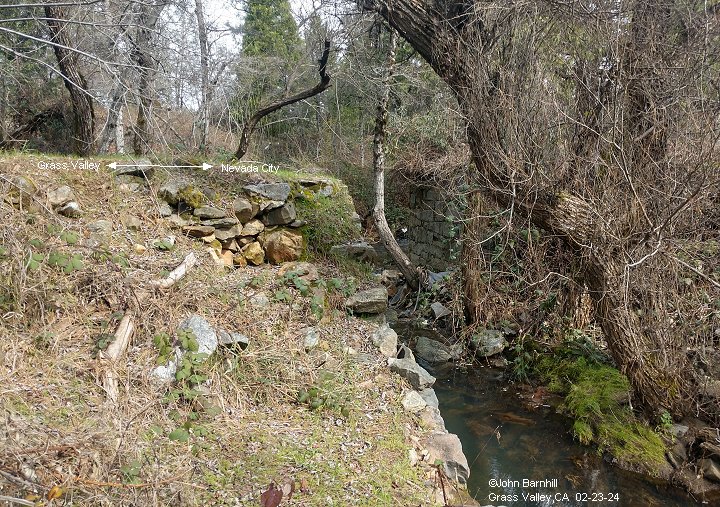
11.-12. Two views of the bridge site. Even to this day, the fitted rock wall and abutment are spectacular.
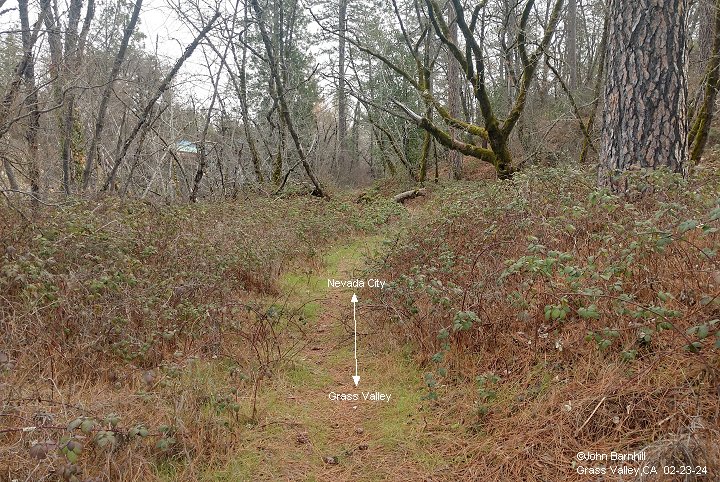
13. Just a short ways from the previous images, the line once again crosses Wolf Creek proper here. Image 13 looks back towards previous photos.
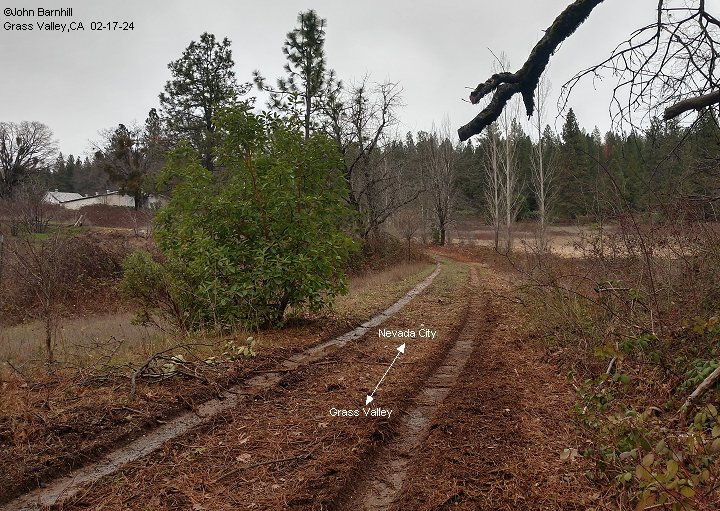
14. Continuing towards Nevada City from image 13. A nice low fill can be found.
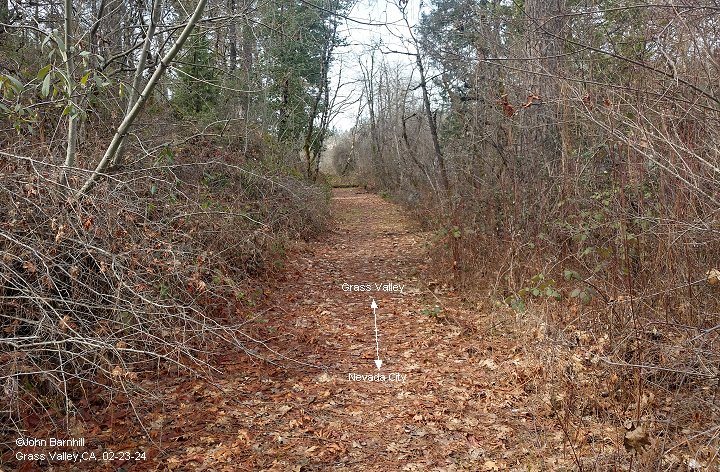
15.-16. Further along the right-of-way, a shallow cut can still be seen.
17.-18. Still on the south side of Wolf Creek and below Idaho-Maryland Rd nearing Brunswick Rd. Image 17. looks back through the cut in the previous images.
19.-20. Now on the east side of Brunswick Rd, the line crosses Wolf Creek again in a sweeping turn north towards Town Talk.
21.-22. Google satellite view and USGS lidar images are marked with the locations of the previous images.
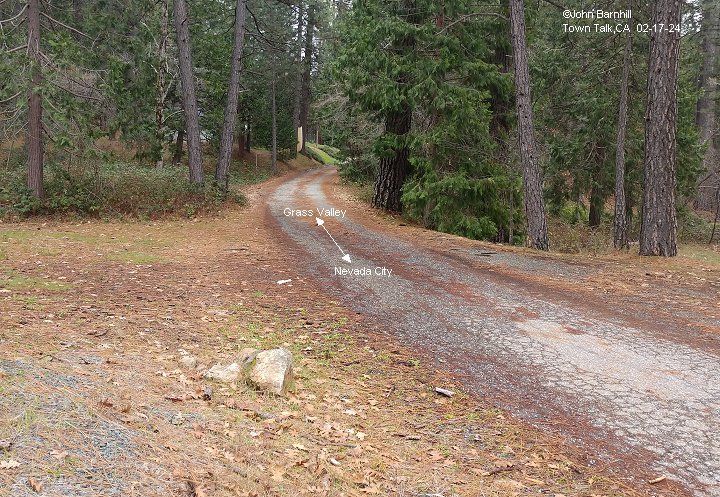
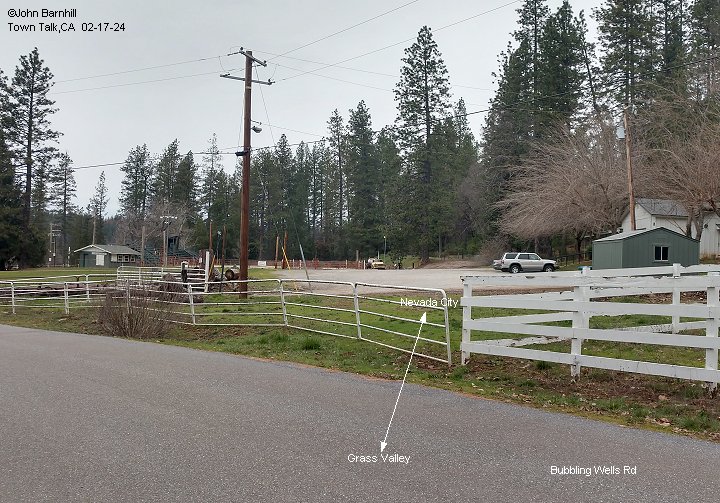
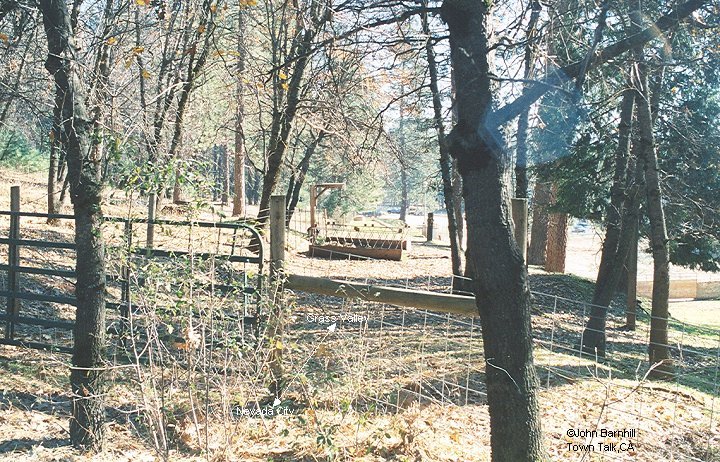
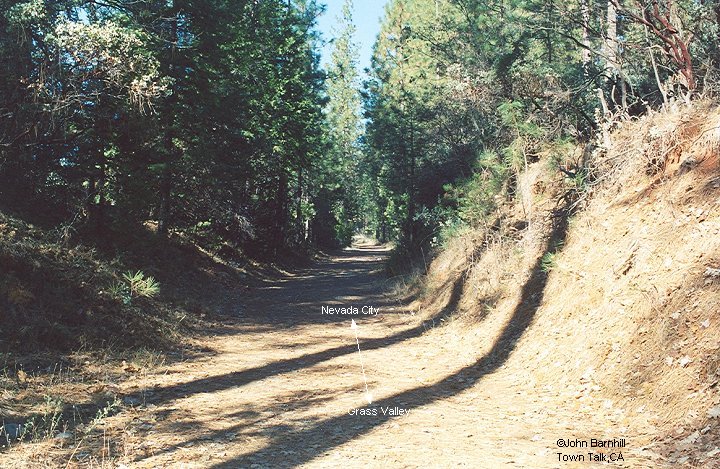
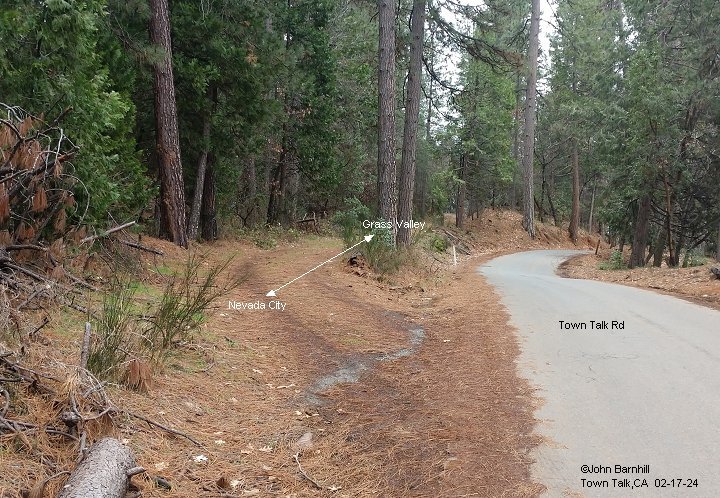
Town Talk
1.-2. Views in both directions from Bubbling Wells Rd. The railroad passes behind the horse arena in image 2.
3.-4. Opposite views taken at Glenbrook Estates Ct just off of Town Talk Rd. 3 looks back towards the previous images.
5. The line joins Town Talk Rd here. This view looks back south towards the cut in image 4.
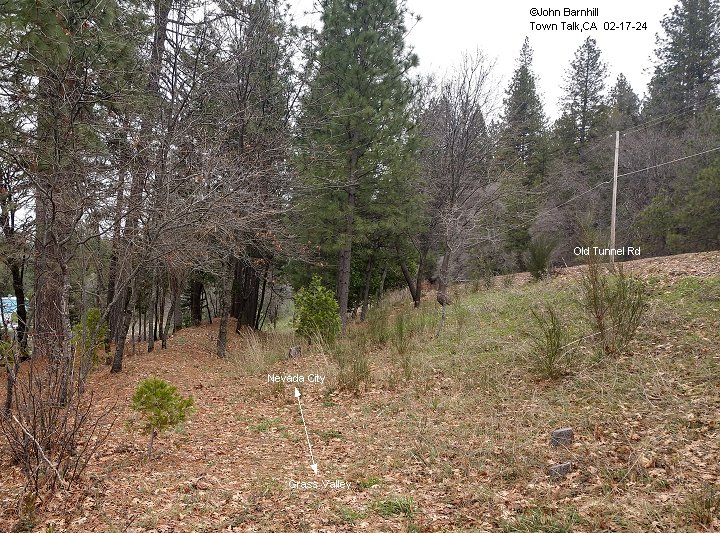
6. Just across and uphill from the intersection of Town Talk Rd and Old Tunnel Rd, the line passes through a couple shallow
cuts along its climb to Town Talk Tunnel.
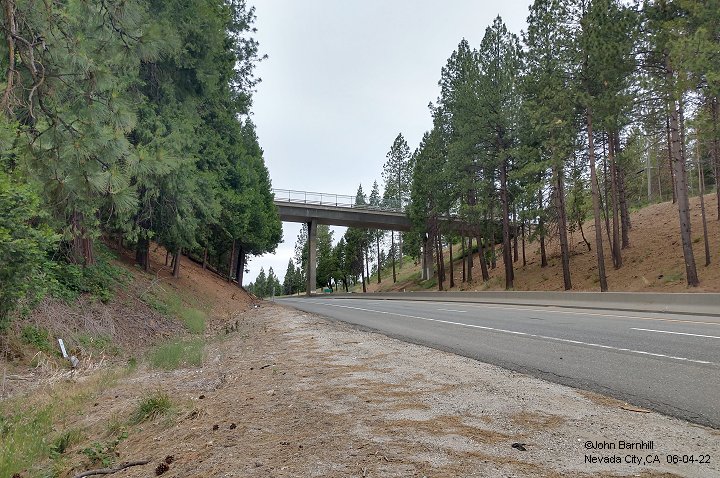
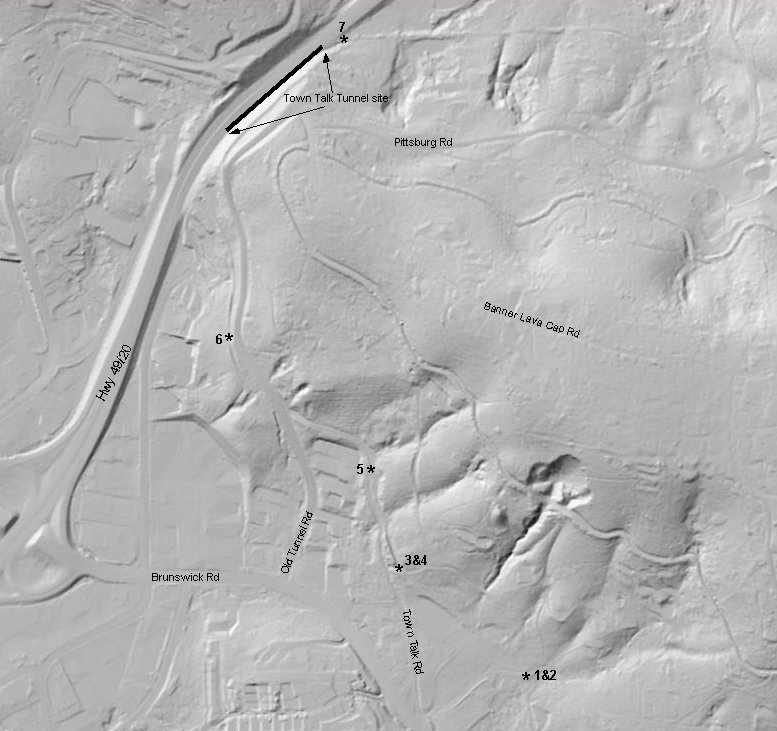
7. This cut and bridge(Banner Lava Cap Rd) on Hwy 49/20 is the site of the Town Talk tunnel. This view looks towards Grass Valley.
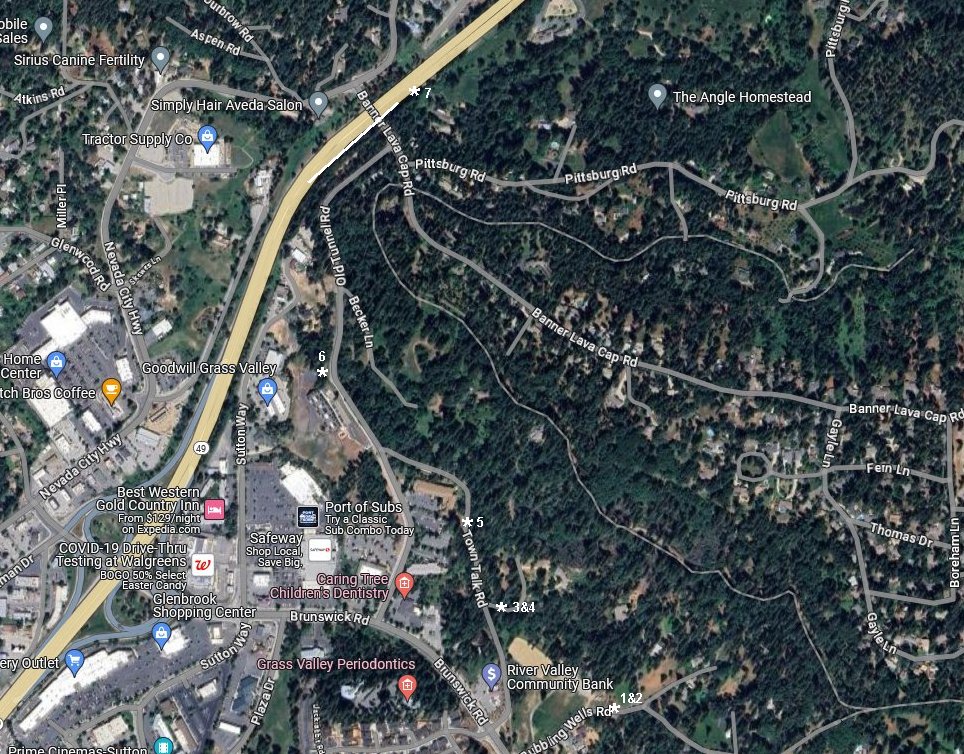
8. Google satellite view is marked to indicate where the photos are taken.
9. USGS lidar image marked with photo locations.
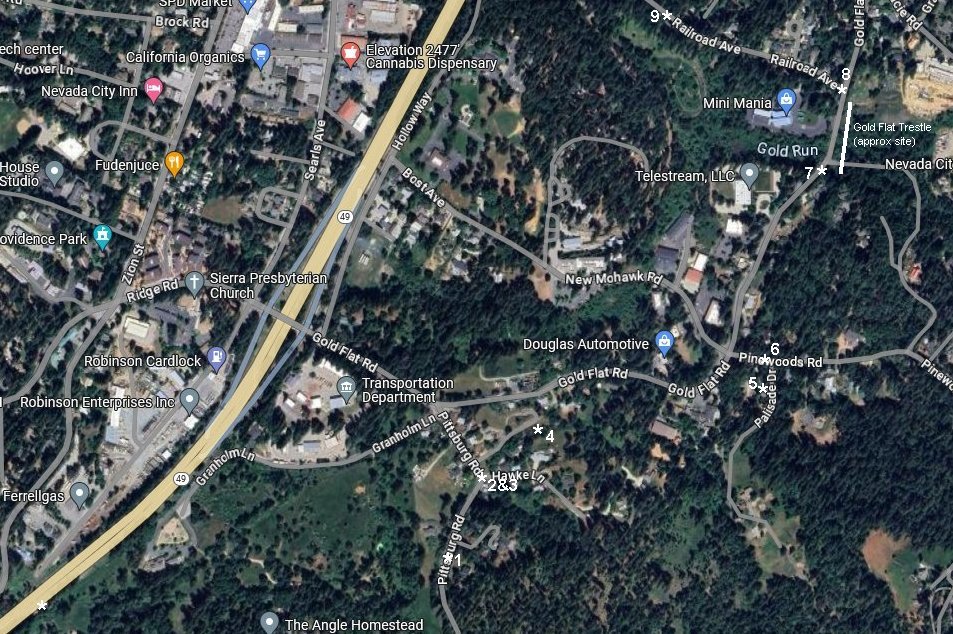
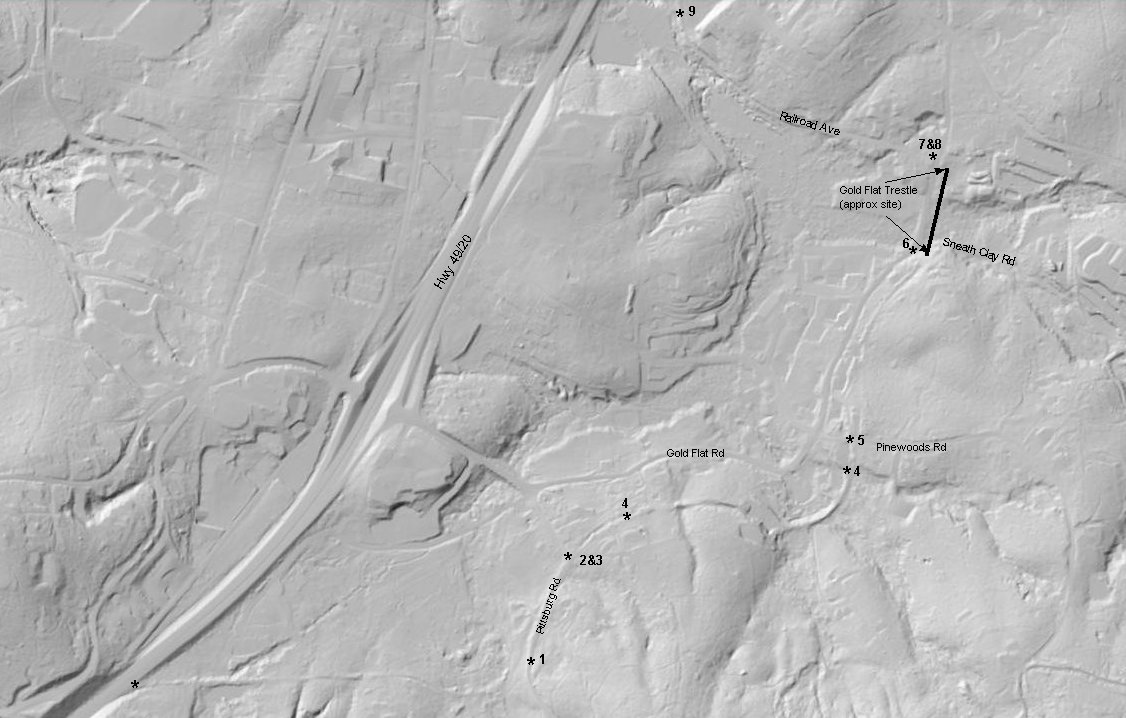
Gold Flat
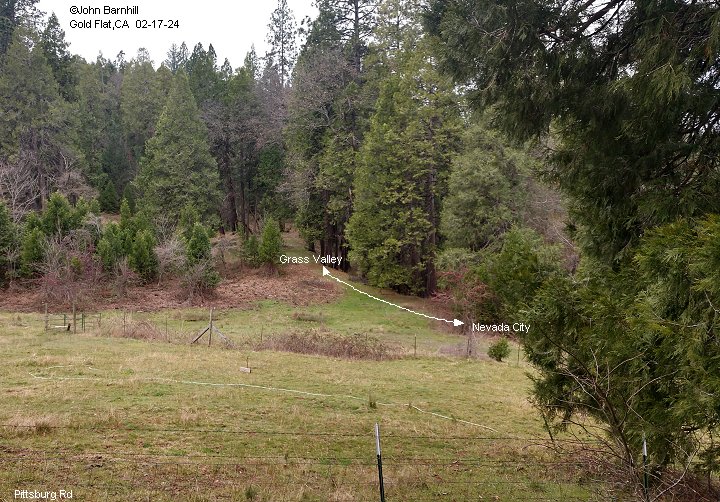
1. Right-of-way seen from Pittsburg Rd just above the old Pittsburg mine.
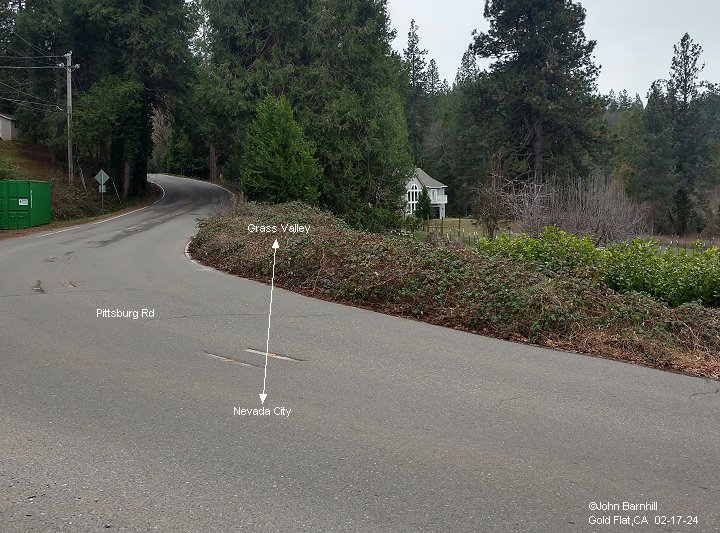
2.-3. The grade crosses Pittsburg Rd just uphill from the intersection with Gold Flat Rd and enters a shallow cut.
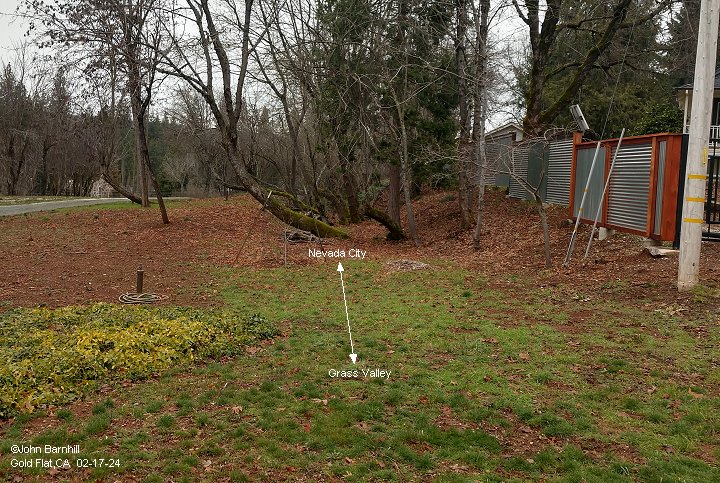
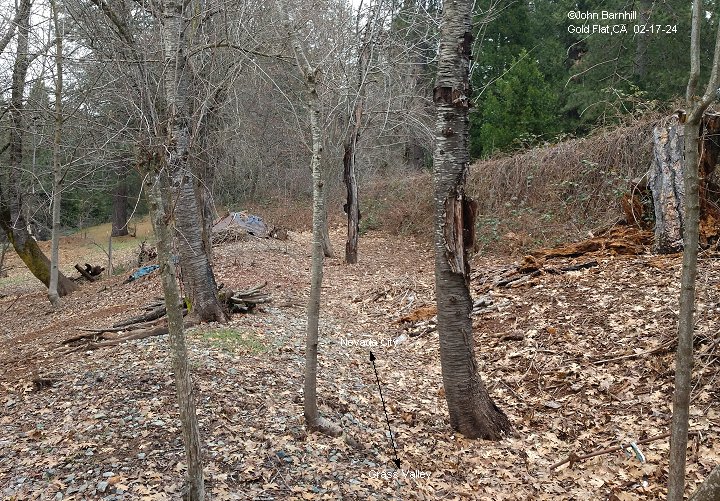
4. Heading towards Nevada City, just north of the previous cut.
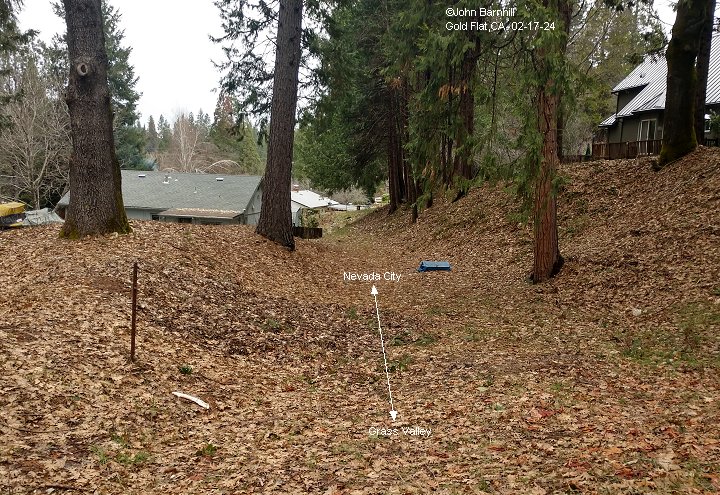
5. A very large fill stands behind Black Bart on Gold Flat Rd.
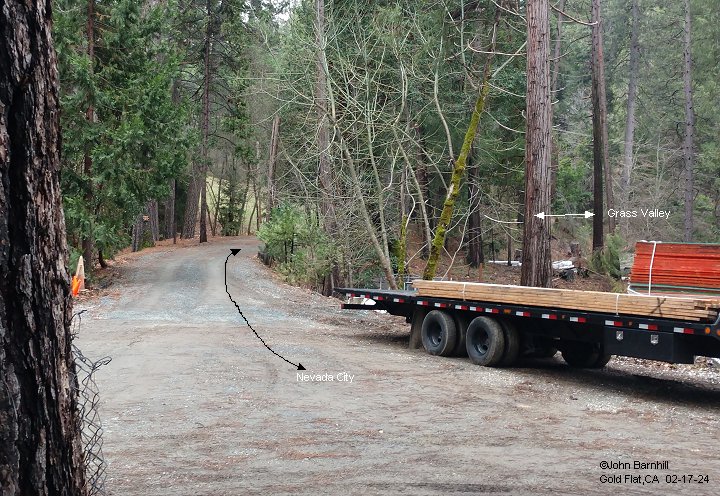
6. Looking north from Pinewoods Rd.
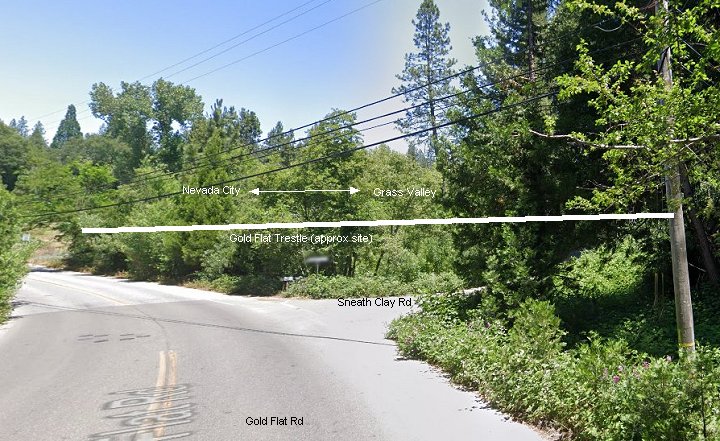
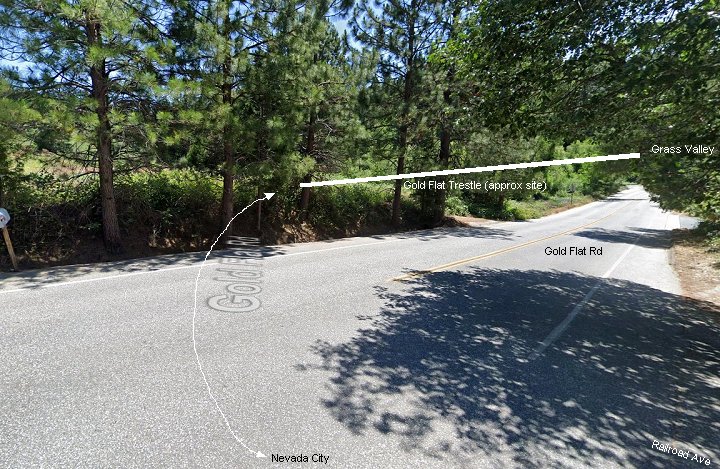
7.-8. Google street views marked up to show the location of Gold Flat Trestle at the Sneath Clay mine.
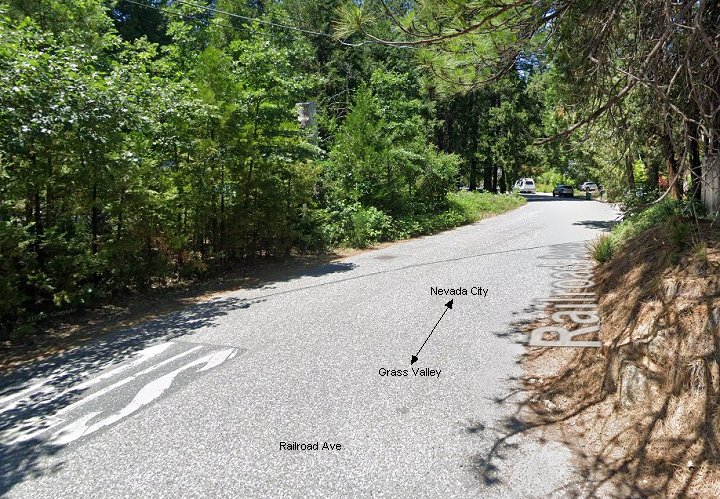
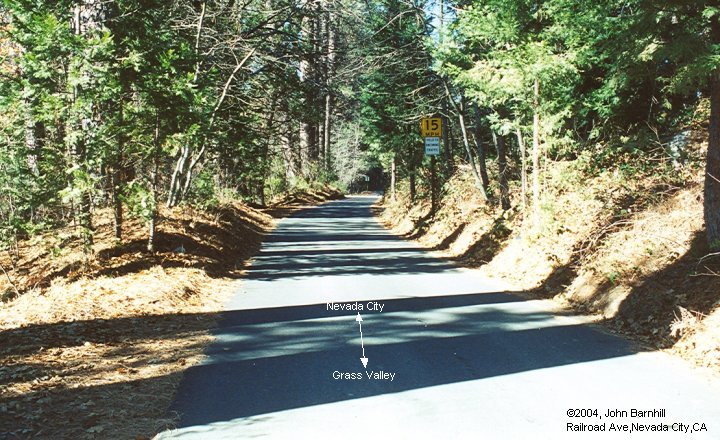
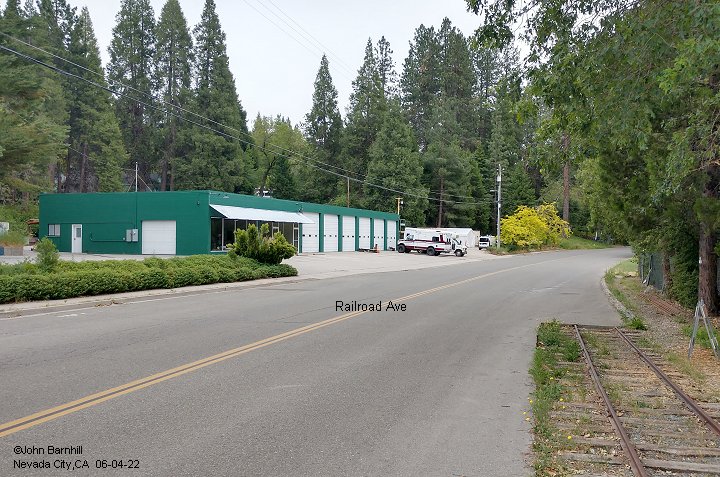
9.-10. After crossing the trestle the railroad turned up, appropriately enough, Railroad Ave headed towards the end of the line.
11.-12. Google satellite view and USGS lidar image marked with the photo locations of the above images.
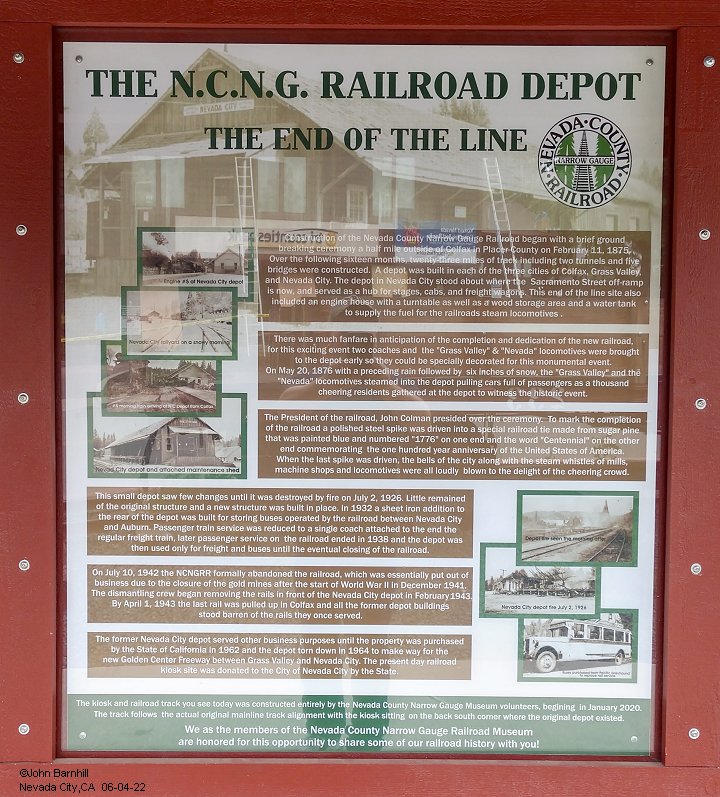
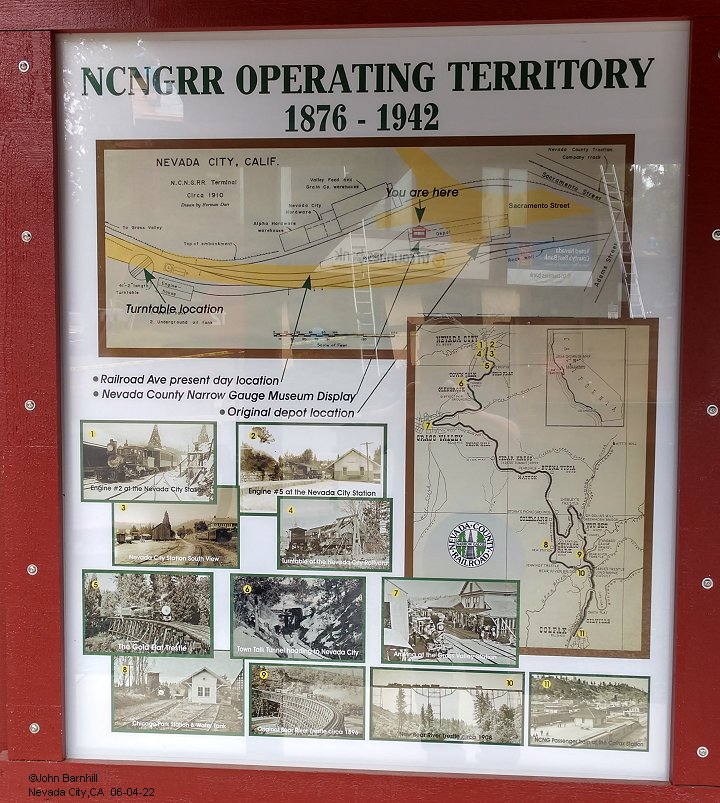
Nevada City
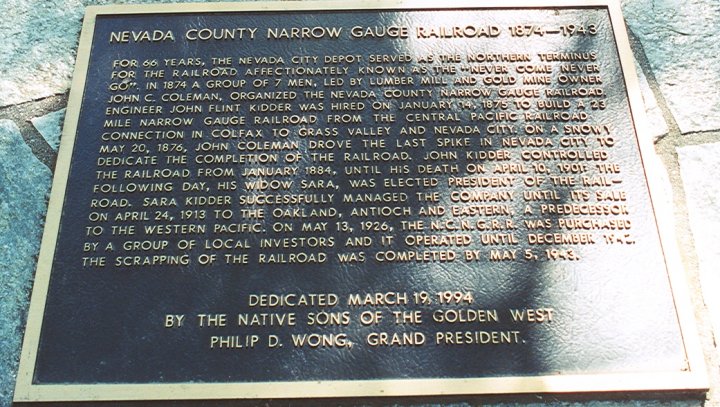
1. Plaque located at the Northern Queen Inn's former Nevada County Traction on Railroad Ave.
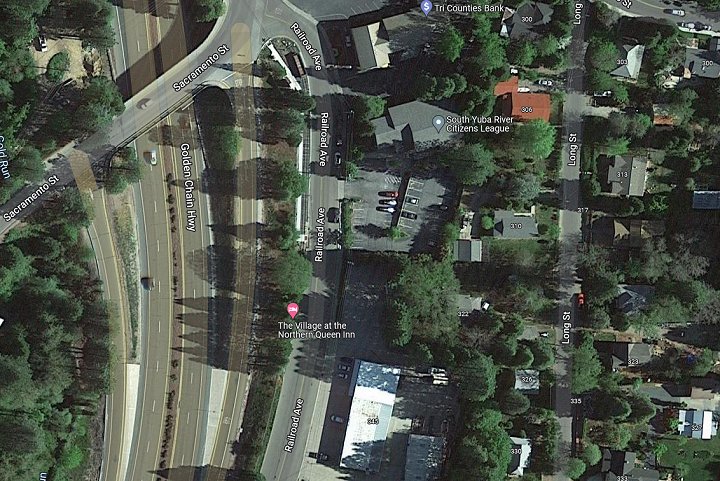
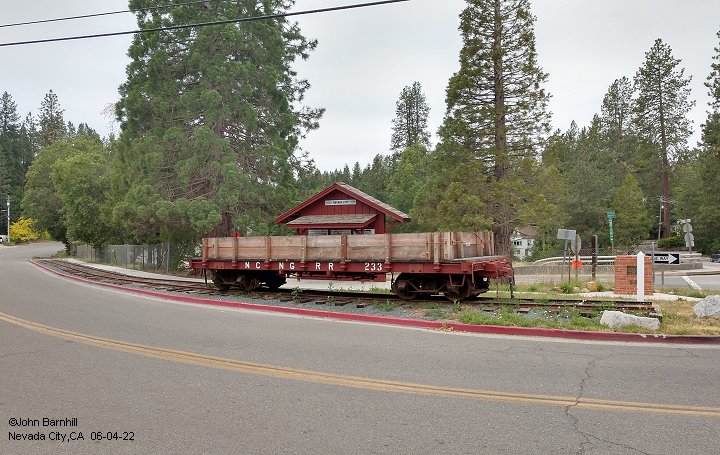
2-9. Milepost 22 was the end of the line at the corner of Sacramento Street and Railroad Avenue. The display was constructed
during 2020 and dedicated in 2021. This is the approximate location of the Nevada City depot. The building across the street in
image 11 sits where the engine house and turntable were located.


==================================================
This page, these images and underlying code ©2001-2026 Barnhill Web Design unless otherwise noted.