|
Click on each Image to Enlarge
and read more about it... |
 |
|
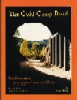
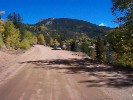
The Gold Camp Road (Revised) |
| Author |
Doris Wolfe |
|
 |
|
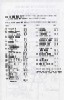
Closing Information Insert (Front) |
| Photographer |
- |
|
 |
|
Closing Information Insert (Back) |
| Photographer |
- |
|
 |
|
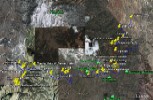
Google Earth Route |
| Photographer |
- |
|
 |
|
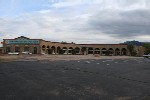
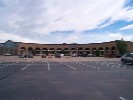
Midland Railway - Roundhouse |
| Photographer |
Lisa M. Hadley |
|
 |
|
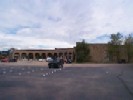
Midland Railway - Roundhouse |
| Photographer |
Darren E. Hadley |
|
 |
|
Midland Railway - Roundhouse |
| Photographer |
Darren E. Hadley |
|
 |
|
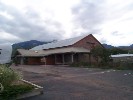
Midland Railway - Machine Shop |
| Photographer |
Darren E. Hadley |
|
 |
|
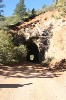
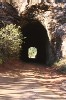
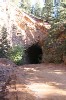
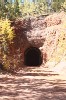
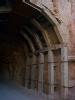
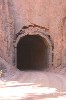
Tunnel 1 (NE Portal) |
| Photographer |
Lisa M. Hadley |
|
 |
|
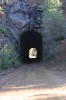
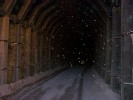
Tunnel 1 (NE Portal) |
| Photographer |
Lisa M. Hadley |
|
 |
|
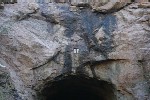
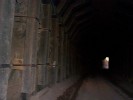
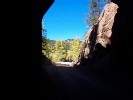
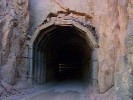
Tunnel 1 (SW Portal) |
| Photographer |
Lisa M. Hadley |
|
 |
|
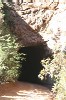
Tunnel 1 (SW Portal) |
| Photographer |
Lisa M. Hadley |
|
 |
|
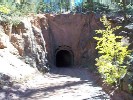
Tunnel 2 (NE Portal) |
| Photographer |
Lisa M. Hadley |
|
 |
|
Tunnel 2 (NE Portal) |
| Photographer |
Lisa M. Hadley |
|
 |
|
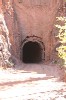
Tunnel 2 (SW Portal) |
| Photographer |
Lisa M. Hadley |
|
 |
|
Tunnel 2 (SW Portal) |
| Photographer |
Lisa M. Hadley |
|
 |
|
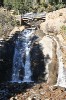
Helen Hunt Falls |
| Photographer |
Lisa M. Hadley |
|
 |
|
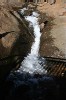
Helen Hunt Falls |
| Photographer |
Lisa M. Hadley |
|
 |
|
Helen Hunt Falls |
| Photographer |
Lisa M. Hadley |
|
 |
|
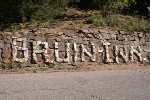
Bruin Inn / Station |
| Photographer |
Lisa M. Hadley |
|
 |
|
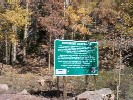
St. Peter's Dome Trail Head |
| Photographer |
Darren E. Hadley |
|
 |
|
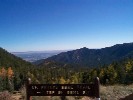
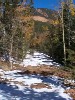
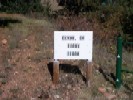
Summit / Mt. Rose Wye |
| Photographer |
Lisa M. Hadley |
|
 |
|
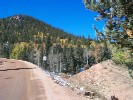
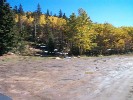
Summit / Mt. Rose Wye |
| Photographer |
Darren E. Hadley |
|
 |
|
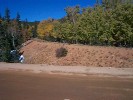
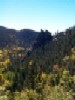
Summit / Mt. Rose Wye |
| Photographer |
- |
|
 |
|
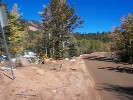
Summit / Mt. Rose Wye |
| Photographer |
Darren E. Hadley |
|
 |
|
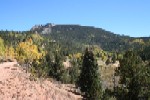
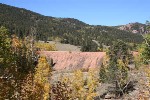
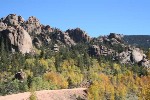
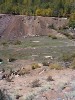
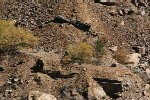
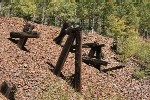
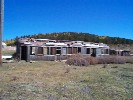
Rosemont |
| Photographer |
Darren E. Hadley |
|
 |
|
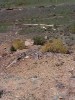
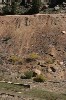
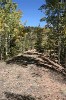
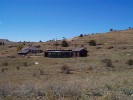
Rosemont |
| Photographer |
Darren E. Hadley |
|
 |
|
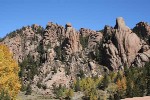
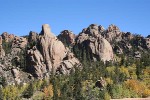
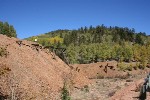
Rock Shot for Lisa |
| Photographer |
Darren E. Hadley |
|
 |
|
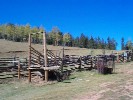
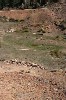
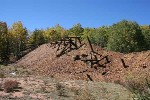
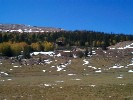
Heslin |
| Photographer |
Darren E. Hadley |
|
 |
|
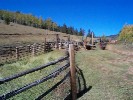
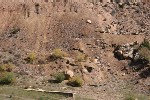
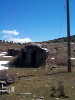
Heslin |
| Photographer |
Darren E. Hadley |
|
 |
|
Clyde |
| Photographer |
Darren E. Hadley |
|
 |
|
Clyde |
| Photographer |
- |
|
 |
|
Clyde |
| Photographer |
Darren E. Hadley |
|
 |
|
Clyde |
| Photographer |
Lisa M. Hadley |
|
 |
|
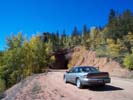
Tunnel 9 (East Portal) |
| Photographer |
Darren E. Hadley |
|
 |
|
Tunnel 9 (East Portal) |
| Photographer |
Lisa M. Hadley |
|
 |
|
Tunnel 9 (East Portal) |
| Photographer |
Darren E. Hadley |
|
 |
|
Tunnel 9 (East Portal) |
| Photographer |
Lisa M. Hadley |
|
 |
|
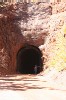
Tunnel 9 |
| Photographer |
Darren E. Hadley |
|
 |
|
Tunnel 9 |
| Photographer |
Lisa M. Hadley |
|
 |
|
Tunnel 9 |
| Photographer |
Darren E. Hadley |
|
 |
|
Tunnel 9 |
| Photographer |
Darren E. Hadley |
|
 |
|
Tunnel 9 (West Portal) |
| Photographer |
Darren E. Hadley |
|
 |
|
Tunnel 9 (West Portal) |
| Photographer |
Lisa M. Hadley |
|
 |
|
Tunnel 9 (West Portal) |
| Photographer |
Lisa M. Hadley |
|
 |
|
Tunnel 9 (West Portal) |
| Photographer |
Darren E. Hadley |
|
 |
|
Cathedral Park Trestle was here |
| Photographer |
Lisa M. Hadley |
|
 |
|
Cathedral Park |
| Photographer |
Lisa M. Hadley |
|
 |
|
Cathedral Park |
| Photographer |
Lisa M. Hadley |
|
 |
|
Cathedral Park |
| Photographer |
Lisa M. Hadley |
|
 |
|
Love, CO |
| Photographer |
Darren E. Hadley |
|
 |
|
Love, CO |
| Photographer |
Darren E. Hadley |
|
 |
|
Trestle 36A |
| Photographer |
Darren E. Hadley |
|
 |
|
Trestle 36A |
| Photographer |
Darren E. Hadley |
|
 |
|
Trestle 36A |
| Photographer |
Lisa M. Hadley |
|
 |
|
Trestle 36A |
| Photographer |
Lisa M. Hadley |
|
 |
|
Trestle 36A |
| Photographer |
Lisa M. Hadley |
|
 |
|
Trestle 36A |
| Photographer |
Lisa M. Hadley |
|
 |
|
Midland Terminal Trestle |
| Photographer |
Lisa M. Hadley |
|
 |
|
Midland Terminal Trestle |
| Photographer |
Lisa M. Hadley |
|
 |
|
Midland Terminal Trestle |
| Photographer |
Darren E. Hadley |
|
 |
|
Midland Terminal Trestle |
| Photographer |
Darren E. Hadley |
|
 |
|
Midland Terminal Trestle |
| Photographer |
Darren E. Hadley |
|
 |
|
Midland Terminal Trestle |
| Photographer |
Darren E. Hadley |
|
 |
|
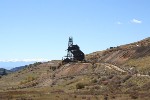
Cameron Mine |
| Photographer |
Darren E. Hadley |
|
 |
|
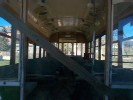
Passenger Car #1 |
| Photographer |
Darren E. Hadley |
|
 |
|
Passenger Car #1 |
| Photographer |
Darren E. Hadley |
|
 |
|
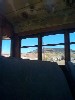
Passenger Car #2 |
| Photographer |
Darren E. Hadley |
|
 |
|
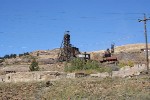
Theresa Mine |
| Photographer |
Lisa M. Hadley |
|
 |
|
Independence & Portland I Mines |
| Photographer |
Lisa M. Hadley |
|
 |
|
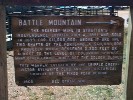
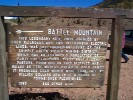
Battle Mountain Mines |
| Photographer |
Darren E. Hadley |
|
 |
|
Battle Mountain Mines |
| Photographer |
Darren E. Hadley |
|
 |
|
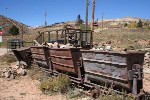
Battle Mountain Mines |
| Photographer |
Darren E. Hadley |
|
 |
|
Battle Mountain Mines |
| Photographer |
Lisa M. Hadley |
|
 |
|
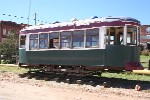
Victor Inter Urban Railway |
| Photographer |
Darren E. Hadley |
|
 |
|
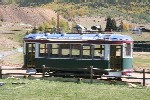
Victor Inter Urban Railway |
| Photographer |
Darren E. Hadley |
|
 |
|
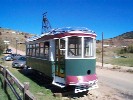
Victor Inter Urban Railway |
| Photographer |
Darren E. Hadley |
|
 |
|
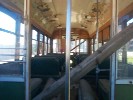
Victor Inter Urban Railway |
| Photographer |
Darren E. Hadley |
|
 |
|
Victor Inter Urban Railway |
| Photographer |
Darren E. Hadley |
|
 |
|
Victor Inter Urban Railway |
| Photographer |
Darren E. Hadley |
|
 |
|
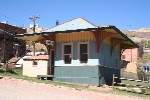
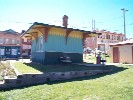
Alta Vista Station |
| Photographer |
Lisa M. Hadley |
|
 |
|
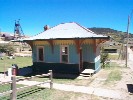
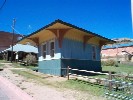
Alta Vista Station |
| Photographer |
Darren E. Hadley |
|
 |
|
Alta Vista Station |
| Photographer |
Darren E. Hadley |
|
 |
|
Alta Vista Station |
| Photographer |
Darren E. Hadley |
|