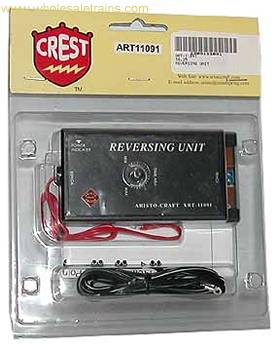
I bought an Aristocraft reversing unit to operate
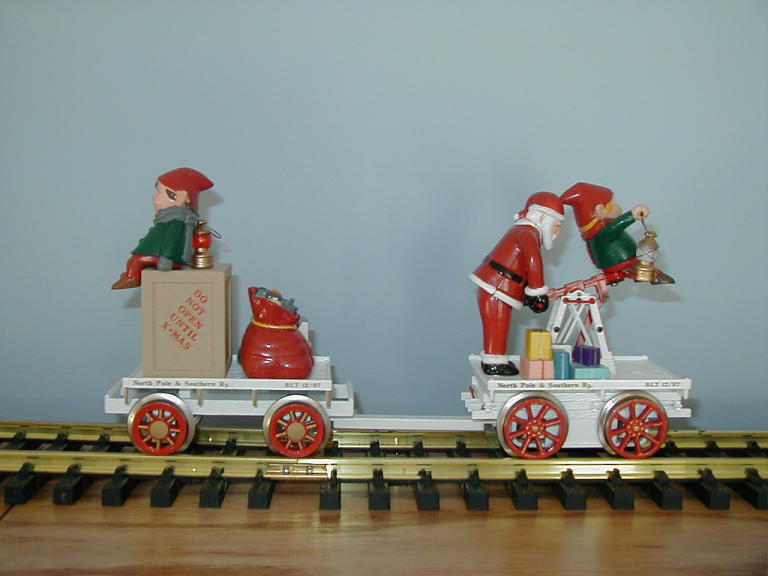
a Bachmann Christmas hand car. I will run the hand car on top of the entertainment
center in our family room. I did not want to have the rerailer sections so I just
bought the reversing unit and planned on installing the diodes in the track myself.
For the most part this was an easy job. However, I did encounter a couple of
issues I thought I would document here.
First determine where the rail needs to be cut in order to have the
the unit stop before the end of the track. The instructions from Aristocraft
indicate to cut the rail at both ends leaving enough room so that the entire
length of the train will fit between the rail gap and the end of the rail. The
disadvantage of following these instructions, is that when the powered unit
is at the lead end of the train, it will stop as soon as it crosses the rail
gap, leaving a portion of the rail unused. The advantage is that you can have
the train facing either direction and the train will not run off the end of the
track.
I decided to cut the rail so that the hand car would travel to the end of
both ends of the rail. The disadvantage of this method is if you do not place
the train of the train the correct direction, it will run off the end of the
track. With the hand car, this involved cutting the rail about 14 inches from
one end and about 9 inches from the other end. I also cut the rail so that the
gap would be between two ties in the section of track.
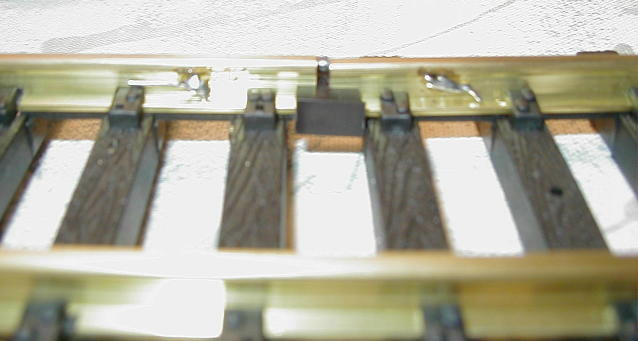
Once I cut the rail I drilled a hole on either side of the gap through which
the diodes would be inserted for soldering. I then installed a plastic rail joiner
(Aristocraft part 11901). I had to cut the joiner a
little to have it fit between the ties. Finally I reinstalled the ties onto the
rail.
Then I repeated the process on the other end of the track.
Then I soldered a diode across each gaps per the instructions from Aristocraft.
I hooked up the reversing unit to the track and then to a power supply.
Once the reversing unit powered up, the hand car began to move. It got to the
end of the track and promptly ran right off the end.
I went back a rechecked the instructions to make sure I had installed the diodes
correctly. I could not find a problem so I tried the following:
I tried reversing the polarity of the power to the reversing unit - didn't work. With the polarity reversed
to the reversing unit, the unit wouldn't power on. I had to change back to the original polarity.
I tried reversing the wires from the unit to the track - didn't work. The unit ran off both ends of the track.
I tried reversing the diodes on the track so that the cathode of both diodes was to the right.
This worked !
It turns out the instructions from Aristocraft are fine for Aristocraft equipment. However, other
manufaturers may make their units differently so that the run the opposite direction of Aristocraft
units given the same polarity power. This is not a big deal, it just affects how the diodes have to
be installed.
So, now the reversing unit and hand car unit was operating fine.
The last problem I encountered was not leaving enough room for the hand car between the gap in
the rail and the end of the track. While I did leave enough room for the length of the hand car, what I forgot to account
for was the momentum of the car. Given the speed I had the hand car moving at, the lead wheels of the
car would sometimes run off the end of the rail. To solve this I slightly elevated the end of the
rail so that it would stop sooner. I also purchased two pair of wheel stops from Hillman Railclamps. Given that the hand car would be operating 6 1/2 feet above the floor, I did not
want to take the chance of the hand car running off the end of the track and fall to the floor!


