TrainWeb.org Facebook Page
Restoring a Union Switch and Signal R2


   Back to Home   
Restoring a Union
Switch and Signal R-2

by Scott Hawbaker

         I've lived a quarter mile from the old Erie Railroad (now NS Southern Tier) mainline for over 22 years and traveled the five miles that Erie Street parallels the tracks many times. In that five miles were three automatic signals that gave me advanced knowledge that freight was due at any time and to get my camera ready! US&S R2 and Eastbound Freight 2001. (c)2001 smph50 (10K-80K Click to Enlarge)

         After World War II, the Erie began to update their Automatic Block Signaling (ABS) system to Centralized Traffic Control (CTC) to handle the increased traffic after the war. Many of the fifty year old semaphores around Buffalo were replaced with "modern" Color Light Signals (CLS) of different styles from both Union Switch and Signal (US&S) or General Railway Signal (GRS). These new signals had very few if any moving parts and were much easier to maintain than the old semaphores. Today many of these "new" signals are well over 50 years old and time has taken its toll. All over the United States, these veterans are being replaced with 21st century versions of the CLS from many manufacturers. 2006 marked the end of an era with the replacement of the Erie Street three.

Erie Street Pole Line in 2006. (c)2006 smph50 (10K) - CLICK to Enlarge (60K)         The "Pole line" along Erie Street was in rough shape and maintainers were always out fixing broken wires and propping up line poles. In 2005, a decision was made in Virginia to upgrade the "Southern Tier" line to "ElectroTrac 7" and replace the signals and deaden the pole line. As soon as winter broke in 2006, I saw the new concrete foundations being installed so it was then I starting making contacts with the signal division based in Attica to maybe rescue one of them. Two months later in May and after the signal foreman cannibalized what he needed, I was able to obtain all three!

         Just around the corner from my house at MP 411E, stood my favorite, a US&S - R2 CLS perched on an old "S" Style Semaphore case. MP 409E and CP 408E both sported US&S "H" Style Searchlights on pedestal masts. The new SafeTran CLS-V-20R's were erected and ready to be brought on line. The signal gang was all about getting the job done and not concerned about a "few" dents and dings. In one day all three veterans lay on the ground and then trucked to the "bone yard" in Attica. Happy just to get these stalwart sentinels of transportation, I overlooked how much work I had ahead of me and disassembled the heads, conduit, terminal cases and ladders from the masts to bring them home. I used a 1 ton chain fall and a 3/4" plywood ramp to load the heavy pieces into my truck. US&S R2 on the ground awating pick up by the signal gang. (c)2006 smph50 (10K) - CLICK to Enlarge (80K)

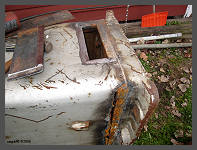
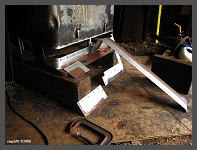
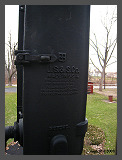
Rot on the old Semaphore base case. (c)2006 smph50(10K) - CLICK to Enlarge (90K)           I started the R2 over the summer of 2006, working in my spare time late at night in my barn on the old 280 pound semaphore case. All the rough handling from the railroad and from me getting it home had broken loose much of rust that had eaten away the 16 gauge sheet steel at the base. The cast iron top, doors and bottom were in great shape but all that was left were the rivets and shards of metal on three quarters around the bottom. Subscribing to the Lynn Modinger creed of "save every piece that you can" I decided to replace just the bottom four inches, where needed, which got me back into solid steel. After I cut off the rot with an abrasive wheel I burned the heads off of 32 quarter inch rivets and punched them out.

         After a lot of grinding and sandblasting I found that a few other areas would need replacement metal as well. A local metal fabricator cut me four 36" strips of mild steel and I began to make my patches.

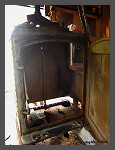
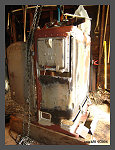
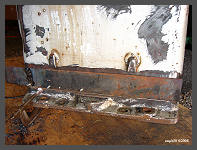
Cutting out the rusted metal and removing the old rivets. (c)2006 smph50 (10K) - CLICK to Enlarge (90K) Four sections of the case removed. (c)2006 smph50 (10K) - CLICK to Enlarge (90K) Outside view of the four sections. (c)2006 smph50 (10K) - CLICK to Enlarge (90K) 32 inch long patch being fitted into place. (c)2006 smph50 (10K) - CLICK to Enlarge (90K) Four 16 gauge patches ready for riveting. (c)2006 smph50 (10K) - CLICK to Enlarge (90K)

         Using my torch, I "rolled" the metal around the corners until I got back to the original profile. Four separate patches were made and then using the internet, I was able to find R. J. Leahy Company had boxes of 50 mild rivets in the correct length to attach the patches. I used long bar clamps to hold the patches in place while I drilled a few starter holes that would allow me to secure each patch in the proper location. Quarter inch machine screws held the patch tightly against the cast iron pieces as I finished drilling the rest of the rivet holes. After all the rivet holes were drilled I started in the center with one rivet, heated it to cherry red and then "peened" the end over into a flat mushroom. As the length of the rivet cools from red hot, it shrinks and pulls the metal in tight. 31 rivets later, the case was whole again! But, what about the edge that was layered over the old metal? Heating the rivets and peening them over. (c)2007 smph50 (10K) - CLICK to Enlarge (90K)

Four 16 gauge patches ready for riveting. (c)2006 smph50 (10K) - CLICK to Enlarge (90K)          I considered a butt joint but that would have meant the both the old and new metal would have had to line up perfectly and not warp while welding. I opted for a much safer overlap joint and MIG welded the seam one inch at a time to prevent distortion. Although not smooth and pretty, the long side of the case stayed nice and straight! Using a 4" die grinder and my trusty 7" disk grinder I ground the seam down to a smooth taper that was only 1/16" high. I used JB Weld Epoxy to fill the pock marks and the finished joint looked very good. Four 16 gauge patches ready for riveting. (c)2006 smph50 (10K) - CLICK to Enlarge (90K)

Four 7/8 inch studs are used to secure the mast to the case. (c)2007 smph50 (10K) - CLICK to Enlarge (90K)          The signal mast is held in place by four 7/8" x 5" studs. Over the last 50 years, the center of the stud had wasted away too much for my liking. Again, using a lot of heat, I was able to unscrew all four studs with a big pipe wrench. Tractor Supply has "All Thread" in many sizes so I bought a 36" long stick for $13.00 plus nuts and washers. I also bought an $18.00 length of 1" with nuts and washers that I would need to mount the signal to a concrete pad.

         It should be noted that all of this did not happen in a weekend. An hour here and there found me at this point in the spring of 2008! After one last overall wire brushing the "alligatored" paint both inside and out, it was time to start priming! I have always had good luck with "Rust-Oleum" Red Oxide Primer which adheres very well and very seldom shows brush marks. Remember, this is a railroad signal and not a classic 66 Chevelle and I never wanted it to look brand new. Since the case is basically a large rectangle, I had 12 surfaces to prime, allow to dry and then go over again with a finish coat of "Rust-Oleum" Aluminum. I rolled and flipped the beast each time I did a side so that I was always painting horizontal to prevent runs and drips. This process took me into the warm evenings of summer. The old semaphore base is looking good again!. (c)2008 smph50 (10K) - CLICK to Enlarge (90K)

         While the paint was drying on the case, I hauled the 170 pound 12 foot mast into the barn and removed all of the scaling paint and cleaned up a few areas of rust. Cast iron is very stable even without paint and it didn't take long to have it looking good again. I also welded the conduit connector back onto the mast and sealed the gaps to prevent water from getting into the mast. The cast iron mast looked bad but cleaned up very nice after an hour of prep work. (c)2008 smph50 (10K) - CLICK to Enlarge (90K)

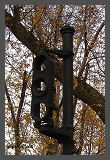
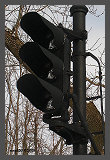
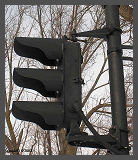
         The US&S R2 three unit head assembly is what really identifies this style of signal. Each light is composed of a glass 8 3/8" clear outer lens (doublet) and a colored 5 1/2" glass inner doublet. Behind the inner lens is a precision 10 volt 18 watt incandescent bulb. This combination creates a pencil thin beam that can be seen for miles. The head, door, lens rings and upper/lower brackets are also all cast iron adding another 180 pounds to the signal. I was able to remove all the 10-32 brass machine screws with minimal problems and only had to replace six of them! The three steel bracket mounting "U Bolts" needed to be "chased" with a 3/4" die and I re-tapped all the 10-32 holes. After wire brushing and some sandblasting I was ready to repeat the prime and paint process on the 18 pieces for the head. On the Erie Railroad, everything above the maintenance platform was painted flat black to prevent headlight reflection but the platform on down recieved the aluminum paint. The Pennsy and NYC gave their entire signal the flat black treatment.

The designation of R2 comes from the vertical lights and cast iron horizontal mounting brackets. (c)2008 smph50 (10K) - CLICK to Enlarge (90K) The designation of R2 comes from the vertical lights and cast iron horizontal mounting brackets. (c)2008 smph50 (10K) - CLICK to Enlarge (90K) The designation of R2 comes from the vertical lights and cast iron horizontal mounting brackets. (c)2008 smph50 (10K) - CLICK to Enlarge (90K) The designation of R2 comes from the vertical lights and cast iron horizontal mounting brackets. (c)2008 smph50 (10K) - CLICK to Enlarge (90K)

The ladder had a few kinks that had to be worked out before painting. (c)2008 smph50 (10K) - CLICK to Enlarge (90K)          The leaves were falling and the nights getting much cooler as I was finishing up the three sheet metal visors, two piece, 58"background, ladder and related hardware. I used a large rubber mallet, backer boards and my large workbench to flatten the bends the background received when the signal was moved by the railroad. The 13 pieces of the wrought iron ladder were also renewed in the same manner as before after I got the "kinks" out if it with a "BFH!" The 20 - 1/2" square head bolts and nuts were in pretty bad shape so I replaced many of them with new ones purchased from Fastenal in Cheektowaga.

         Taking advantage of one of the nicer fall weekends, I dug four 8 by 30 inch deep holes for the concrete needed to hold the 1" mounting bolts. I welded up four "J" Bolt assemblies using double 1" nuts that I would be able to screw the mounting studs down into. It took six 80 pound bags redi-mix to fill the four holes but I got lucky and they all lined up with the base pattern I had cut.

         On November 1st, 2008 I was ready to put it all together! I chose my location based on two things, the wife said to "put it out in the woods" and I needed a way to lift the entire unit without any heavy equipment. I already had electricity into the middle of the backyard where our pool used to be so a site 20 feet further back in front of a sturdy Box Elder tree seemed to be perfect. Using my 1 ton chain fall, I loaded each large piece onto a cart behind my John Deere garden tractor and hauled then into the back yard. I spotted the case on its side right in front of the four concrete mounting holes. The mast was secured to the four 7/8" studs in the case and then the mounting brackets and just the head were bolted to the mast. I wanted the entire unit to stand up as close to the holes in the concrete as possible so I staked a "foundation," made from 4x4 oak telephone cross ties to the ground to act as a pivot as I pulled the 15 foot unit up. Using a 1 Ton Chain Fall I began the lift! (c)2008 smph50 (10K) - CLICK to Enlarge (90K)

The stud holes lined up perfect as I wrenched her down. (c)2008 smph50 (10K) - CLICK to Enlarge (100K)          Using 20 feet of tow chain and the 10 reach of the chain fall, I lifted the unit up around 6 feet, braced the mast, shortened my grip and repeated the process two more times. I thought at around 80' I could just push it up...Ha! I used a cable come-along to finish the pull and with just a small "thunk," as gravity did its part, it stood on its own. During the assembly, I used the better half of a 5 pound tub of grease to ease the bolting and ensure longer life to the components. I also applied a liberal coating to the bottom of the case which allowed me to "align" the four base holes and the oak foundation with a 2x4 and a sledge hammer. I was able to screw in by hand the 1" x 9" long studs and then locked the base down with washers and nuts. It was up!......

         I installed the ladder next to facilitate the installation of other smaller pieces. Since I had no idea how deep to bury the cast iron "foot" of the ladder, I started by clamping the curved top to mast using an extension ladder. The maintenance platform bolted on next and gave me the correct spacing away from the mast. I added the lower section and that gave me the correct depth to dig the hole for the foot which went on last. With the ladder secured, I was now able to use the existing equipment the way it was intended. In the event of an accident, I did not want to smash any of the lenses or 50 year old sockets so they were left on the ground. I put together the entire assembly, lens ring, socket, inner doublet, outer doublet, and outer lens clamp ring and sun visor on the ground. All bolt holes got a dab of "Anti-Seize" before the brass hardware went back in. I used non-hardening, black automotive "3M Strip Calk©" to create a waterproof seal between the lens rings and signal head. I've used this stuff for many, many things because it does not dry out, shrink and sticks great! Two stainless steel cap screws clamp each lens ring to the head and in no time my signal had "eyes." The ladder, mile marker, platform and lenses have been installed. (c)2008 smph50 (10K) - CLICK to Enlarge (100K)

         The back door of the head went up the ladder next to prevent any rain from getting in and messing things up. The old "oakum rope" seal of the door was still in good shape and closed up tightly with a few twists of the locking door hasp.

Inside the the three light head unit. (c)2008 smph50 (10K) - CLICK to Enlarge (90K)          I was fortunate that the railroad left all the relay wire in the mast of every signal, so I had plenty to work with. Each signal was wired to control other signals up and down the line so each head had multiple wires which connected to relay cases located near each signal. I decided to use a much simpler system by using a common ground and one lead for each of the three colors. Starting from the head, I made my connections to each lamp socket and pulled the wires through the 1 1/2" pipe elbow on the side of the case. The US&S Co. used 1 1/2" flexible steel conduit to connect the head to the mast so I pulled the wires through that and fed them into the mast. A pipe union on one end of the steel conduit made for a fast and easy connection with a pipe wrench. Close up of the green lens, socket and 18 watt precision bulb. The bulb filament is located directly behind the center of the lens. (c)2008 smph50 (10K) - CLICK to Enlarge (90K)

         I was now ready to energize the signal. Inside the base was a 12 pole terminal strip which gave me plenty of room to work and add all my connections. I've had good luck using old washing machine timers as controllers for other signal projects and so a "Maytag©" timer was used for this one as well. Most of these timers have eight single-pole, double-throw contacts activated by eight cams on a center drum. I choose two of the cam runs that have opposite activation cycles and then, if needed, modify a third to give me three unique on/off cycles that can last for up to 15 minutes. I rewired the 120 volt motor to run continuous and added new leads to the snap on terminal strip of the timer. Using the terminal strip in the case, I mounted a sheet metal bracket to the timer so it would hang free of the case. To electrify the lights I used an 80 watt "Malibu Lighting" transformer which supplies about 11 volts to each bulb. An "Intermatic© Timer" allows the signal to come on for as long as I want, twice a day. The lights look good in the middle of the day but are dazzling at night! A Maytag© Universal timer supplies continuous voltage to each bulb for about 15 minutes. An Intermatic timer turns the power supply and timer motor on twice a day. (c)2008 smph50 (10K) - CLICK to Enlarge (90K)

December 28th the R2 is finished! (c)2008 smph50 (10K) - CLICK to Enlarge (100K)          With the signal now working, over Christmas vacation, we had a perfect day for me to reinstall the big background sun shield. I was able to reuse all 12 of the original stainless steel cap screws and nuts and in less than an hour the signal was complete!

         I'll be the first to admit that I often over engineer and sweat the details of my projects but that's who I am. The signal looks great, easily visible from the street, and reminds me of all the tonnage it guided safely on its way east for over 50 years. It saw the end of steam, five different owners and a constant evolving charge of diesels which welcomed a "High Green" to speed them on their way.
A High Green speeds the train on its way! (c)2008 smph50 (10K) - CLICK to Enlarge (100K)

Back to Top   


This page was last updated: March 16, 2017


Web Site Hosting by    TRAIN WEB

The WNYRHS, Inc. P.O. Box 416, Buffalo, NY. 14231-0416 is an independent organization and has no affiliation with any other local or national group.
The Society is a fully qualified organization under 501 (C) (3) of the Internal Revenue Code and all donations to the Society are tax deductible.
©Copyright 1999 - 2017 WNYRHS Inc. all rights reserved

Email Logo   Web Design & Hosting by  - Scott H.