TrainWeb.org Facebook Page
Using a PC power supply for DC workbench power or Layouts

 Getting a Multi Volt Power Supply

 from an Old Tower PC

By Doug Stoll

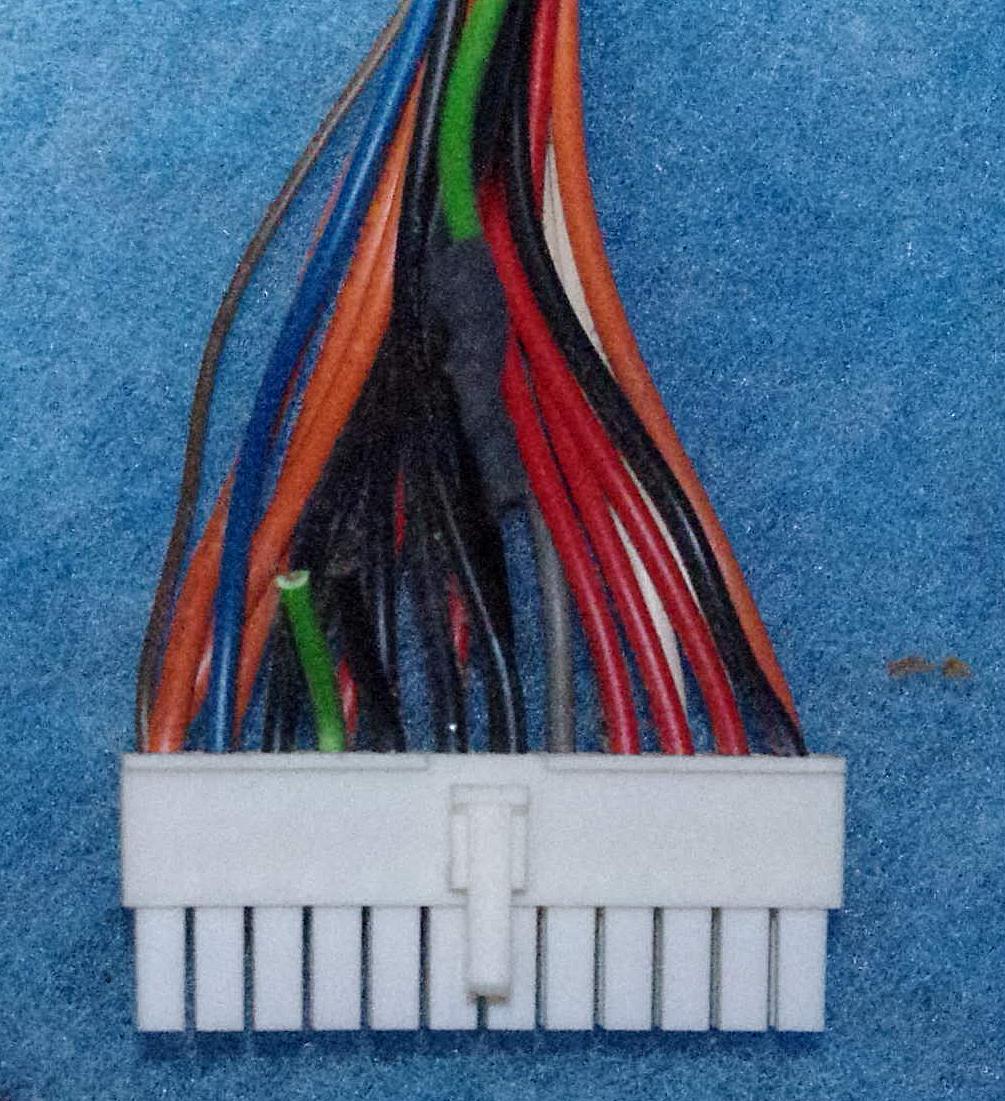
A power supply is available online at retailers for PC components or auction sites such as eBay. The one I am most familiar with and described in this article is a ATX style found in desktop tower PCs. The supply may or may not have it's own power switch on the rear of the unit. Once on it's own without a mother board it can be used for a good source of filtered power to be used for lighting, sound, DC accessories so long as the load is within the range limit of the source output. Steps for removing from a tower are shown below. If the power source was removed already, skip to step 4.

  1. Remove the power supply retaining screws in the rear top of the unit. Typically screws are found surrounding the fan at the top of the rear cabinet. Keep screws separate if intentions are to replace the supply in the PC as they are different thread pitches and sizes.

  2. Remove the left side panel typically retained by a clip, screw or both depending on manufacturer and model.

  3. The disk drives are located at the upper front of the unit and may need to be slid forward to allow space to remove power supply. This will involve removing the retaining screws from the side of the disk drives holding them to the inner frame. Some models have a cosmetic guard preventing them from sliding forward and is easily removed with a small regular screwdriver. I have also seen addition drive screws on the opposite side that also need to be removed. Once the drives have been slid forward, unplug the supply from the drives and mother board and remove the supply. 

  4. The power unit has many wires and different color wires can not touch each other when power is on. The colors may differ based on manufacturer. If different color wires do touch, the internal circuit breaker will trip. To reset the unit will need to be powered down for about a half  minute to reset. Each color has an separate output source except the black ones that I will call Neutral or Ground. I refrain from calling them Negative because there are colors that produces a negative output when used with the the black ones.

  5. The two wires that make the unit power up are the green wire combined with the black one. When tied together they turn the supply on. This can be done by combining them simply with a wire nut or solder if it gets powered up by 120v input cord or a switch if you wish to remotely start the supply. The power on wire (sometimes other colors than green) is the fourth one from the left end when looking at the clip side. (see picture on right)

  6. The other wires can be tied together or in  groups to an output as long as they are the same color. The individual wires can handle up to 4 amps each, so as an example: if the circuit load is 10 amps you will need at least 3 tied together of the same color.


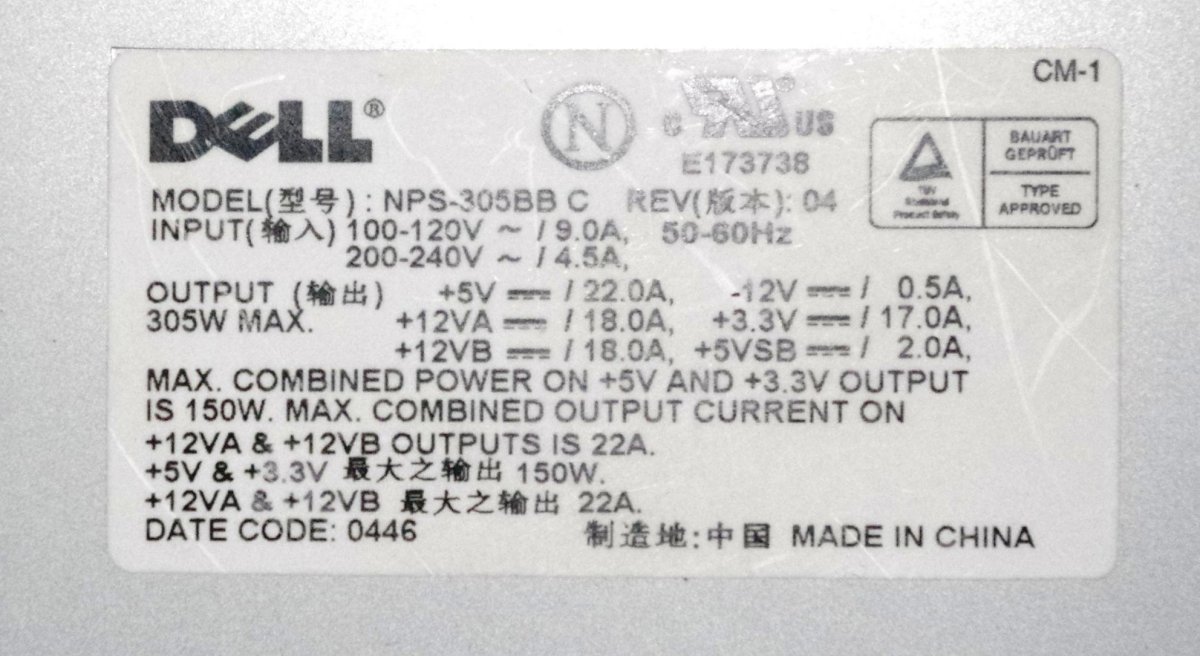
The unit described below is a Dell 300 watt ATX type. More watts obviously becomes more amps. Ohms law applies. Volts times amps equals watts
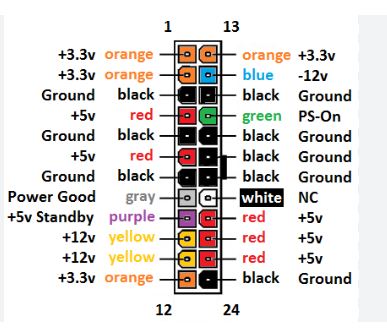
Wire color Quantity Available Voltage Output Output total per color (Amps)
Green 1 - Power on
Black 17 None Neutral
Orange 6 +3.3 17
Purple 1 +5 1
Red 8 +5 22
Grey 1 +5 1
Yellow 3 +12 11
White 4 +12 * 22
Blue 1 -12 .5

(*) 12 volts positive used to be 12 volts negative on earlier versions of power supplies. Always check output with voltmeter if load is voltage polarity sensitive.


Home - Why S - Hirail - Scale - Module - Accessories - About us 

Shows & EventsTrade & Sale - Join - Hints & Tips - Members info - Links


For comments on, change request, or questions  send E-Mail Message to the Webmaster
All information contained on this site is © 1999 - 2006 Badgerland S Gaugers, unless otherwise credited.
The views and opinions expressed in the Badgerland S Gaugers WWW Pages are those of the contributor, unless otherwise credited, and do not necessarily represent that of the club it's officers, directors, or the membership. The Badgerland S Gaugers do not offer any warranties, guarantees, nor assume any liability from the information contained on or referenced from this site.