|
|
Novice
Guide - Page 2
 For railroad listening, I strongly suggest a handheld scanner. All will
work, but the handheld is the most versatile. You can't take any of the other
three with you trackside. Nothing is handier than clipping it to
your belt and letting the trains whizzzz by! But really, its all personal preference. If you do
all of your trainspotting in a car, a mobile might be the better choice - but
you can't take it inside with you. Having an unlimited power supply such as AC
or your car's battery is great, but there are options for handhelds, such as
cigar lighter adapters, rechargeable batteries, etc.
For railroad listening, I strongly suggest a handheld scanner. All will
work, but the handheld is the most versatile. You can't take any of the other
three with you trackside. Nothing is handier than clipping it to
your belt and letting the trains whizzzz by! But really, its all personal preference. If you do
all of your trainspotting in a car, a mobile might be the better choice - but
you can't take it inside with you. Having an unlimited power supply such as AC
or your car's battery is great, but there are options for handhelds, such as
cigar lighter adapters, rechargeable batteries, etc.
You should decide off the bat if you want a new or used scanner. Unless the
previous owner bashed the hell out of it, a used scanner is just as good as a
new one. Cash Converters has a constantly changing stock of used scanners around
$100. Be careful, though - I've been screwed by CC on more than one occasion - make
sure you examine it thoroughly! Most Cash Converters have a test bench, so
you can make sure that you just didn't spend $100 on a piece of shite that isn't
going to work two seconds after you bring it home. Also, note that Cash
Converters usually gets their stock sans manuals, so expect a lot of 'figuring it out for
yourself'. If you aren't into that, you can usually find manuals on the net. If used isn't your
cuppa, then by all means go new.
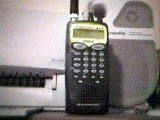
Check out the "Scanner Reviews" page for some information on more
popular scanners. In my opinion, the best scanner for beginners is the Realistic
Pro-29. Its the one pictured above. New or used, they are a quality scanner. New ones list for about $240, but I've seen them used
at Cash Converters for around $100.
Step Two - Scanners 101
 Scanners
come in all sorts of different flavours. Some have lots of memories, some have faster scan
speeds. Scanners
come in all sorts of different flavours. Some have lots of memories, some have faster scan
speeds.
I've used my Uniden Sportcat 180b in these photos because its functions and
buttons are pretty much similar to most scanners on the market. This section
might be of help to you, and then again - it might not. All scanners are
different, so if you are TOTALLY lost by this next section, you're probably
better off asking someone who knows the ins and outs of your scanner.
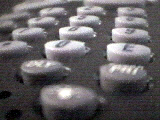
1. Top of scanner
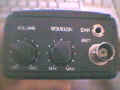 First, lets take a quick look at
the controls of your scanner. Experienced people might want to skip this part -
I guarantee it will be insulting! Nothing personal - don't worry. The first knob on the left is the volume/power knob. Obviously, it turns the
scanner on and off, and also controls the volume. The second knob is the squelch control. Squelch mutes the speaker until
it receives a signal - how strong depends on where you set the knob. You control the sensitivity of this barrier
using the squelch knob. All of the way to 'min' effectively turns off the
squelch, and you hear EVERYTHING on a particular frequency (static, noise,
etc.). Opening the squelch also renders the scan feature of the unit useless.
Its best to open the squelch up, and then turn it until just after the speaker
mutes. First, lets take a quick look at
the controls of your scanner. Experienced people might want to skip this part -
I guarantee it will be insulting! Nothing personal - don't worry. The first knob on the left is the volume/power knob. Obviously, it turns the
scanner on and off, and also controls the volume. The second knob is the squelch control. Squelch mutes the speaker until
it receives a signal - how strong depends on where you set the knob. You control the sensitivity of this barrier
using the squelch knob. All of the way to 'min' effectively turns off the
squelch, and you hear EVERYTHING on a particular frequency (static, noise,
etc.). Opening the squelch also renders the scan feature of the unit useless.
Its best to open the squelch up, and then turn it until just after the speaker
mutes.
Some scanners, such as the Icom R2, have automatic squelch.
The EAR port is for earphones or an external antenna.
The ANT port is for the antenna. Scanners need an external antenna to receive
signals.
2. Programming your scanner & the Keypad
 The keypad is the most important
part of your scanner. It is the 'interface' between the user and the hardware.
Some scanners have lots of buttons (the Alinco DJ-X10 for example) and some have
only a few (the Icom R2). The keypad is the most important
part of your scanner. It is the 'interface' between the user and the hardware.
Some scanners have lots of buttons (the Alinco DJ-X10 for example) and some have
only a few (the Icom R2).
Most handheld scanners have a keypad with numbers on the front of the
scanner. This makes programming your frequencies a breeze. Some
scanners, such as the Icom R2 have a tuning knob, so you can tune your
scanner like a conventional radio. Some radios, such as the Uniden Sportcat SC180B &
SC200, have both knobs and keypads.
A lot of older scanners, such as the Pro-42, only have a few memories, or
'channels'. This particular model only has ten. Most scanners today have
over 50 - some over 500, some have thousands! PC based ones can store an
unlimited amount of frequencies. Typically, radios with over 10
channels have their memories separated into 'banks'. 100 channel scanners
usually are separated into 10 banks of 10 frequencies. This is a handy way to
organize your scanning life. You might put CN's frequencies into bank one, CP
into bank two, yard frequencies into bank three, and so on. While the radio is
scanning, a simple press of the keypad's numbers will activate or deactivate the
corresponding bank. Very handy! How you organize it is totally up to you.
 How to
program frequencies differs from scanner to scanner - you will have to consult your manual. Some scanners have a
'PGM' key, others require you to enter the freqeuency and press the 'ENTER' or 'E' key to
save it to memory. How to
program frequencies differs from scanner to scanner - you will have to consult your manual. Some scanners have a
'PGM' key, others require you to enter the freqeuency and press the 'ENTER' or 'E' key to
save it to memory.
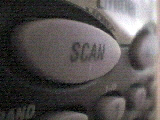
After you've got you scanner all programmed and ready to go, its time to scan!
Press "scan" to start
scanning. The scanner will now cycle through the programmed frequencies &
banks until it
reaches an 'open' frequency, one that is transmitting a signal. When the
frequency stops transmitting, the scanner will resume scanning. Note the Squelch
control MUST be set in order for the radio to scan!
 Other buttons
on the scanner can include lock-out, delay, keylock and light. Other buttons
on the scanner can include lock-out, delay, keylock and light.
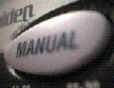
MANUAL: Puts your scanner in Manual mode, allowing you to scroll
through your frequencies one by one.
LOCKOUT: Excludes frequencies from the scan
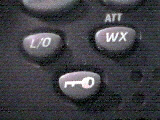 DELAY: Delays the time between when a frequency closes, and the scan
resumes DELAY: Delays the time between when a frequency closes, and the scan
resumes
KEYLOCK: Locks out keypad, so accidental key presses don't interrupt the
scan
LIGHT: Activates the LCD display's backlight - handy for night use.
Different scanners have different functions, so you're best to consult the
manual.
3. Organization
Typically, I like to separate CN and
CP into different banks - that way when I'm photographing a CN line, I
only get CN transmissions. You need to have your rail line's road
frequencies in each bank. For explanation of Road Frequencies,
go to the Railroad Ops section.
You
also will want to put the EOT (end of Train) frequencies in EACH
RAILROAD BANK. These sound like short data bursts (or
squawks) and can give you advance warning of an approaching train. Again,
more info in the railroad ops page.
If you are near a yard, you can put yard frequencies in as well.
This is how the first two banks in my scanner are configured:
|
Bank 1 - CN |
Bank 2 - CP |
| RTC Road |
EOT rear-front |
| EOT rear-front |
EOT front-rear |
| EOT front-rear |
Galt sub standby |
| YA Dispatcher |
Belleville sub standby |
| YB Dispatcher |
Galt Sub standby |
| AI Dispatcher |
Term/Switching |
This is typical - and what works best for
me. I live in Brampton, so do a lot of photography along the CN Halton sub
and the CP Owen Sound sub. I also have been known to hang out at the CN Oakville Sub,
CP Galt sub, CP Mactier Sub and at Bayview Jct in Burlington. I also used to work at CTV in Agincourt,
which is just down the road from CP's Toronto yard (McCowan road), and
used to catch a lot of the yard activity there.
 Next
Page Next
Page
|