


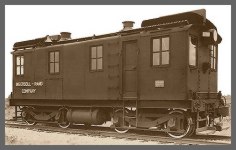
BUFFALO CREEK #43
ALCO HH660
Updates 2012
| Its time for an update on the restoration of WNYRHS Buffalo Creek Locomotive. With the decent fall and winter weather we enjoyed in Western New York, work on #43 has progressed quite nicely. No decisions have been made on the type of batteries we will use. We would like to see if we can "jump start" the engine with the help of a Buffalo Southern locomotive before we commit to the big purchase. Late last summer we bought a pneumatic "needle scaler" to remove the thick grime and paint from the trucks from Harbor Freight and it works great! It is very efficient on the cast parts but also does well on sheet metal. Air consumption is very low and I highly recommend it for getting into nooks and crannys. |
) |
The entire hood and the roof has been painted in urethane black after many hours of prep work and priming. It seems that the two previous paint jobs didn't address the need to lift the four "sand hatches" or the two engine hatches to paint under the weather lip. This allowed the rust to creep under three layers of paint and pop off large areas of paint. | ) |
) |
We really like the "KemBond Red Oxide" primer from Sherwin Williams. It has excellent adhesion and drying properties. After the roof line was complete, we needle scaled and primed the side frames, brake rigging and tires on both sides of both trucks. | ) |
) |
) |
) |
) |
| Years of flaking paint were removed down to nice clean cast iron and sheet steel. All four steps, frame, battery side covers, air tanks and piping have been scaled, wire brushed and primed. The effort and results speak for themselves. We hope the "winter" weather continues to be mild to aid our progress. |

May 2012
) |
The weather in Western New York has continued to cooperate so work on #43 continues to make progress. We focused on detail work that is not as obvious as the side frames and trucks but needed attention. The rear deck where hundreds of work boots had tread was showing its age. | ) |
) |
Rust had worked its way under the 3/16" diamond plate and lifted it almost an inch between the hand rail posts and in some spots ate right through. Replacement patches would not solve the problem so we decided to remove and replace the plate. After cutting loose all the welds and | ) |
| removing the hand rail the old deck was removed. The 1/2" frame plate was needle scaled and ground down to clean steel and primed. Urethane black enamel finished the job and the new deck received the same treatment. We used a plasma cutter to cut the new deck to size and cut the bolt slots which was much faster and cleaner than using a cutting torch! Before dropping the new deck in place a liberal coating of bearing grease was applied to the entire deck to help prevent future damage. |
) |
Another issue existed on engine doors #3 and #4. It was common to see a locomotive running in the yard with the door open to aid in cooling. Unfortunately this allowed the doors to slam open and closed depending on what direction you were traveling. The louvers on both were bent and #4 was twisted. Attempts to strighten things while mounted on the engine became a waste of time so we removed the hinge pins and dropped the doors. |
| With the doors on the ground, we were able to use a 10 ton hydraulic jack and cribbing to remove the bends and take the twist out of number 4. After some grinding, wire brushing and priming, the doors went back on with ease and look great! On May 24th, we put 270 gallons of water into the cooling system and were happy to find we had no leaks! Next up, pressure oiling the engine and turning the prime mover over. |
July 2012
) |
Even with July being brutally hot and no rain, our small engine group continues to "chip" away on the old paint. Coarse grinding with a 4 1/2" wheel gets the rust pits out followed by smooth grinding with a 7" disk. A DA Sander "feathers" the paint edges and removes the scratches. | ) |
) |
The top of the compressor cabinet had some nasty rot all along the riveted seam. We opted to cover the ragged joint with a new piece of angle stock. The joint is still very solid so this cosmetic fix was all that was needed. | ) |
) |
Rick B. has been working on the Control Stand system switches and brake controls. There was two layers of gray and one layer of black paint before getting down to the original ALCO green. | ) |
| The control stand dash panel has been repainted and lettered. All six of the 4" brass guage face bezels have been bead blasted, new glass installed and then sealed with clear lacquer. Bob M. has done a wonderful job restoring the gauge faces and pointers. We can not wait to see the whole stand back together after all the flaking paint is removed! |
September 2012
) |
In early August the James E. Strates Fair Train came to Hamburg for America's Fair. The BSOR brings the train in two sections, first six crew coaches. After that up to fifteen flats loaded with all the rides and equipment. | ) |
| Over the hot days of summer we finished scaling, grinding and sanding all of the rust spots and getting them primed. Pat and Brian from the Buffalo Southern Railroad were amused to see primer "creeping" up all over the engine as they passed by each week. After all the grinding and sanding, the locomotive needed a good scrubbing! Society friend Gary S. was happy to allow us the use of his 3800psi Northern Hydraulic pressure washer. You really had to "brace" yourself when you pulled the trigger on that beast! |
) |
It took a couple of hours to get all the "nooks and crannies" free of dust, paint chips and leaves but at the end we had a much cleaner engine. We were then able to finish appling the white background for the letters and mask the windows and lights before painting the entire locomotive. | ) |
) |
We made "negative stencils" to apply the lettering so before the urethane black went on we had to put the base white down wherever letters and numbers were going to appear. Bob and I cut out all the letters and numbers from clear "Contact Paper" using our ALCO builders photo to get the letter font and size correct using enlarged photographic prints. | ) |
| Once the letters were ready, we applied them to the engine counting rivets to get them in the exact same spot as shown in the photo. This process took us almost one whole day in itself. |
) |
On September 28, using the Societies "Air Less" sprayer, I applied 9 gallons of Sherwin Williams urethane black to the engine. Working from top to bottom it took almost five hours to complete the job. As soon as the sprayer was cleaned we had to strip off the stencils before the paint hardened or they would never come off. | ) |
| It was quite a site to step back and see the engine as it last looked in 1966 when the Buffalo Creek sold the engine to RELCO. (Railroad Equipment Leasing Corporation) |
) |
Well, not quite.... We still have to apply more of the white "pin striping" that the engine had when it came out of the ALCO shops in Schenectady, New York back in 1940. If the weather holds out we will have all of this detail work done before the snow flies. A HUGE Thank You has to go out to Life Member Jim Szymanski who generously donated the money needed to buy the paint, solvents and tape. Thank You Jim! |
) |
With some great fall weather we have been able to apply some the 3/4" 3M striping tape. This paint scheme was developed by Otto Kuhler who worked for the Pennsylvania and Lehigh Valley Railroads. The FRA required "contrasting color" on all grab irons for crew safety has also been applied. | ) |
December 2012
) |
December weather in Western New York can be very unpredictible. We were able to do some touch up work on the white accents and when the weather didn't cooperate, work inside the cab. Using ALCO S2 wiring diagrams, we were able to electrify the rear headlight with a 55watt 12volt bulb. | ) |
| Another detail we attended to was the application of the FRA required letter "F" on both sides of the front of the locomotive. Below are the before and after views of the "F" and a look at FRA rule "229.11 - Locomotive identification." |
) |
) |
) |
 |
When the very first "Oil-Electric" later "Diesel-Electric" locomotives were built, the "Boxcab" design gave no indication as to where the engineer was located. In the early 20's, a letter "F" or "1" was used to identify the front of the | 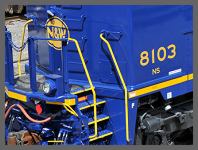 |
| locomotive. As locomotive design evolved, a distinct "cab" allowed for better visibility by narrowing the engine compartment or "hood." However, the "front" of the locomotive was kept in front of the prime mover with the engineer on the right hand side. It was not until 1934 that ALCO moved the "F" to the "hood end" of the locomotive. Todays modern GE and EMD locomotives still sport a small "F" at the "short hood" cab end. |
) |
The engineers Arm Rest was in very rough shape. The black outer covering was not leather but an early "naugahyde" that really did hold up quite well. The wood form of the arm however did not. As seen in the photos, much had decayed and had split down the middle. The full length "piano hinge" still works freely. Using the original dimensions, a new rest has been made from white oak which should weather very well. | ) |
) |
) |
) |
| The WNYRHS greatly appreiciates all the generous donations to this project to date. However, we could still use your help! All Donations to the WNYRHS, Inc. are Tax-Deductable! If you would like to mail in a donation, send it to WNYRHS Inc., PO Box 416, Buffalo, New York 14231-0416 or |
| Click the PayPal Button to make a Secure Electronic Donation. THANK YOU! |
![]()
Web Site Hosting by TRAIN WEB
The WNYRHS, Inc. P.O. Box 416, Buffalo, NY. 14231-0416 is an independent organization and has no affiliation with any other local or national group.
The Society is a fully qualified organization under 501 (C) (3) of the Internal Revenue Code and all donations to the Society are tax deductible.
©Copyright 1999 , WNYRHS Inc. all rights reserved


