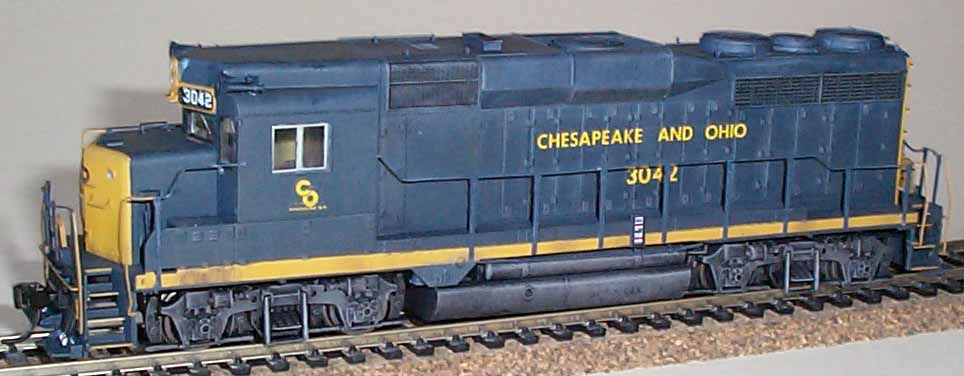
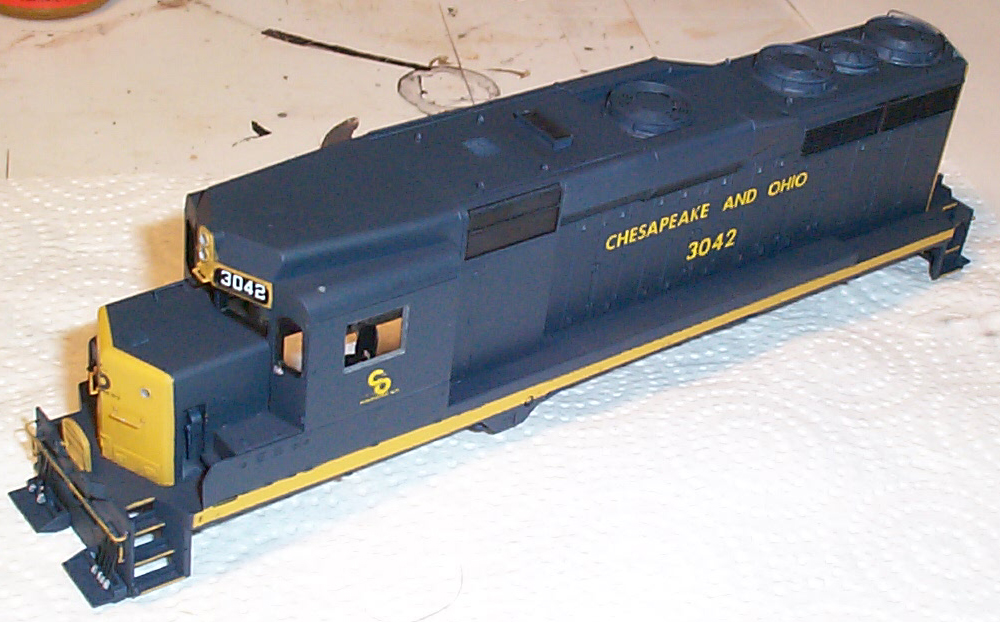
I traded for an undecorated Phase II GP30 undecorated kit recently. This kit became C&O 3042. 3042 was unfortunately wrecked in 1979, but with my restrictions on odd and even numbers, it was the only unmodified C&O GP30 that wore this paint scheme its entire life I could find and wore an even road number.
Below is a prototype pic of 3042 in the paint job I am
referring to.

How to:
1. Remove the shell from the box. With so
many small parts, painting the shell blue and yellow first and then touching
it up will be easier than waiting to paint after assembly.
2. Paint the shell with a 75% CSX Yellow and 25%
UP Armor Yellow mix.
3. Mask off the numberboards, side sill, end and
nose. Paint the locomotive shell with C&O Enchantment blue.
4. When dry, mask off the bottom edge of the side
sill, so the yellow stripe is an equal width all the way down the side
sill. See photos for clarity above and below.
5. Put all the detail parts on the shell except
the hand rails. You can do this before doing any painting if you
want. I paint so much, that it wasn't a big loss to skip this step
before painting the shell originally.
6. Spray the shell with gloss coat and decal it.
I used Herald King's L-81 C&O locomotive set. Spray the shell
with dull coat before weathering.
7. Carefully dry brush around the decals with lighter
shades of C&O enchantment blue.
8. Add the hand rails. Paint them C&O
enchantment blue. Paint the part you would hold climbing the steps
yellow.
9. Spray the bottom 1/4 with an overspray of roof
brown. Weather the frame at the same time with drybrushing shades
of grey and the roof brown overspray.
10. Using pastel chalks put black soot around the
exhaust on the top and some around the bottom of the battery boxes on both
sides.
11. Put in the "windows". Hold them in with
white glue. This was quite a challenge to do without breaking off
all the little detail parts.
12. Assemble the locomotive by putting the shell
on first and then adding the couplers. Don't forget to add the screws
to the frame before putting the fuel tank back on.
13. You are done, enjoy your GP30.
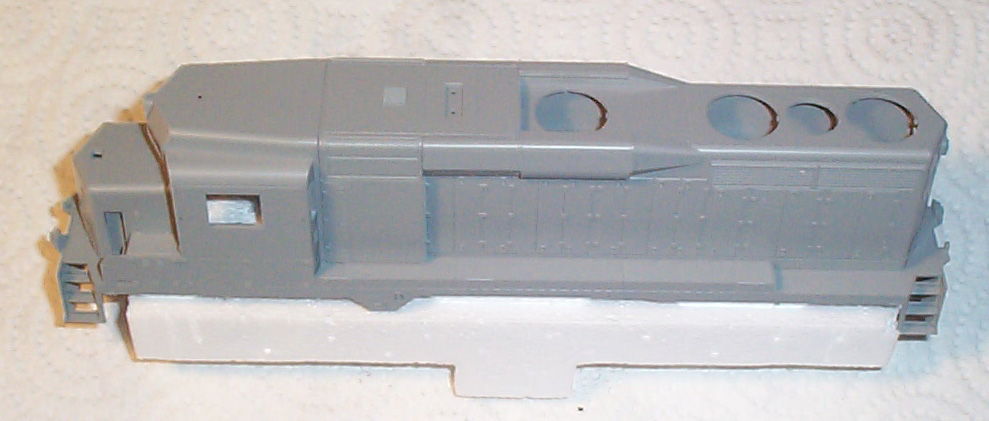
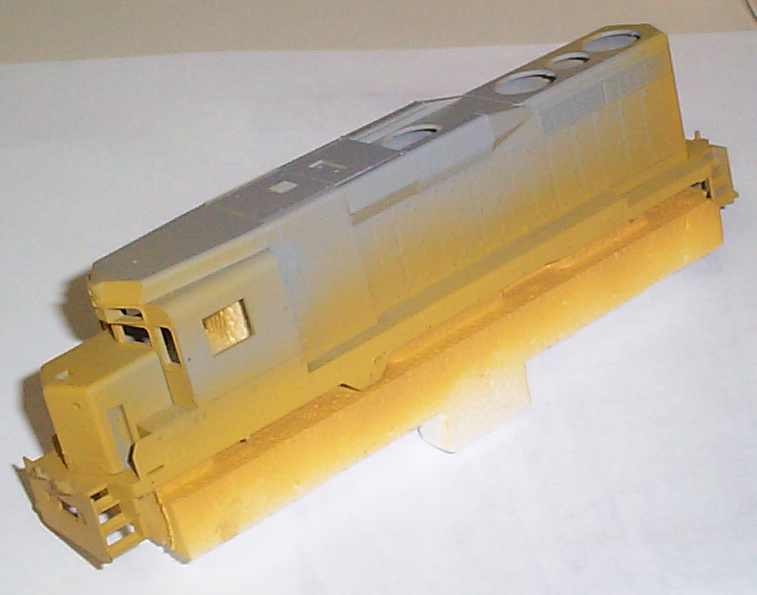
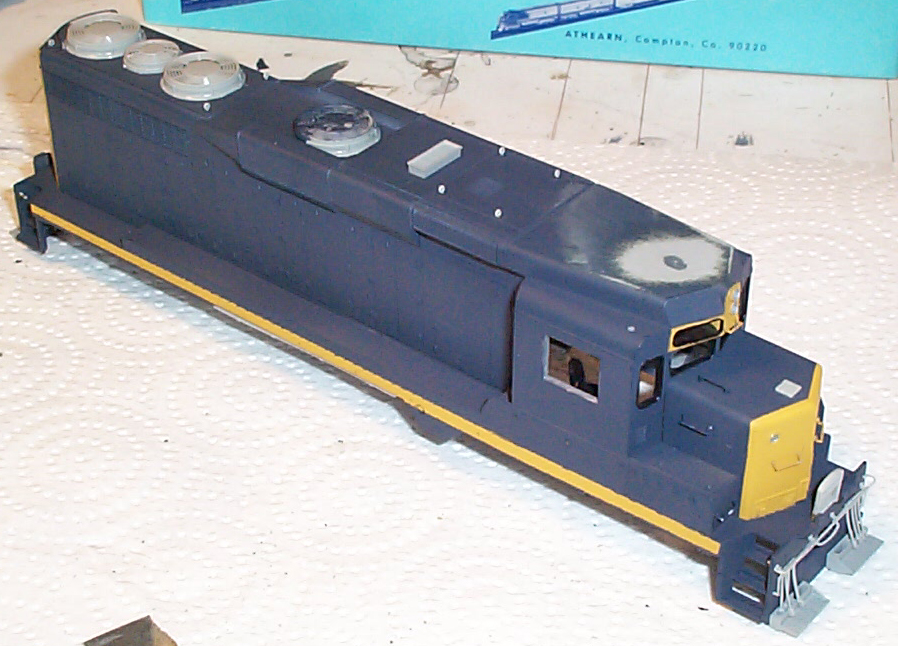
Below is the shell right out of the box. Notice
how the fans are not attached, neither are any of the other details.
This adds to the difficulty of this kit.
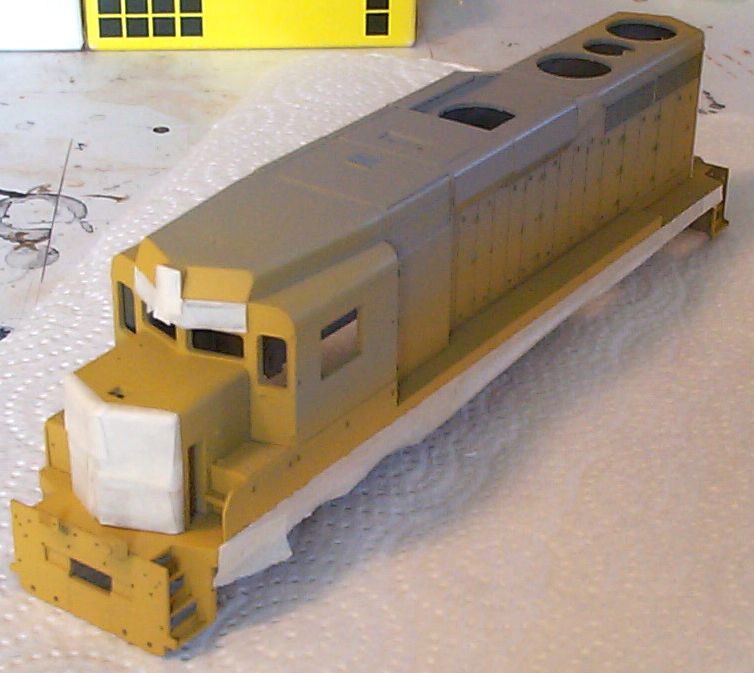
Below is the kit painted a 75% CSX yellow and 25% UP Armor
Yellow mix. This is a fairly close color to the real yellow on these
C&O units. I used the styrofoam from the kit as a holder while
spraying. Be sure to cover the front of the nose, the numberboards,
the side sill, and the rear of the unit yellow. On the right is a
pic of the shell masked and ready for the C&O Enchantment Blue paint.
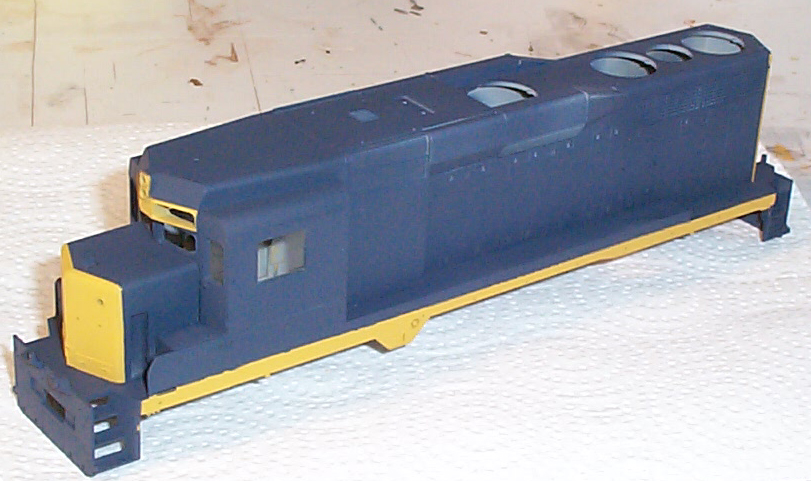
Below are two pics of the blue paint. The second
pic shows how the added blue along the bottom of the side sill makes the
yellow stripe appear the same width all the way down the locomotive.
Below is a good shot of how many detail parts you have
to put on the undec kit. It is alot of work. I should have
done this before painting blue. Notice where the original horn attachment
hole is filled in on top of the roof and sanded smooth.
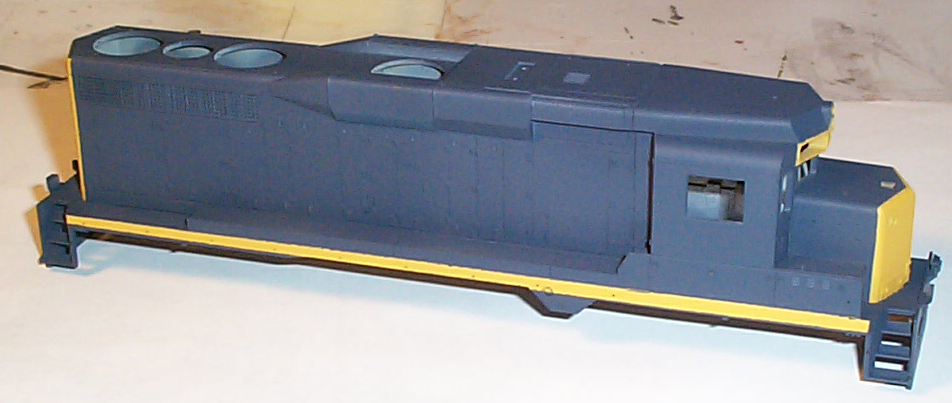
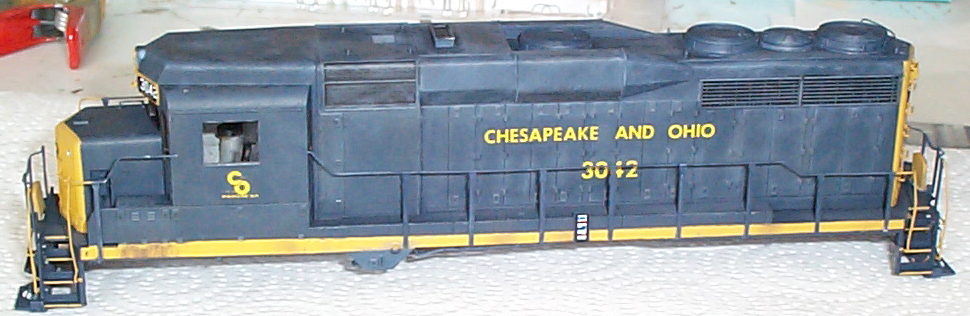
Below is the shell, decaled and ready for drybrushing.
Below is the shell, dry brushed with lighter shades of
C&O enchantment blue and roof brown.
Below is the frame or base, right out of the box.
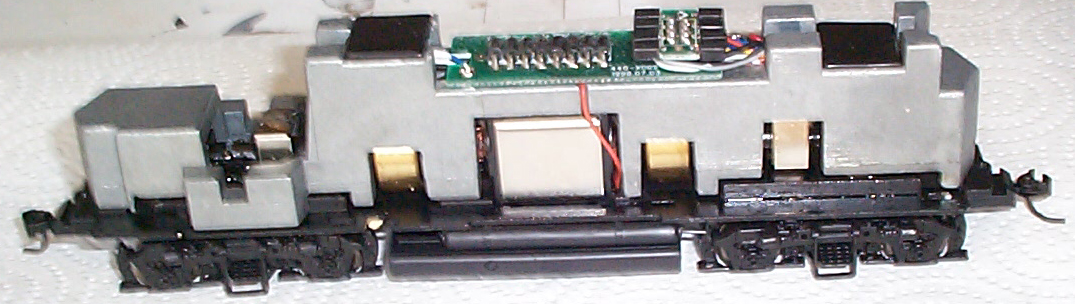
Below is the frame or base weathered.
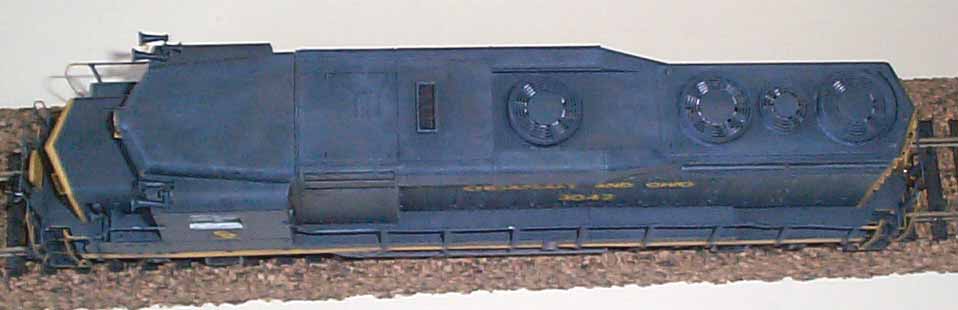
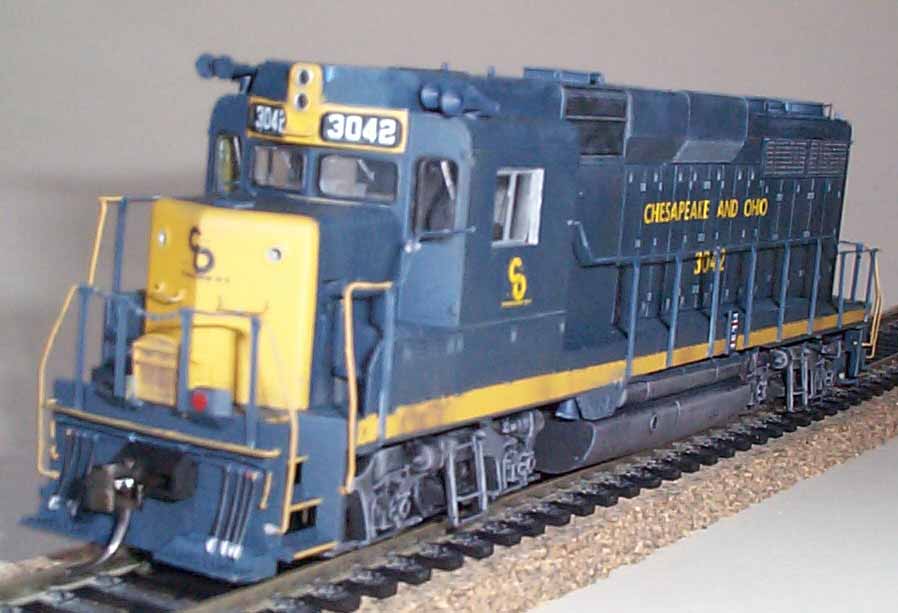
Below are pics of the finished model.