


This is the 2008 diary of the S&TR
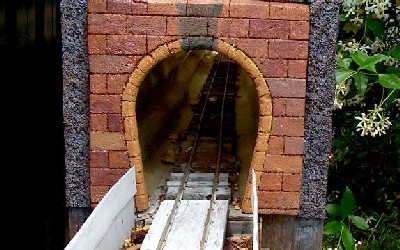
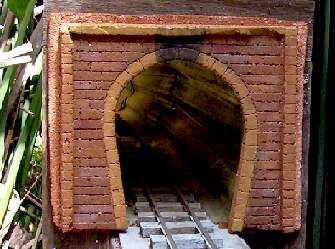
I've made a couple of tunnel mouths from 1" thick styrofoam for the 'tunnel' behind the shed. (It's not a real tunnel, just a covering to keep leaves off where I can reach)
The left pic shows the north end with main line at far left, and the new sidings in foreground. The sidings are temporary may someday lead to a turntable.
The right pic is the south end and shows the cantilevered new loop at left, and the track removed from the dock platform.
And in a non-GR job, I'm building more shelves in my workshop to store more trains. Boring, but necessary.
click here for 2004-06 diary
click here for 2007 diary
click here for 2008 diary
click here for 2009 diary
click here for 2010 diary
click here for 2011 diary
click here for 2012 diary
back to current What's New?
November 25, 2008
Finally I have laid a siding where the old turntable used to be at Sandstone. I reused some old aluminium bar for the rails, but this time made the sleepers from old fence palings and used a router to cut the slots.They are very 'chunky' but I'll cover them with dirt when I finish whatever industry goes there.
see May 17 entry.
Carved them with a hacksaw blade and a quick coat of acrylic paint.
November 21, 2008
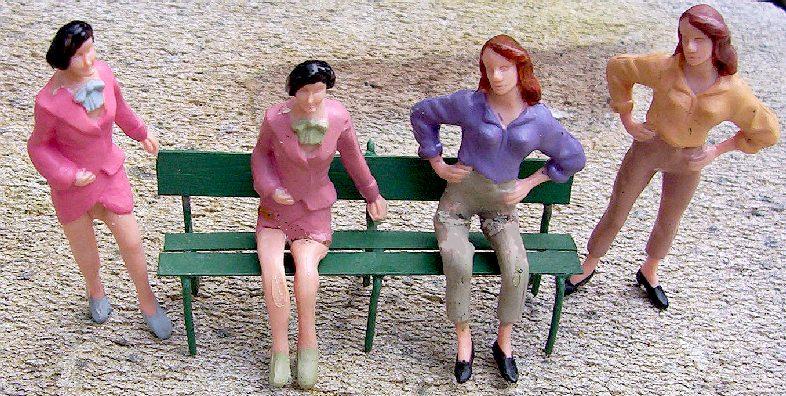
The second delivery of people from eBay have been bent into sitting positions and installed in various carriages. The SaTR now has plenty of paying customers.(see Oct 26)
November 13, 2008
I've added a gradient diagram to the
Description. 
October 26, 2008
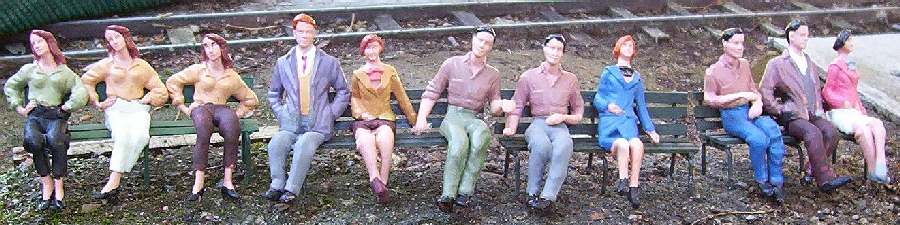
I discovered some G scale people on eBay. $A25 for 20 people - there are 6 different styles of person, with a varying number of each to make 20. They are painted, with a number of different coloured clothes for each style. The faces have no paint.
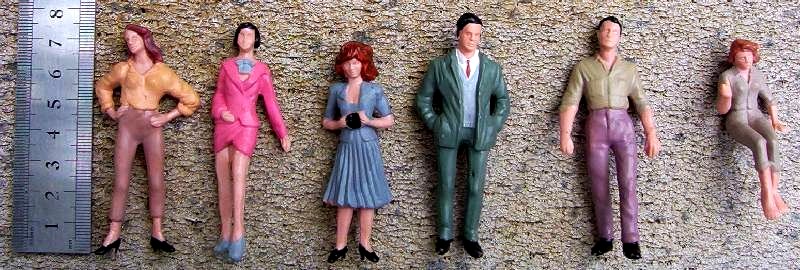
As I was mainly looking for seated people for passengers in carriages, I tried warming the figure (over a soldering iron) and bending the legs and it worked! Here you can see the before and after for 2 styles. With a bit of repainting, they'll be good enough for inside carriages. Pity about the woman with elbows out - she'll have a seat on her own.
Oct 24, 2008
More results from using the dynamometer (see Oct 21).
Today I put 12, 2-wheelers on straight, level track and measured that I needed 160g to pull them along. The total weight of the wagons was 4.0kg. These are my plastic wheeled wagons, with steel axles running in aluminium bearings. It didn't matter whether they were on brass or alum. rail. Bogie wagons gave similar results so it seems that a good approximation might be that each kg of train needs 40 grams of tractive effort from the loco.
I then tested the diesel loco for tractive effort on dirty brass and alum rails and there is a large difference. At starting the alum rails allow the loco to have about 15% more grip than brass. And as the speed increases, the brass allows much more wheel slip so that the alum rail has about 50% more grip than brass. Lucky I've got alum rail on the 1:25 grade!
So here's a nice equation for determining the drag of a train, including the effect of grade:
total drag in grams = wagon weight(kg) x 40 + wagon+loco weight(kg) x 10 x grade in %
Notice that the loco 'saw' a great difference in rails but the wagon drag did not. This seems to indicate to me that the main part of the wagon drag is in the bearings, not the wheel-to-rail resistance.
That value of 40 will probably reduce a little with steel wheels and better bearings, but the fact that both alum and brass rails had the same drag may mean there's not a lot of difference. - who's going to lend me some steel wheeled wagons to test?
Now to look at the effect of curves!
October 21, 2008
I've built a tractive effort measurer (dynamometer?). I've always wondered just what force a loco exerts. I bought a 6kg fish scale - the smallest I could find, but I then found I really needed to measure only around 600g max. So I used a lever system to multiply the force by 5.
In the pic the loco is pulling to the right and the brown piece of aluminum is the lever. The yellow scale reads 2.4kg, so the tractive effort is 480g. (I know, I know it should be in Newtons for force).
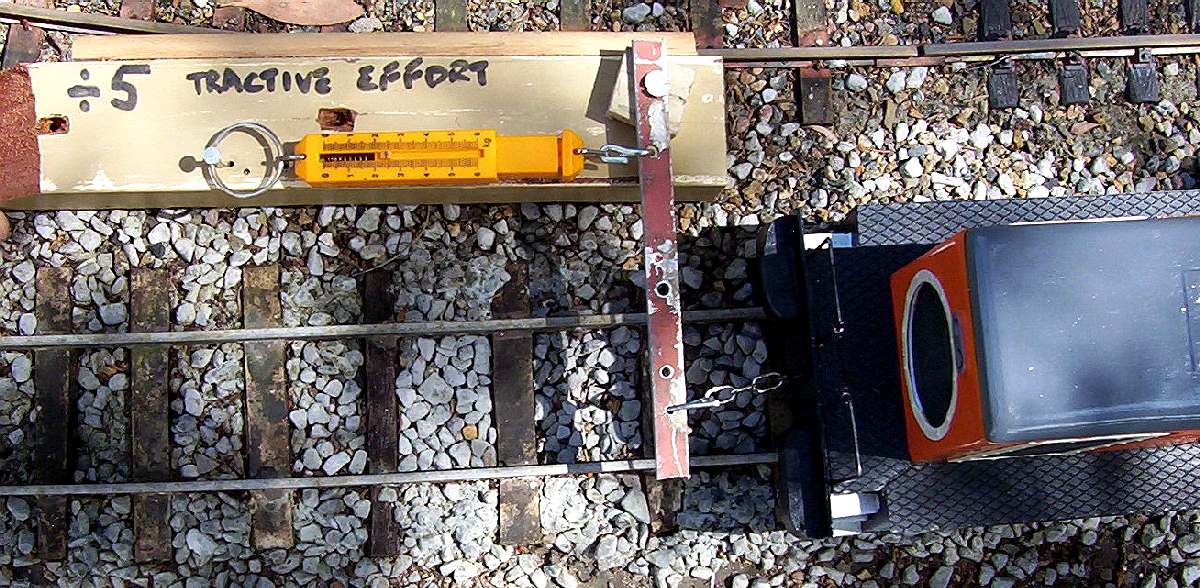
One interesting thing I realised by doing this is that I don't need to power up the loco to pull the scale, I just need to pull the loco along with the wheels skidding to get the same result. Obvious when I think about it.
Continuing with the theme, I wanted to figure out why my new diesel won't pull as much as my Climax, when they both have the same motor block. Using the dynamometer, I measured the Climax at 600g pull and the diesel at 400g pull. So I measured the locos weight on the kitchen scales at 2500g for the Climax and 2200g for the diesel. I then balanced the locos on a board to determine the weight on each motor bogie and calculated 1815g and 1585g. ie the diesel has 230g less weight on the drivers. So I added more lead until the diesel has 1875g on the motor bogie, but it still has only 550g pull. So no conclusion here! Maybe the wheels have to get a bit dirtier?
An interesting fact is that the adhesion (trac effort/weight) is around 30% which is close to what real locos have.
September 24, 2008
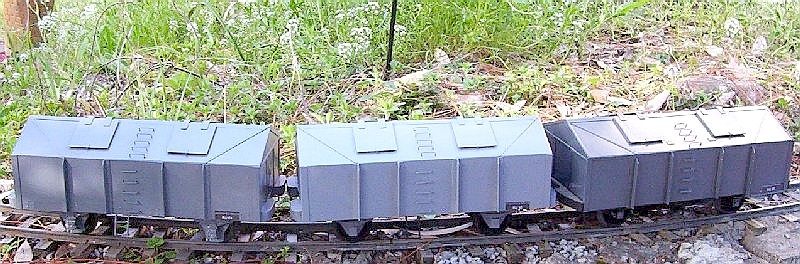
I've built a couple of 4-wheel RU wheat wagons. I built one a few years back, but decided I needed some more. I'm thinking of building a wheat silo as wheat is one of the few loads that you can't tell if the wagon is loaded or empty. The right one is the original.I thought different shades of grey would look better.
September 13, 2008
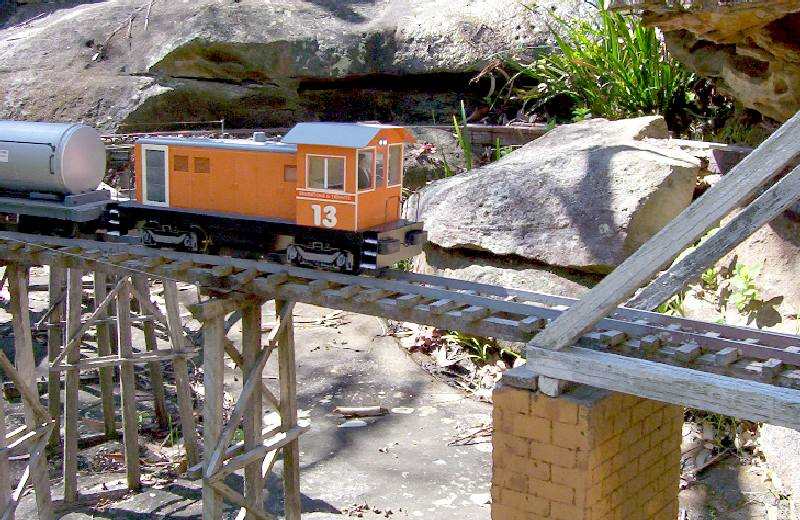
Well, after many problems, the new diesel is finally able to operate. Number 13 proved to be a real jinx. Trying to paint in the high humidity/rain meant 3 goes at painting, then the sound wouldn't work, then the RC control was faulty, etc, etc....
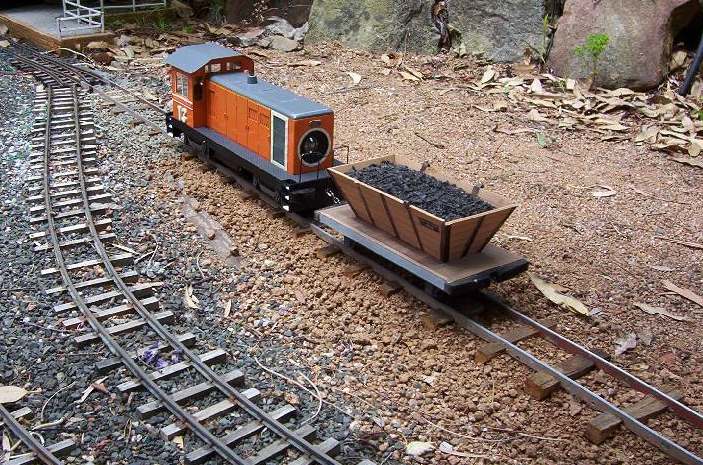
But here it is finally working. Loosely based on a BHP D-9 it's only 380mm (15") long. It uses a single Aristo motor block.
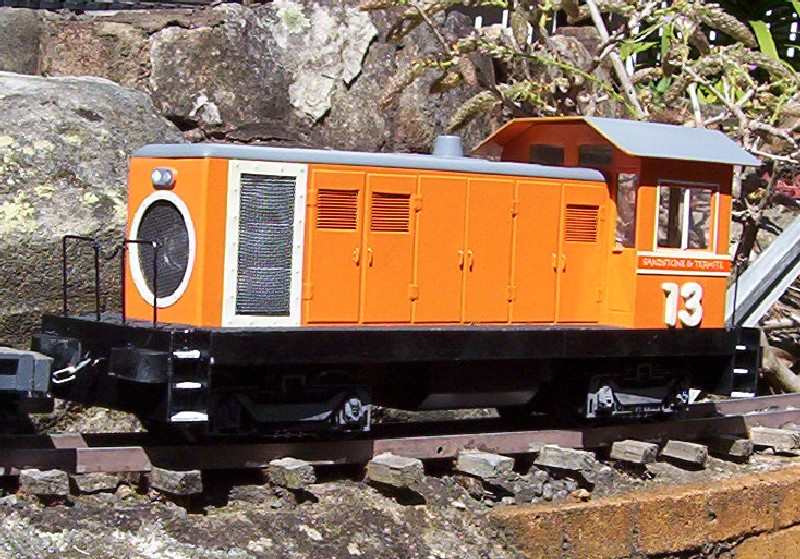
It is radio controlled using my standard 433 MHz system, and 8 AA NiMH cells. I developed a new diesel sound system. All diesel sound systems are 'driven' by the motor voltage so the engine revs lag behind the loco speed. This seems wrong as the engine revs should build up before the loco accelerates. So in this new system, the RC actually controls the sound system and then the sound cct controls the motor voltage.
The sound system is really good - the engine revs up and gets louder before it starts to move.
This is the back end. The 'fan' is actually the speaker. The numbers are wood from a craft shop, the Sandstone & Termite lettering is homemade decals. The hood roof (or is that the hood hood?) is held on by magnets and allows access to the electronics.
That track looks like it needs a bit of ballast after all the rain!
August 16, 2008
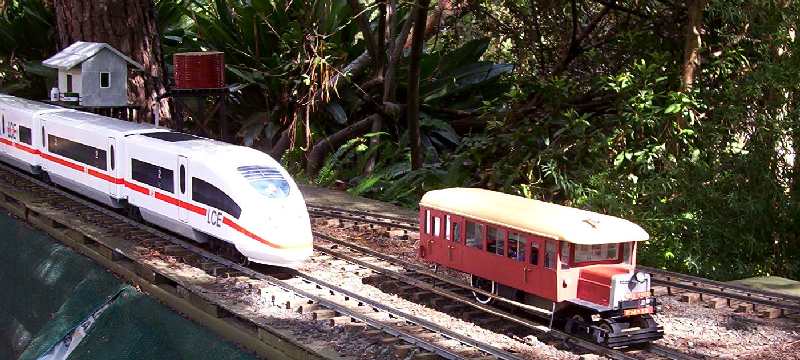
A succesful run day saw this old and new combination of Geof's Red Fred and Bryan's LCE express.
A time machine has allowed Ti-Tree station to leap into the 21st century.
May 17, 2008

I have removed Sandstone turntable as it was not getting much use. I'll lay one or two short sidings (temporary one in pic). Now I have to decide what industry to build for the spot. A sandstone block quarry ( like Wondabyne NSW) seems the best idea - after all it is at Sandstone.
But maybe a dairy or sawmill or wheat silos?????
 I've finally finished the storage cupboard under Ti-tree baseboard (after 5 years). It will be used to store buildings out of the weather.
 I've managed to 'find' a bread crate so I can make some lattice bridge sides and open wagons (thanks Geoff Coleman for the idea about using the sides for wagon sides.)
May 13, 2008
My little yellow diesel (see April 3) is a real beauty. It's a great shunter but I found it is also perfect as a pushup engine up the 1:25 grade. Because it's nice and slow I just control the front engine's speed so the diesel just takes up the slack on the last few wagons.

May 3, 2008
During a visit to Gundagai, the old weighbridge took my eye. Here's my model using the 2 new materials described for 24/4 below, installed at Melaleuca goods shed.

Here's another material that might be useful - it's fishing 'trace' line. Made from nylon, it's 0.6mm in dia and consists of 7 strands like rope. It's very flexible and could great for electric cables on poles (they always look kinked when you use wire). Even for catenary? The picture doesn't do it justice. And the best bit - $5 for 10m.

April 24, 2008
Here's a couple of hints.
I bought a 'peg basket' at a $2 shop. It's a flat matrix of 12mm squares - ideal for window frames (maybe a bit thick).
The other material is (full size) building window flashing made from polyethylene. But the good thing is that it has a pattern that's a bit like chequerplate steel - it's a bit large but looks good to me. Get it at any hardware store for about $5 for 10m.


April 20, 2008
The big trestle bridge is showing its age - the tomato stakes are rotting away after 15 years in the ground, even though they were well creosoted. So I'll have to build concrete foundations for the 16 bents. Here's the 1st two fixed.


April 13, 2008
The little yellow, switch controlled, diesel is such a success with the youngest grandson Ernie, the next project is another small diesel for the other grandson. This is my own design of a 'sort of' railcar-cum-loco. It has a few seats at one end and an open 'goods/guard' space at the other, with a centre area blanked off for the batteries and sound. It has an on/off/reverse switch on the roof.( but there is room for RC so maybe it will be a dual mode loco.) It's 9" long, based on Aristo motor block from L'il Critter ART 29351.


Without doubt it is the worst piece of modelling I've ever done - everything went wrong. I glued it together and pulled it apart 3 times and it's still not very good. The roof is still a hopless fit. But it will do after I tidy it up a bit. The louvres hide the speaker. With 4 cells it 'gallops' along at 15 kph.
April 3, 2008
The new small diesel shunter (5" long) is complete and works great. It is battery powered and for the grandsons' use it just has a simple reversing/on/off switch on top and uses 4 NiMH cells which gives about 20 kph scale speed. It uses an Aristo motor block ART29356 - these take less than 200mA when running light, so are great for small battery jobs.
The batteries are in the hood, charging points are visible under the running board in the left pic - I have standardised on using alligator clips now, so just need a couple of 'studs' to clip to.


Mar 31, 2008
Ti-Tree has only ever had 2 loops (ie a mainline and loop) ( and 3 sidings) and this causes congestion. I now believe all stations MUST have 3 loops, so 1 train can be running through while another runs around its train while shunting. So I've cantilvered a 6" wide extension off the back of the baseboard, and run a loop behind the platform. It isn't an island platform, because the station building backs right onto the track! The dock platform was removed and extended around the platform to a new turnout in the mainline.
I reused some old aluminium rail but I won't be powering the tracks for any new track I lay. There will be at least two new sidings too.see plan here.


Not the nicest piece of trackwork, but it was easier that way!
The turnout for the future siding is also at left. It will need more cantilever pieces off the back of the baseboard.
Mar 12, 2008
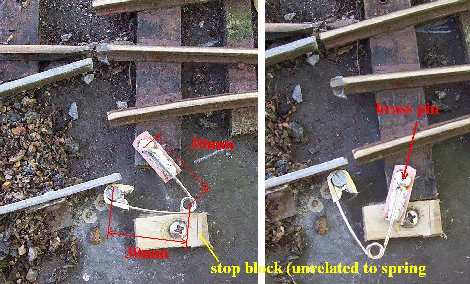 After years of using a locking pin to secure my swivelling turnouts in each direction, I finally figured out how to make an overcentre spring arrangement (Thanks to Bryan and Geof with more mechanical knowhow than me.). And they are simply made from Safety pins (of the baby nappy size).
Now no more pulling out the pins and pushing it back in every time you move a turnout. I have fitted these to 3 turnouts so far.
Now I have to get someone to figure out how to make a 3 position spring for my 3-way turnouts.
Feb 16, 2008
A couple of simple timber bogies to haul big logs. This is a prototype for a few more of these for the Climax to haul. Unfortunately it has turned out to be unstable when going downhill and pushed by the train behind - so there'll be no more after all.

Jan 25, 2008

I made a 'buckle plate' water tank from styrene and timber.
Jan 14, 2008
I built infra red detectors to operate the reversing loops at Termite and Lilyvale. Termite, being indoors was easy - I just used the ceiling lights and put the receiver between the rails.
Outdoors was harder as sunlight reflecting off light coloured wagons gave false readings. I finally had to use a differential detector system. Here's a picture of the Lilyvale setup. The little building houses the receiver electronics.

Previous Latest Pages


