This is the 2009 diary of the S&TR
December 15, 2009
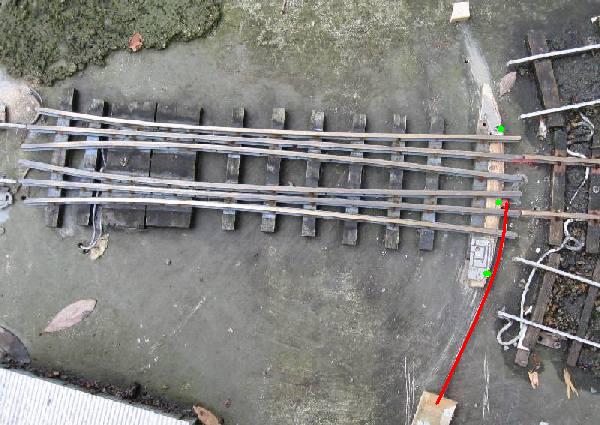
After this is complete, the 3 turnouts at the far right will be rearranged to provide a passing loop between Melaleuca and Sandstone, and Maple Jn station will disappear.
November 22, 2009
If I want to control a second loco from the same transmitter (ie can only have one loco at a time turned on), I'll just need:-
I have been using a 6:1 mix of 5mm gravel and cement for roadbed and ballast together, applying it dry and brushing it in then watering. But the problem is that it is 'final' level and not easy to make any changes.
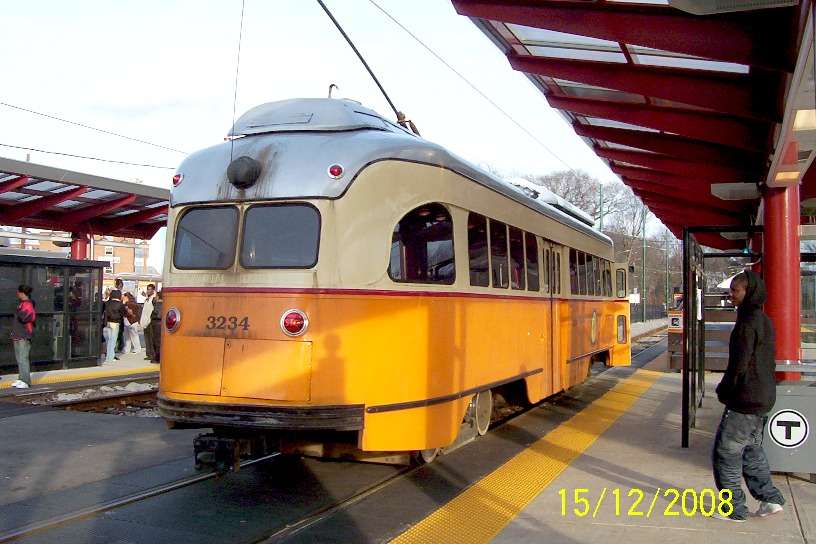
Also had a ride on Boston's "T" train systems. Wonder why they use red for headlights and taillights?? ALSO Added a new link on the Links page for data on many different motor blocks comercially available.
click here for 2004-06 diary
click here for 2007 diary
click here for 2008 diary
click here for 2009 diary
click here for 2010 diary
click here for 2011 diary
click here for 2012 diary
click here for 2013 diary
back to current What's New?
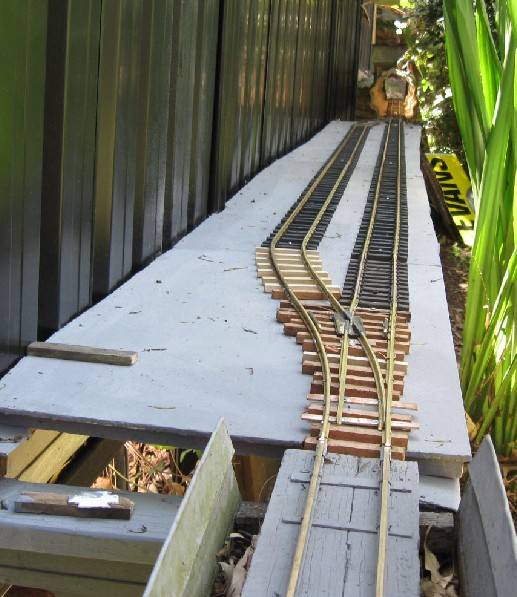
Track laying at Lilyvale has been completed.
Here's a plan of the new layout at Lilyvale. The green lines are the new path crossing and turnouts. The red lines are the new brick walls and 'extension' to the wall near the new turnout. The purple track on the left is completed, - only that on the right to go.
It provides a passing loop (blue/purple) for trains heading to Ti-tree. The yellow is the remaining part of the 'reverse loop'.
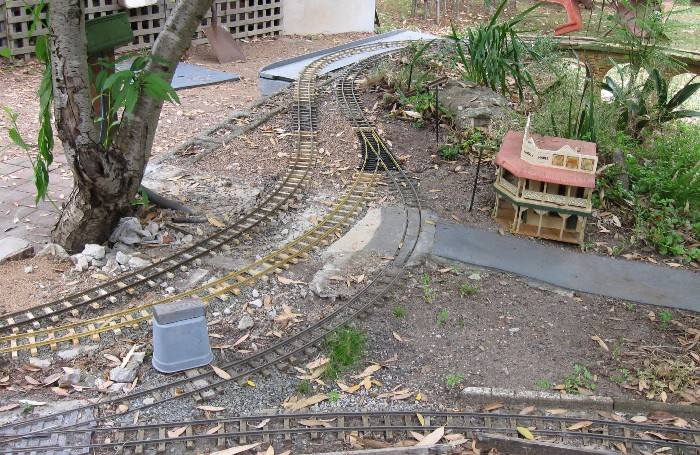
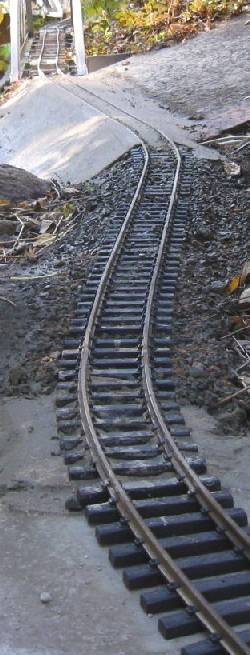
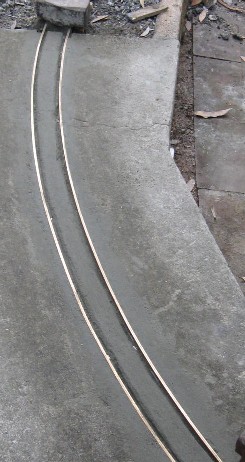 The other end of the the new Lilyvale loop ( see Nov 16) needed a new crossing over the concrete path. I bent the rails (1.5m radius), then soldered 5 copper-clad sleepers to hold roughly in gauge, to allow me to mark the concrete. Then it was just angle-grinding, wearing out 4 masonary wheels to cut the grooves. I used a slurry of 1:1 sand:cement to concrete it in.
November 28, 2009
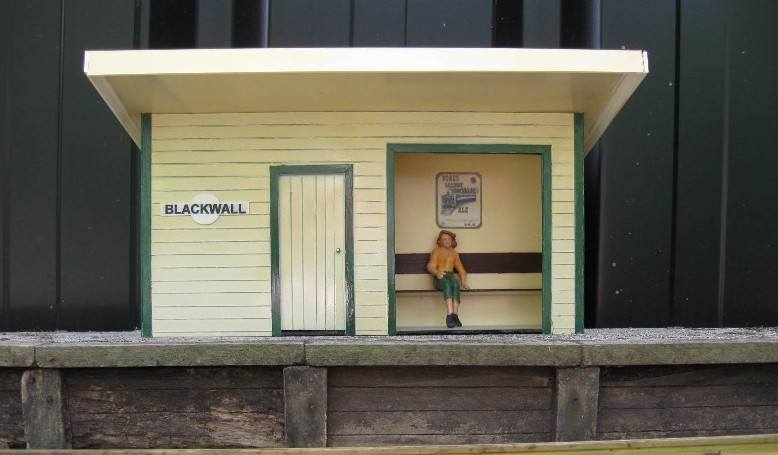
I've finished a station building for the new Blackwall station, which will be situated on the new crossing loops (see Nov 12). It's only 50mm deep, so really just a 'flat', as that's all the room I've got to the ugly black fence.
I've written up a full description on how to use the 2.4GHz RC equipment (see Nov 20). You can access it through the Electronics menu item at top right.
++++++++++++++++++++++++++++++++++++++++++++
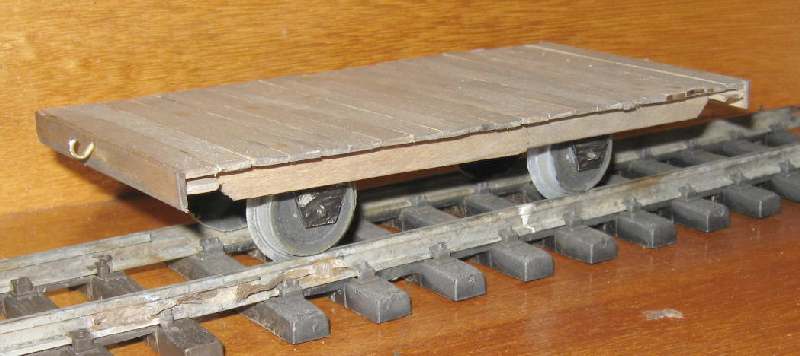
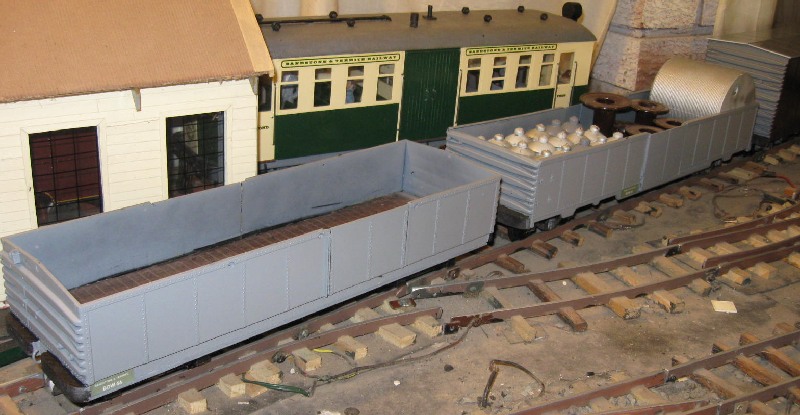
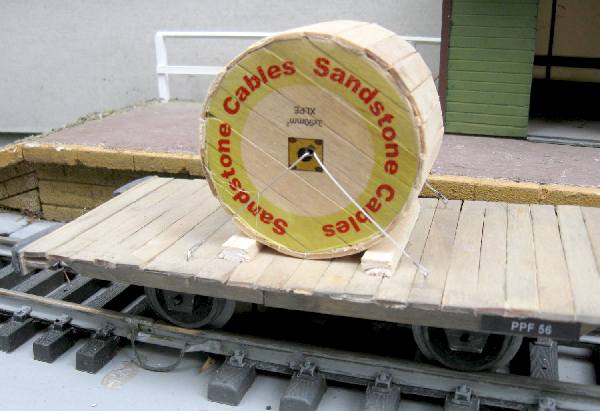 Back in July on a very cold day, I started to make a wagon from paddle pop sticks. It has sat on the bench all this time. Now on a stinking hot day I decided to finish it off. Made a cable drum, added some decals and put 200g of steel underneath and here it is.
November 20, 2009
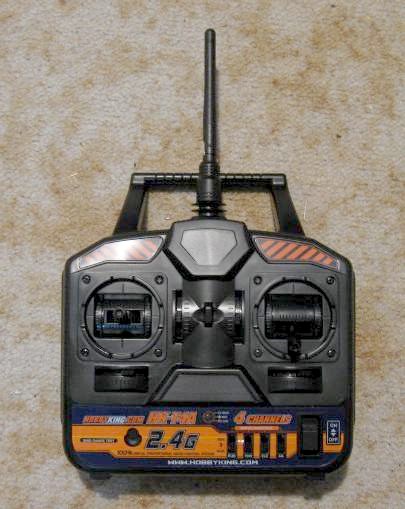
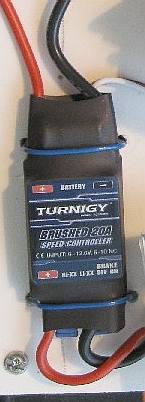
I finally received my new 2.4 GHz radio control gear from Hong Kong and installed it in my 36 class loco (replacing an old unreliable, model car 27MHz unit).
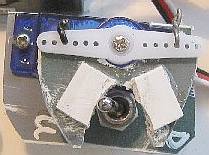
For $A65 I got the Tx/Rx unit, motor speed controller and a servo. The only work I had to do was get the servo to operate a DPDT switch to do the motor reversing.
From Hobbyking I bought:-
1x #HK-T4A-M1 Hobby King 2.4Ghz 4Ch Tx & Rx (Mode 1) = $US29.99
1x Turnigy TGY-20A 20amp brushed Electronic speed control (ESC) = $US4.95
1x Turnigy TG9 micro servo 9g /1.6kg /0.12sec = $US2.99
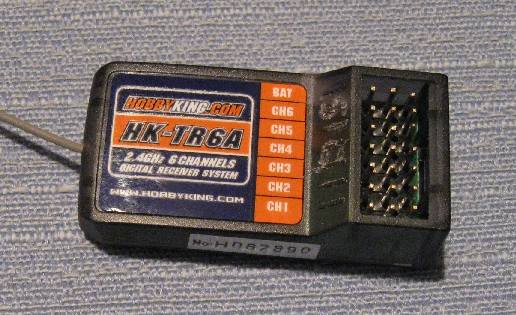
Transmitter Receiver motor speed controller servo and switch
Postage to Australia = $US20
plus DPDT switch ($5)
Total cost about $A70 (plus 8, AA NiCd batteries I had lying around for the Tx.)
1x HK-T6A Hobby King 2.4Ghz Receiver 6Ch =$US 13.95
1x Turnigy TGY-20A 20amp brushed Electronic speed control (ESC) = $US4.95
1x Turnigy TG9 micro servo 9g /1.6kg /0.12sec = $US2.99
postage about $US10
plus the DPDT switch at $5
A total of $A40 for the 2nd loco. Pretty good value!
November 16, 2009
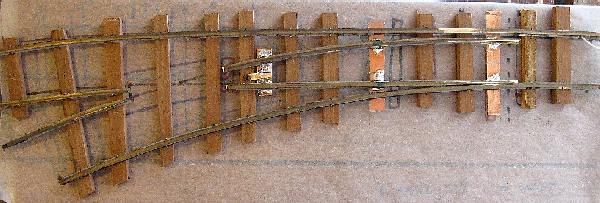 Today I built another turnout - this one's for a future passing loop at Lilyvale. I had to make it to fit the existing curve.
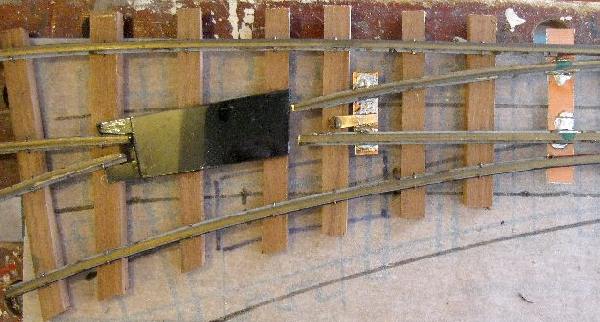 Here's all the rails finished and the first piece of 1.5mm styrene in place to start building up the frog.
 And here it is installed on the curve. Tomorrow I'll run as many trains as possible through it to test.
Then I have some concrete block work to do to extend the wall to make it wide enough for the new track.
November 15, 2009
I found some cheap model aircraft 2.4 GHz radio control equipment (thanks to NZ Garden Whistle newsletter) that looks like a cheap way to RC trains. I've ordered the 4 channel transmitter, receiver and a motor controller from www.hobbyking.com in Hong Kong for a grand total of $A73 incl postage. When it all arrives I'll be busy making sure I can get it to work, and post details here.
November 12, 2009
 I've built the left hand point for the other end of the loop, so it's all finished now.
I used black styrene for the frog - notice how I haven't used any check rails at the frog - see yellow dashed lines - I just cannot see what useful purpose they serve !
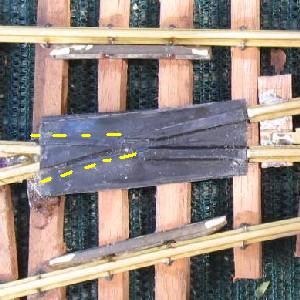
![]() I found that the Aristo point didn't work well with the 8 coupled locos - and they are Aristo motor blocks. I had to add a 0.5mm shim of styrene on the curved checkrail to hold the wheels out of the frog.
I found that the Aristo point didn't work well with the 8 coupled locos - and they are Aristo motor blocks. I had to add a 0.5mm shim of styrene on the curved checkrail to hold the wheels out of the frog.
November 8, 2009
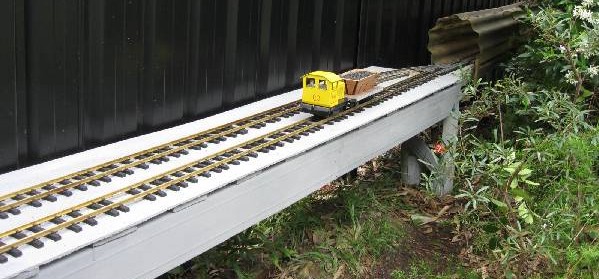 Mainline track on the new station is finished and a long siding. Here's Ernie with the work train. I used 1 ft Aristo sleeper packs, but cut the webing underneath and respaced them so that 8' of sleepers made 12' of track. Can't use this method on curves as it goes undergauge as the sleepers rotate slightly.
November 7, 2009
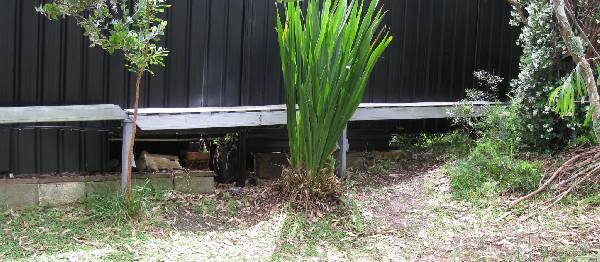
I've started to put a passing loop in along the ugly black fence between Ti-tree and Sandstone. Sandstone gets very congested at times with only the mainline and one loop, but would be difficult to add another loop. So I thought I'd put a loop in a separate location.
That Gymea lily in the middle of the pic, will have to go.
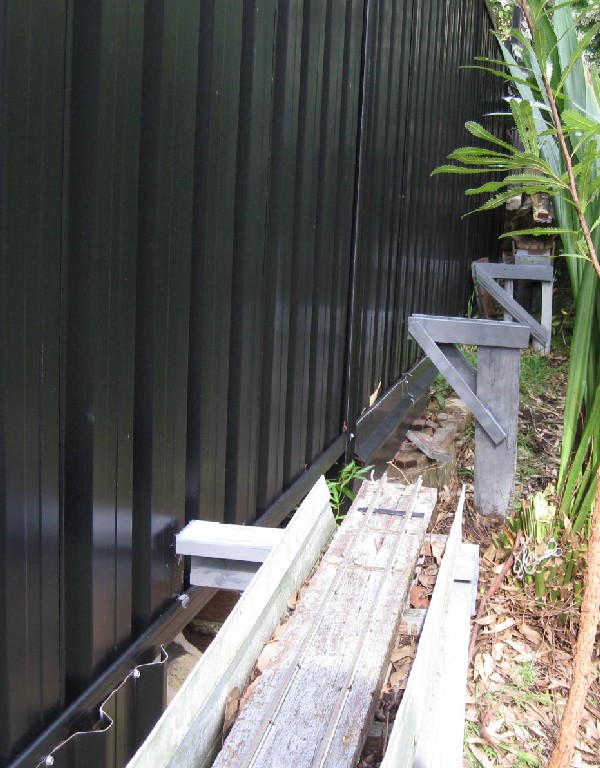
This pic shows the outriggers installed on the original piers, to support the wider baseboard.
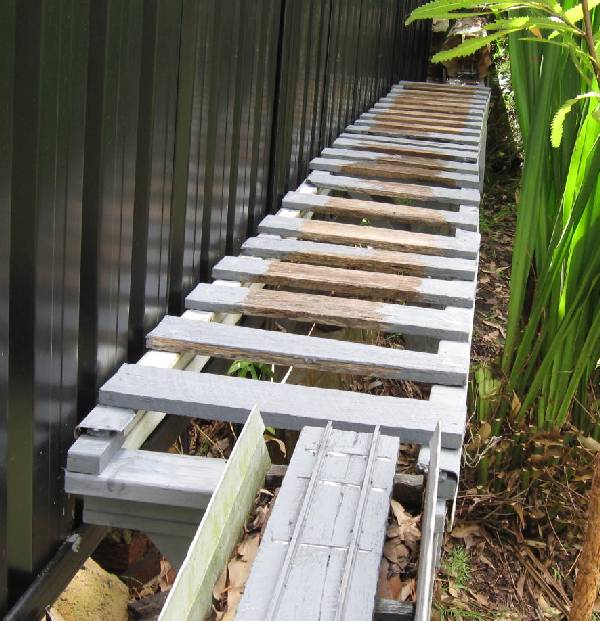 Then with my standard 'fence paling ladder' support for the fibro base. I've reused the old swimming pool metal bridge sides-turned them upside down so they are under the baseboard.
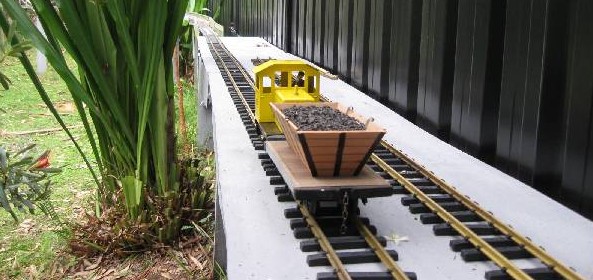
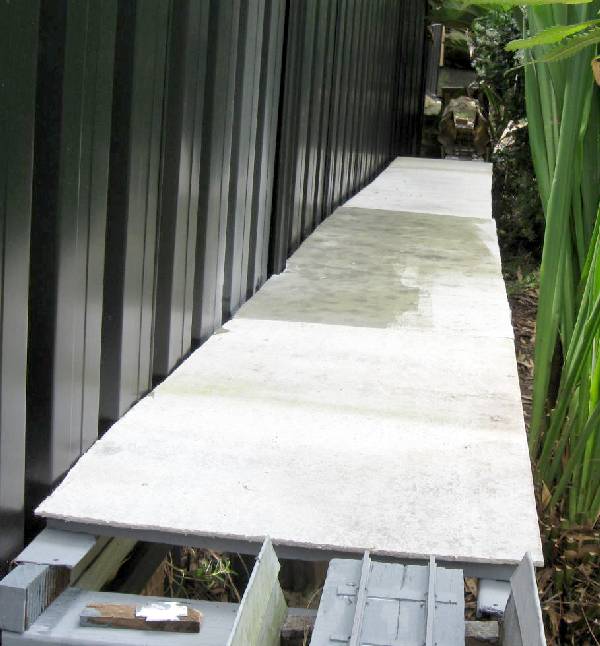 Now with the fibro installed. It's 420mm wide, I think I can fit in a narrow platform at the back, so now need to find a name for it. Track laying has started, using new club rail and Aristo sleepers. I only have the turnout for the right hand (far) end, so it will be a siding until a build another turnout.
November 6, 2009
Today I tried something really radical - I turned a piece of Hebel concrete on my wood-lathe.
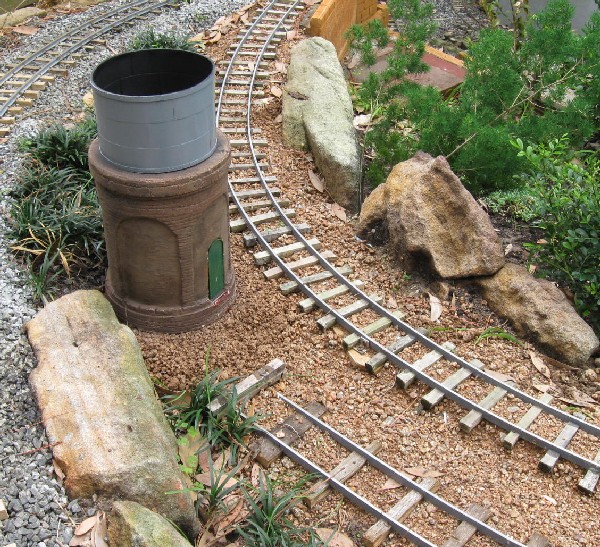 I've always liked these NSW circular, brick water tanks, so I thought the best way to make the base is from Hebel. I covered my lathe with paper and wet the Hebel thoroughly and it worked like a charm. Made lots of 'mud' everywhere. It's 6" dia and 7" high. I decided to make it a bit fancier and put arches on the sides. Here it is almost complete, at Melaleuca turntable. Needs some pipes to finish it off.
The water tank is a CD holder - the kind you get when you buy 50 blank CDs.
October 17, 2009
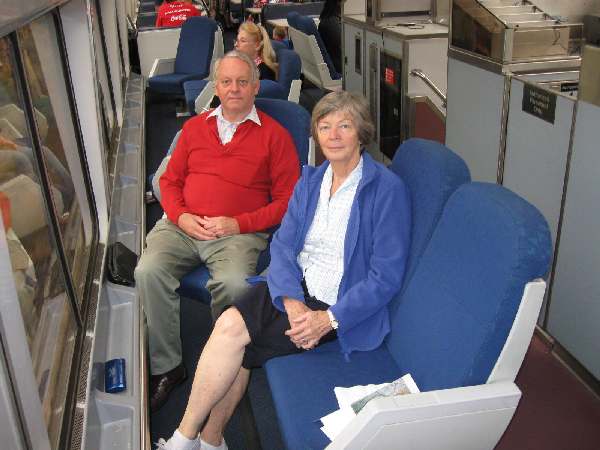
We have now returned from the US and sampling Amtrak from Boston to Arizona and it was most enjoyable. Here we are in the observation car of the Sunset Limited
But now it's back to Garden Railways !!!!!!!!!!
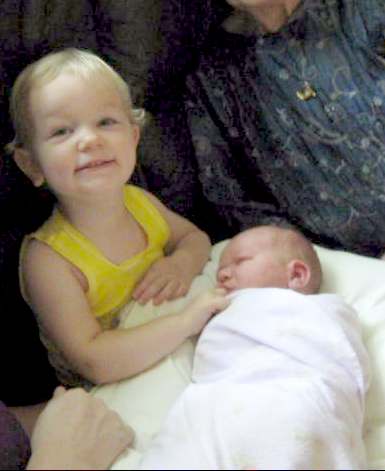 September 24 saw the birth of yet another grandson. Unfortunately he and his sister live in the USA so won't get to play trains with Grandpa.
August 3, 2009
I've put a new video on Youtube. The link is on the Pictures Photo Index page or
click here
August 1, 2009
Today saw a great Operating Day for GRASS members on the S&TR. We ran point-to-point with lots of shunting and many excursion special passenger trains. see here for pictures on the GRASS website.
July 28, 2009
Another little future train operator has appeared. New grandson, Eddie, arrived today. Here he is with his 2 brothers Nick and Ernie who are already accreditied operators.

July 25, 2009
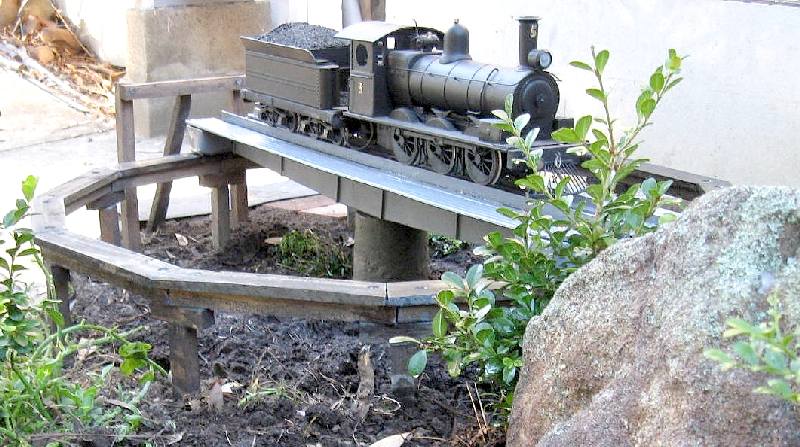
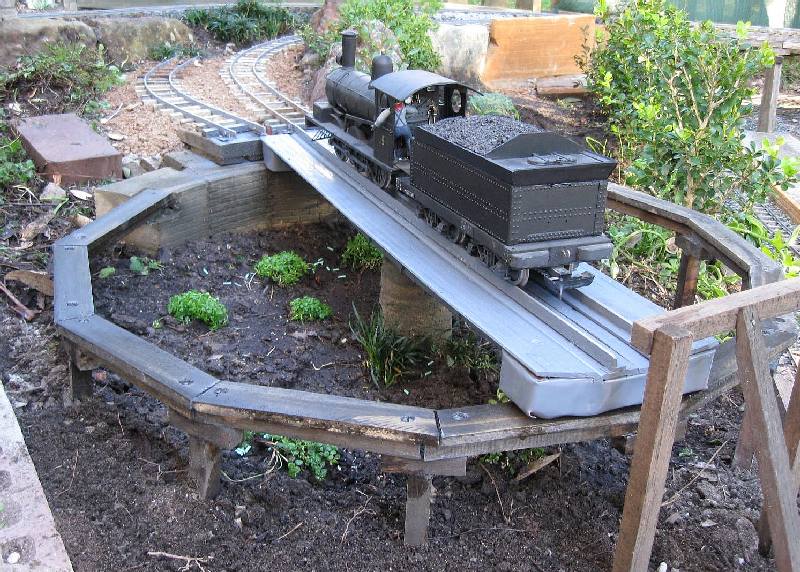
As soon as I saw a picture of the elevated turntable at Woolloongabba I knew I had to have one!
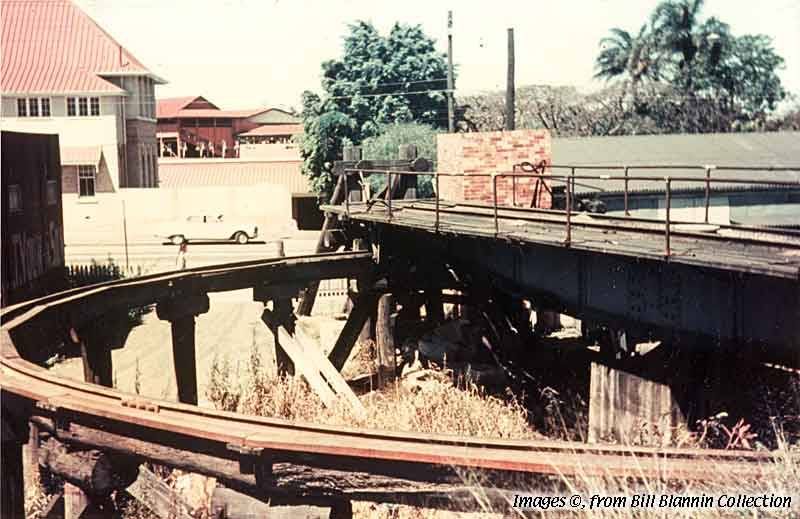
So here it is virtually finished. It's just 18mm square tomato stakes, 500mm long pounded into the ground and concreted in. The TT bridge is the reclaimed one from Sandstone shortened to 32" and with 4 small wheels added (from a castors).I know it should have handrails but they are too delicate to withstand handling. I thought I would need some sort of 'locking pin' to align the tracks but I've found it works OK without. It's manual operation and no track power - battery locos only! There is one siding leading off the TT for a loco to stand.
July 25, 2009
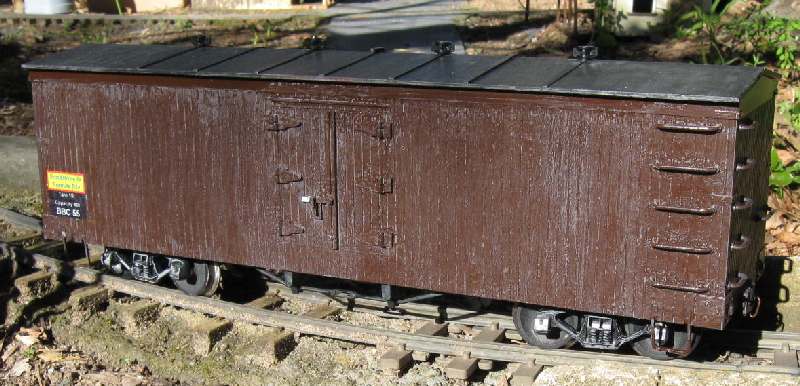
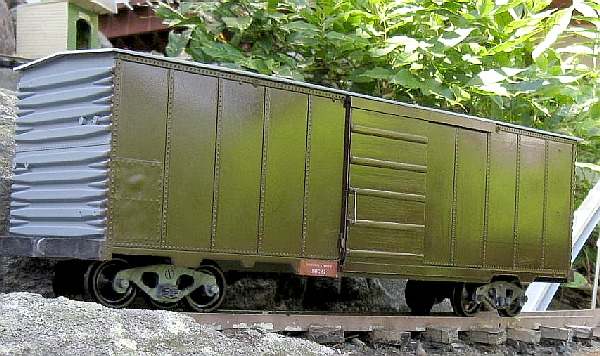
I was given a Bachmann reefer by Bryan, but seeing as these were not a type used in Australia, I decided it needed a little work. So I removed the roof walkway and icing hatches and covered the holes with plastic sheet. A couple of garden irrigation fittings became the ventilators to fill the holes. It was a horrible teal colour so I painted it brown then washed it with watery grey.
But it was too low when I put it in a train so I've raised the body by 10mm.
It's the 55th vehicle on the line, only 6 of which are not scratchbuilt.
July 9, 2009
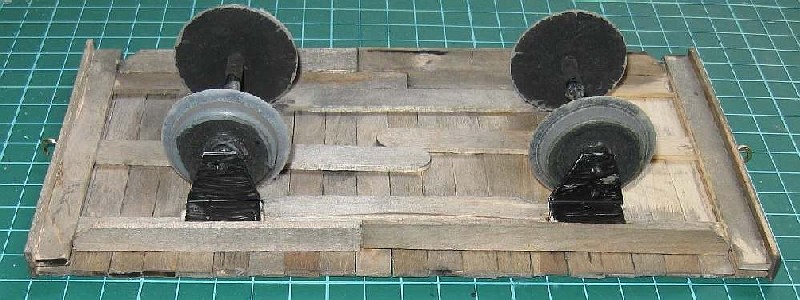
It was a windy, cold day � too cold to go outside, so I wondered if I could make a wagon from paddle pop sticks (PPS) in one afternoon. I�d recently bought a pack of 500 PPS for $2.50 from a $2 shop. I�ve found that 4-wheel wagons 200mm long with 100mm wheelbase, work well on my track, and my wagons are all 100mm wide max. Cutting the curved ends off the PPS gives 100mm long, so I took 21 of these side by side. I had some old spare wheels so to mount these I used a piece of 18x18x1.5 mm plastic angle that was lying around and here's the result
July 6, 2009
Did some gardening and moved some rocks to get the new siding through. New mainline track all complete, just need to finish off the trackbed. Here's the first train through.

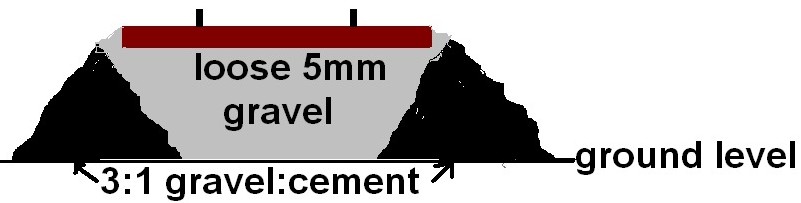
This time I'm trying a different method as shown in the diagram. I temporarily supported the track every couple of feet with old bricks etc. It's generally 1 to 3" above ground level. Then I mixed 3:1 (ie normal strength concrete but with 5mm gravel) dry and placed it alongside the track up to sleeper top height (shown black). I let it form its natural angle, then sprayed with water. When it's dry, I'll fill the insides of the inverted triangle up to sleeper top with loose gravel. This will allow me to 'tamp' out any irregularites.
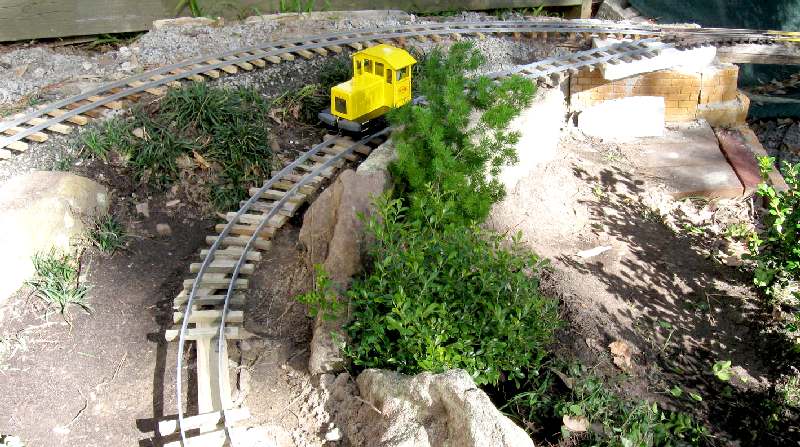 And here Ernie tests the future turntable siding.
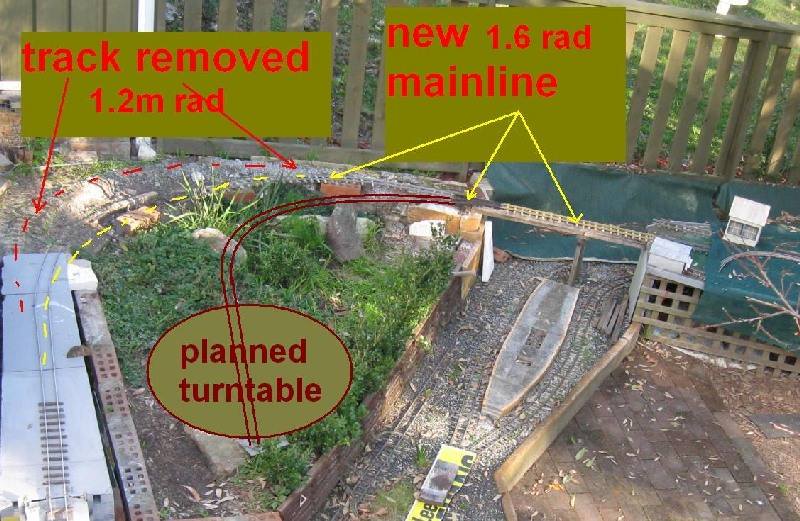
July 1, 2009
I've started replacing about 4m of aluminium rail with brass on the sharp (1.0m rad) curve near Melaleuca. The new curve will be 1.6m rad on a 1:25 grade. I'm putting in a 2' radius turnout to allow for access to a future turntable. I'll reuse the old alum rail for the TT siding. I've repaired and strengthened the fibro baseboard (left of pic). Some new gardening will be required when I'm finished.
May 30, 2009
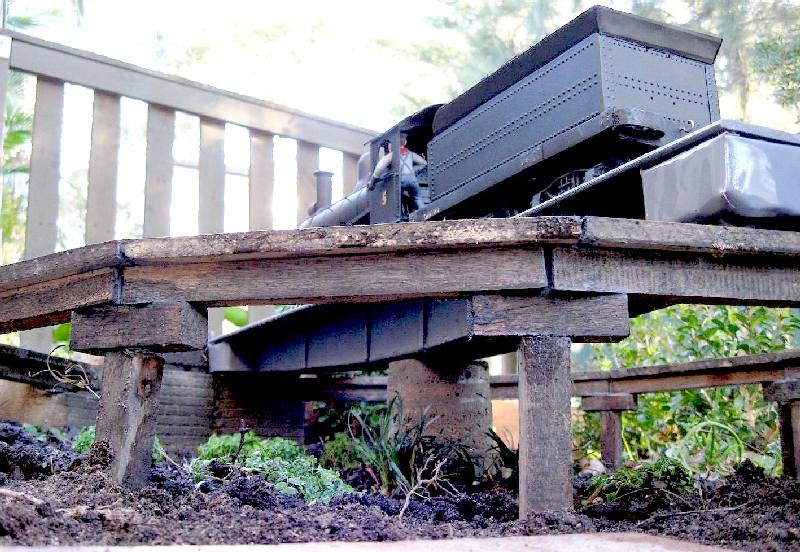
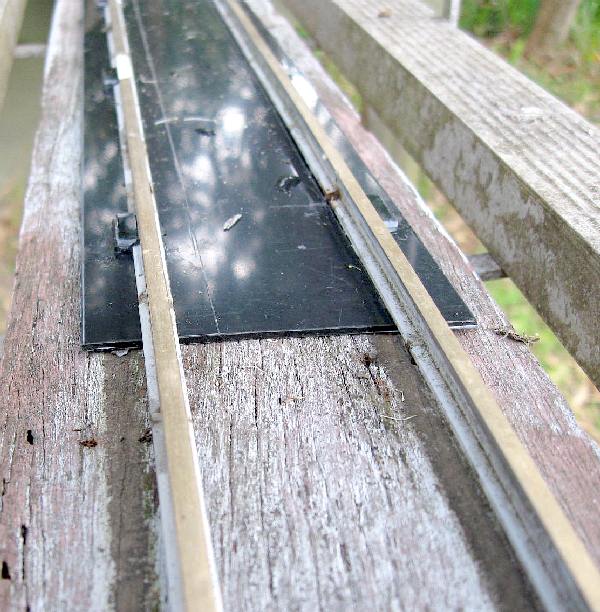 Back in 2002, I tried an experiment of nailing rails directly onto old fence palings, without sleepers. I figured on bridges this wasn't too far from prototypical. BUT, some of the palings have been a problem with swelling when wet and rotting where the nails are. I have bought plastic sleepers to use on some of the problem areas, but on the arch bridges I can't increase the rail height by fitting sleepers. So I bought some black, 1.5mm styrene and am laying it under the rails and renailing through it. Here's the first section. It seems to work OK. I put a few styrene lugs on it to align things and just rip the old nails out, slide this under, clip in lugs and nail away!
May 26, 2009
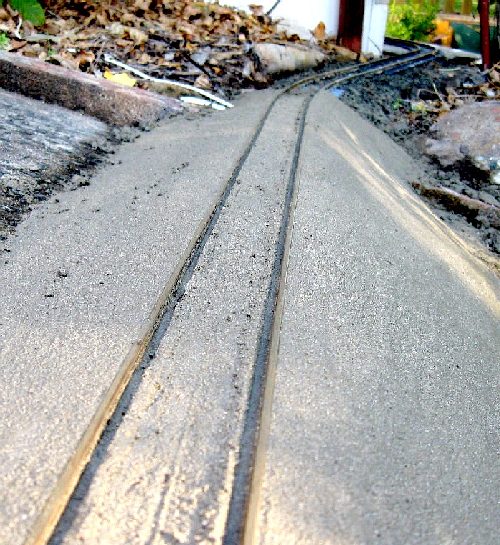
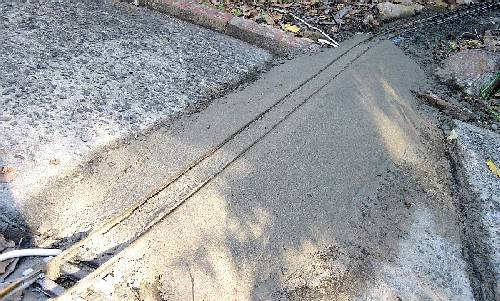 The 2nd path crossing has been falling apart and the track very uneven. The concrete path is actually 'sliding' downhill slowly. So today I ripped it all out, made some new brass track all the way down to Fibro Flat (5m), and concreted it in. Under the concrete is timber sleepers, but the rest is Aristo plastic. The grade is now more constant and the curves look better at least.
May 23, 2009
 I've managed to make my 3-way turnout 'spring loaded' so I don't need to pull a locking pin in and out to move them. It's just a bit of spring wire (shown red) and 3 indents to line the tracks up (green). If it works OK I'll cover up the long wire somehow.
(see March 12, 2008 entry down the page for how I did the 2-way turnouts)
May 20, 2009
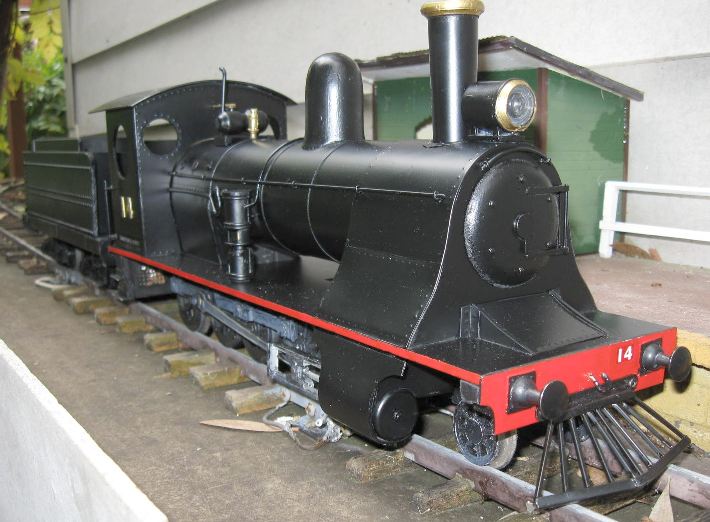
The 4-8-0 is finally looking like a loco after all the work. Put the red lining on the tender and added sandboxes.
I still can't decide whether to paint the dome brass. The RC and sound system are finally working after much 'tweaking'.
see a NEW 50sec (10MB) video here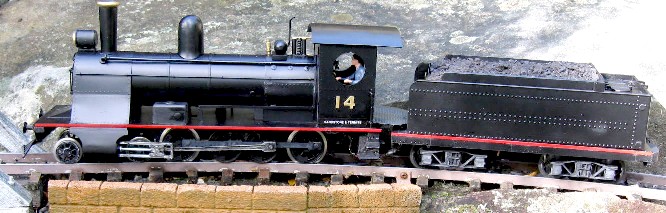

May 12, 2009
 It's the 15th Birthday of the SaTR.
Of course it didn't have a name in May 1994 - it was just a Bachmann Big Hauler and a few metres of homemade track. But the original semicircular trestle was complete (still there but now 'abandoned') and the steel arch bridge (still in use in a different location).
May 5, 2009
Three more videos added to Youtube (Episodes 3, 4 & 5). Two show trains at Melaleuca station and the 3rd is riding a log train from Melaleuca to Sandstone.
click here
May 2, 2009
Finally some progress on the 4-8-0

April 29, 2009
I've put a couple of videos on Youtube. The link is on the Pictures Photo Index page or
click here
April 12, 2009
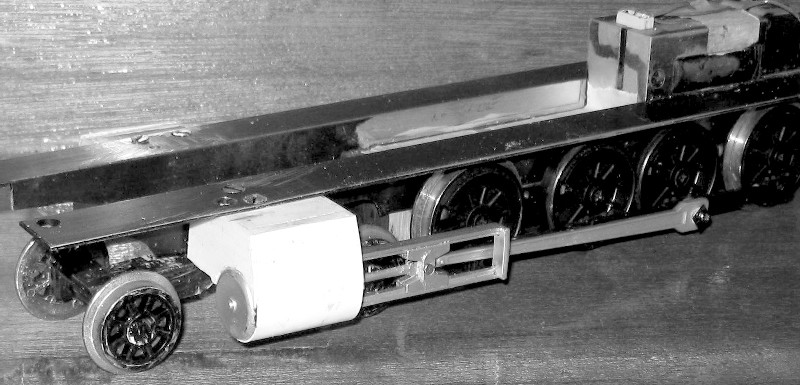
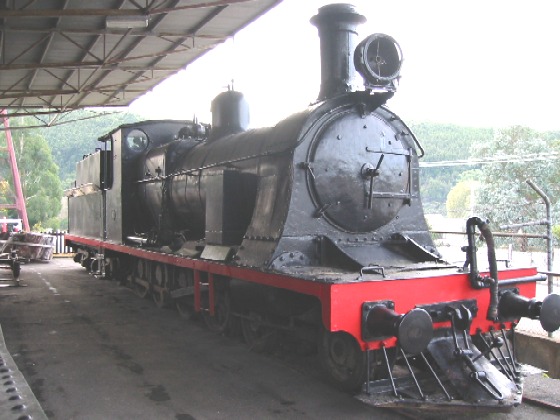 I've decided to build a 4-8-0 loco using the Aristo 0-8-0 motor block I've had sitting around. It will be loosely based on this Dubs 4-8-0 built for the Emu Bay railway in Tasmania. I want to get that flaring down over the cylinders if I can. I've shortened the pony truck of a Bachmann Big Hauler by 12mm and will use the cylinders from it as well. I realised I can't get the batteries, RC, sound and speaker all in the boiler, which will be 250mm long, 56mm dia electrical conduit. So I may put them all in the tender to reduce the number of wires between tender and loco. Goes against my philosopy of putting the heavy batteries in the loco to get the adhesion. I'll probably shorten the big hauler tender.
Here it is with the frame and cylinders finished. I've tested it around all my track and the pony truck stays 'glued' to the track - always the biggest problem.
+++++++++++++++++++++++++++++++++++++++++++++++++
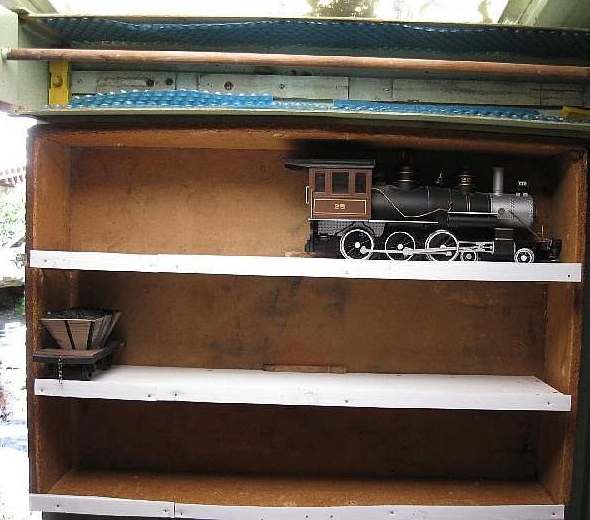 In some non-train work, I've been building more storage shelves for future trains to 'live' in.
April 2, 2009
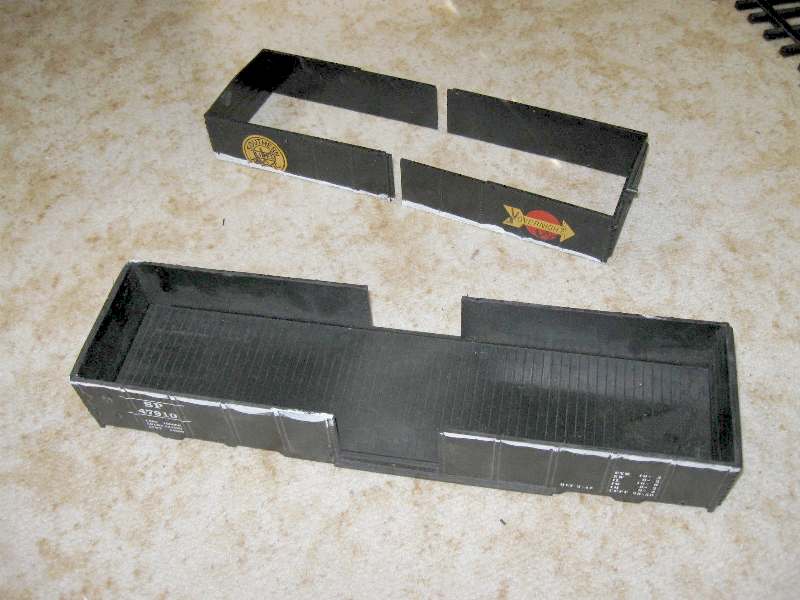
When I visited Dan Pierce in Boston last Christmas, he gave me a couple of LGB boxcar bodies - just the shell, no roof, doors or bogies. Unfortunately they were damaged in my suitcase on the way home. I'm repairing one of them as a boxcar, but it's almost more work than building a new one. So I decided to cut the 2nd one in half and make 2 open wagons. It's easier to make a floor then a roof!
March 28, 2009
Here's a link to a short video I took of my latest diesel, to show off my sound system.
click here
March 18, 2009
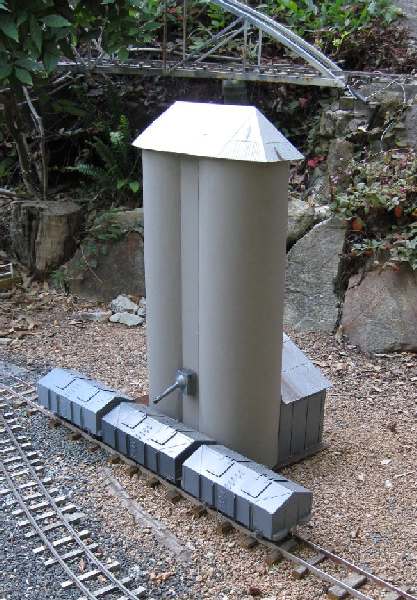
I wanted to make some concrete wheat silos. I thought of using PVC pipe but it needed to be around 200mm dia and each silo about 600mm high; and this would cost a fortune.
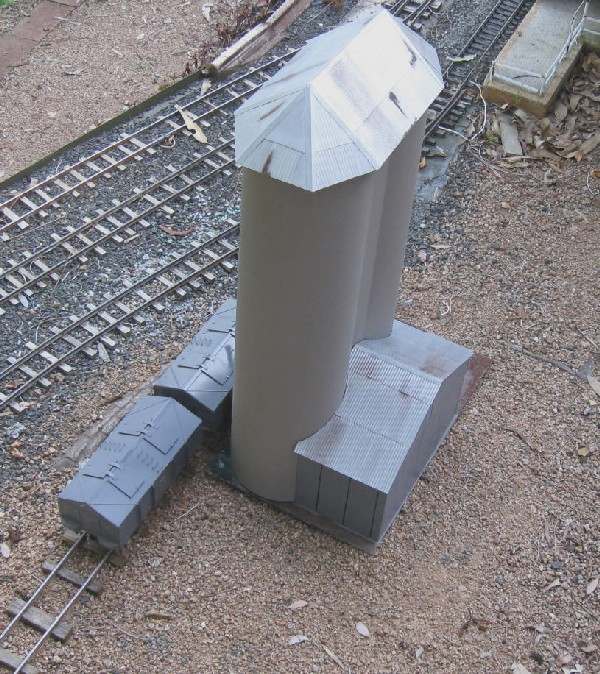
So I took a trip to Reverse Garbage and bought a 2.4m length of 5mm thick cardboard from the centre of a carpet roll for $6.
I sealed the insides of the tube with timber sealer (cardboard is sort of wood, right?). Then Kwik-Gripped 0.5mm styrene over the outside, being very sparing with the glue to not dissolve the thin styrene. (another $4). I decided to use just 2 silos instead of the prototype 3 or 4 or more, just to keep the size down. It will be a very stylized version, with no actual elevator structure, at 1:32 scale. If most people recognise it as a wheat silo, that's all I want.
The loading shed is a plywood frame, covered with corrugated iron made from plastic sheet in my hand-held corrugator, Kwik-Gripped onto the plywood. The standard NSW shed looks like the pic below, but I decided the overhanging bits would be too flimsy and I wanted doors as I've found that open buildings just fill up with spiders, leaves etc. So it's a simple closed shed.
The silos are painted with a mixture of white paint and black (cement) oxide to give a bit of testure. The rust on the roof is brown oxide dry-brushed on and sealed with clear spray. There's not a lot of detail as flimsy bits on outside buildings just get damaged or covered in spider webs.
March 17, 2009
I've transferred most of these webpages to my Optus ISP as I'm sick of the ads on Trainweb and the fact that search engines don't seem to 'find' sites 'within' Trainweb.
These What's New? pages and Clickable Map and Photo Index will stay here on Trainweb.
Nothing else has changed on the moved pages.
So if you have a link on your website or a bookmark to the main home page of the S&TR, you might like to update it to:-
https://members.optusnet.com.au/satr/satr.htm
March 16, 2009
GRASS website updated with pictures of a great running day here on 7/3/09
Feb 14, 2009
I've updated my 'Making Track' page with lots more description and pictures.
January 14, 2009
The first entry for 2009. We're back from the cold of the USA, ready to do some train running in the sun instead of the snow. Visited Charles Ro in Boston for drooling purposes only - my only purchase was a diesel motor block ($US31) 'to try it out'. Doesn't look as good as Aristo, but we'll see when I figure out what to build with it.
Did manage a visit to Dan Pierce (left pic) and Sean McGuilicuddy in Massachussets, but too much snow to run much.

One ride was on this old tram still performing daily service.