


This is the 2004-2006 diary of the S&TR
May 27, 2006
May 21, 2006
May 13, 2006
April 14, 2006
March 17, 2006
March 9, 2006
Feb 28, 2006
Feb 6, 2006
Jan 12, 2006
Jan 10, 2006
Jan 7, 2006
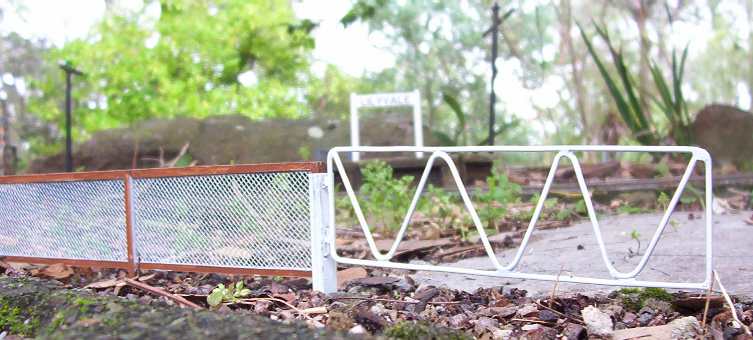
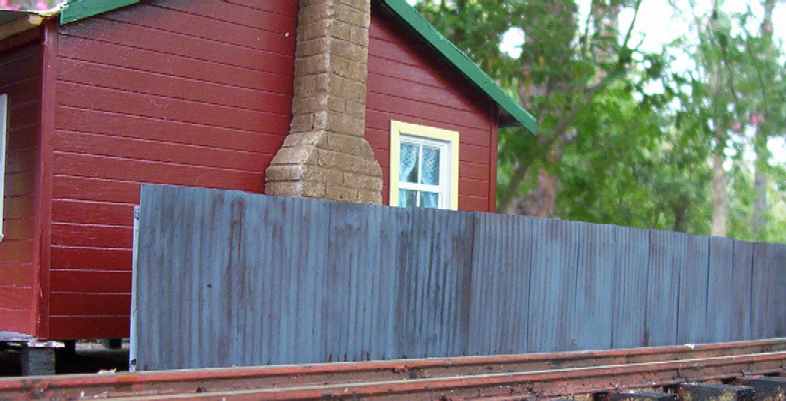
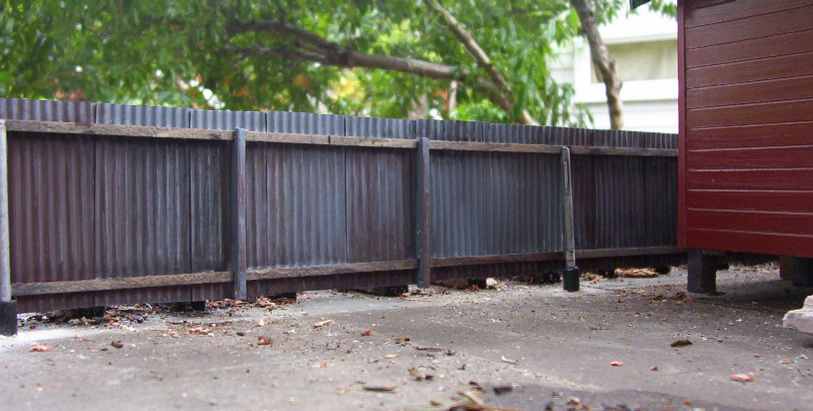
I've been experimenting with making 'corrugated iron' from plastic sheet instead of aluminium cans.The plastic sheet is used for covers on reports or overhead transparencies. It's the thicker type - not the very thin O/H transparency. It seems to work quite well - a couple of passes through the corrugator and it gives a good profile which is held. It works best with pieces no more then 75mm wide in the 'gator (ie that makes 75mm long sheets). It has to be sanded with fine sandpaper on both sides before use, so that it can be painted or glued. As an experiment I've put together a portion of CI fence, using timber rails and Superglue to attach the sheets of CI.
Dec 1, 2005
Nov 28, 2005
Nov 17, 2005
Nov 9, 2005
And I have finally got my modifications to the Oatley Electronics UHF radio control working. The problem with these great, cheap little radio controls is that you can't use two at once. I've added a small circuit to the transmitter so that it only transmits in bursts. This should allow up to 4 units to 'time share'.
Oct 6, 2005
Sept 5, 2005
Siding extension
August 31, 2005
August 24, 2005
August 11, 2005
July 13, 2005
June 7, 2005
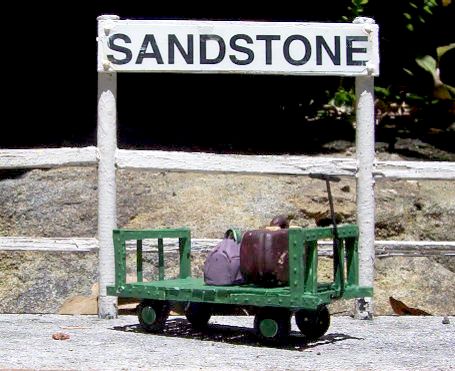
Mar 21, 2005 Here it is standing at Sandstone station.
Feb 16, 2005
February has turned into 'electronics' month. But I've finally finished all I want to do for now - I've had enough electronics for a while. It's time to run trains!
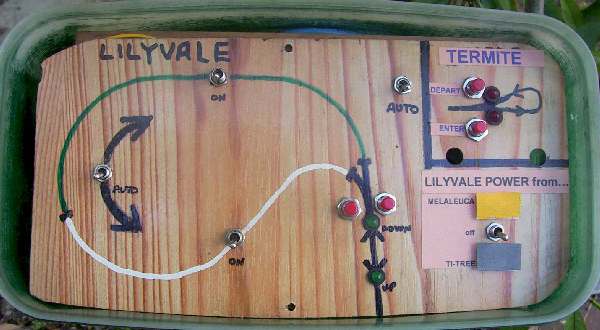
In conjunction with the new Melaleuca wiring, I've made some major changes to the overall electrical system, with a new plug/patch panel to allow any one of the 4 track radio controllers to connect to any of the 4 mainline sections. Every station area has it's own Local controller and well as being capable of being fed from the mainlines at either end. The result is that when operating as a point-to-point line, the 4 controllers will become the safeworking 'staffs' for each single line section. (Lilyvale has no local controller as it is just a reverse loop with no sidings, so no shunting is possible.)
For example if you are approaching Melaleuca from Termite, using the grey controller/staff, you must clear with any other operator in the station and then connect the station to grey. Then to depart to Sandstone on yellow controller, you select yellow for the yard, pick up the yellow controller/staff and depart for Sandstone.
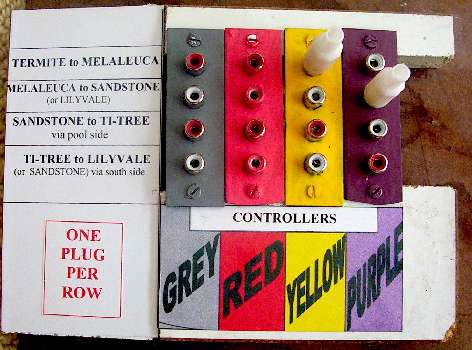
Here's a pic of the 5 control boxes.
Ti-Tree Melaleuca
Termite Lilyvale
Sandstone The four RC controllers
Oct 9, 2004
Sept 24, 2004
July 21, 2004
April 15, 2004
March 7, 2004
I've added a new page of "Beginner's Hints". I've had quite a few email requests for information on getting started in GR that I thought I'd consolidate them. Access them through the Tech Tips menu item above.
click here for 2007 diary
click here for 2008 diary
click here for 2009 diary
click here for 2010 diary
click here for 2011 diary
click here for 2012 diary
click here for 2013 diary
back to current What's New?
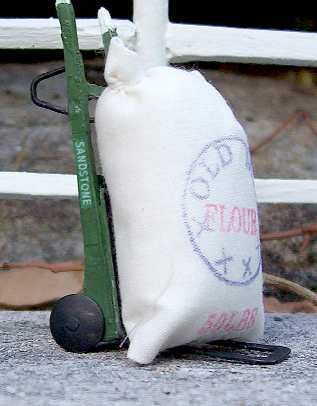
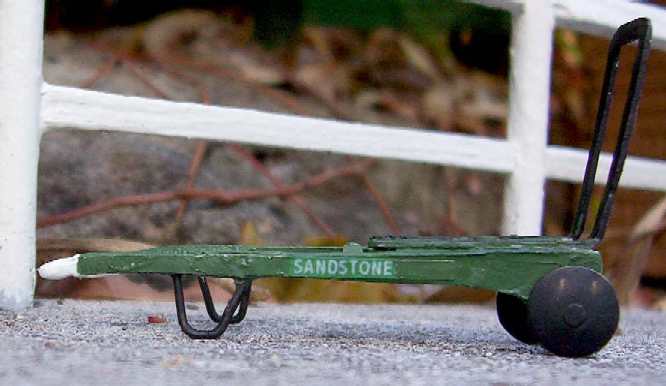
Sandstone station now has a luggage trolley for the porter to use. It's made from styrene, a bit of steel wire bashed flat with small drawing pins for wheels. It's 55mm long.
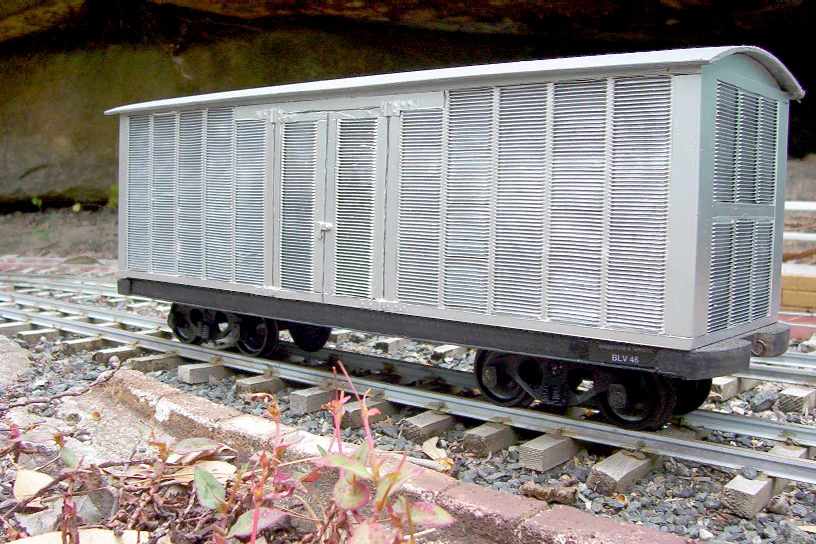
A bogie louvred van has been added to the goods wagons roster. It's a 1.5mm thick styrene box covered with Mark Hobbs' magic louvre material and the roof is curved plastic from Reverse Garbage. Bogies are from 3mm styrene with Bachmann plastic wheels, with steel washers glued on the back for some extra weight 'down low'.
I've painted it silver, but am not real happy with the colour. As usual the louvres do not reproduce well with a jpg file.
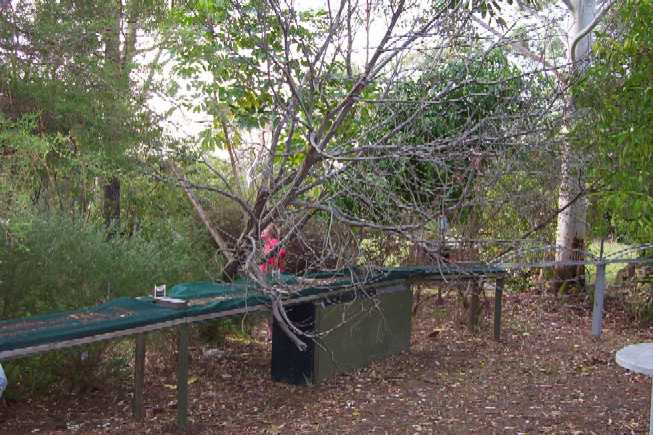
Last week's wind storm brought down a dead tree across Ti-tree station - luckily little damage because a branch just happened to hold the main trunk above the station. But it took a lot of work with a chain saw to clean up. Just a foot of rail to be replaced.
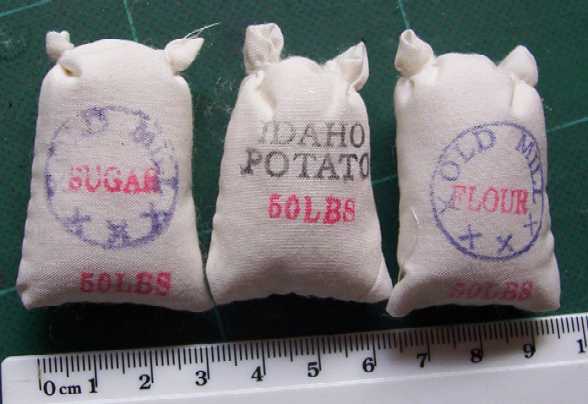
I found some model wheat bags etc at The Warehouse - this is a great shop for ferreting out stuff for the trains! You get 6 bags for $2.50 - each one is about 40x25mm. Now to build a trolley or two for them.
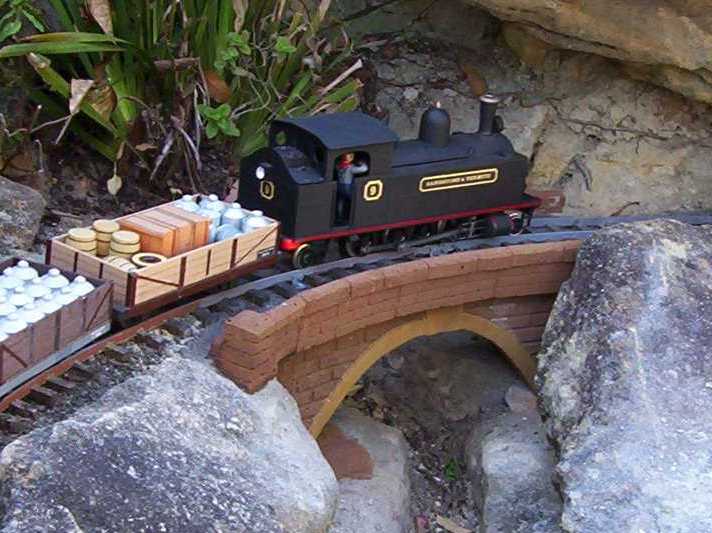
The bridge over Mint Gully has always been a temporary affair - just a couple of tomato stakes, but I've finally got around to making a single arch from a block of Hebel. Mint Gully is a natural cleft in the big sandstone ridge, where a mint plant sometimes flourishes (when it rains). The left picture is the old view. The new bridge is carved from a 200x200x600mm hebel block. The track is on a 900mm rad curve and the arch opening is skewed to the track to match the direction of the gully. It was a difficult job and I managed to break the arch when almost finished, so I pinned it together with a couple of 100mm nails and Liquid Nails adhesive.
 A bit of brass tube, some steel wire and cotton .....
and an iconic Hills Hoist for the station master's house!
(very hard to photograph in-situ)
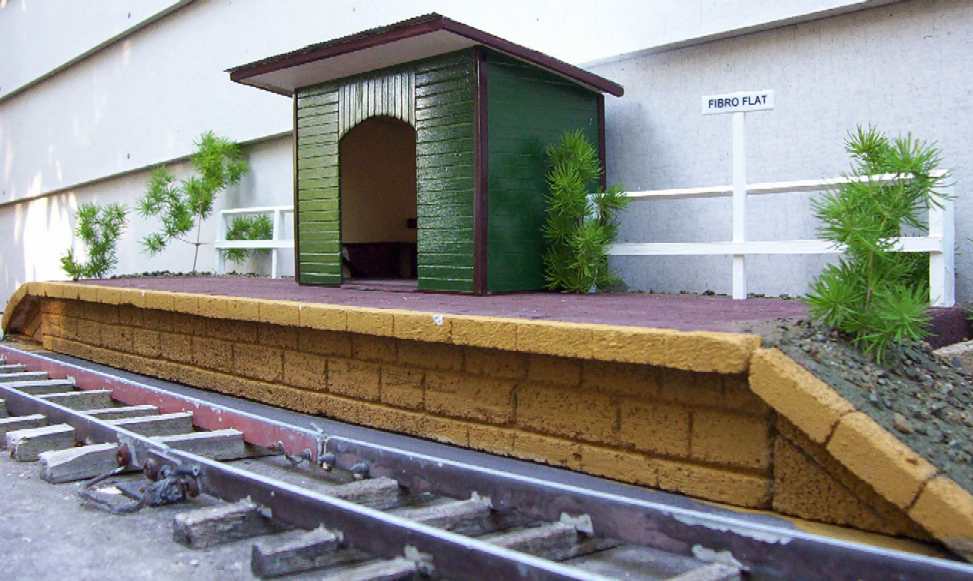
I decided I could fit in a new platform 'halt' just outside the workshop/Termite door. This is already on a fibro 'baseboard', so it just needed a block of Hebel and a simple styrene building.
Deciding on a name was difficult as I usually name stations after a nearby plant. But there are no plants here - just the fibro board against the fibro workshop wall. So it has (tentatively) become "Fibro Flat".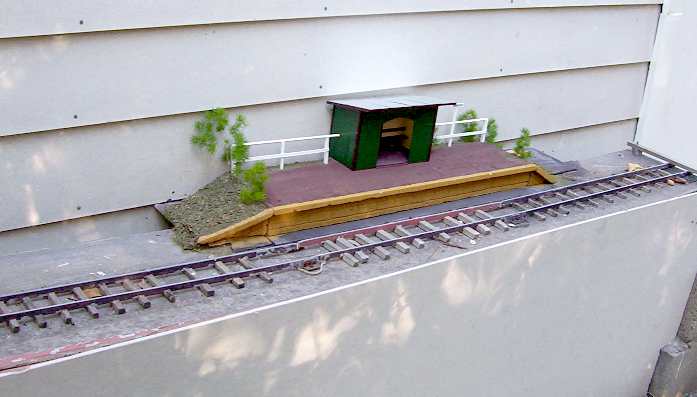
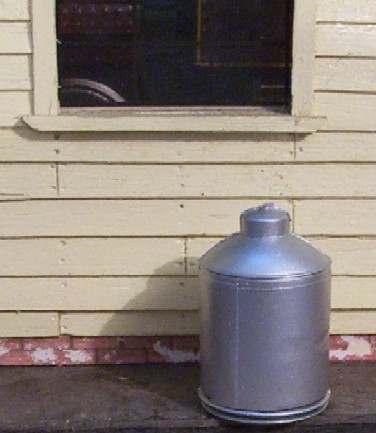
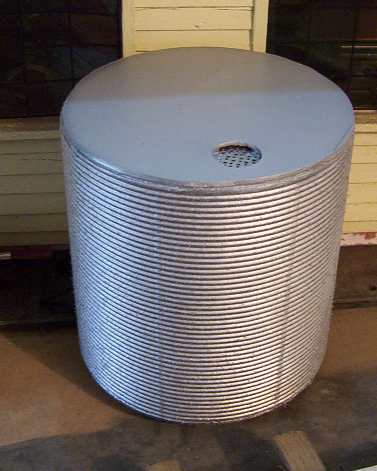
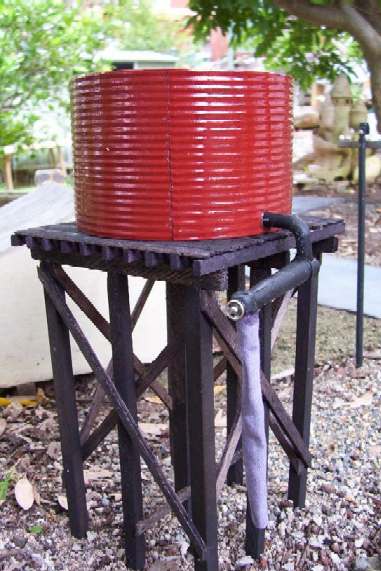 A visit to Puffing Billy prompted this model of the water tank at Gembrook. It's just a piece of 110mm pipe with stryene ends. I found that 'overhead transparency plastic sheet' goes through the paper corrugator quite well.
The support is treated pine and balsa. The pipework is from an electric tootbrush 'bit' and garden irrigation pipe, with a press stud for a wheel. The trunk is a piece of material sewn by Pauline.
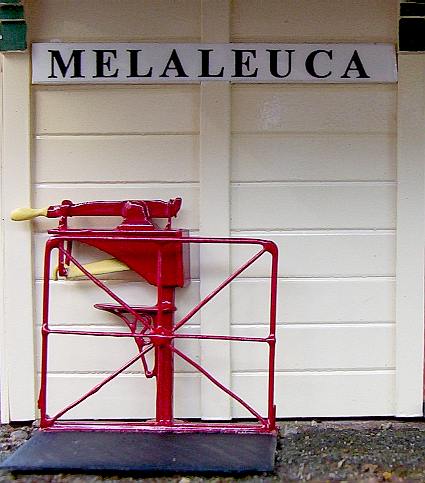 I've finally finished off Melaleuca station with some platform scales. It's just bits of steel wire and styrene and solder.
Not much new work, mainly maintenance during January.
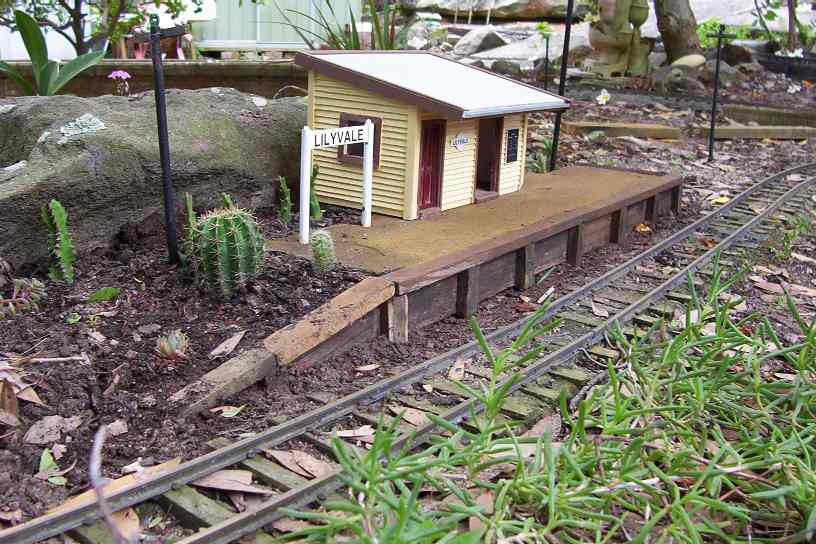 Lilyvale platform had deteriorated, so I replaced it with a 500mm thick Hebel block, with timber facing glued on.
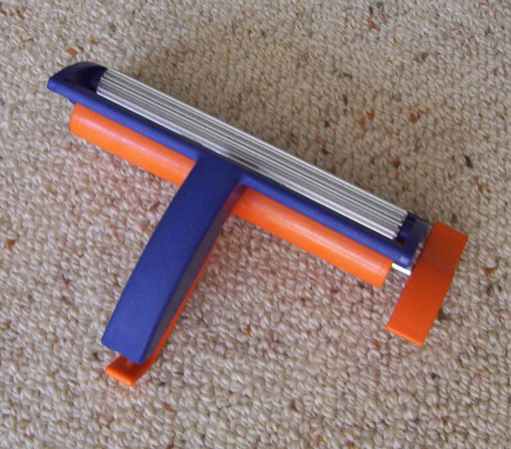
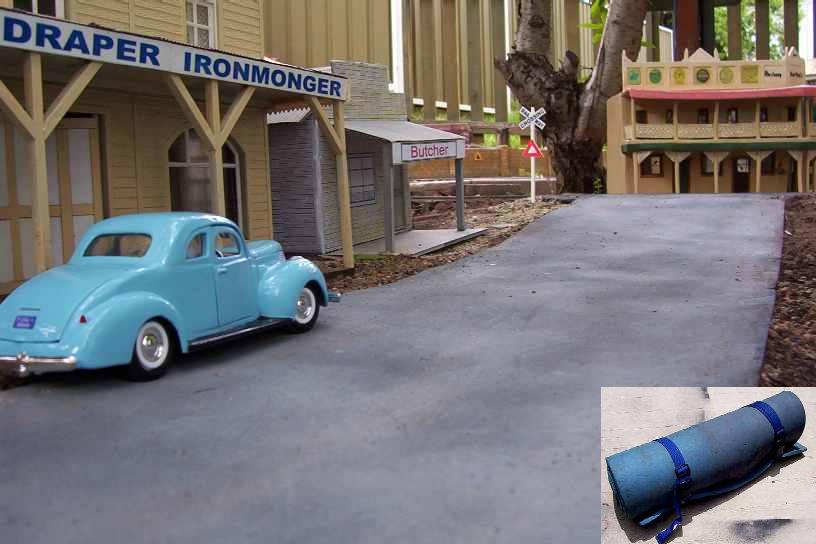 The road at Lilyvale was thin concrete and breaking up. So I've tried using rubber as a road. It's cut from a camping mattress-the thin blue kind - see inset. I put a thin slurry of concrete down and then the rubber and spray painted it grey. I'll see how long it lasts.
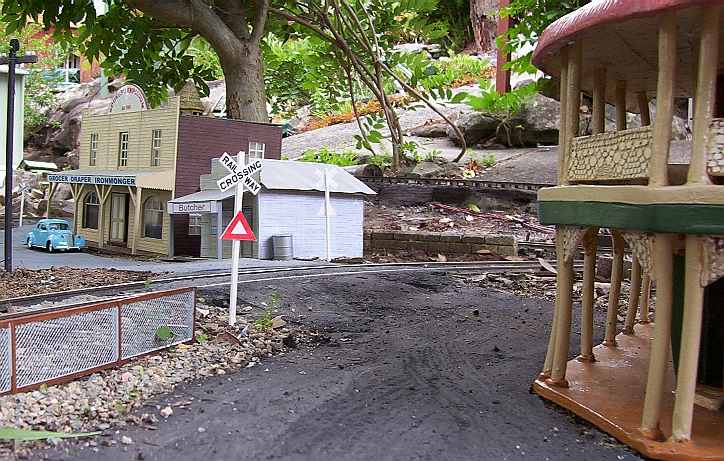 And I took the chance to rearrange the town buildings for some new ones in future. (the road in foreground is still the old concrete.)
The level crossing signs are an experiment - they are just normal printing paper, printed normally and then 'flooded' with superglue onto styrene backing. It almost converts the paper to plastic.
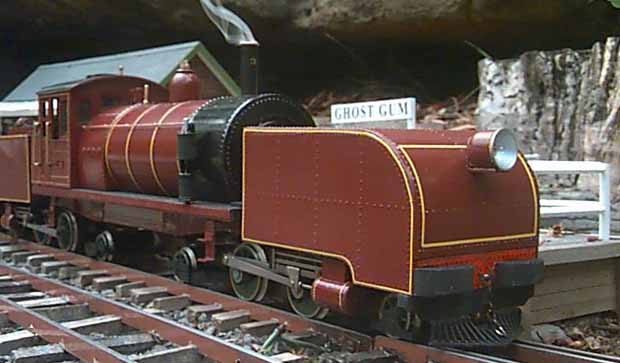 The red Garratt (built in 1999) sound system failed so I built a new dual chuff system using my 'standard' Picaxe sound circuits. There are separate units for front and rear engine units. I used a $10 sound recorder to record a whistle from the internet, and it is triggered by the picaxe too. The chuff rate is dependent on track voltage and the two units run at very slightly different rates so that they drift in and out of synchronism. Sounds pretty good for parts cost under $50.
I also managed to fix the perenial 'jerking' problem when running downhill - by using lots of good old WD40 sprayed into the motor blocks. Now it runs beautifully, but for how long?
I've been experimenting with making a chain wire fence from flyscreen. The rails and posts are styrene, superglued to the flyscreen. The gate is 1mm wire bent and soldered.
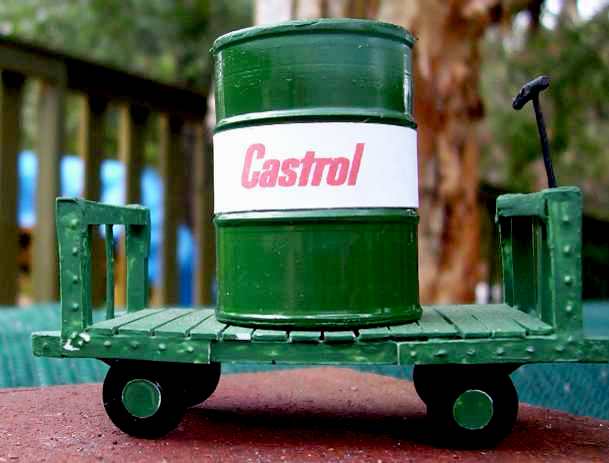 I've tried turning 44 gallon drums on my wood lathe, using electrical conduit. I ground down an old chisel to the profile of one of the 3 sections of the drums. Ends are made from 0.5mm styrene, it's painted green and the middle section is just the Castrol printed on plain paper and glued on.
Here's a link to a great Aussie GR site - the Shishi-ga-tani (Deer Valley) Light Rail of Toshi Yoshioka. Toshi is a master scratchbuilder - you won't believe the amount of detail he includes on his models.
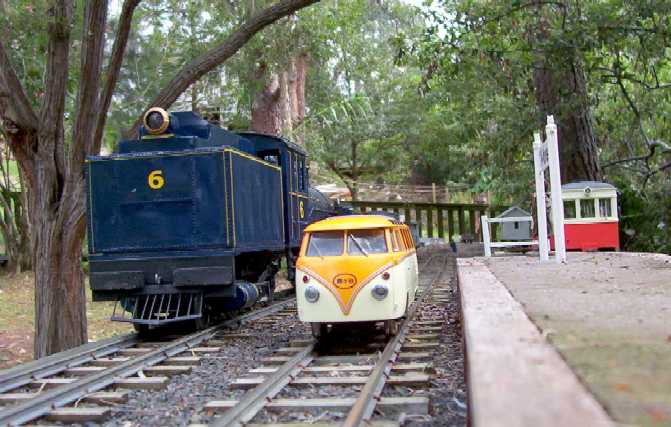
An enjoyable run day on 7/1, with Toshi's rail bus and VW van the star attractions.
The left pic is surely the sublime (diminutive VW) and gor-blime of the 'giant' Garratt.
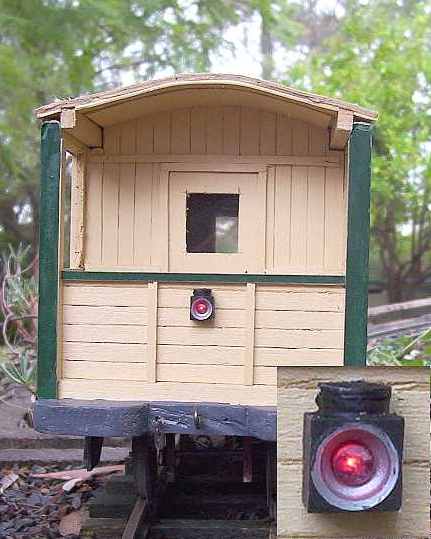 I haven't previously used any lighting on my trains except headlights, but after seeing Bill Cooper's little tail lights on his guard's vans and how they looked so good, 'disappearing into the distance', I decided to try some.
This is my second attempt and looks a better shape than the first. It is just a 3mm red LED in a square piece of styrene and the top is two pieces of 1mm styrene from a hole punch, to give some vague 'lamp shape'. The 'reflector' shape is made with a 6mm drill and the front of the LED is filed flat. The inset shows it closeup, but it's hard to photograph something only 6mm square.
The piece of chain on the buffer beam at left, operates the switch to select which end is lit, via a piece of fishing line. It operates from 2xAA NiCd cells.
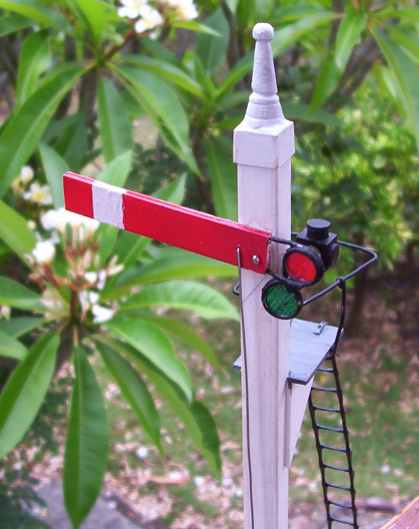 The S&TR has its first semaphore signal. It's not quite finished, but here's the first pic.
It's made mainly from styrene sheet and will have a white LED for the light. The finial is a golf tee turned down in a power drill clamped in a vise. The ladder is a piece of GutterGuard.The spectacle is just 2 loops of copper wire wrapped around a 6mm drill and a piece of paper slipped between the loops, then coloured with a felt pen and covered in SuperGlue.
I haven't figured out how to operate it yet.
It's sprayed grey, then I used brown cement oxide rubbed on with my finger and then sprayed with hairspray. (yes, I know some of the posts don't reach the ground, but the ground has to be raised!). It's designed to lift out for storage (or the possums will trash it).
I've put a new pic of all my locos on the Loco Gallery page and updated it a bit. Buildings Gallery pages also updated.
The Melaleuca stockyards are about finished. Just need final installation. They are removeable to prevent Rustlers!!.
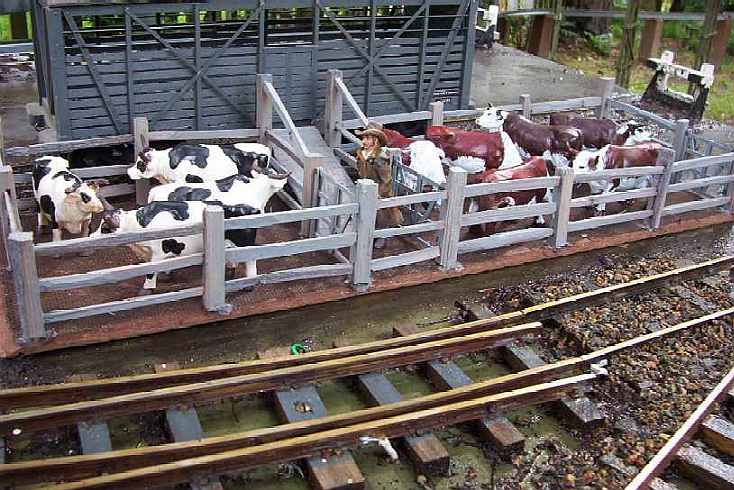

The posts and rails are split from oregon with a chisel and then whittled to size with a knife. The base is just Masonite. I got 10 black/white cows at a $2 shop and repaint 6 of them as Herefords. The drover in the middle is also from a $2 shop.
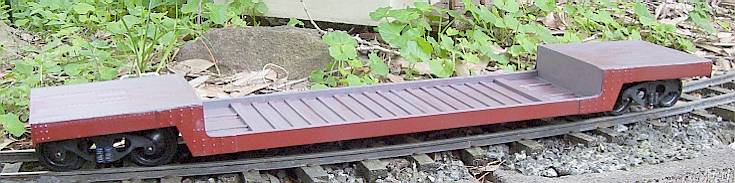
Here's the well wagon finished. Now all it needs is a BIG load. It's just bits of ply, styrene and aluminium with homemade styrene bogies. It's 530 mm long.
Pauline suggested I needed some luggage trolleys for the stations, so here's my first attempt. It's made from styrene, paper and drawing pins for wheels. The rivet detail is just embossed paper flooded with superglue.
( That fence at Sandstone station sure needs painting!)
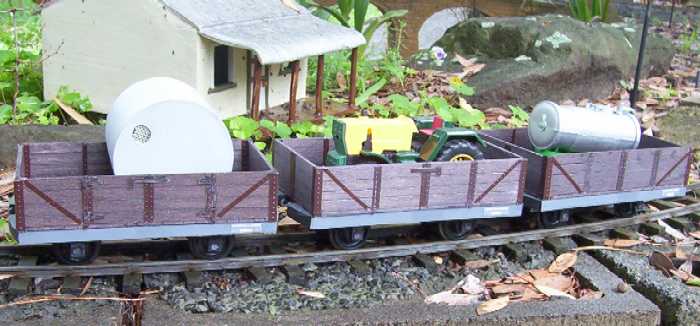
I've completed 3 open, 4-wheel wagons. Made from 3-plywood. I tried using self adhesive vinyl for the 'steelwork'. I marked the rivets using my tracing wheel, then cut them out and spray painted then before applying. We'll see how the adhesive goes with time.
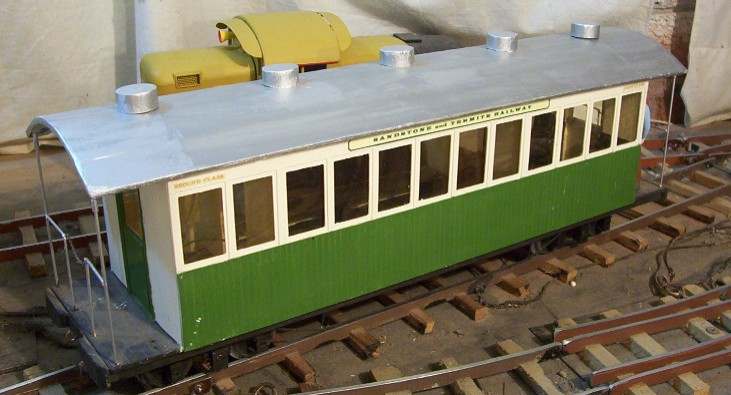
I reinstated the simple roof on the #1 passenger car. I had changed it to a clerestory type a few years back but decided I didn't like it.
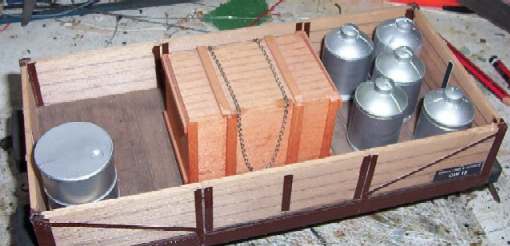
Made a few old fashioned 'milk cans' from Party Poppers - those little plastic things that go bang when you pull the end and throw streamers everywhere. I cut the long neck off and reattached the 'cap' with superglue and painted silver.
Also made a corrugated water tank as a load for an open wagon. A beetroot tin can covered with corrugated cardboard.
I've finished a new Station Master's house for Melaleuca. It's all styrene with a plywood roof covered by aluminium drink cans. Chimneys and steps are Hebel. Note the curtains and termite caps on the stumps.
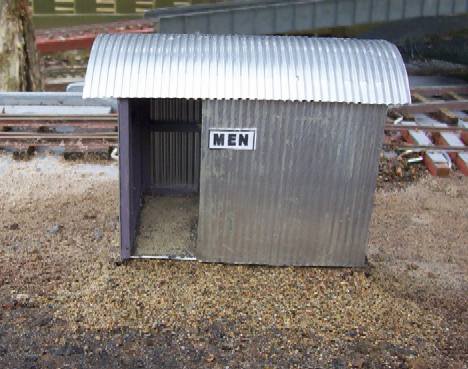
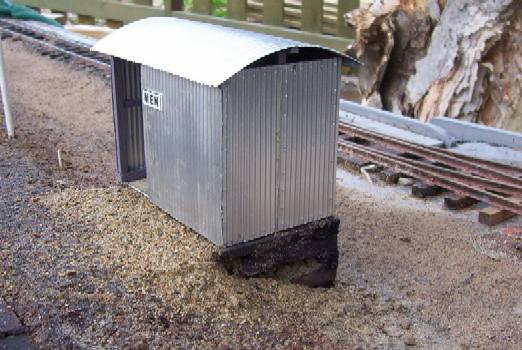
New Melaleuca station lacked a Men's convenience, so I built a corrugated iron one for the far end of the platform. It's from styrene covered by corrugated aluminium drink can. The roof was curved against the corrugations by gently 'teasing' around a rolling pin, and has no other support.
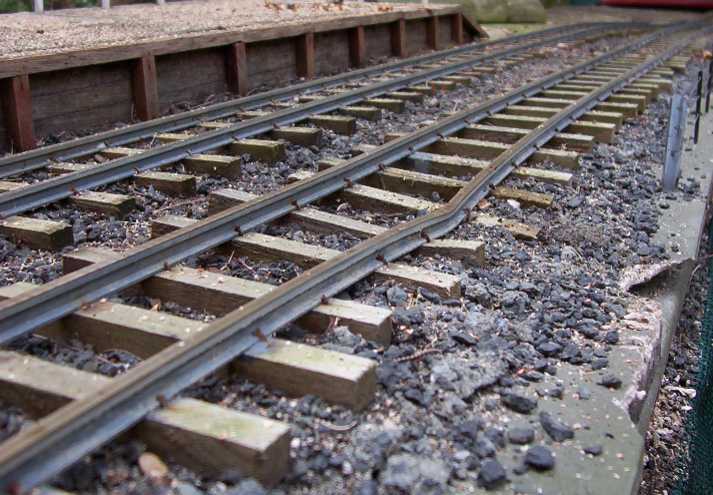
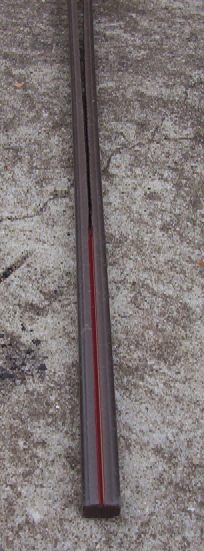
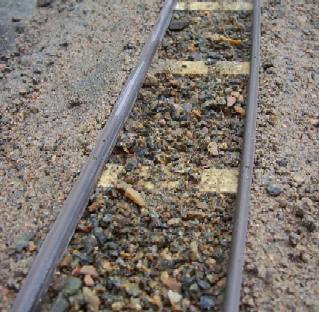
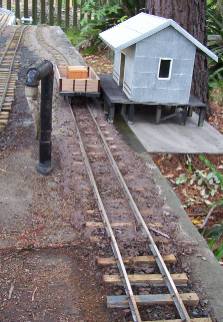
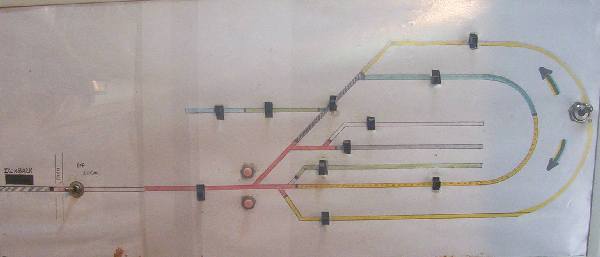
At Ti-tree I had a short siding for an engine shed. This was seldom used during operating, so I decided to lengthen the siding for more wagon standing space. I used plastic for the rails as I figured that locos seldom visit the far ends of sidings and most locos are battery powered now. The rails are cut from a 2.4m length of brown plastic beading 10x12mm from the local hardware for $3. I cut it in half (it has nice grooves down the centre of each side to make it easy! - left pic) and then each half in half again. This gives 4 rails about 5mm high by 3mm wide. Then drilled through the rails and nailed to a min number of pine sleepers (centre pic) - and covered with concrete 'ballast' which supports the rails. The new siding used some space previously occupied by the goods shed, so I built an 'outrigger' for it to sit on. The siding is now 1.6m of brass rail and 2.4m of plastic, so gives a full 4.0m train - my max design length for crossing loops.
I've made the first of 6 turnouts I'll need for my latest plans. The frog is made up from styrene. Let's hope it works OK when I get it installed.

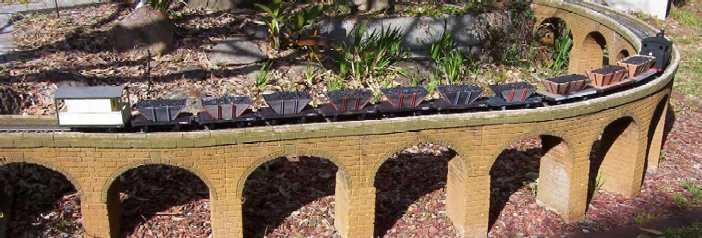
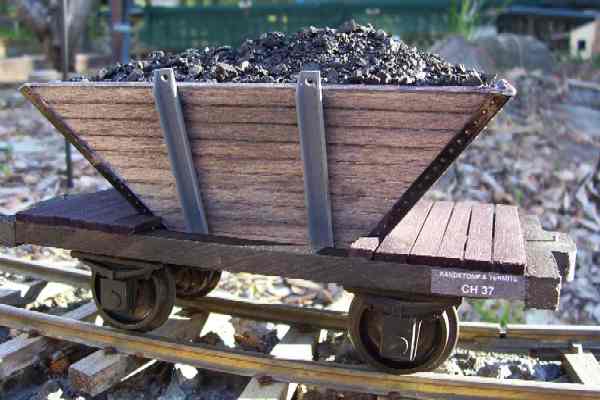
I've finally finished the seven, 4-wheel coal hoppers I started 2 months ago. Along with the 3 slightly larger ones I made 10 years ago (right of pic), they now form a decent sized train.
They are made from 3mm balsa coloured with black shoe polish. The channels are from rectangular ice cream container lids. Axle boxes and springs are styrene. Plastic wheels have large steel washers glued to the insides to increase weight. I'm trying centre link and pin couplings instead of my hook and chain - hence the curved centre 'buffer'. Overall length is only 200mm with a wheelbase of 100mm (8'). The coal is real. I tried glueing it over polystyrene with PVA white glue but the best method was to embedd the coal in black coloured plaster, and then finish off with a few big lumps individually glued with PVA to cover any exposed plaster.

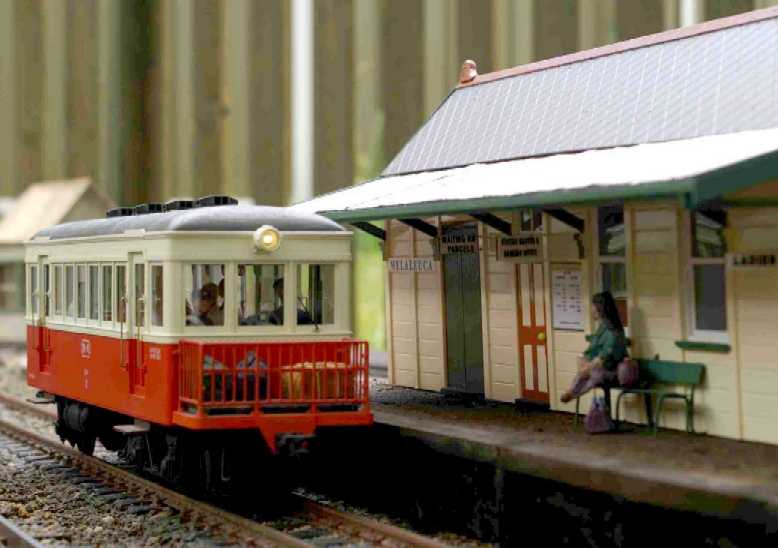
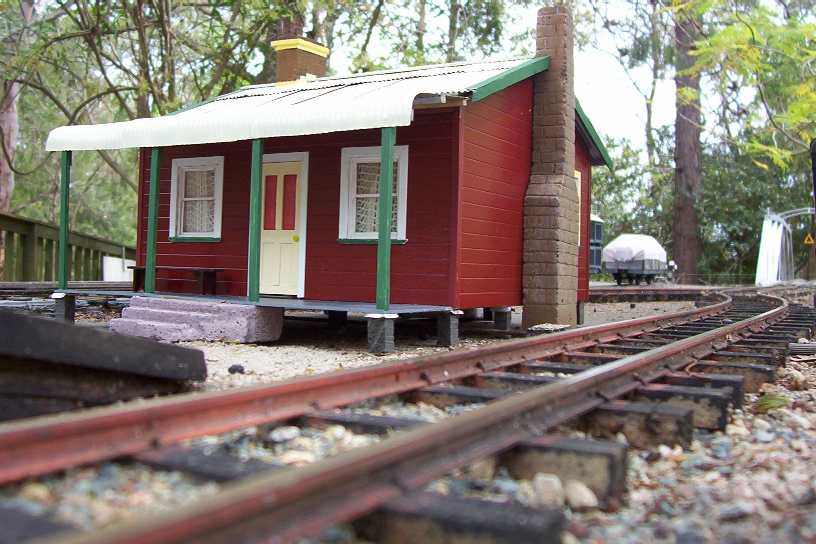
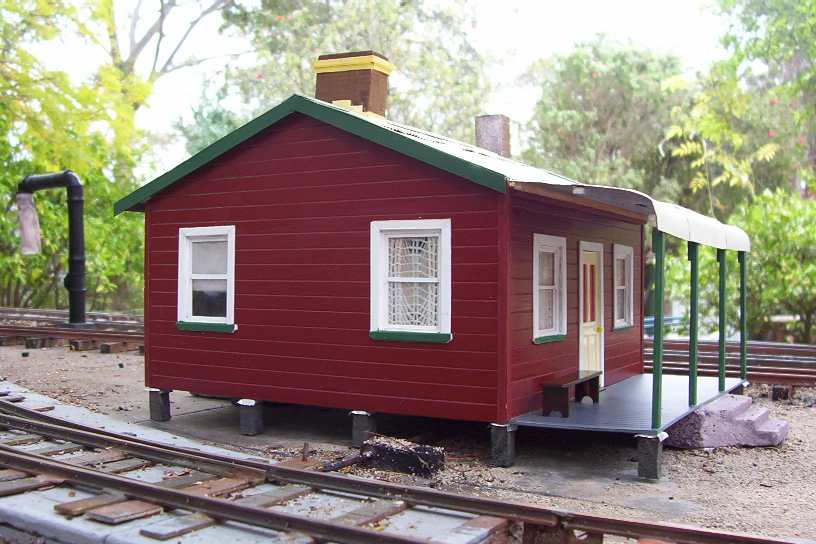
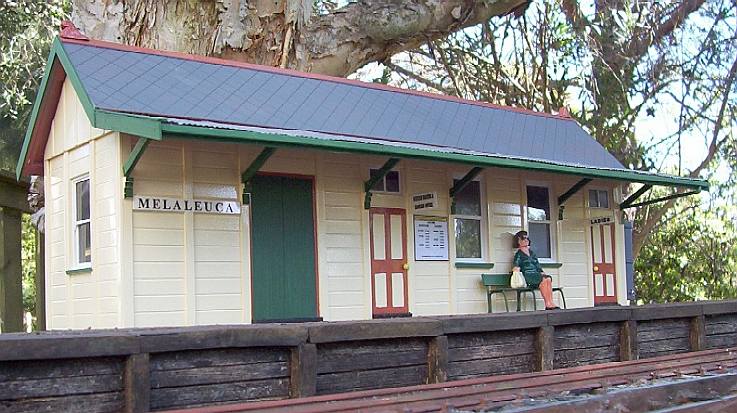
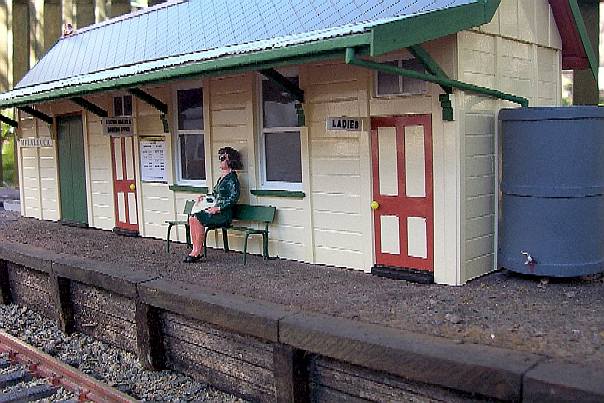
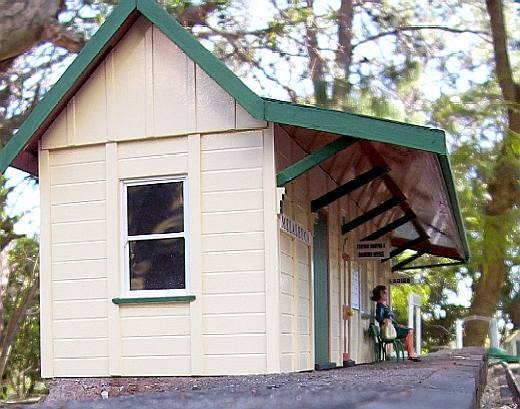
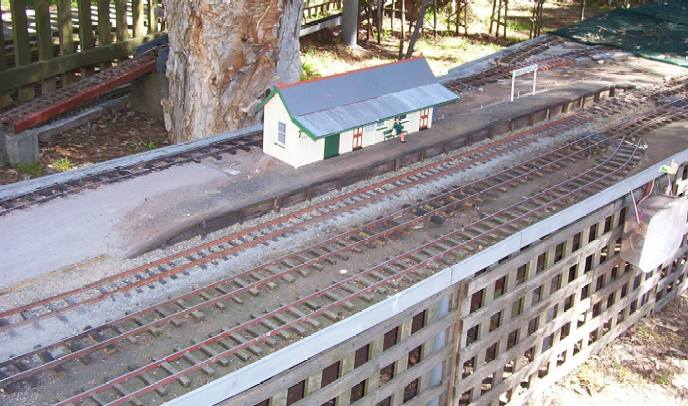
I've built a new station at Melaleuca. After toying with the idea of making it an island platform, I stayed with a single, timber platform face. The platform is 20mm concrete with flyscreen embedded, over 25mm styrofoam.
A bigger station building, replaces the small shelter shed, more in keeping with the larger yard and longer platform. It's made from styrene over 3mm plywood. The awning corrugated iron is from soft drink can aluminium and a paper corrugator.
Note the tap on the tank (copper wire and solder) and the roof finials (modelling clay).
The existing small station building will become OLD Melaleuca at a new station site I have planned.

Finally some work on the railway. I've finished the radio control and sound for the 2-8-2 tank. But it has a problem with the mechanism so that it jerks when running downhill. Stripped it right down and it still jerks, so I give up. What I need is a real brake van to hold it back. How can I do that?
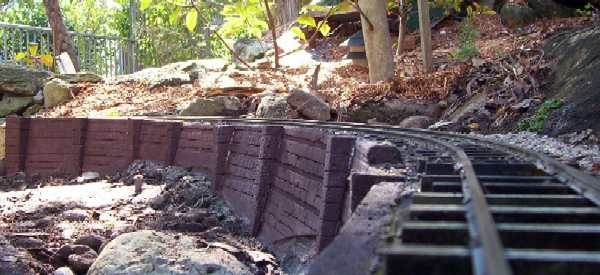 I've replaced the track around 'disaster curve' ( see June 27, 2004 further down the page). This was an experiment in glueing rails to old fence palings and a failure! - always out of gauge. It was also on a bridge so any derailment was major. So I've filled under the bridge and just have a small Hebel retaining wall, and normal sleepered track.
I've added a new page describing the latest UHF radio control and PICAXE sound circuits I'm using. You can find them under Tech Tips above.
A couple of pics of progress on the 2-8-2 tank. The body is finished now. I originally painted it with Dulux flat black but it is just TOO flat and picked up all bits of dust etc. It was so flat that it was difficult to photograph because it didn't reflect enough light for the camera auto focus! So I've used White Knight flat black which has just a tad more sheen and I like it a lot more.
I've added a link on my Links page, to Tod Hetherington's website - he builds great models of NSWR at 1:32.
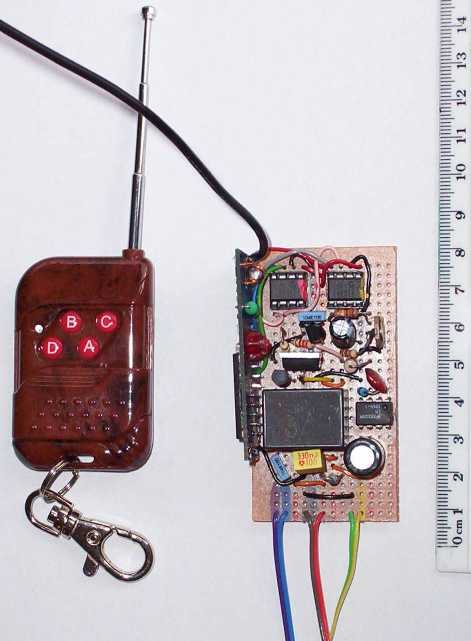
I've finished building the 4th track radio controller (RED). The Ti-tree controller is a temporary solution, using a 12V battery. It only gives slow speed, but that's OK for shunting.
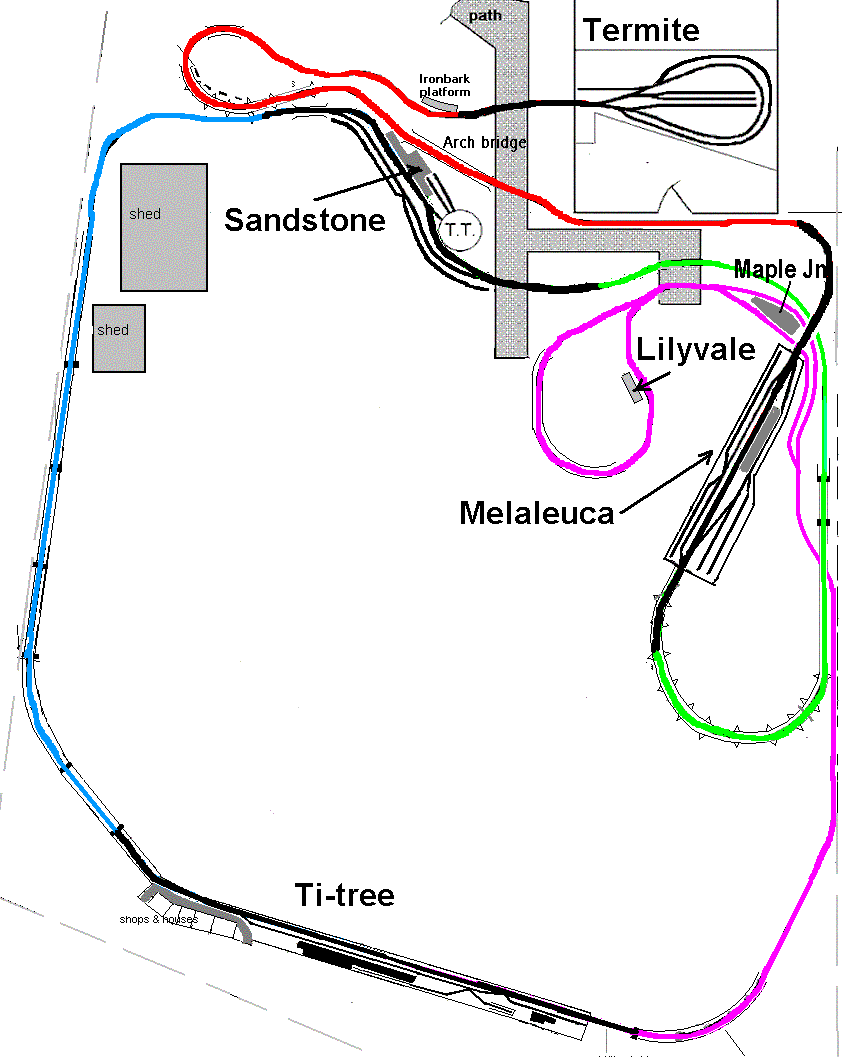
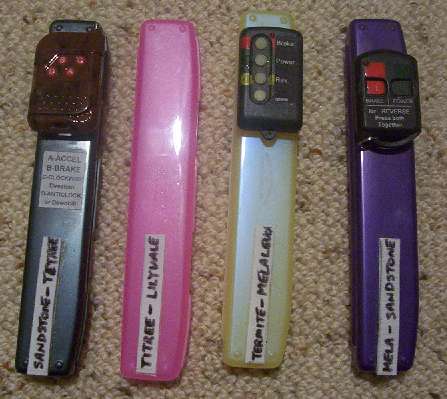 There are 4 single line sections (click here for a map) and there are 4 radio controllers for the track power of each section - coloured grey, red, yellow and purple. (the red one wasn't finished when the pic was taken.)
You can see that they are mounted on toothbrush holders so I don't misplace them!
The controllers are home made, based on car door remote controllers.
I've added Velcro tags so each controller can be labelled with its (removeable) section name.
 The supply to each single line section can be provided from any of the 4 controllers via the use of a patch box'. (I couldn't use switches for 4-way connections.) The pic shows Termite to Melaleuca connected to the Yellow controller, and Mela to Sandstone connected to the Purple.
But in general I won't change these connections very often - a given controller usually stays connected to a given section. This means that as you drive a train along you have to change controllers as you enter each new section. It also means that the RC unit becomes the safeworking 'staff' for each section. So even if you have a battery loco you should still hold the staff to prevent others entering your section.
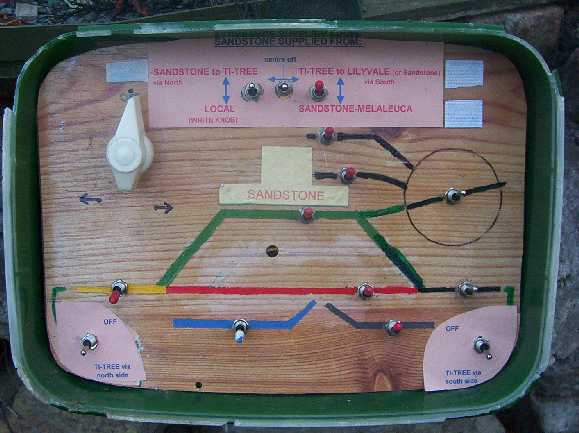
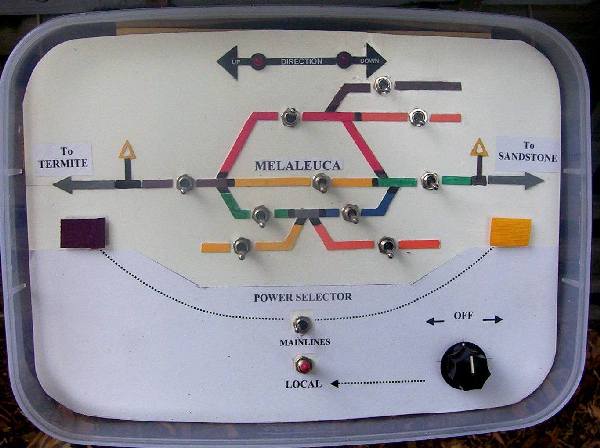 Each station 'yard' will have a control panel similar to this pic for Melaleuca.
The supply for the yard can be from any mainline entering the yard or a Local controller.
Each siding has an on'off switch to isolate it.
In the pic, the two switches at centre, bottom select the source from either end or local. The local controller knob is at bottom right.
I use small coloured Velcro tags to remind operators which controller is on which section.
You can see the grey (black in pic) rectangle at left for the line to Termite and the yellow one to Sandstone These have to be manually changed if I change the connections at the patch box.
While no mainline trains are entering or leaving a station, you can select the local controller for shunting.
See here for more details

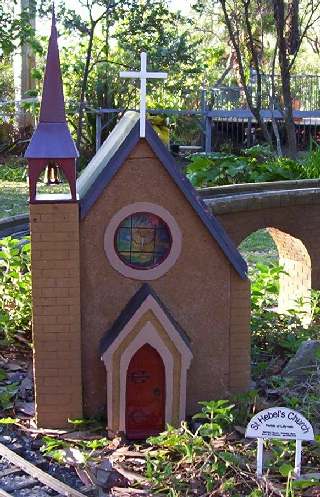
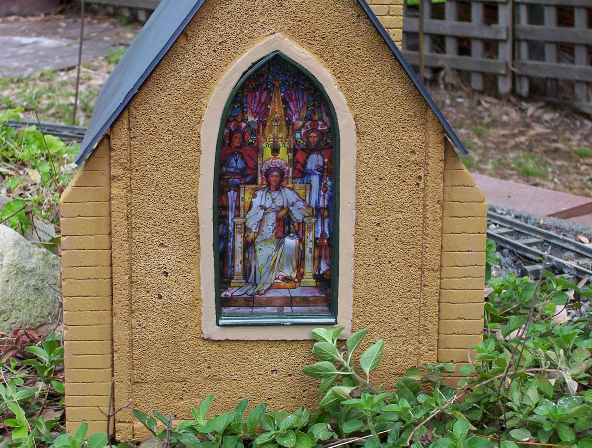
I've finally completed St Hebel's Church (The patron Saint of Garden railway buildings). It now has its belfry, with a bell (but no bats). It is made from Hebel blocks (what else?). The stained glass windows are pictures off the web, and printed on overhead transparencies. The spire and cross are made from styrene.
I've added a page on how I use Hebel concrete blocks to make structures. Go to the Tech Tips page from the link above.
 My design of radio controller using a programmable chip has been published as an article in the July 2004 issue of Silicon Chip electronics magazine. This was for a track power controller, but I have also built a loco version for battery locos. This includes both steam and diesel sounds.
Click here to listen to the diesel, and here for the steam
My design of radio controller using a programmable chip has been published as an article in the July 2004 issue of Silicon Chip electronics magazine. This was for a track power controller, but I have also built a loco version for battery locos. This includes both steam and diesel sounds.
Click here to listen to the diesel, and here for the steam
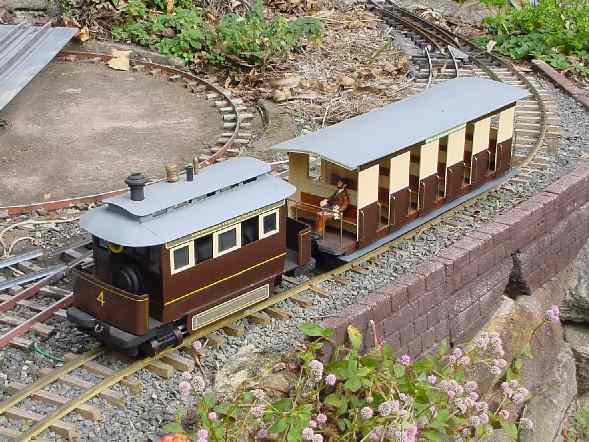 I have added radio control and sound to the Sydney steam tram which I built years ago. (based on an old Bachmann Porter chassis). In the past it had pushbutton control based in a 4 wheel wagon which carried the batteries. I never liked having to drag the wagon around, so with the new RC units from Oatley Electronics and using two PICAXE controllers I have been able to get all the electronics inside the boiler. (see Feb 27 entry for details on the RC unit).
I put 7 NiCd cells on the floor and painted them black so they can't be seen and a 2" diameter speaker in the roof.The spkr magnet fits nicely up into the clerestory.
One PICAXE controls the speed/direction and the other does the sound. There is a Mute control which reduces the 'chuff' volume when the speed is decreasing or stopped.You can listen to the steam tram sound by clicking here. (with the simple whistle sound at the end too)
The direction control is a toggle, so to indicate which direction is selected, there are 2 different quiet hiss sounds when stopped.
The RC is a 4 button controller so I used the 4th pushbutton for a whistle which is just a single frequency tone (about 3kHz) generated by the PICAXE.


