


This is the 2011 diary of the S&TR
Dec 22, 2011
The GRASS website has more pics too. click here
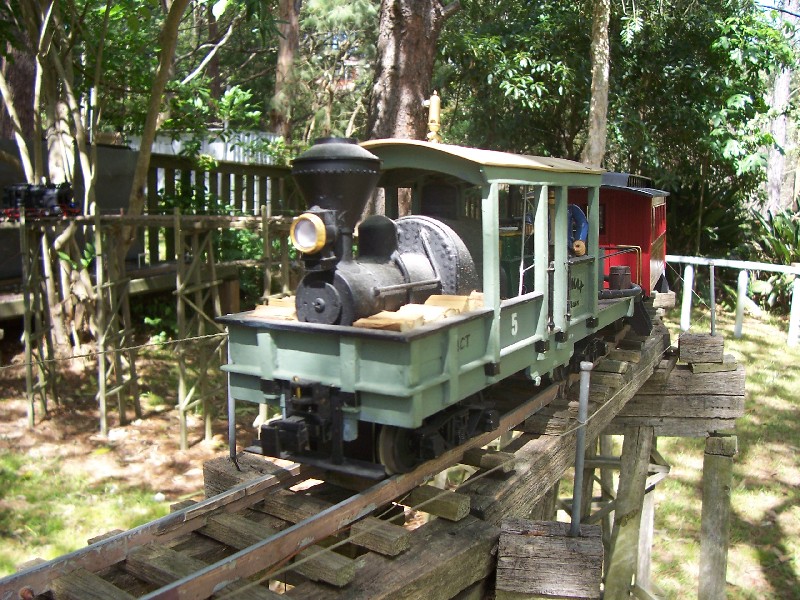
Bryan had his new $100 european outline tank My locos #2 and 3, based on Bachmann Big Hauler motor blocks, both split their axle gears. (see June 18, 2011 for other locos with this problem). So I ordered 2 new ones and fitted them today. They seem OK but full testing must wait till the rain stops.
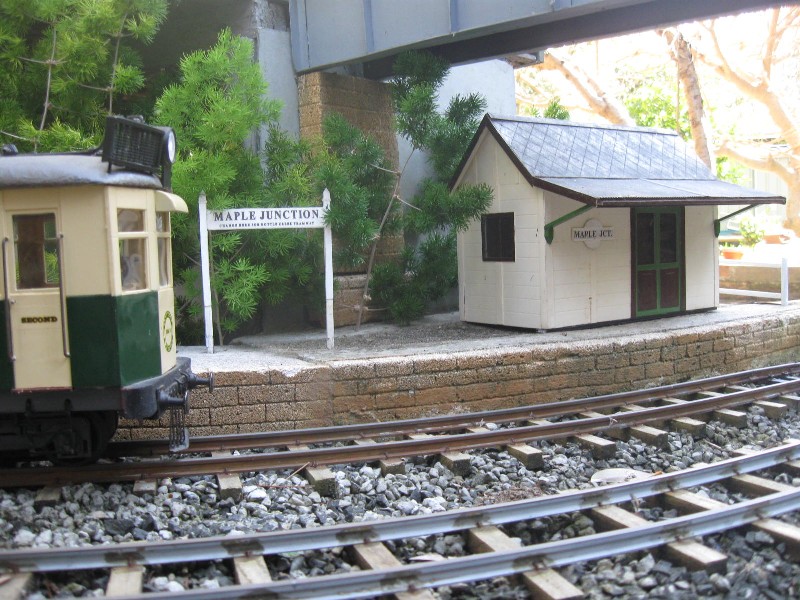
Maple Junct is not often photographed.
I actually had to do some garden work! After all the rain, I had a real boggy patch near the new turnouts at Sandstone. So I cut a mini Grand Canyon through the rock and put in some white pebbles to stand on 'above' the waterline.
I've been working on a level crossing boom gate operated by a servo. I think I've invented a simple train detector based on cheap light dependent resistors. See the web page I've done for it click here:
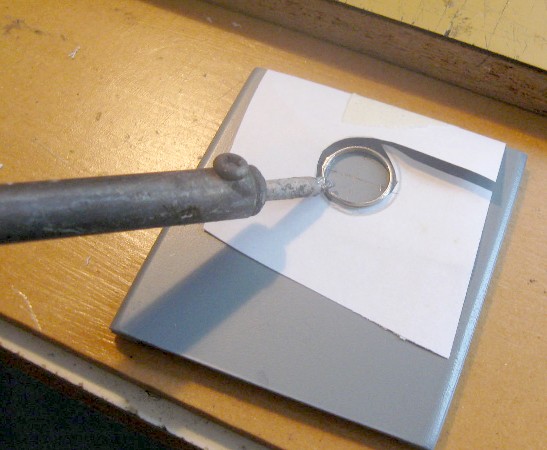
The front headlight is a keyring melted into the styrene. The paper surround is to protect the styrene when I slip with the soldering iron! Two 5mm white LEDs will be inside the circle.
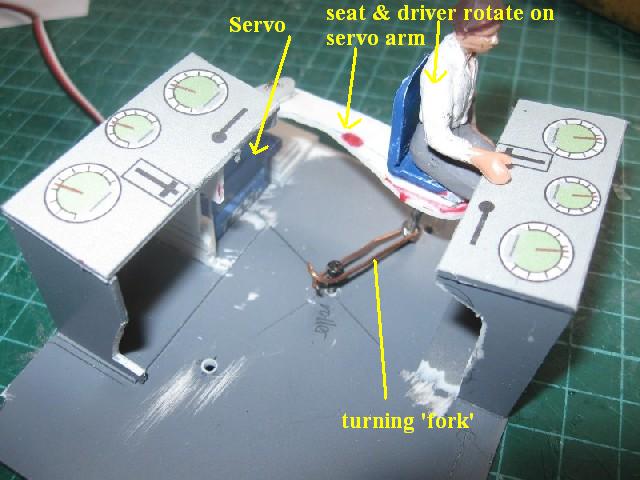
I decided to get carried away with the driver and make him rotate to the direction of travel. I use a servo and some fancy linkages to get the 180 degree rotation within the small space available. A picaxe is used to slow the rotation down so it takes about 2 seconds. This is a mock-up for testing. You can see how I had to butcher the desks to let the legs rotate.
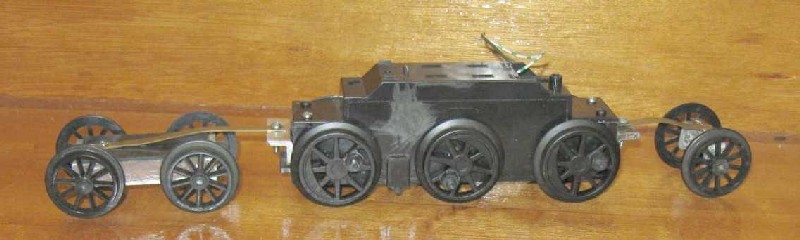
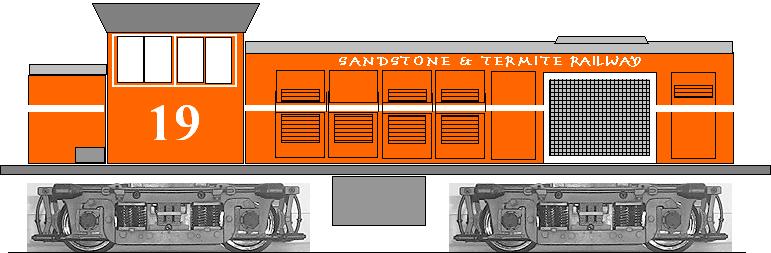
It's 480mm long compared to its smaller brother #13 which is 380mm long, shown here to the same scale.
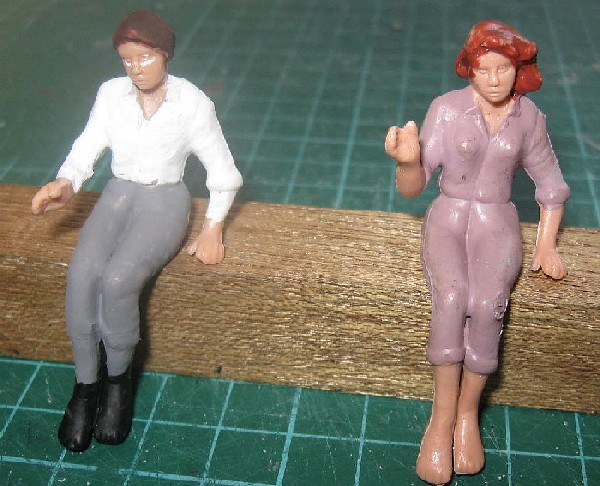
I never realised I'd have to be a surgeon, but I had to perform an operation - I only had seated figures of women and I wanted a sitting man driver, so a sex change operation was performed. Here's the before (right) and after.
Mark's 48 class
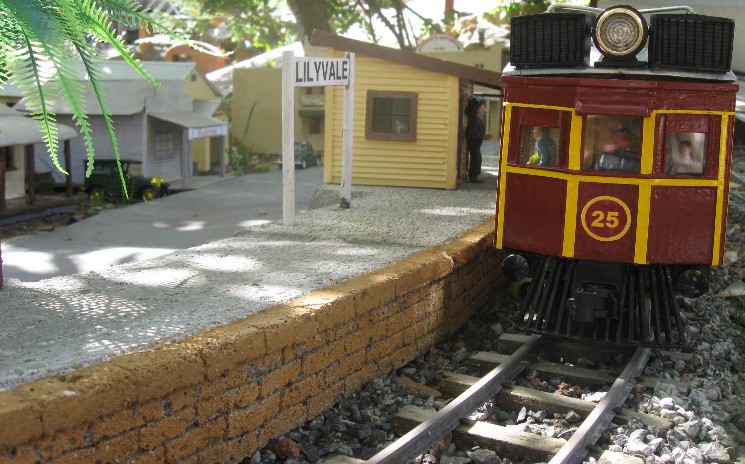
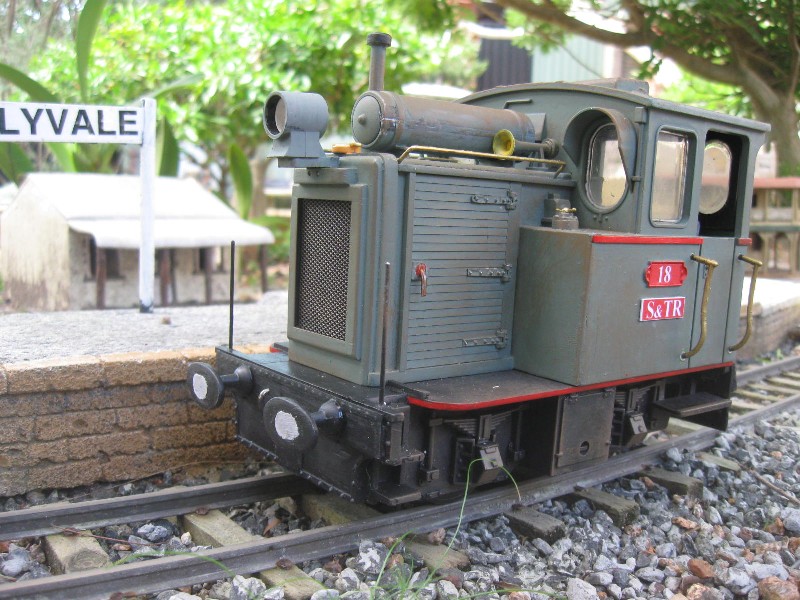
Keith's CPH at Lilyvale
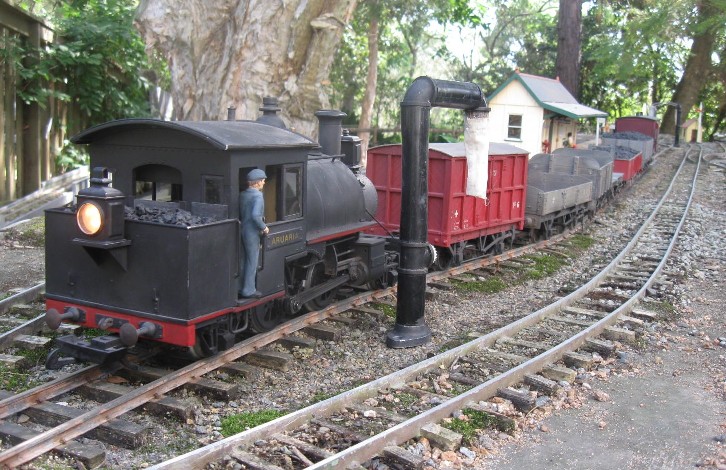
And James McInerney's loco taking water at Meleleuca
And maybe a turntable like this, built out on a raised board...
click here for 2004-06 diary
click here for 2007 diary
click here for 2008 diary
click here for 2009 diary
click here for 2010 diary
click here for 2011 diary
click here for 2012 diary
click here for 2013 diary
back to current What's New?
Just a little more work on the tank. Aluminium angle attached to motor block to form the chassis for the body to sit on.
Dec 8, 2011
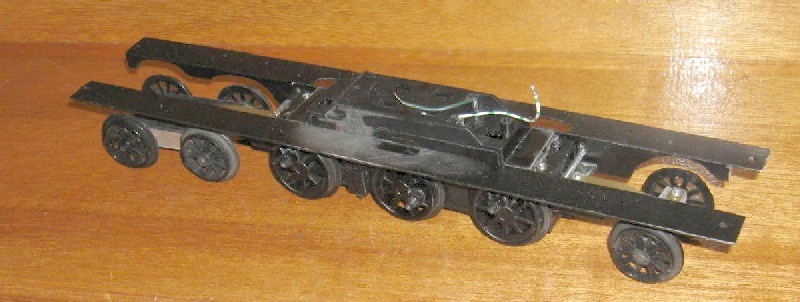
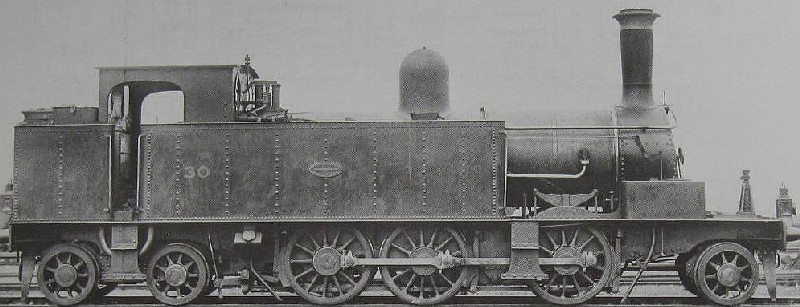
I've decided to use the new PIKO 0-6-0 motor block to build a NSW 20 class tank loco. The axle spacings are too close, so I'll shorten the whole thing by about 30mm, by moving the front wheels back under the smokebox.
Here's the progress so far.
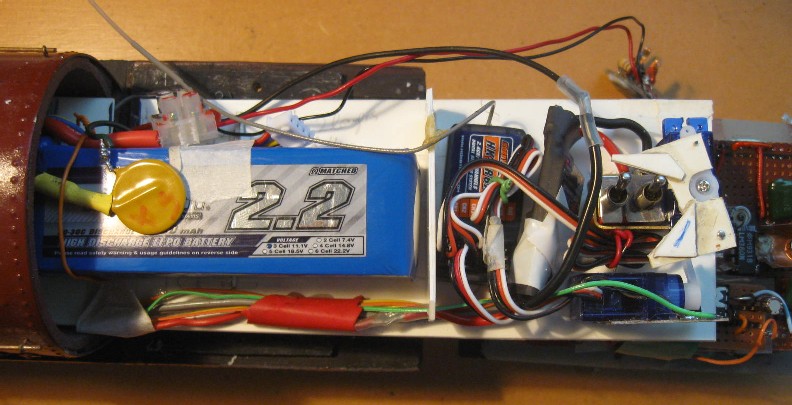
I've ordered a 2650 mAh LiPo battery and RC gear and am 'thinking about' the sound system and where everything fits and how to access it.
Nov 29, 2011
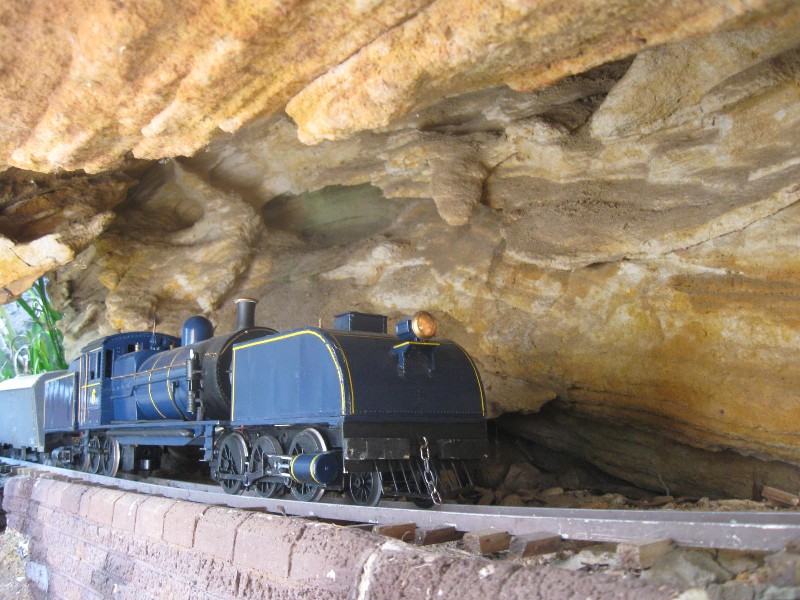
Yesterday saw a busy run day. I only expected 3 operators and only opened the 'top half' of the track. But Keith turned up too, so 4 of us really filled up Melaleuca and Sandstone. (I was trying to run 3 trains myself!)
Here's a link to a short video of the day.
Geof had rebogied his 1620 class and it now runs like a charm.

Keith had a new carriage from his US trip to run behind his Climax
Nov 23, 2011
The new Sandstone loops got a good testing by the 3 grandsons on Sunday, with the first trains for 3 months running.
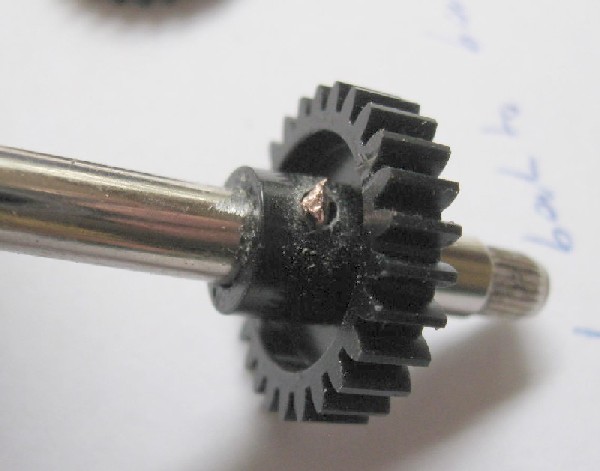
The split gear is the white one on the left.
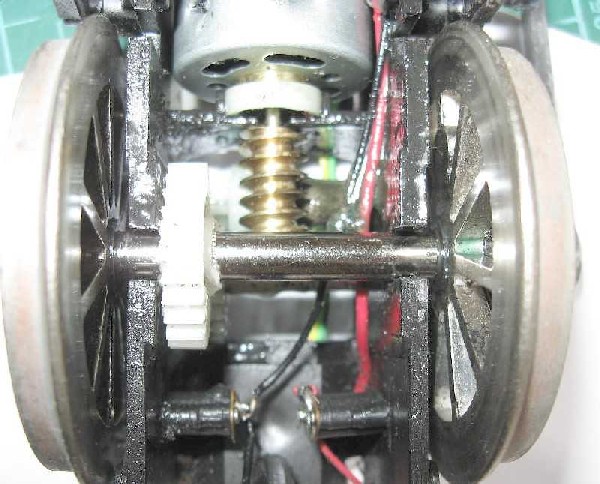
Gentle persuasion to remove the wheel from axle
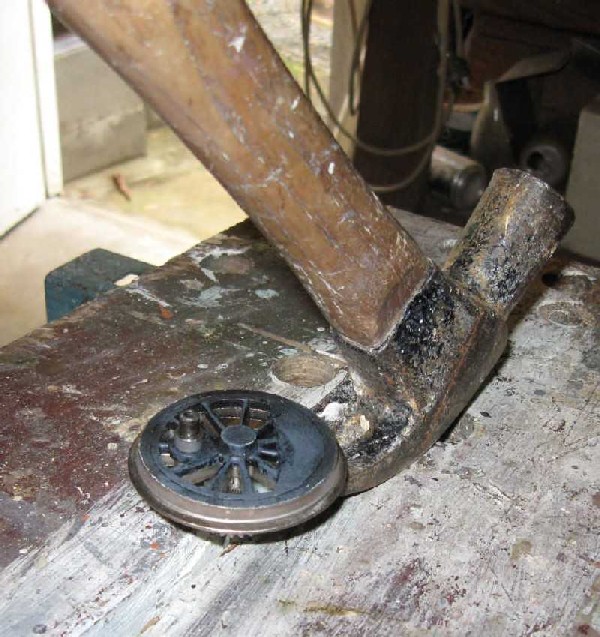
The new gear is held by a pin through the axle instead of the original spline.
Nov 13, 2011
Finally after 2 months away, I've started cleaning up the weeds to get trains running again.
I bought back a couple of PIKO points, but had problems with one. Apparently a common maufacturing fault is the use of too long screws underneath to make the electrical connections. But they also hold the moving rails and if loose the rails do not fit snuggly against the stock rail. The screws are stupid Torx types and I stripped the head so could only remedy the problem with shims and glue. Lucky I don't need elec connection!
Anyhow it's installed at Sandstone to complete the 4th loop, but not tested yet.
Sept 6, 2011
Just a couple of pics from today's running.
Also a 'different' video
Aug 22, 2011
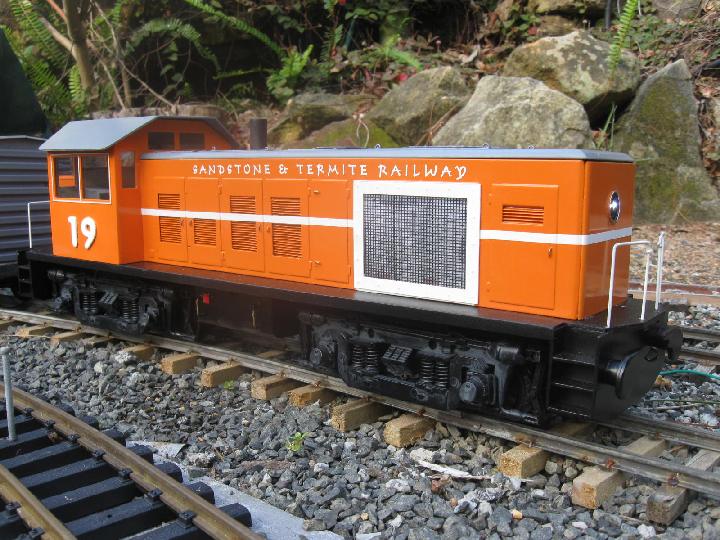
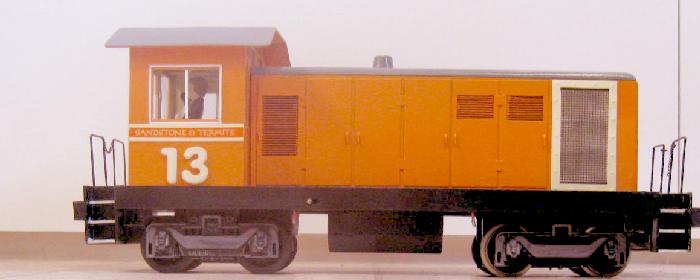
Haven't achieved much in the last 3 weeks. I added some lead to the #19 diesel and it works well.
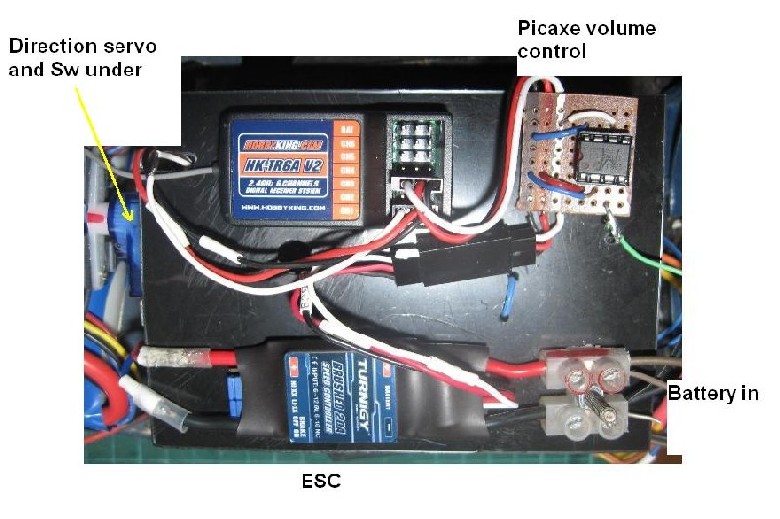
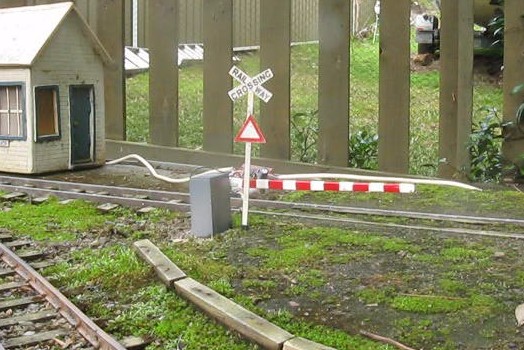 And here's an early pic. The white wiring behind will go under the baseboard and the electronics in the signal box. The servo is in the little cabinet next to the boom. Ultimately there will be flashing lights. All the detection, servo control and flashing lights is done by a single Picaxe
Aug 2, 2011
Finally finished the new diesel loco. Getting all the RC gear in was a squeeze. Now I need some weight - LiPo batteries are too light!
Here's a link to a 1 minute video:
click here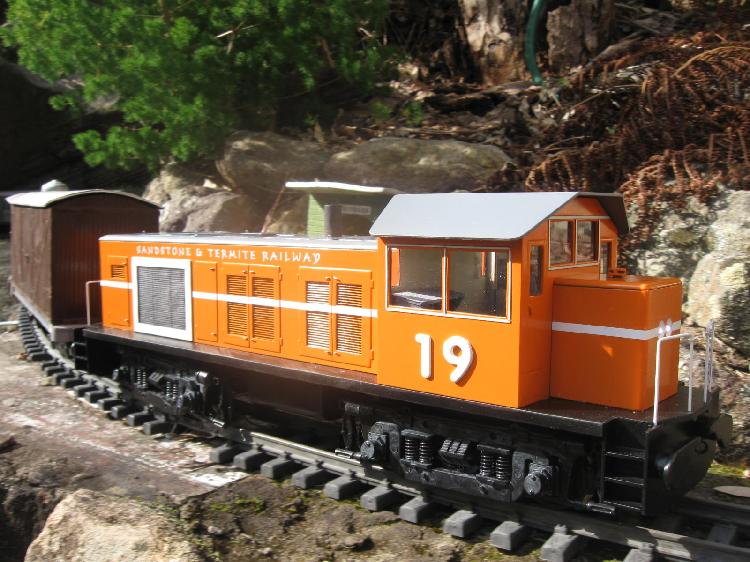
July 30, 2011
Finally the dry weather allowed me to paint the loco. I decided to do all the painting and lettering BEFORE I assembled it this time. Here's some of the bits. Tomorrow should see final assembly !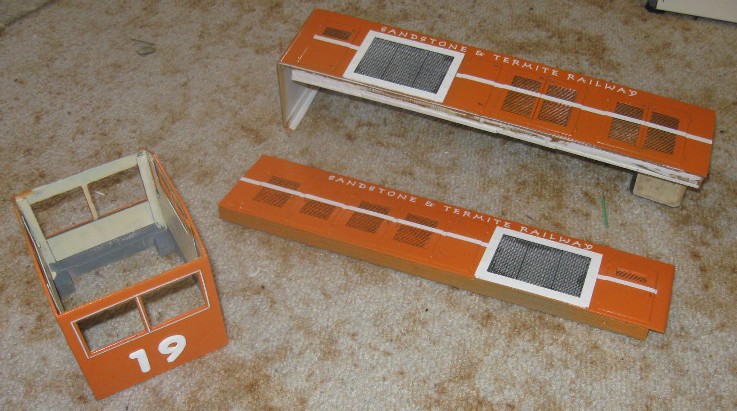
July 20, 2011
All the parts for the new diesel have been completed and undercoated. Just waiting for some good weather to paint them.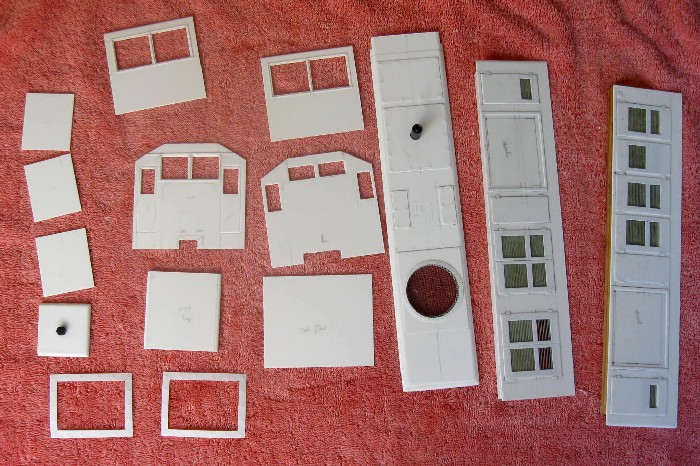
July 9, 2011
Work is progressing on the next diesel. This will be a larger hood type, but very similar to the existing orange #13. I'm using an Aristo motor block (from their RS3) under the cab, and some spare bogie frames (I used the motor block for "Ernie" - see Dec 19, 2010) and plastic wheels for the front bogie. All the bits and pieces have been cut out and detailing started. At present I'm trying to figure out how to do the fan on the hood roof, which is actually the speaker.
I've decided the orange will be the SaTR's diesel colour scheme. This how it will look.
June 20, 2011
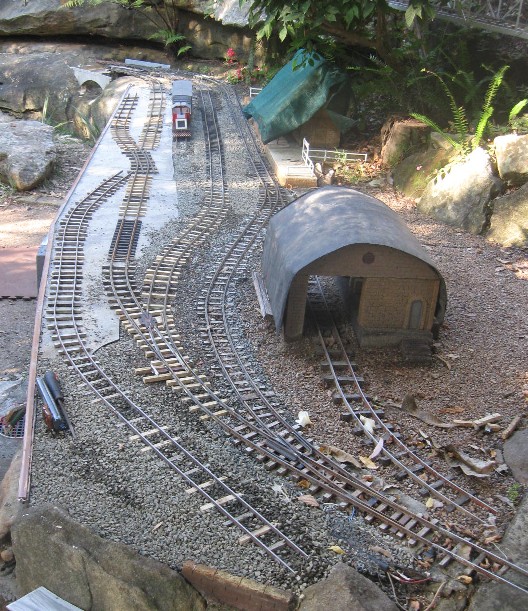
I've installed another turnout at Sandstone (courtesy of Keith) to form the 3rd loop. Necessitated some rock cutting. Also extended the front siding to 8'. Will need more rock cutting if I want it longer. Just need one more turnout for the 4th loop and I'm finished.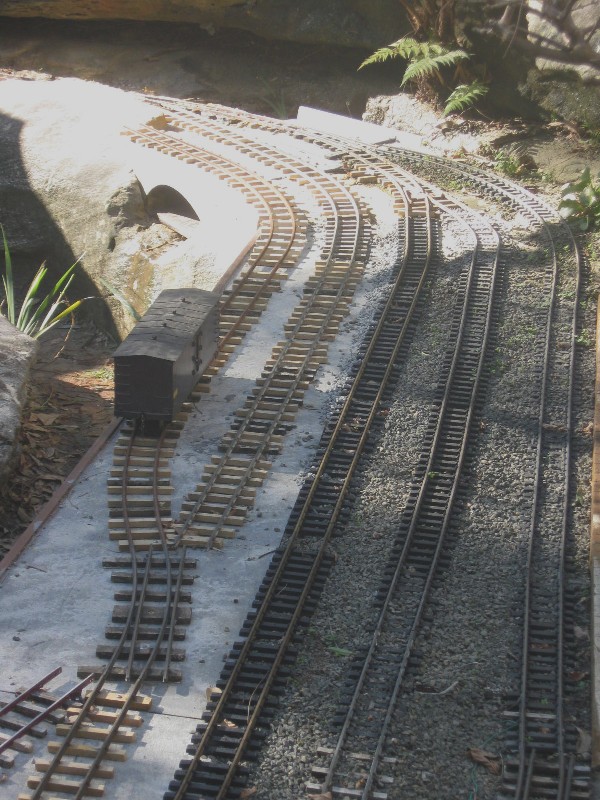
June 18, 2011
Well I replaced the 2 gears in the blue Garratt with those from Hobbyparts. They were a loose fit on the shaft so I had to drill through the shaft and gear collar and screw them on. The front unit (26 teeth) is very noisy, so I've added some toothpaste to hopefully do a bit of 'grinding'. Ran it quite a bit on Saturday.
May 28, 2011
DISASTER. After all my work putting new RC in the blue Garratt, when testing it, the gears on both engine units split. I had one spare but not TWO! I think I've found some replacements from hobbyparts.com.au. We'll see if they fit when they are delivered in a couple of weeks.
In the meantime, it's back to working on the new diesel.
May 26, 2011
I replaced the big 7 Ah lead-acid battery in the blue Garratt with two, 3000 mAh LiPo. Reduces weight by 2.1 kg!
But the old 'toy car' radiol control was not working too well, so I've converted it to 2.4 GHz. I reused the old dual sound system, and found that I had designed it all those years ago, to have a voltage controlled volume feature which I never used. So I built a small Picaxe circuit to 'read' the throttle pulses and determine if it is accelerating or coasting or braking or stopped and vary the volume accordingly. Here's the 2.4 GHz component board. It fits in the boiler.
Apr 18, 2011
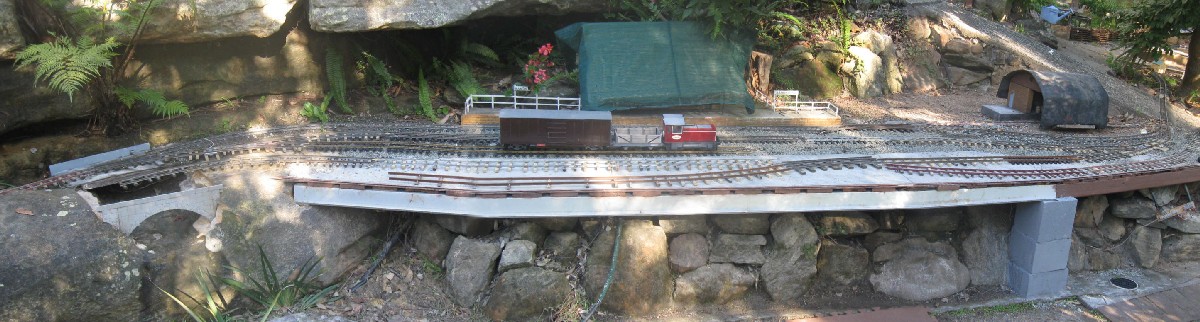
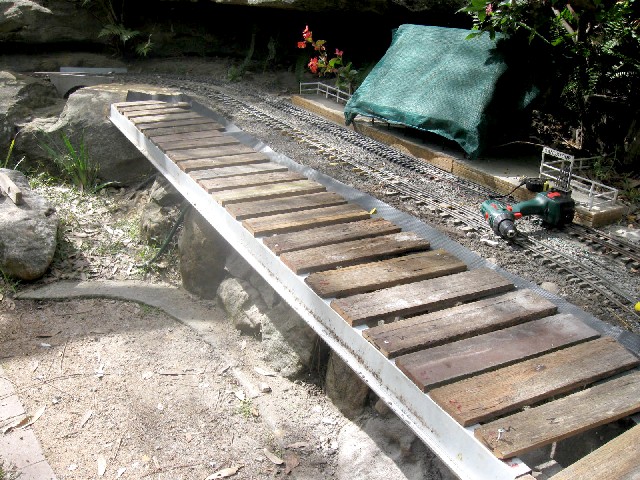
 Sandstone baseboard is finished.
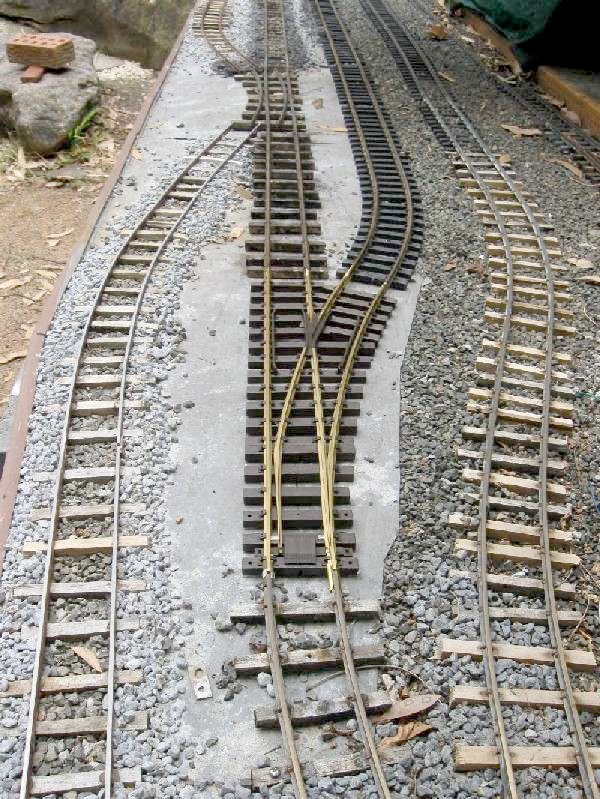
Tracklaying is virtually complete until I get the 2 extra turnouts I need. The 2nd loop has been re-instated with the 2nd handbuilt turnout finished. Four sidings now available.
Just need some bridge work over Fern Creek and some more sleepers for the front siding.
Apr 10, 2011
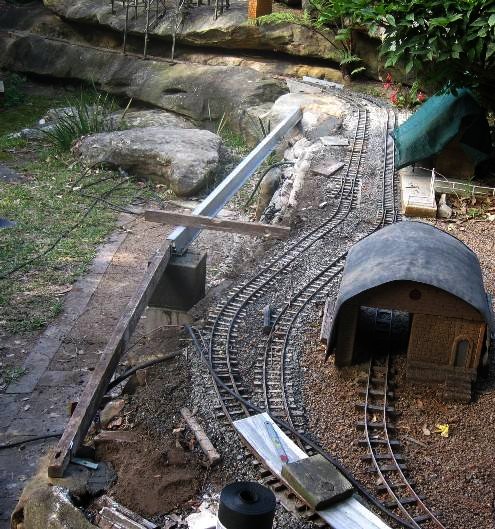
Progress continues on widening Sandstone. Even though I've removed track power, I thought I might need some wiring in future for signals etc, so I put a conduit under the board.
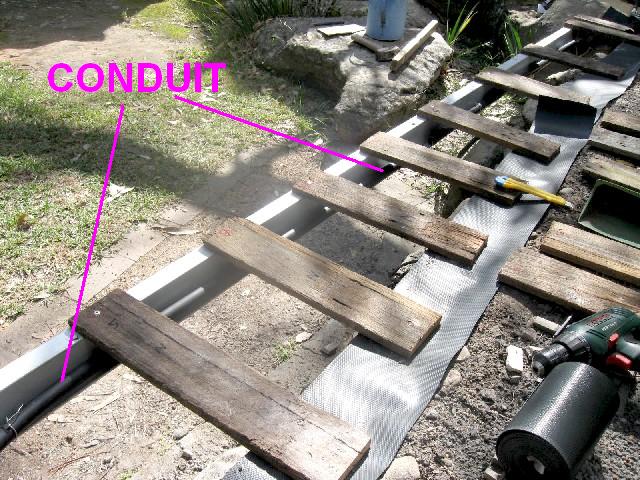
I'm using my standard 'ladder' construction of old fence palings covered by 1.5mm thick styrene
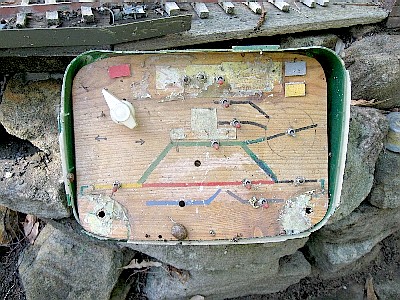
I've ripped out all the track wiring and will probably just have power to the mainline, with no switches. The poor old control panel had crumbled away. Here's the as new and end-of-life pics

Apr 8, 2011
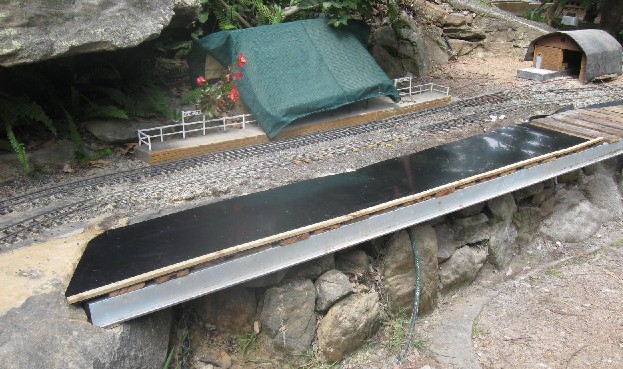
I've started work on the Sandstone widening for more tracks. The support pier and front beams are in place.
I decide not to have a turntable at this stage - just the extra loop and maybe an extra siding. I've ordered two PIKO points and will build one more too.

Apr 4, 2011
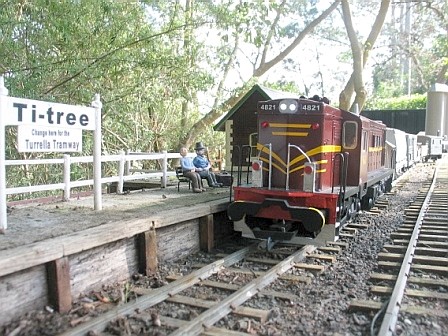
 Vandals attack Ti-tree !!!
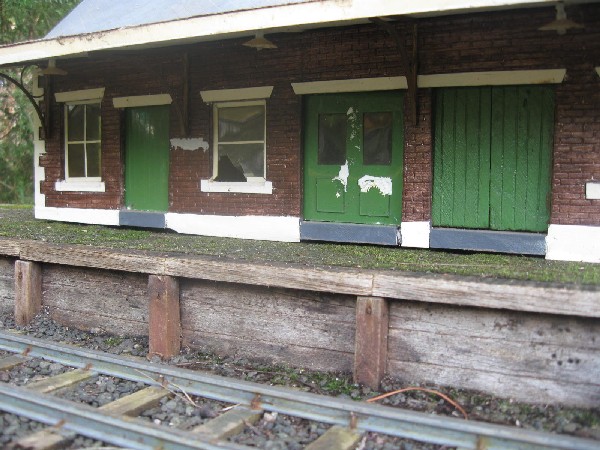
The dirty rats have eaten the station nameboards and parts of the doors. Seems the local rodents are now developing a taste for styrene. Also gnawed through a 44 gal drum and broke the window to get inside. All repaired now.
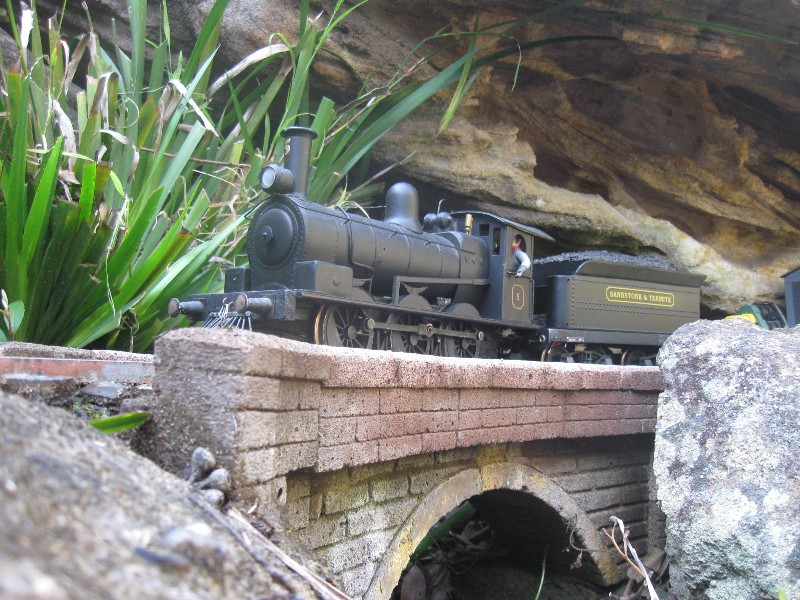
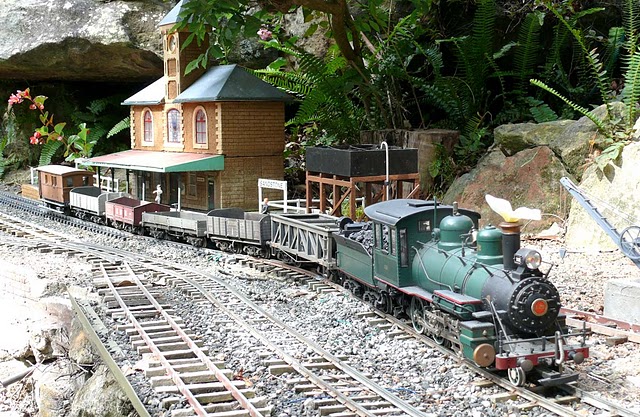 And a last pic of saturday, with James McInerney's 4-6-0 at Sandstone.
Apr 3, 2011
A very busy running day. I had every building out!
Here's Andrew's modified Stainz
.
.
.
Mar 31, 2011
 Years ago I made a semaphore signal. Today I finally installed it. I decided to just see if I could operate it from the turnout position using a bit of fishing line. I'll see how it lasts.
Mar 23, 2011
During the last few rainy days I decide to make another turnout.
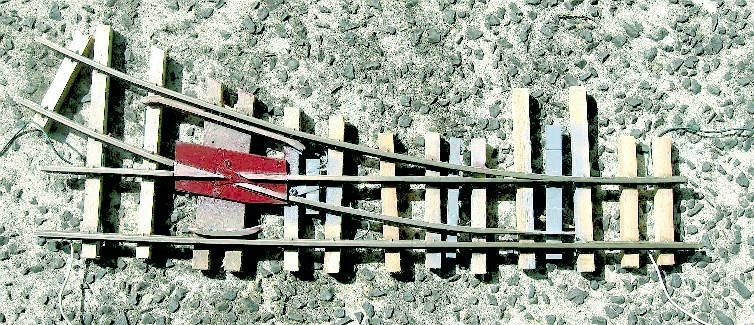
Plans for a 3rd loop at Sandstone and new sidings were drawn up but I'm still deciding whether I should put a turntable back or not. First step will be something like this.

Mar 6, 2011
I ran the Garratt for 50 minutes today with 6 bogie load. Means the loco takes about 1.4 amps average.
It then took 1200 mAh to recharge. So I guess I'll only get about 90 mins run. If I put another 1300 mAh in the cab, I'll get 140 mins.
Mar 5, 2011
The grandkids have gone, so time to work on trains.
I've taken the plunge and installed my first LiPo battery. (Bryan and Keith have used them for years).
I replaced the NiMH cells in the red Garratt, as I've realised that the >1 amp currents are not good for AA cells (after problems with my 4-8-0). I've used the same 2200 mAh rating and slightly lower volts (nominal 12V), but the higher discharge capacity of the LiPos will help. I can add another 1000mAh in the cab later if necessary. The motors now only have around 5.5V each but the speed seems OK.
I bought the battery and charger from Hobbyking and while ordering I bought a new Tx+Rx+ESC for a future loco. All up only 87AUD !
Feb 13, 2011
It's been a month since the last update, but that's due to my grandkids from US being here on holidays. No work on the trains (except for repairs!) but playing trains every morning.
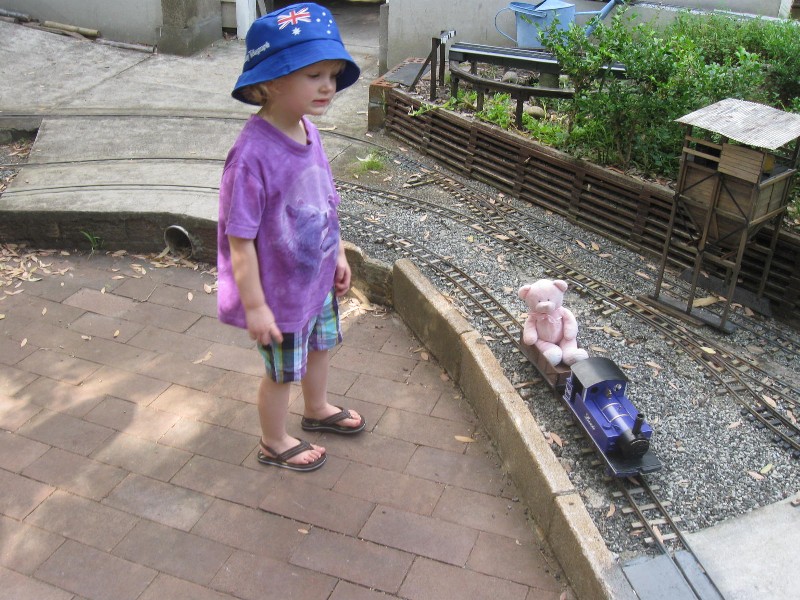
Here's Lexie with her loco and bear.
Here's 4 of the 5 kids, with their locos.
.JPG)
I've installed 2.4 GHz RC in the new diesel. A bit of lining and detail painting and it's about finished.
I'm working on a simple sound system, mainly to just remind me that it is turned on! There's only room for a little speaker, so volume will be pretty low.
Jan 10, 2011
I put another video on Youtube. This one shows a trip over the whole line from Sandstone to Termite and includes part of the video from 2 Jan. click here
Jan 7, 2011
Friend Bryan gave me a small diesel loco. It's been nicely scratchbuilt by persons unknown on an LGB powered tender motor block. I think it looks ugly and great. Only unusual feature is the open cab rear wall, when it has side doors on the cab.
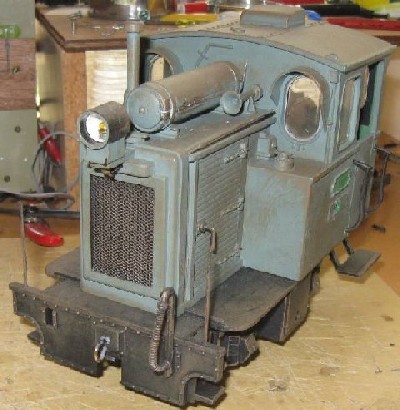
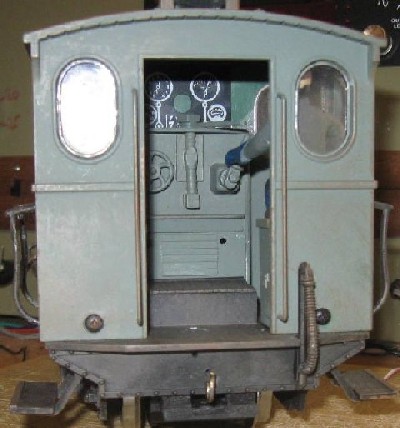
Now the real problems are:-
There's no room for a speaker, except maybe in the cab roof.
All the 'cavities' are just too small for AA batteries. So I'm going to use a false cab floor and get 4 cells under it with another 1 or 2 under the hood. Then use 2.4 GHz RC under the hood too.
Then decide whether to close in the back of the cab.
Jan 1, 2011
I've added a new page to my Electronics section to explain a bit more about using batteries and different control systems. It includes a detailed look at PWM controllers. Just click here and go to the Battery/charging menu item.


