TrainWeb.org Facebook Page
Baltimore Light Rail Photo Tour


Baltimore Light Rail
Modern day photo tour

Accompanying each photo below are:

Click a photo to see a larger view. Please send your comments and corrections to Steve.


<< Previous (north) | THIS PAGE: Woodberry to Penn Station | Next (south) >>

Woodberry
Photo credit HH Harwood

Woodberry
Mile: 3.4 Date: 1990s
Ease: B+ View: N
Area: B BLR:
Map: Ba 34 H 5 Topographic Maps

During light rail's single-track era, many -- but not all -- stations were double-tracked, such as Woodberry's where MTA 5002 is about to stop. On the right is the 1877-constructed Meadow Mill.

Link: 1969


Erosion Control
Photo credit HH Harwood

Erosion Control
Mile: 3.3 Date: Jan 1992
Ease: B+ View: NW
Area: B BLR: 46
Map: Ba 34 H 6 Topographic Maps

Major floods have been the downfall of more than one railroad. Where the route gets close to the Jones Falls, embankments were shored up as part of light rail preparation.


Under I-83

Under I-83
Mile: 3.2 Date: Dec 2019
Ease: A- View: W
Area: B BLR:
Map: Ba 34 H 6 Topographic Maps

Two trains dance with the JFX/I-83. This is not the only place thay can all do-si-do: light rail will duck under I-83 one more time before reaching downtown.


Early Test Run
Photo credit HH Harwood

Early Test Run
Mile: 2.7 Date: Nov 1991
Ease: B View: NW
Area: B BLR: 50
Map: Ba 34 J 7 Topographic Maps

Near Falls Road's connection with I-83, Harwood captured an early test run of one of the first LRV cars delivered by ABB Traction. At photo time, the system was still over four months away from opening for revenue service.


Single Track

Single Track
Mile: 2.4 Date: May 1999
Ease: B+ View: N
Area: B BLR: 70
Map: Ba 34 K 7 Topographic Maps

With spring colors out in full force, what looks to be a double tracked area is actually single light rail track. The track on the left was a used by Conrail for its freight operations north of Baltimore City.

Baltimore's light rail system is one of the country's few public rail transit systems that was built without Federal funding. For later expansions, the Feds did chip in some money.


Double Track

Double Track
Mile: 2.4 Date: Nov 2019
Ease: B+ View: N
Area: B BLR:
Map: Ba 34 K 7 Topographic Maps

A few years after the prior photo, a second light rail track was added on the east (right) side, making for a total of three. This stretch had been similarly triple tracked during the Northern Central (NC) era.

Mount Vernon Mill No. 1 is a former cotton mill that dates to the 1870s. During the 2010s it was repurposed for mixed use.

Link: near here 1950


From Wyman Park Drive

From Wyman Park Drive
Mile: 2.4 Date: Nov 2019
Ease: B+ View: SE
Area: B BLR:
Map: Ba 34 K 7 Topographic Maps

The system's ridership of close to 10 million annually sounds impressive until one realizes New York City's subway tallies more riders than that every two weekdays.

A bridge across the valley here dates to the late 1800s before the renaming of Cedar Avenue to Wyman Park Drive.

Links: Cedar Avenue Bridge, 1934 photo, metal arch bridges (PDF)


Interchange
Photo credit HH Harwood

Interchange
Mile: 2.2 Date: ~2000
Ease: B View: NW
Area: C+ BLR: 57
Map: Ba 34 K 8 Topographic Maps

Wyman Park Drive is the overpass in the distance. The switches ahead are one of just two places light rail interconnects with other railroads. Despite the connections, new light rail cars were trucked to the system.

From left to right: CR/NS lead to Mount Vernon yard bulk transfer terminal, light rail going from double to single track (as originally built), CR/NS connection to Mount Vernon yard lead track crossing light rail, CR/NS connection to light rail line for freight operation to Hunt Valley. At photo time the interchange track was still in service, but now sees just light rail maintenance use.


From 28th Street

From 28th Street
Mile: 2.1 Date: Aug 2019
Ease: B View: S
Area: C+ BLR:
Map: Ba 34 K 8 Topographic Maps

Norfolk Southern's last train rolled at Mount Vernon yard during 2005. In the Northern Central era, much of Baltimore's incoming produce had arrived via this yard. Now light rail's North Avenue maintenance shop occupies the southern part of the yard. In-service trains notmally pass via the tracks at left that, at photo time, were blocked by orange traffic cones due to a service disruption downtown.


Idle

Idle
Mile: 2.1 Date: Aug 2019
Ease: B View: S
Area: C- BLR: 55
Map: Ba 34 K 8 Topographic Maps

shop stored cars Failure of a downtown Baltimore water main during July 2019 meant rail service was curtailed until repairs. As a result, at photo time more trains than usual were sitting idle adjacent the shop.

Note the standard road traffic signals guarding the repair bay entrances. That's I-83 on the right.


Shop Interior
Photo credit Todd Sestero

Shop Interior
Mile: 1.9 Date: ~1996
Ease: View:
Area: BLR:
Map: Ba 34 K 8 Topographic Maps

This shop's interior is juuuust a little bit cleaner than the typical shop during the steam engine era.

Link: photo source


Light Rail Shop
Photo credit HH Harwood

Light Rail Shop
Mile: 1.8 Date: ~2000
Ease: B View: N
Area: C+ BLR: 68, 69
Map: Ba 34 K 8 Topographic Maps

When the shop was still newish, Harwood captured its opposite side with its five bays.


Valley View

Valley View
Mile: 1.4 Date: Sep 2016
Ease: B View: NW
Area: C BLR:
Map: Ba 35 A 10 Topographic Maps

Deep zoom looks back about a mile. The blue building at left is the light rail shop.


North Avenue Station

North Avenue Station
Mile: 1.6 Date: Sep 2016
Ease: B View: N
Area: C BLR:
Map: Ba 35 A 9 Topographic Maps

The same blue building is also visible from North Avenue, as is the closer North Avenue Station. Camden is the system's only other station with more than two tracks.


Aerial 2019
Aerial photo courtesy Google

Aerial 2019
Mile: 1.5 (center) Date: Nov 2019
Ease: View: N (up)
Area: BLR:
Map: Ba 35 A 10 (center) Topographic Maps

Light rail's North Avenue Station is at upper left, traced in light blue. This tour will follow light rail under North Avenue (US 1), under I-83, over The Box, and under Howard Street where it meets a spur to Penn Station, which is off photo right.

Dark blue represents the ex-B&O, now CSX route here. Deep red is for the ex-Baltimore & Potomac, ex-Pensylvania Railroad (PRR), now Amtrak Northeast Corridor that tiptoes through the aging B&P Tunnel. Light red traces a few ex-Northern Central (ex-PRR) alignments in the area.


Aerial 1970s
Photo courtesy Library of Congress

Aerial 1970s
Mile: 1.4 Date: 1970s
Ease: View: N
Area: BLR:
Map: Ba 35 A 10 Topographic Maps

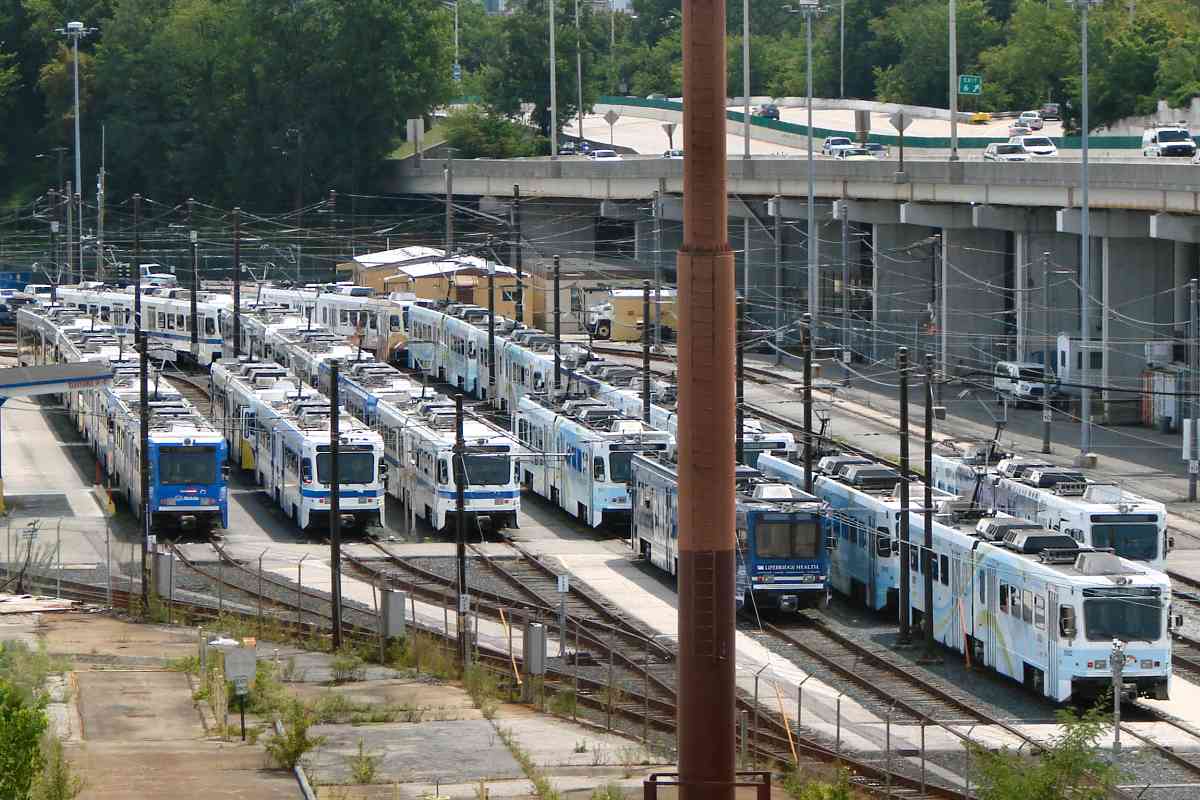
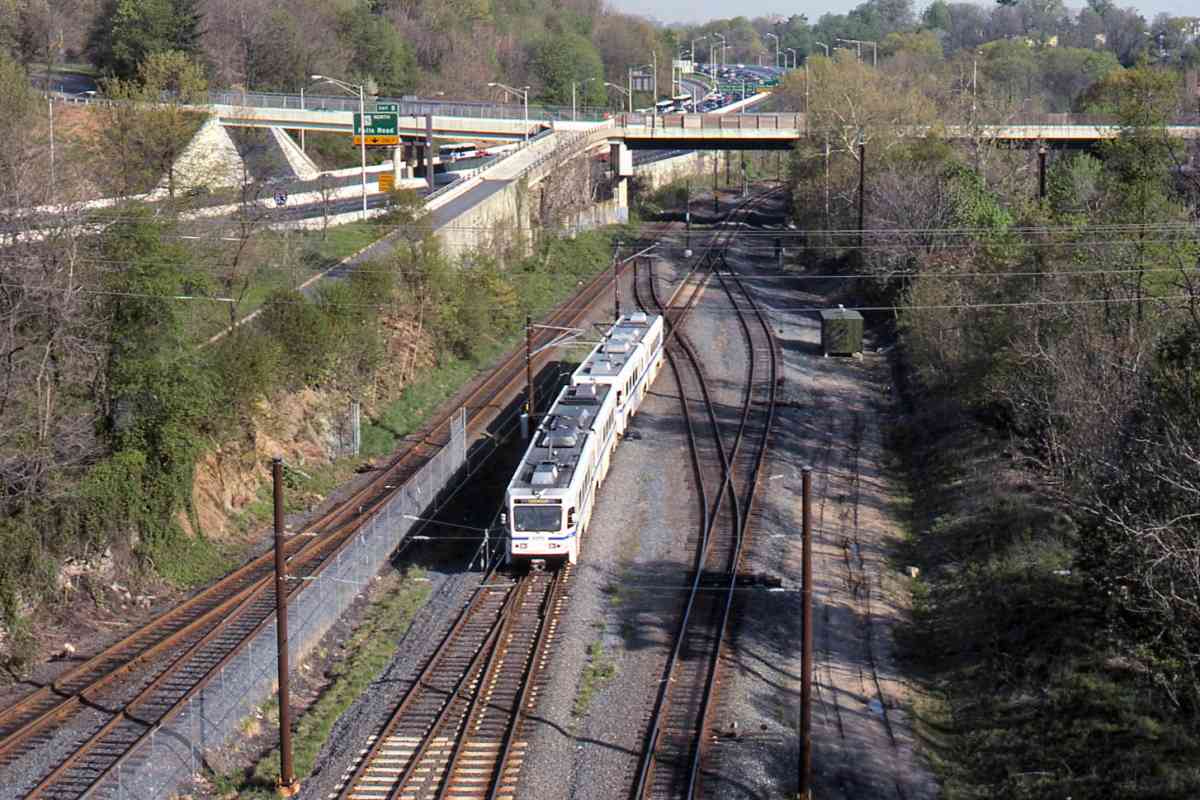
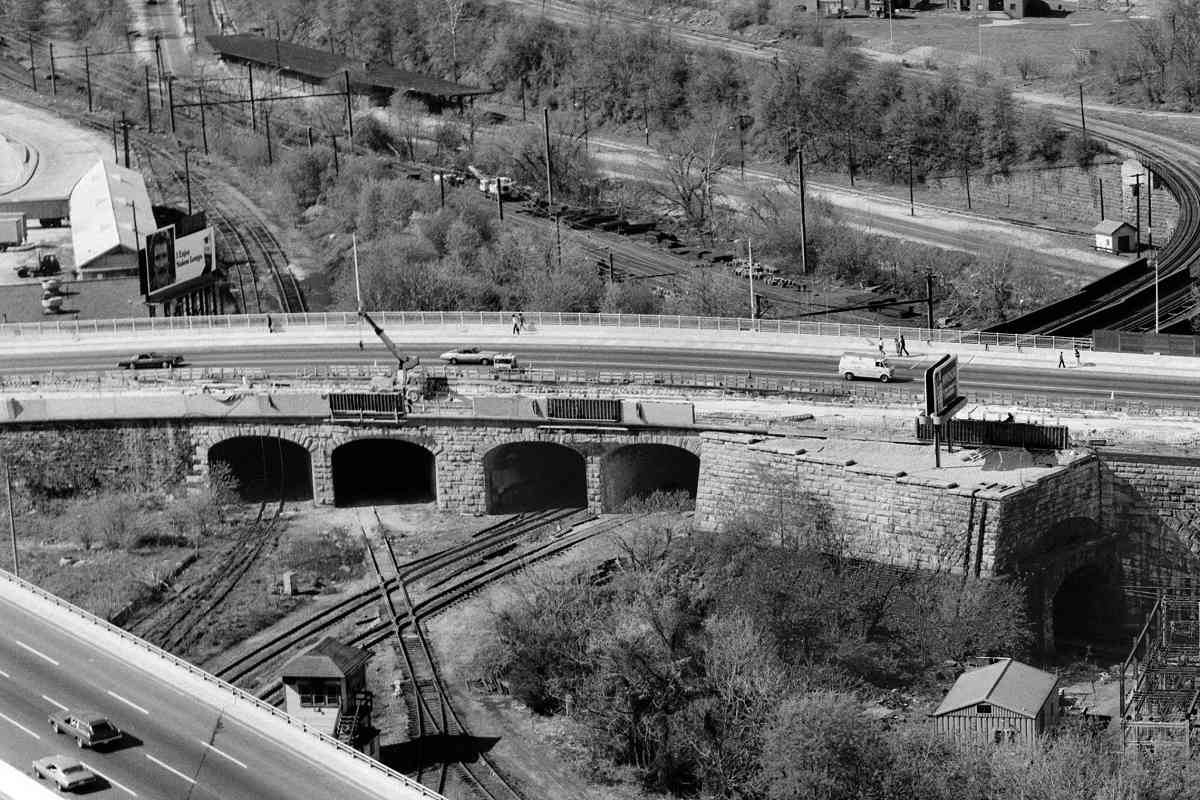
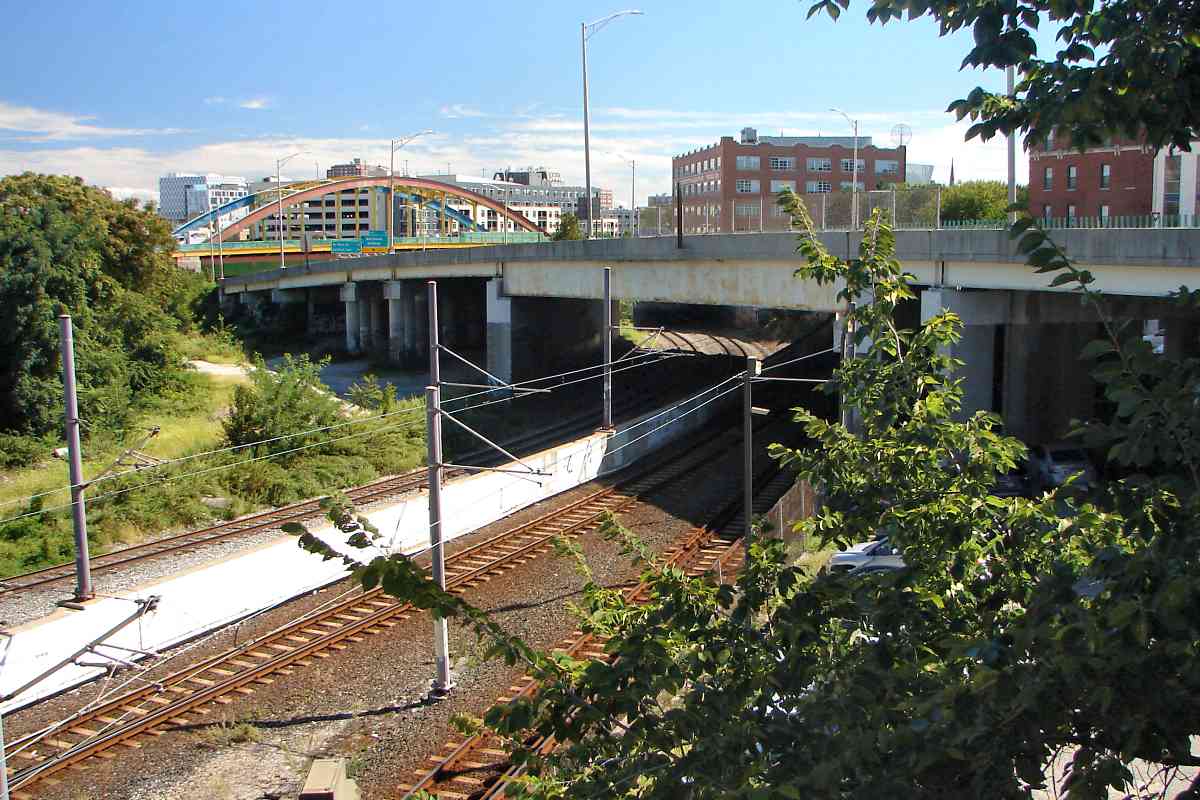
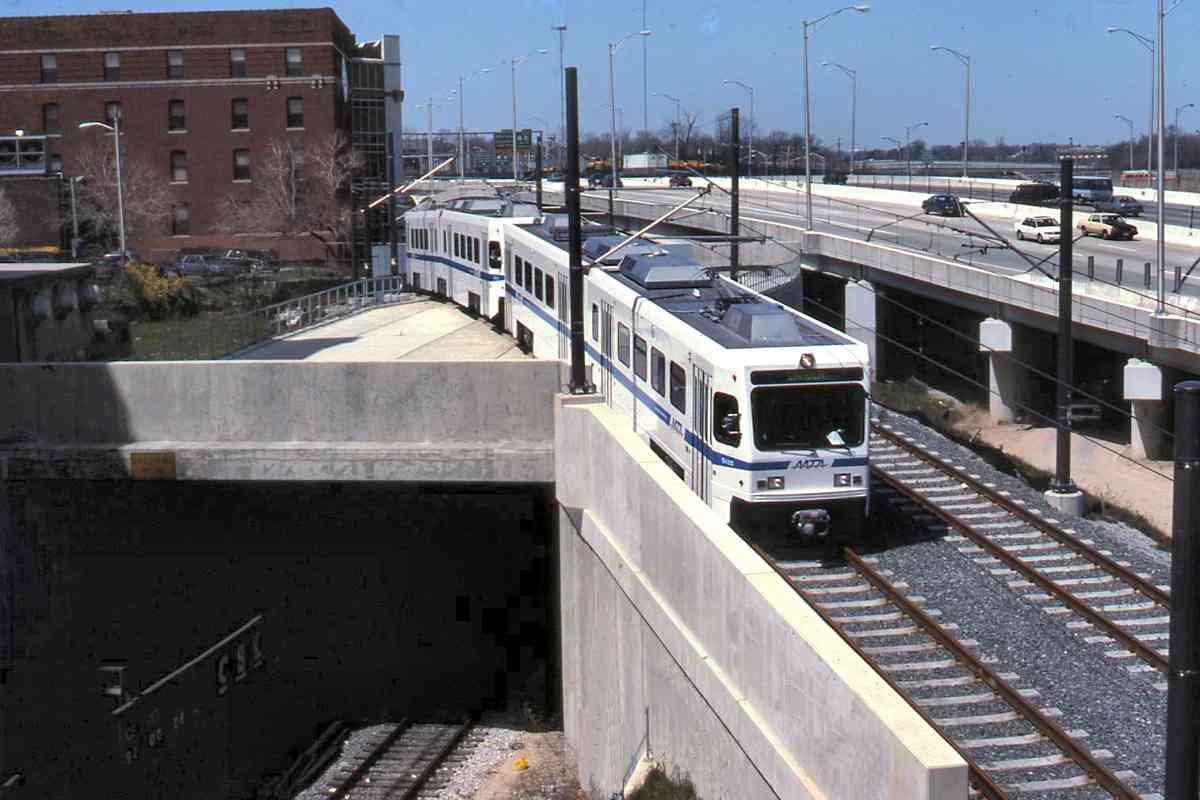
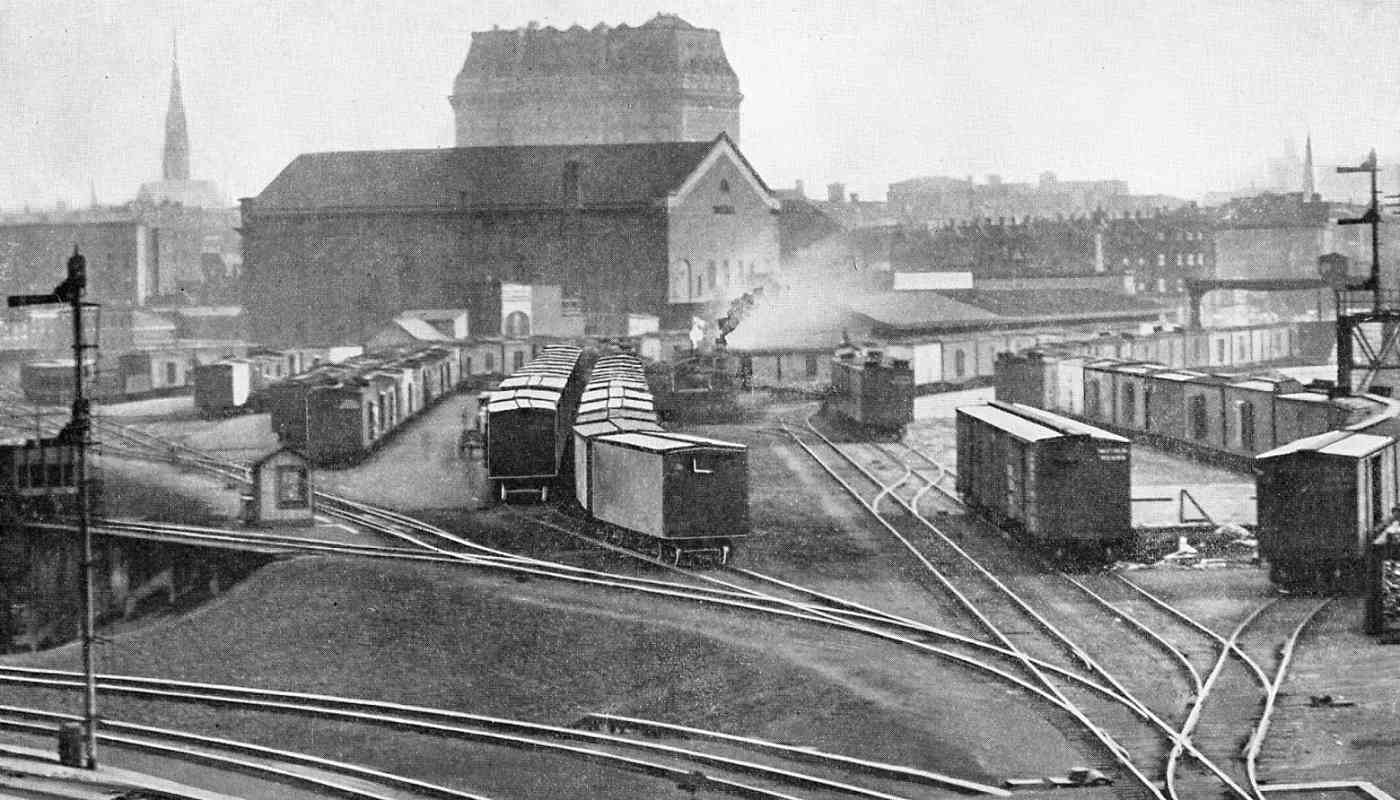
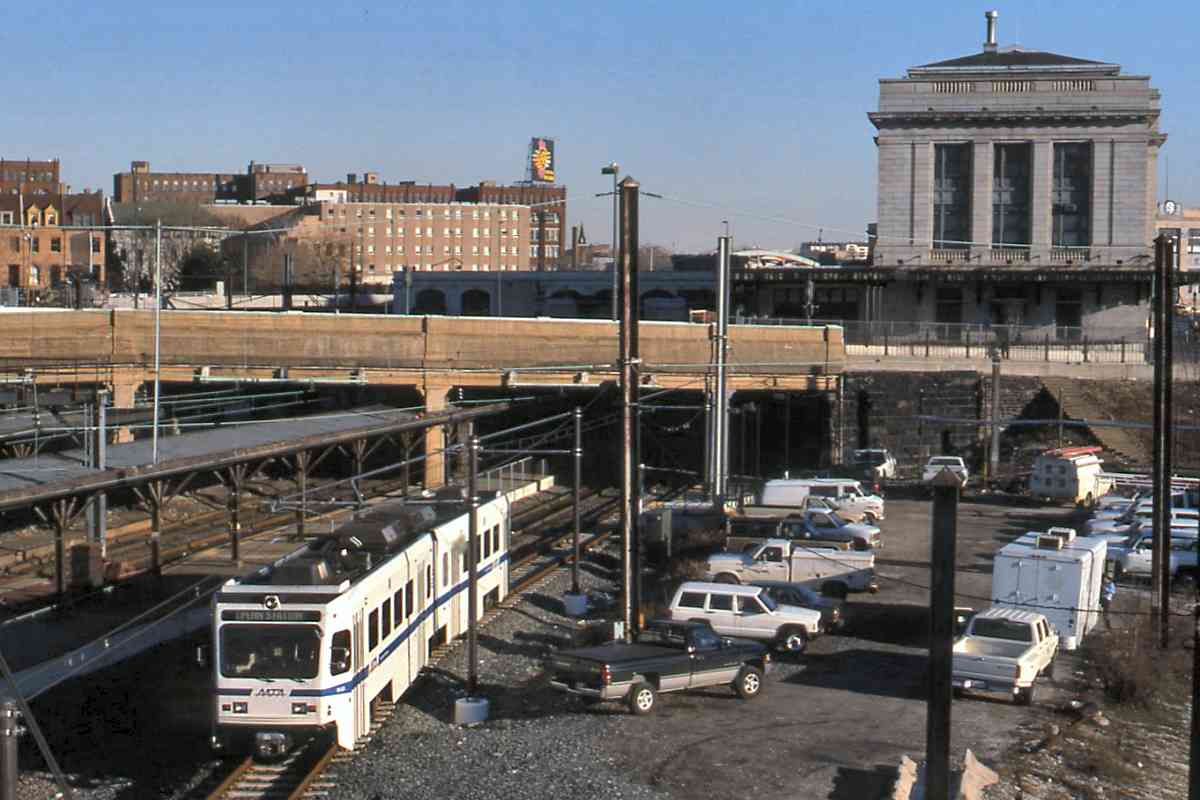
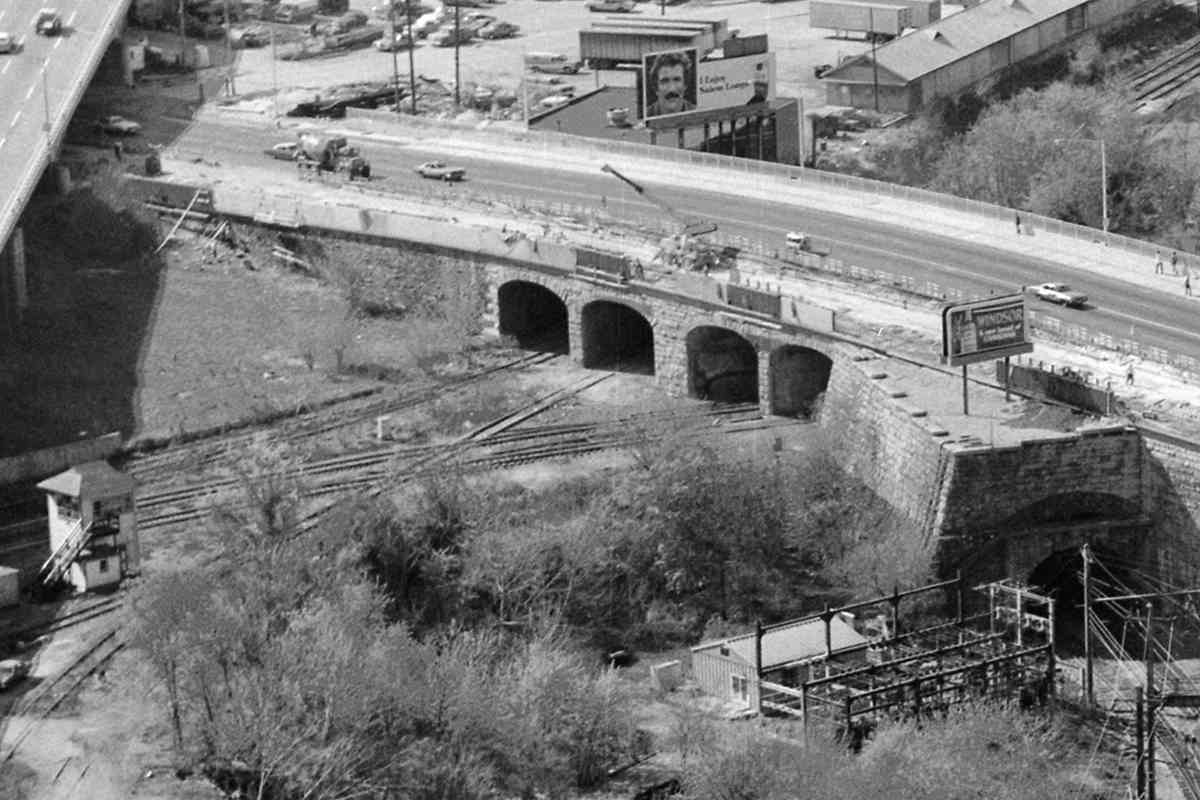
In this mid-1970s view, the former Northern Central route along the Jones Falls at upper left is looking a bit shabby. A few years earlier, stalled remnants of Hurricane Agnes had flooded out bridges north of Baltimore City, rendering the route useless for through trains. With the corridor devalued, subsequent owner Conrail became willing to share the route with light rail.

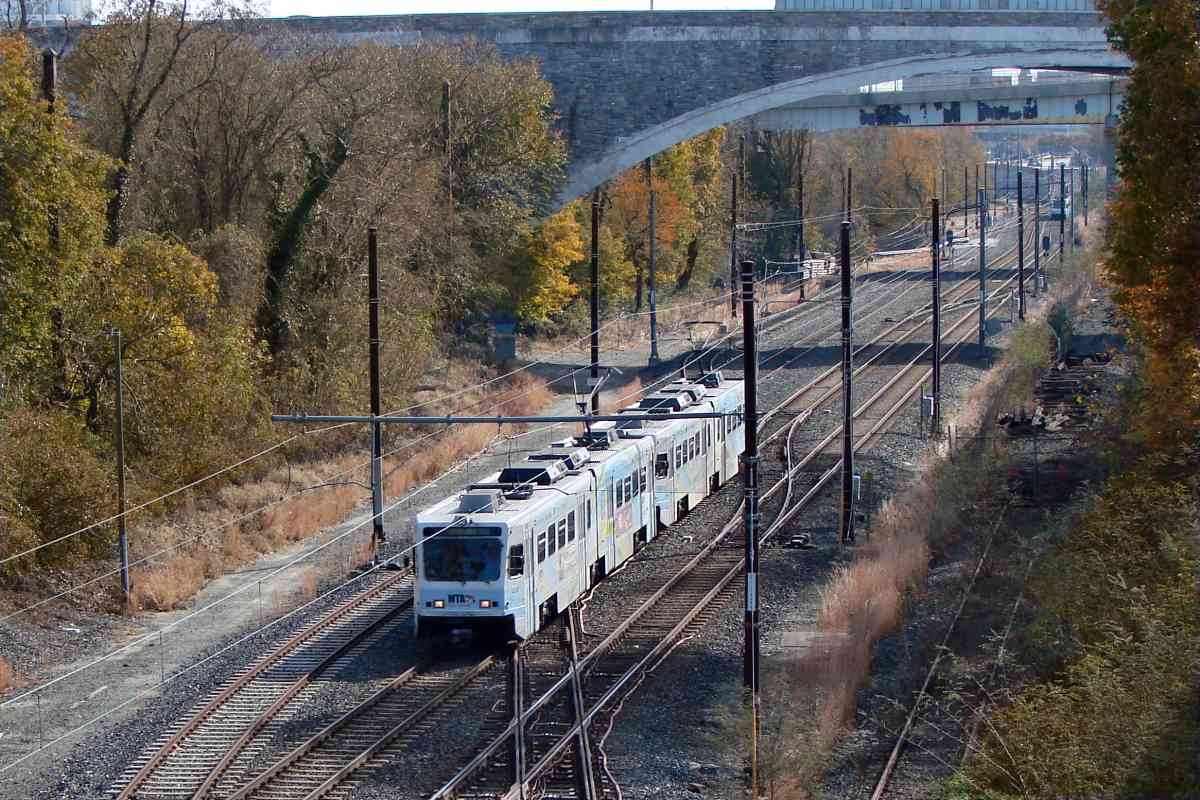
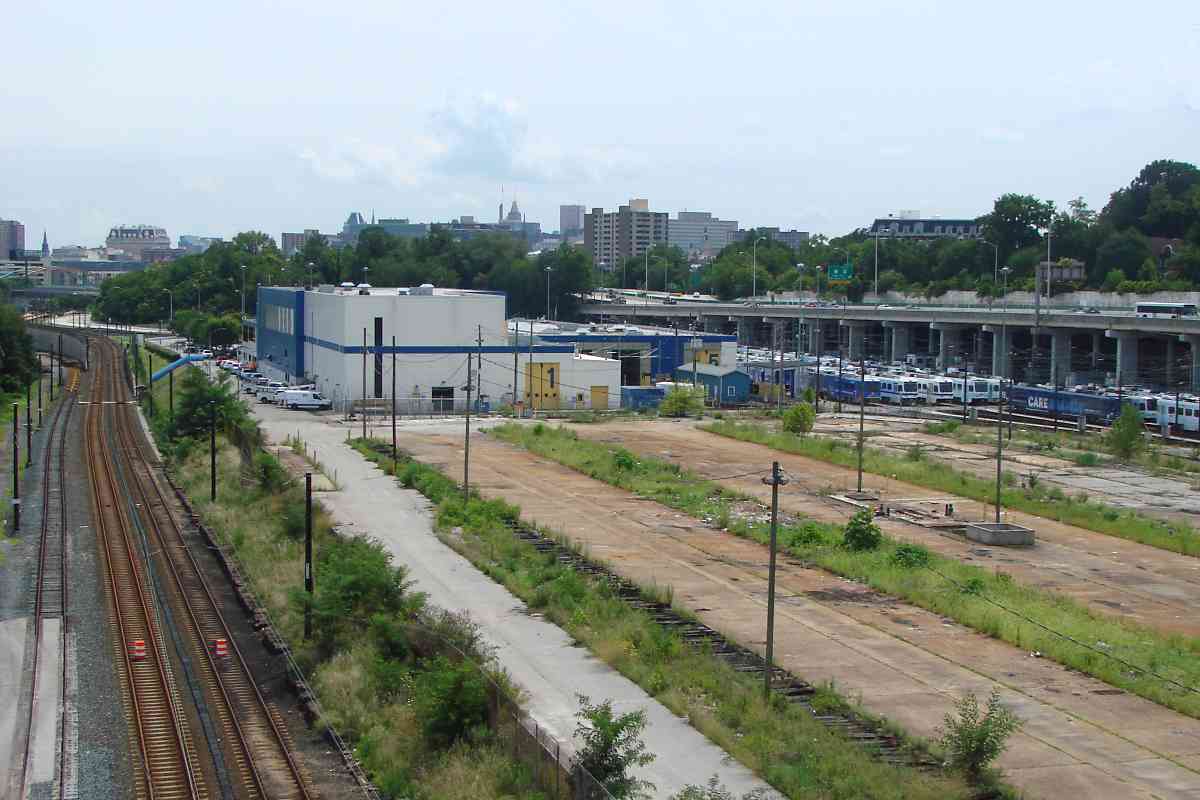
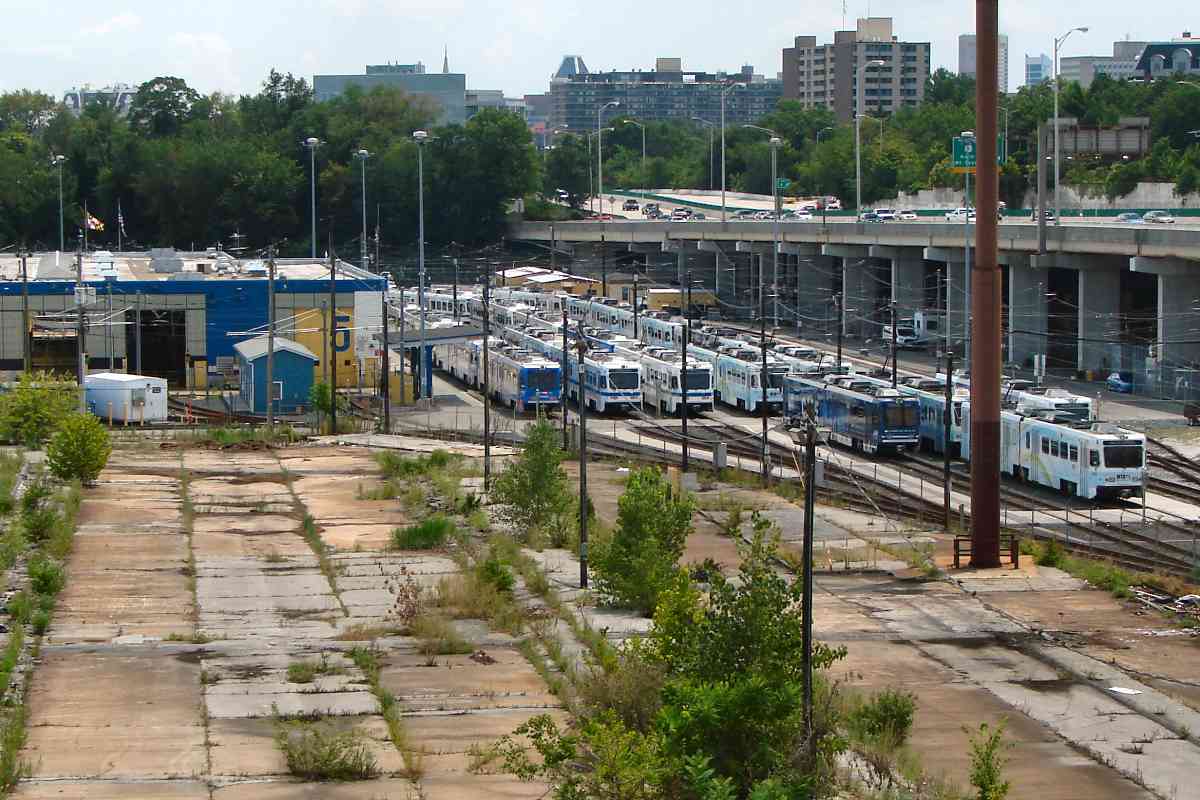
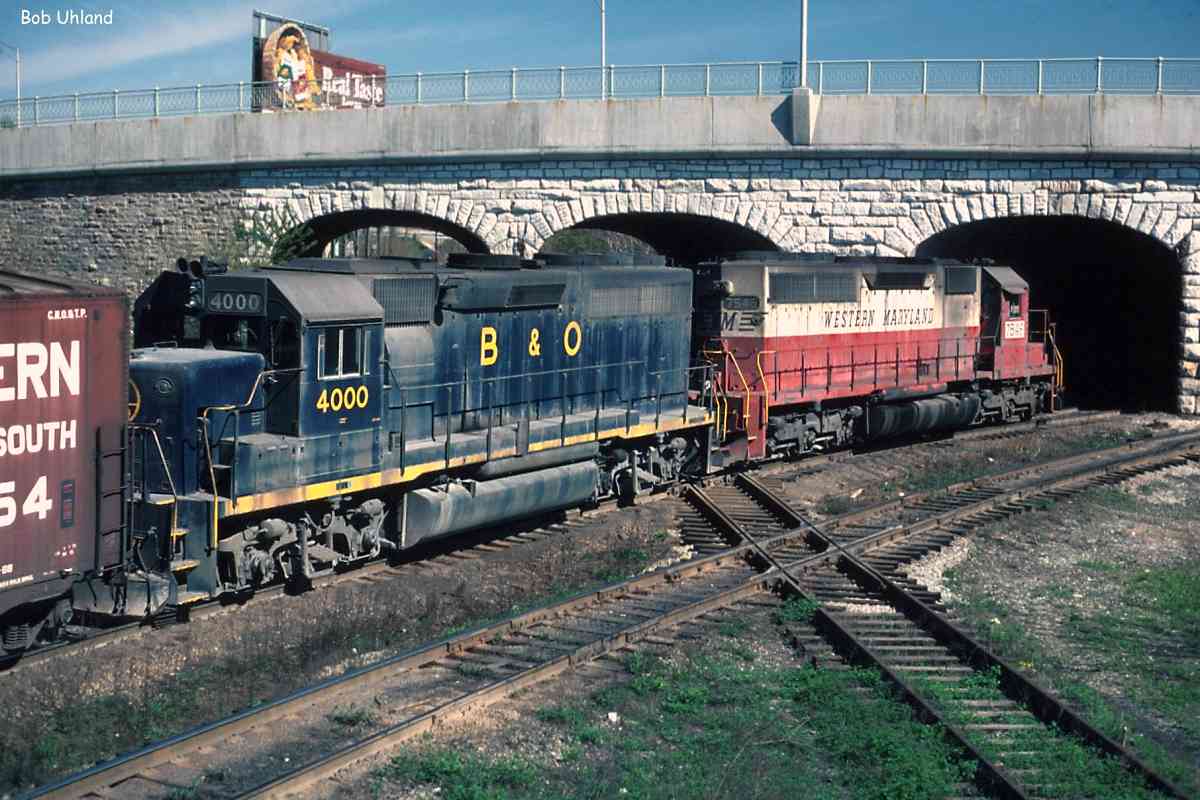
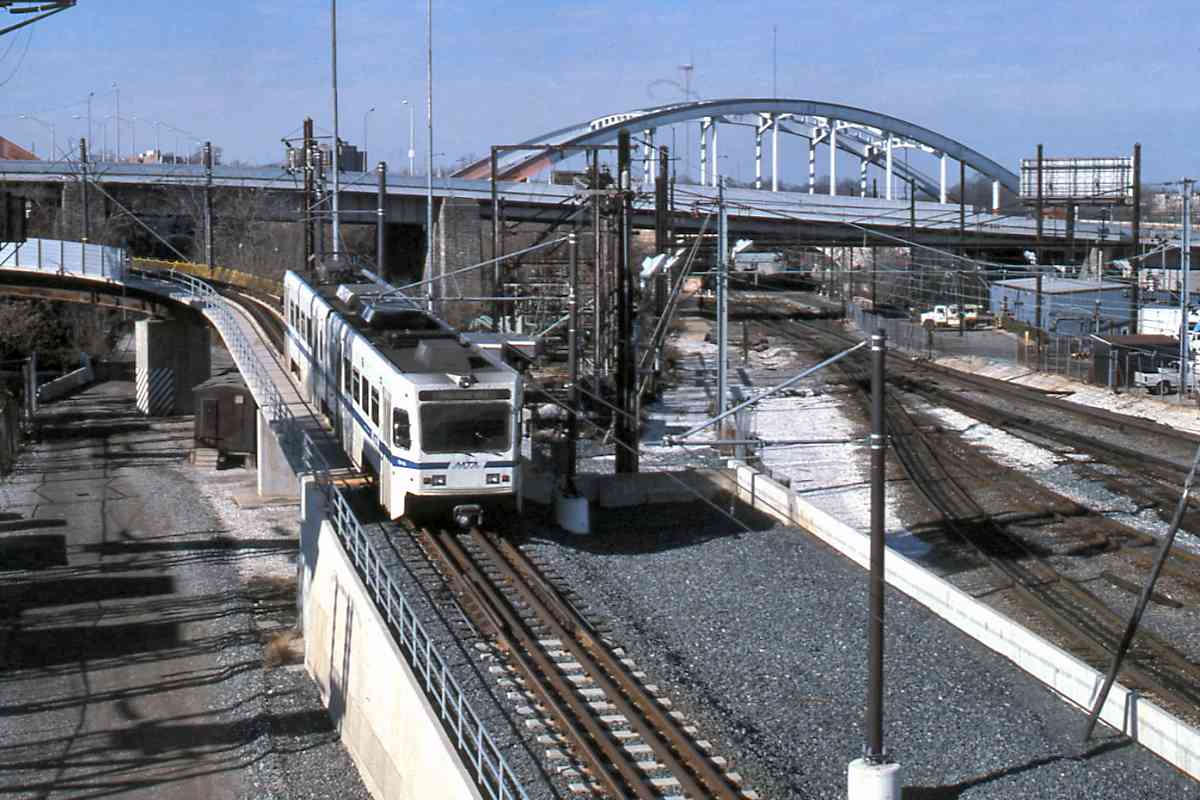
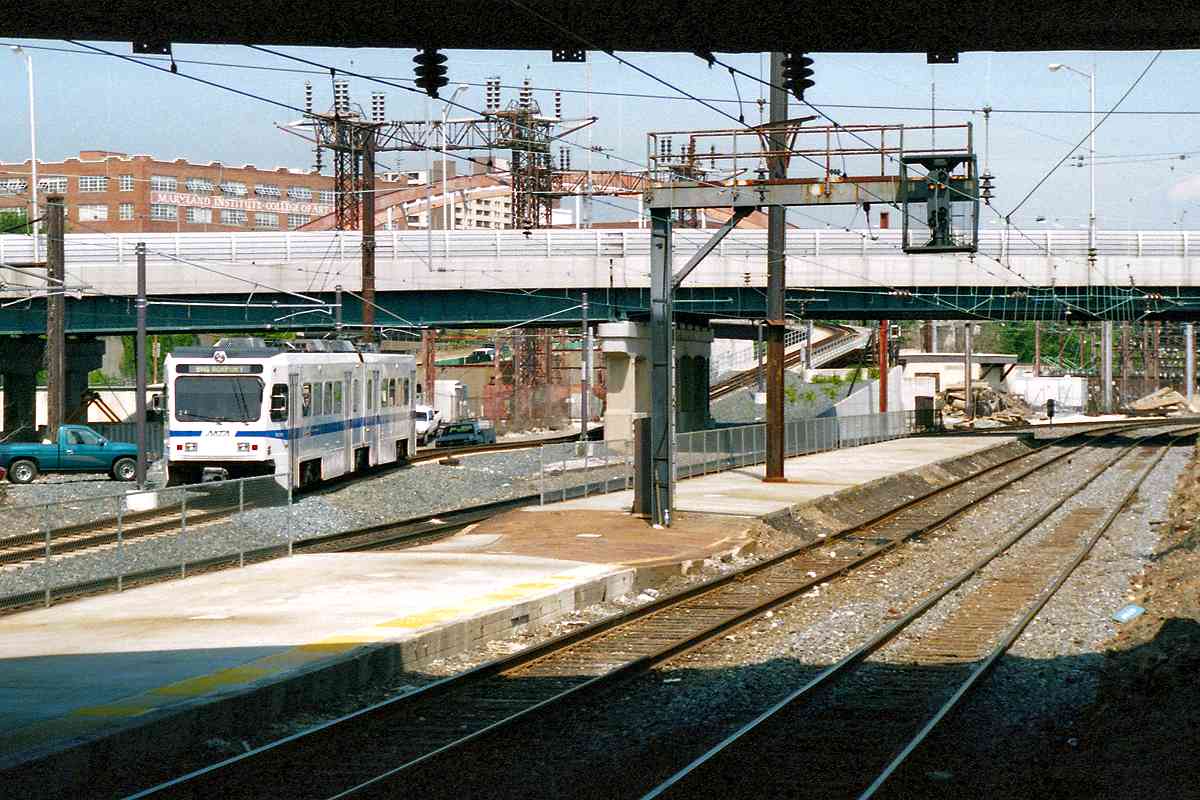
Snaking through photo middle is the B&O's Baltimore Belt Line, now part of CSX's Philadelphia Subdivision. The building at lower left is the B&O's NA 
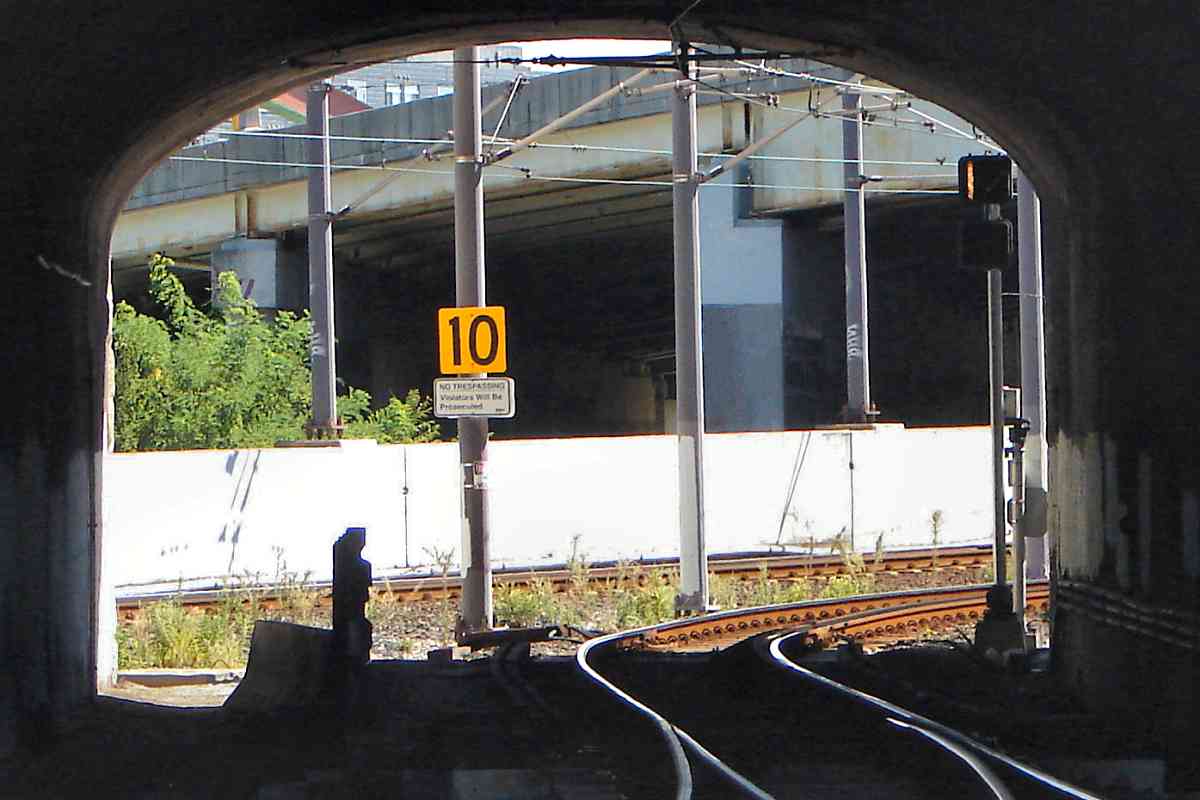
tower. At right is a portal of the 1870s B&P Tunnel whose replacement is, looking northwest 
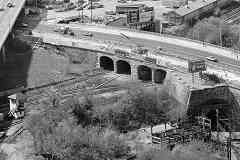
as of this writing, no further than on drawing boards. The building at upper left, which had been a maintenance depot of the Maryland & Pennsylvania RR, is now used by the Baltimore Streetcar Museum.

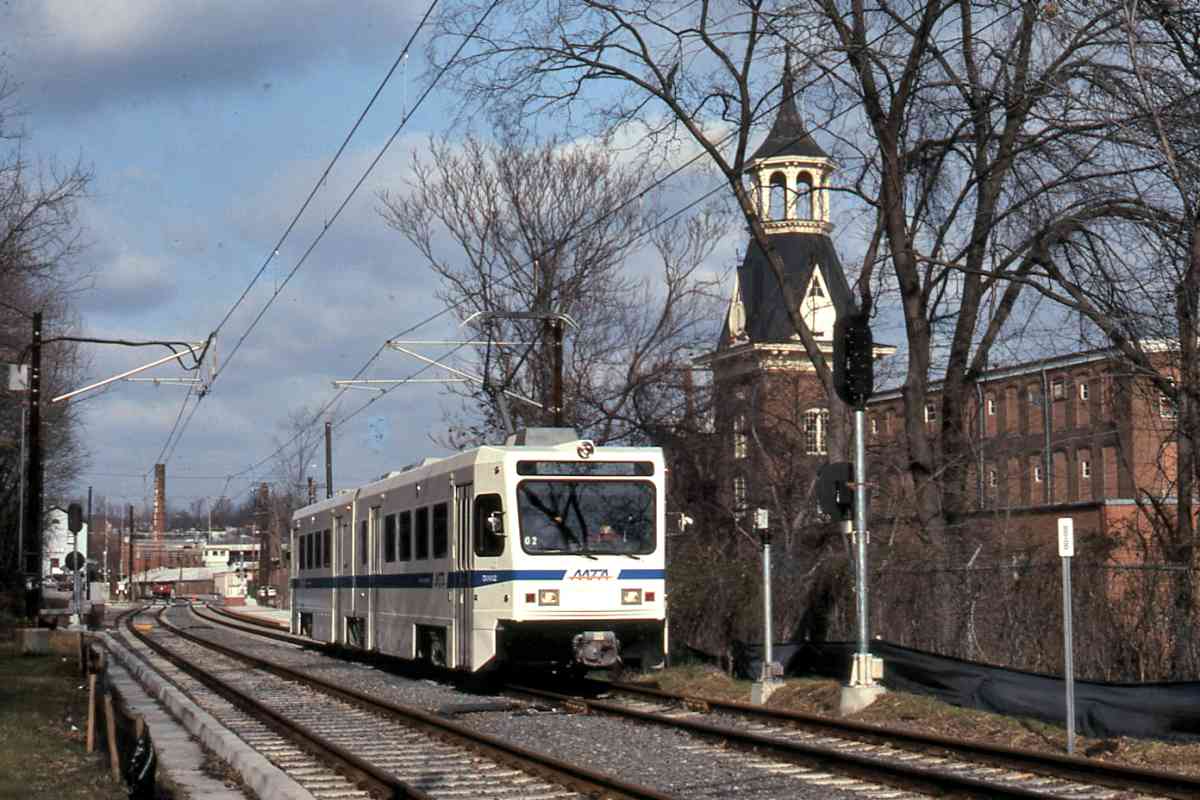
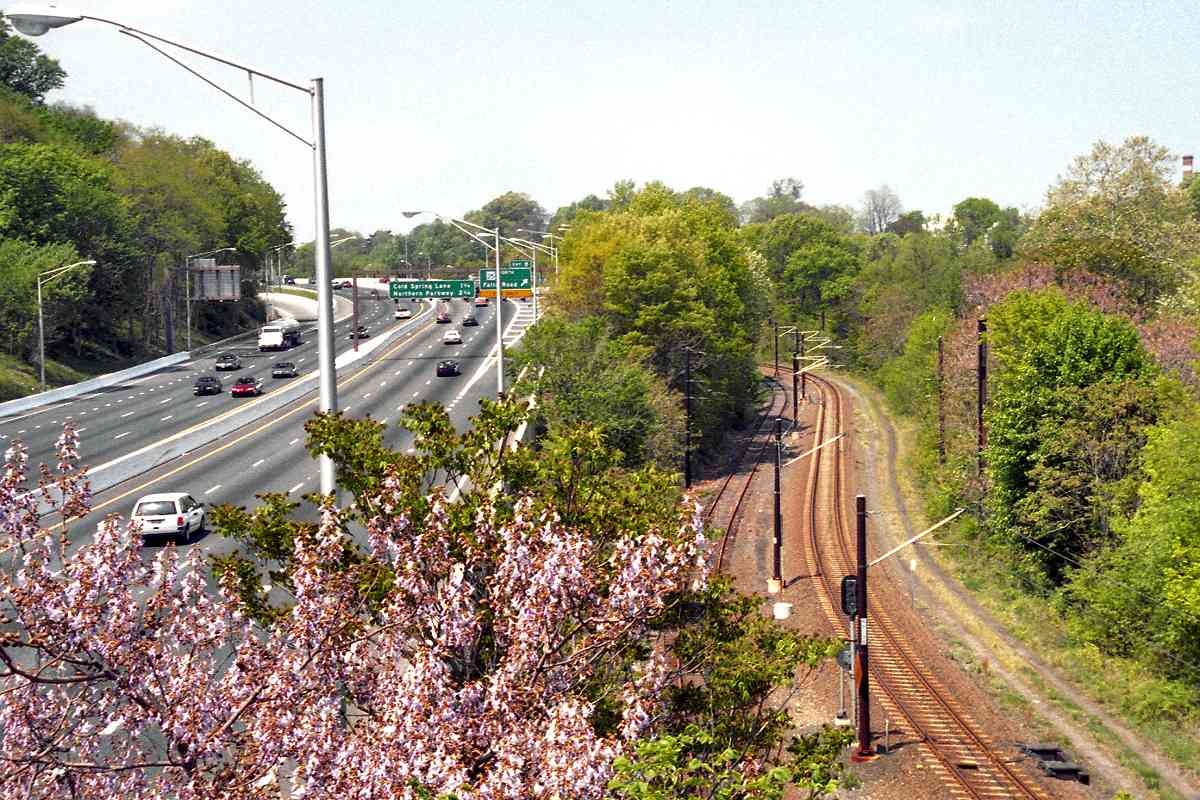
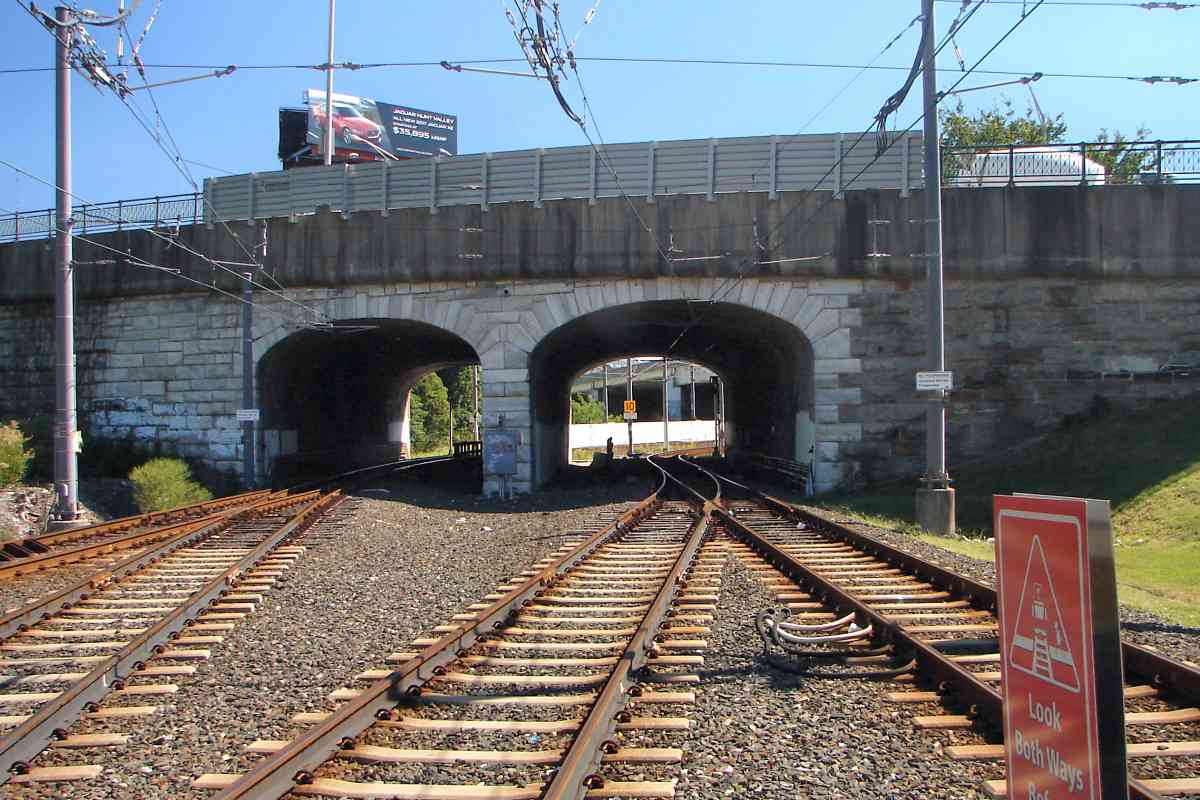
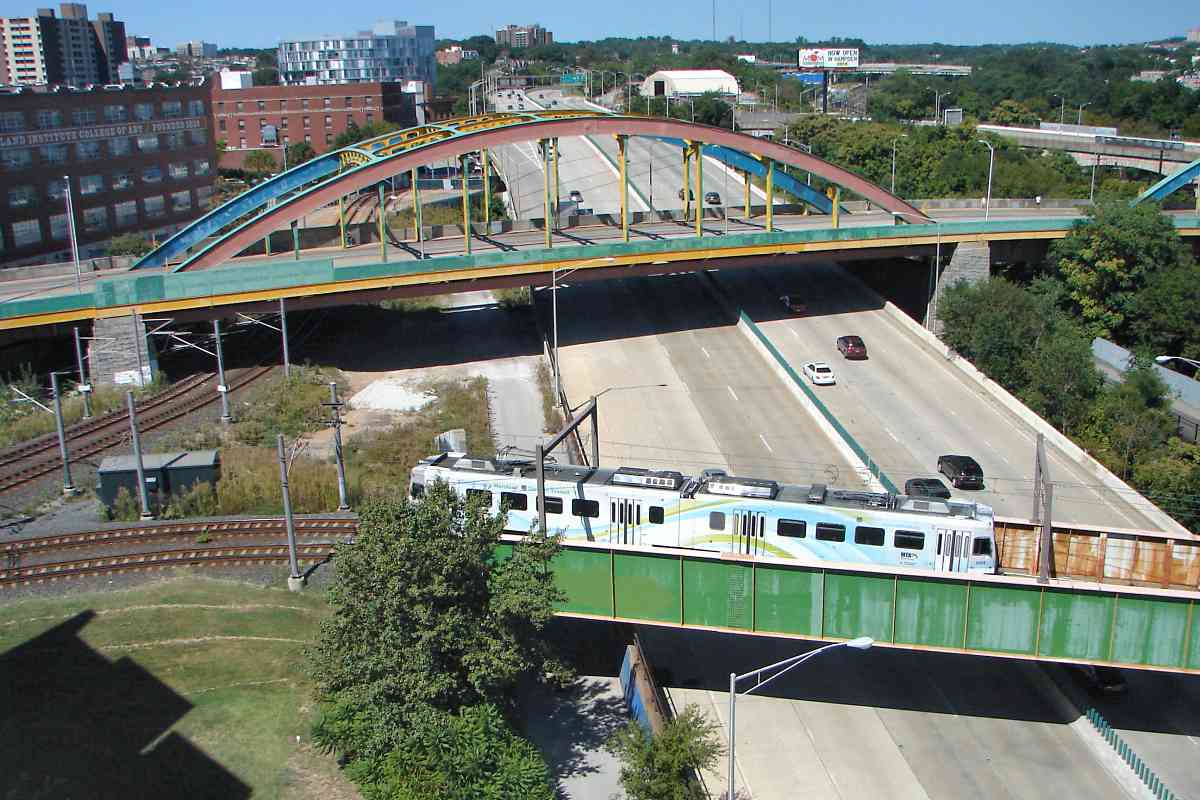
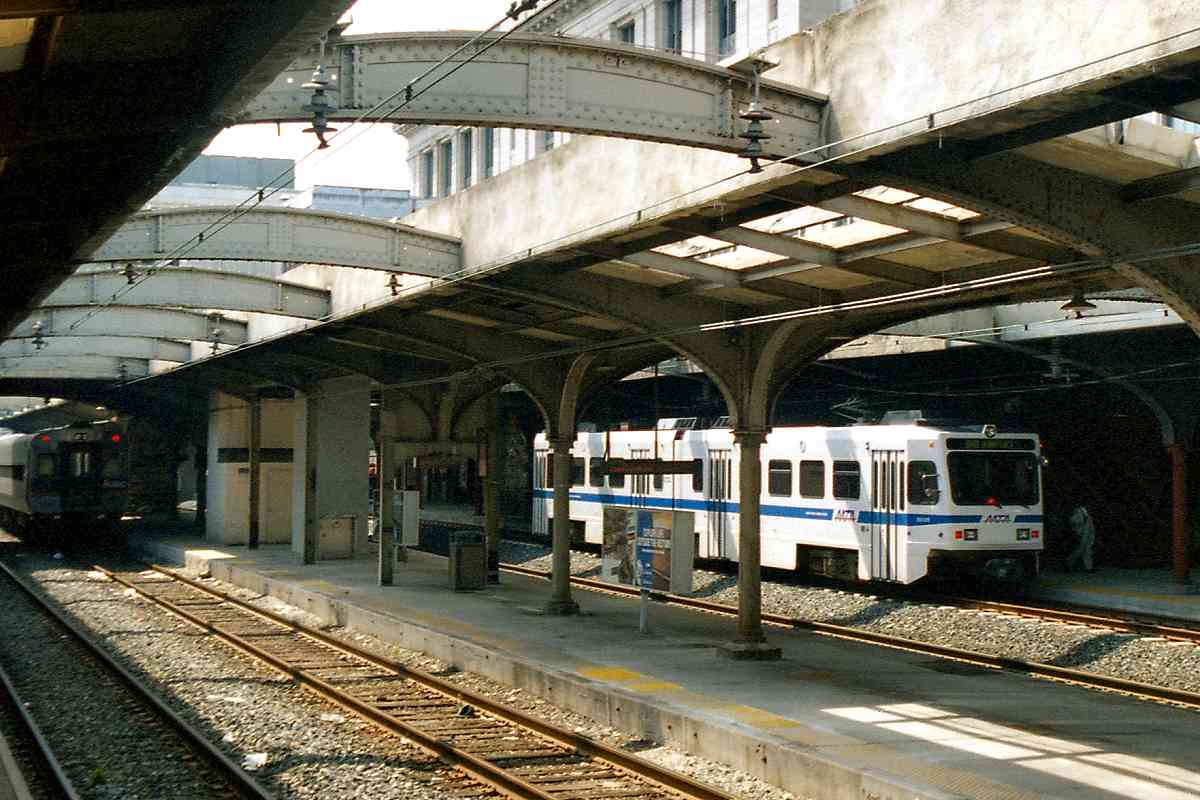
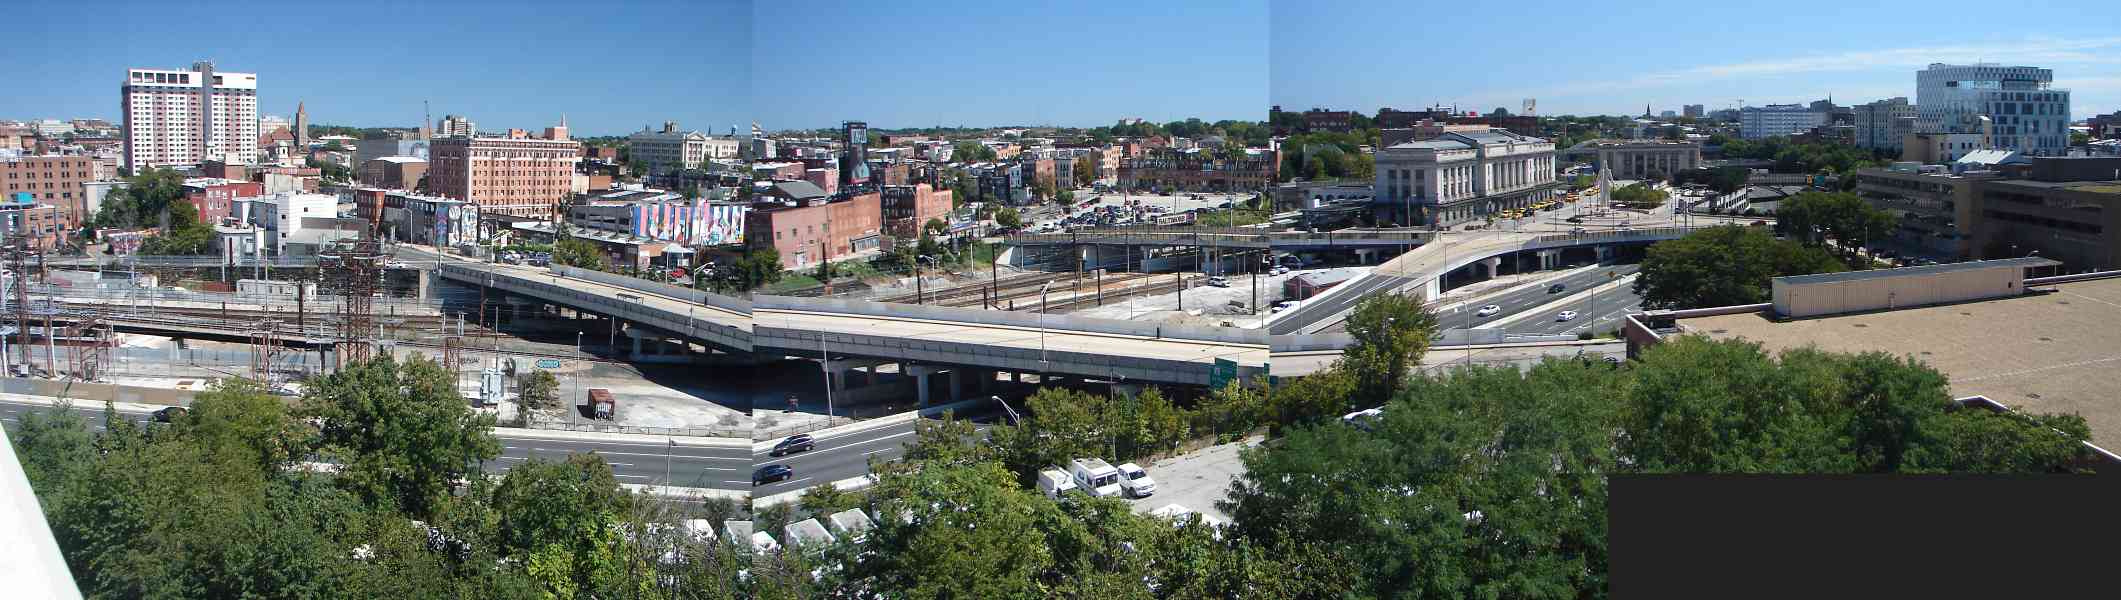
North Avenue runs east-west through the middle of the photo. The billboard adjacent it at left, with Tom Selleck advertising cigarettes, is near where the next photo was snapped.

Link: LoC source photo


Underpasses

Underpasses
Mile: 1.6 Date: Sep 2016
Ease: A- View: S
Area: C BLR: 67
Map: Ba 35 A 9 Topographic Maps

This more recent view looks the opposite direction; the Tom Selleck billboard had stood off photo right. Each underpass has room for double track, but light rail chose to run just one track through each. What appears to be a railing inside both is part of a bridge over the ex-B&P ex-PRR Amtrak tunnel underneath.

position bar signal There are unusual signal applications here. Most light rail signals are automobile-road style: red on top, amber middle, green on bottom. Where they might be confused by automobile drivers, instead a different signal style is employed: white vertical (go) or horizontal (stop) lines. One puzzling installation is atop the pole at right, a spot at which no auto driver is going to be confused by it.

Change for: PRR tour at this site


Directional Signal

Directional Signal
Mile: 1.6 Date: Sep 2016
Ease: B- View: N
Area: C BLR:
Map: Ba 35 A 9 Topographic Maps

route indicator The other side of the underpass has a pole-mounted PRR-style dwarf signal, a unique application along light rail. This signal tells train operators whether their train, when it proceeds, will be directed straight, or veer to the left on the way into the car shop. In this photo, the signal is displaying stop.

NA Tower had stood behind the photographer.

Link: light rail signals


From NA Tower
Photo credit Bob Uhland

From NA Tower
Mile: 1.5 Date: 1970s
Ease: B- View: N
Area: C BLR:
Map: Ba 35 A 9 Topographic Maps

As seen from NA Tower during the Chessie System era, WM 7546 and BO 4000 lead the way across the NC route that light rail has been following. Frequent light rail trains crossing a slow freight line is a recipe for danger and disruption, so the two systems had to be separated. As shown below, achieving that goal turned out to be easier said than done.

Links: source photo courtesy North American Interlockings, interior
Change for: B&O Belt Line tour at this site


NA Tower Site

NA Tower Site
Mile: 1.6 Date: Sep 2016
Ease: B View: S
Area: C BLR:
Map: Ba 35 A 9 Topographic Maps

The view south from North Avenue shows the solution to the light rail / CSX freight crossing problem involves keeping light rail on the west (right) side of the CSX route... for just a little longer. Ahead, the two routes will juxtapose via some creative maneuvering dubbed the Rebel Yell, after a regional rollercoaster.

The B&O's NA Tower had stood left of photo center. Our first glimpse of one of Howard Street bridge's colorful arches comes in the distance.

Links: ~1980, 1984


Under I-83
Photo credit HH Harwood

Under I-83
Mile: 1.5 Date: Jun 1994
Ease: B View: N
Area: C BLR:
Map: Ba 35 A 9 Topographic Maps

Next, approaching light rail squeezes under I-83, purportedly with one inch to spare, and then turns to climb over the CSX alignment. The steepness of the climb exceeds the railcar manufacturer's specifications, but the daring choice has not been a problem so far.


The Box

The Box
Mile: 1.5 Date: Sep 2016
Ease: B- View: S
Area: C- BLR:
Map: Ba 35 A 9 Topographic Maps

As seen from under I-83, after the climb, light rail veers to travel over CSX via a utilitarian structure I call The Box. Art schools in the vicinity regularly contribute layers of graffiti.


Train Garden

Train Garden
Mile: 1.5 Date: Sep 2016
Ease: B View: NE
Area: C BLR:
Map: Ba 35 A 10 Topographic Maps

Though the nearby art school had no influence on the design of The Box, students did install this attractive garden adjacent to where MTA 5017 is reaching the peak. That's I-83 behind.

Links: art park 1, art park 2


MTA 5032
Photo credit HH Harwood

MTA 5032
Mile: 1.4 Date: Apr 1992
Ease: B View: N
Area: C BLR: 50
Map: Ba 35 A 10 Topographic Maps

At The Box during light rail's opening month, a patient and determined Harwood captured a train leapfrogging shadowed CSX coal hoppers. Unfortunately, The Box did not leave enough clearance for double-stack freights, so the CSX track is scheduled to be lowered as part of the Howard Street Tunnel project.


Box Top
Photo credit HH Harwood

Box Top
Mile: 1.5 Date: Jun 1994
Ease: B View: SE
Area: C BLR:
Map: Ba 35 A 10 Topographic Maps

After The Box, southbounds descend rapidly in order to next fit under the Howard Street bridge. Decades earlier, overhead-powered trolley buses, aka trackless trollies, had plied Howard Street, per the photo linked below.

Link: ~1950


Howard Street Bridge
Photo credit HH Harwood

Howard Street Bridge
Mile: 1.4 Date: Apr 1992
Ease: A View: NW
Area: C+ BLR: 40
Map: Ba 35 A 10 Topographic Maps

At the southern end of Howard Street's rainbow-like arch, the elusive treasure of a route through tight quarters was found. Weaving light rail through this obstacle course required some impressive planning and engineering.

Links: Sun report, 2015 photos


Bolton 1910s
Public domain photo

Bolton 1910s
Mile: 1.6 Date: 1910s
Ease: View: S
Area: BLR:
Map: Ba 35 A 9 Topographic Maps

Light rail follows the western edge of what had been NC's Bolton Yard. That yard was sandwiched between the Jones Falls and Mount Royal Avenue, south of North Avenue, and west of Maryland Avenue. This is a view into part of that yard from North Avenue.


Spur

Spur
Mile: 1.4 Date: Sep 2016
Ease: B View: S
Area: C BLR:
Map: Ba 35 A 10 Topographic Maps

This is a somewhat similar view about a century later.

This northbound light rail train has entered the spur to Penn Station. Though track does not exist for southbound trains to move directly to Penn Station, this tour will throw caution to the wind and follow the spur anyhow.


Over I-83

Over I-83
Mile: 1.4 Date: Sep 2016
Ease: B View: N
Area: C BLR:
Map: Ba 35 A 10 Topographic Maps

MTA 5035 rides the spur over I-83. As of this writing, all light rail trains to Penn Station originate from points south. At left, there might be enough room for a wye to be shoehorned so that future trains can move directly between points north and Penn Station. panorama north

The main photo, and the three in the poorly-stitched panorama at right, were snapped seconds apart, so that's the same train in each photo.

The two thin, dark, vertical lines left of the distant billboard belong to TV Hill antennas near Woodberry, where this tour page began.

Link: trolley coach 1959


Steep

Steep
Mile: 1.4 Date: Sep 2016
Ease: B View: SE
Area: C BLR:
Map: Ba 35 A 10 Topographic Maps

The steepness of the bridge over I-83 tells you it's not part of a freight line. The lack of a central support similarly tells you this long bridge is not for heavy freight trains. According to my measurements, the spur's 5.6% grade is the system's steepest, though some sources report steeper grades near The Box.


Ramp
Photo credit HH Harwood

Ramp
Mile: 0.1 spur Date: Dec 1997
Ease: B View: NW
Area: C+ BLR:
Map: Ba 35 A 10 Topographic Maps

The spur opened December 6, 1997, and Harwood was on location that month to capture the scene from Maryland Avenue. Before being decommsioned during 1987 and moved to Sykesville, B&P Junction Tower had stood near the center of this photo.

Link: B&P Jct 1985


Coast
Photo credit HH Harwood

Coast
Mile: 0.1 spur Date: Jan 1998
Ease: B View: E
Area: C+ BLR:
Map: Ba 35 A 10 Topographic Maps

After gliding down the bridge's ramp, trains can coast to Pennsylvania Station.

The platform canopies seen here were original to the station. They would be removed during the next year as part of a renovation.


Under Charles Street

Under Charles Street
Mile: 0.2 spur Date: Jun 1999
Ease: A- View: W
Area: B+ BLR:
Map: Ba 35 B 10 Topographic Maps

The removal of the canopies has yielded better views, this one in the direction opposite the prior photo.


Penn Station Platforms

Penn Station Platforms
Mile: 0.2 spur Date: Jun 1999
Ease: A- View: SE
Area: B+ BLR:
Map: Ba 35 B 10 Topographic Maps

Trains have been stopping here since 1873 when the NC opened Charles Street Station. Now, Amtrak and MARC Penn Line trains visit, joined by light rail.


MTA 5004

MTA 5004
Mile: 0.2 spur Date: Nov 2018
Ease: A- View: E
Area: B+ BLR:
Map: Ba 35 B 10 Topographic Maps

Despite their proximity, light rail does not connect with the Amtrak line here, one reason being the power supplies of the two rail networks are incompatible.

Link: 1986


Busy

Busy
Mile: 1.4 Date: Sep 2016
Ease: B View: E
Area: C BLR:
Map: Ba 35 A 10 Topographic Maps

Dating to 1911, Penn Station has endured more than four times longer than the previous station to grace this spot. In the foreground, Charles Street runs south-north (right-to-left) adjacent the station.

Change for: Northern Central tour at this site
Links: 1974, 1974, 1974


<< Previous (north) | THIS PAGE: Woodberry to Penn Station | Next (south) >>

Or, return to main page

Copyright Notice