This is the 2012 diary of the S&TR
2012
This is where the future track will be.
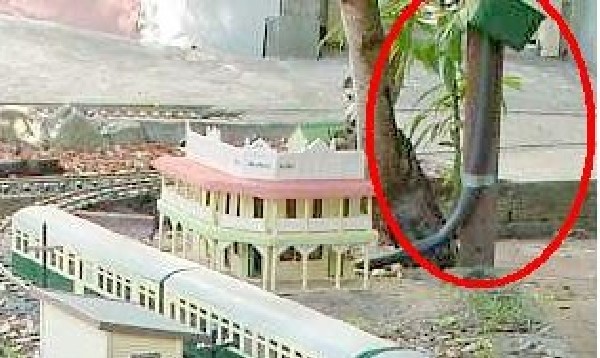
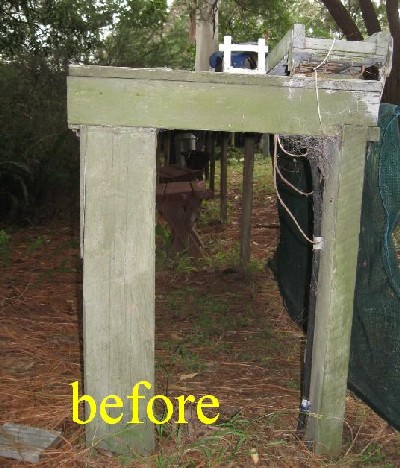
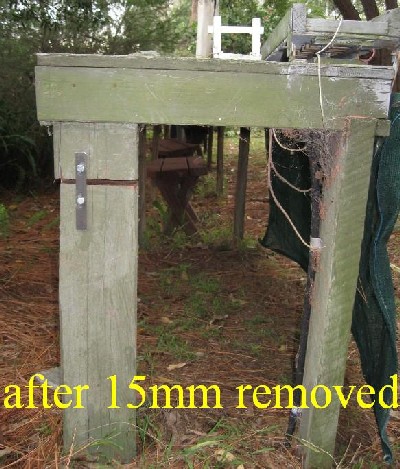
The 'baseboard' at one end of Ti-tree had been lifted by a large pine tree root nearby. This was causing the adjacent lifting bridge section to become mis-aligned. (You can see the bridge at top right in its folded up position.)So to remedy the situation I cut 15mm from the leg supporting the baseboard and braced with steel bar. And I left plenty of adjustment in the metal holes for future reductions in height too.
click here for 2004-06 diary
click here for 2007 diary
click here for 2008 diary
click here for 2009 diary
click here for 2010 diary
click here for 2011 diary
click here for 2012 diary
click here for 2013 diary
back to current What's New?
Another carriage courtesy of Bryan. A Boston and Maine. I haven't decided whether to repaint and letter or leave as is for my grandkids in Boston.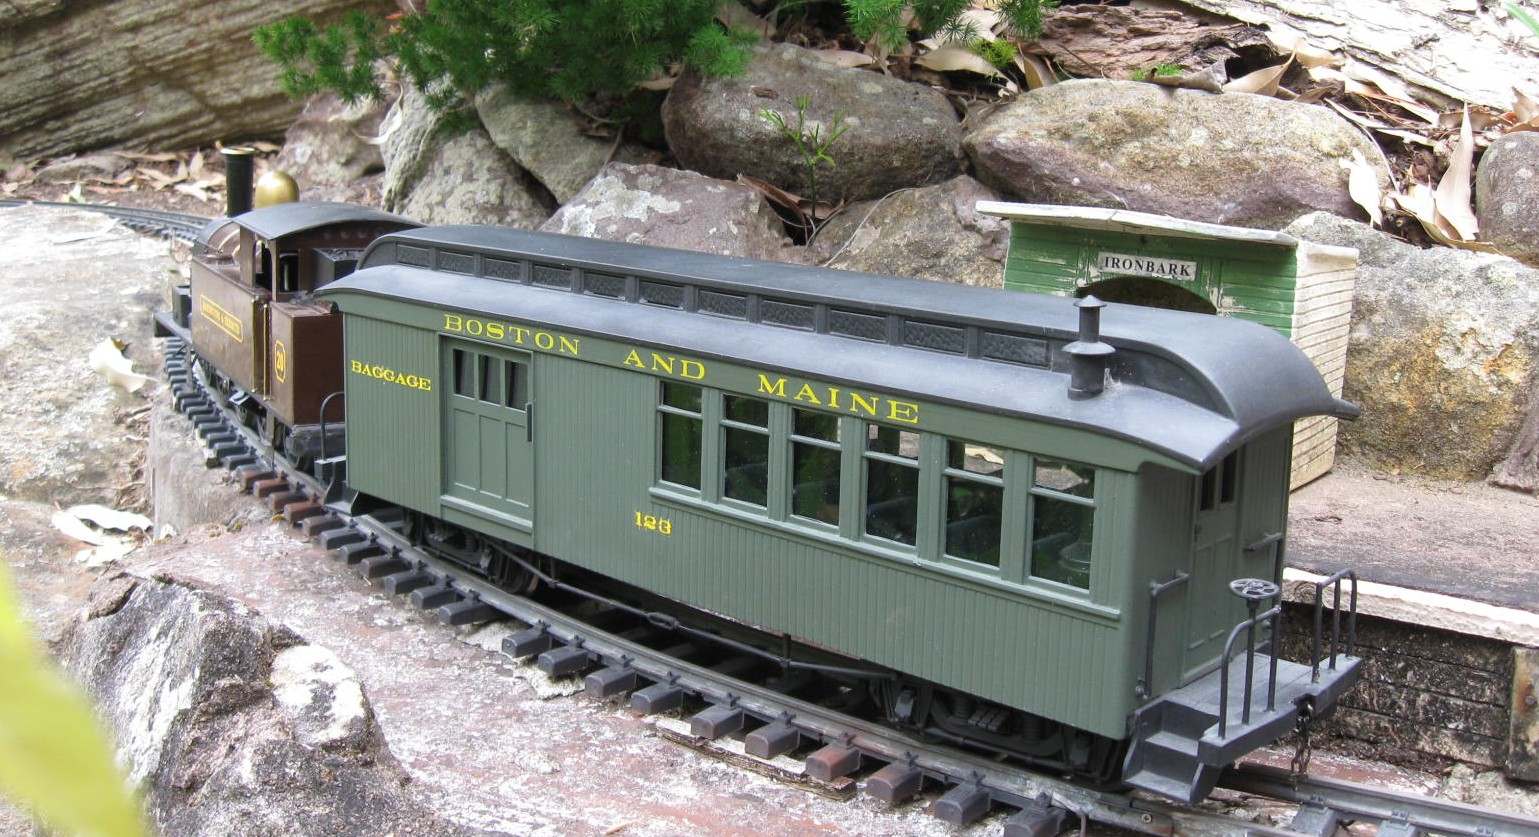
Oct 8, 2012
The battery finally arrived for #21, so now it's operational. I put a speaker in the roof instead of the fuel tank for better volume.
Here's a link to video
Sept 29, 2012
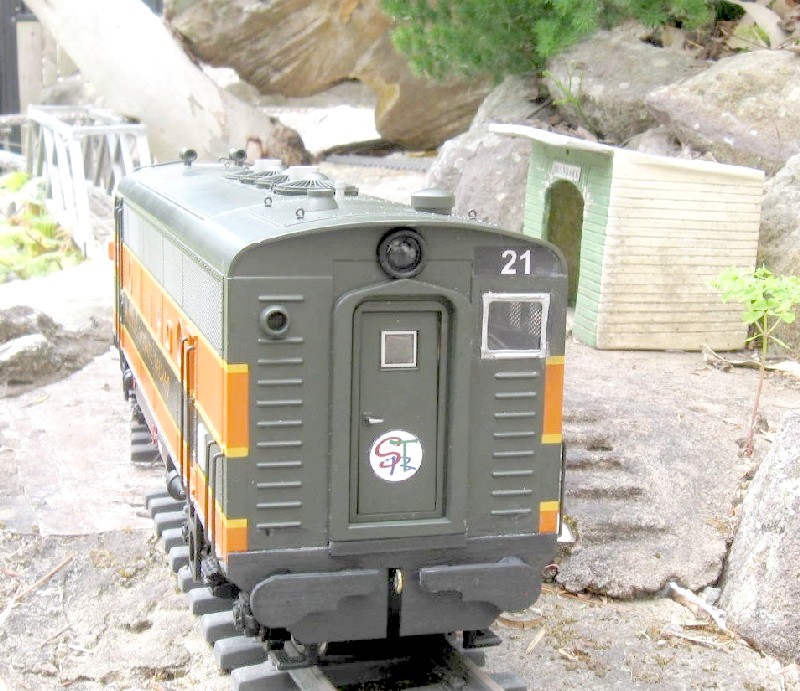
I bought a USA Trains F3 from Bryan. I always wanted one of these 'streamliners' but couldn't figure out how to build the curved nose. This is it as delivered...
I've installed Hobbyking 2.4 GHz radio control and Talking Electronics diesel sound with my Picaxe delay circuit so that the loco moves after the engine revs up. The colour scheme was very close to my standard diesel orange and white so I didn't want to repaint. I did the lettering on photo paper and stuck it over the Great Northern letters.
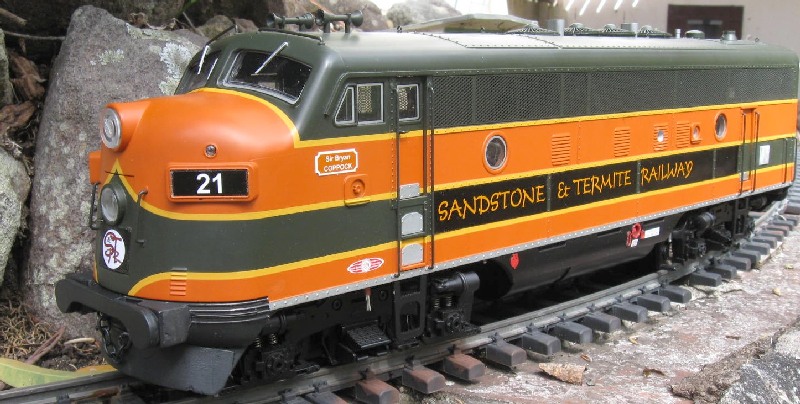
I added the 'hosler' position at the rear end as per NSWR 42 class, and the light - a 10mm dia LED and a 'O' ring from a tap.
As soon as the LiPo battery is delivered I can give it a run.
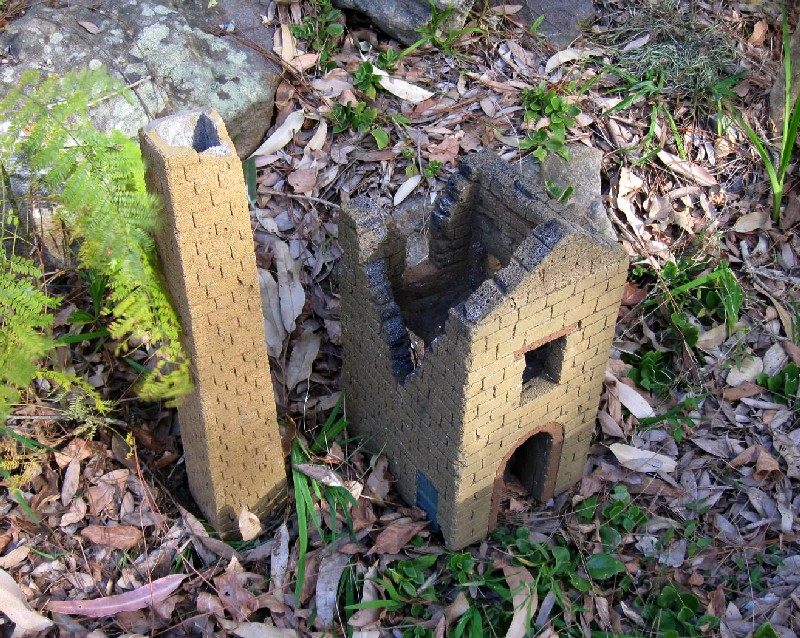
Completed work on a ruined mine building from Hebel. Now to decide where to put it.
Aug 16, 2012
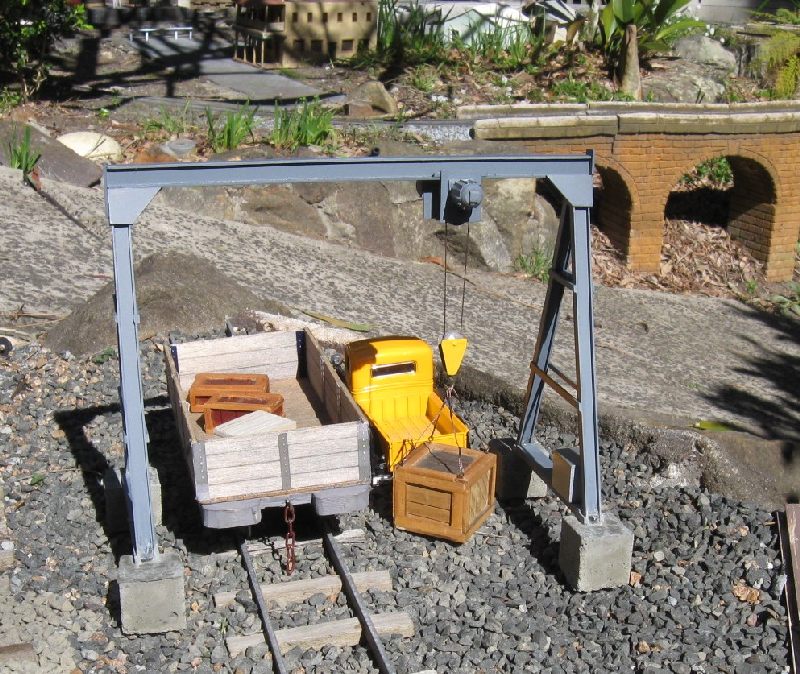
I made a gantry crane from styrene. Fabricated all the H beams. Decided I didn't want to model the large gears that were used on the manual prototype, so I 'converted' this one to electric operation by putting a couple of 'motors' up top and a control box on the right side. This is probably not its final position, but good for a pic!
Aug 12, 2012
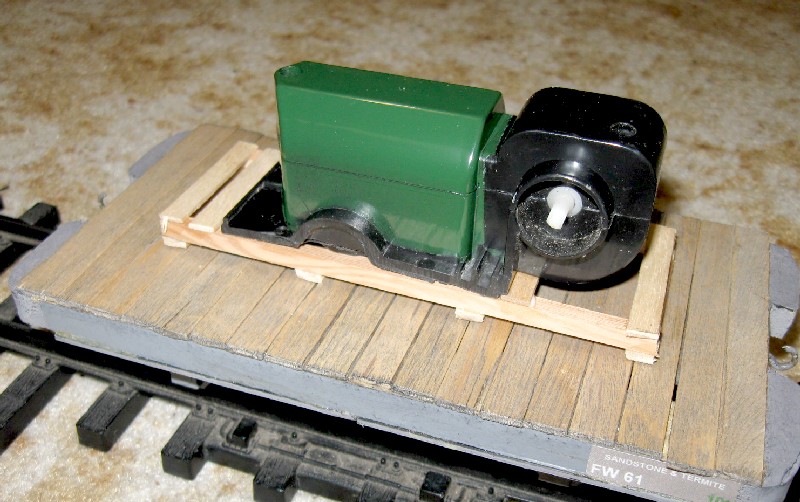
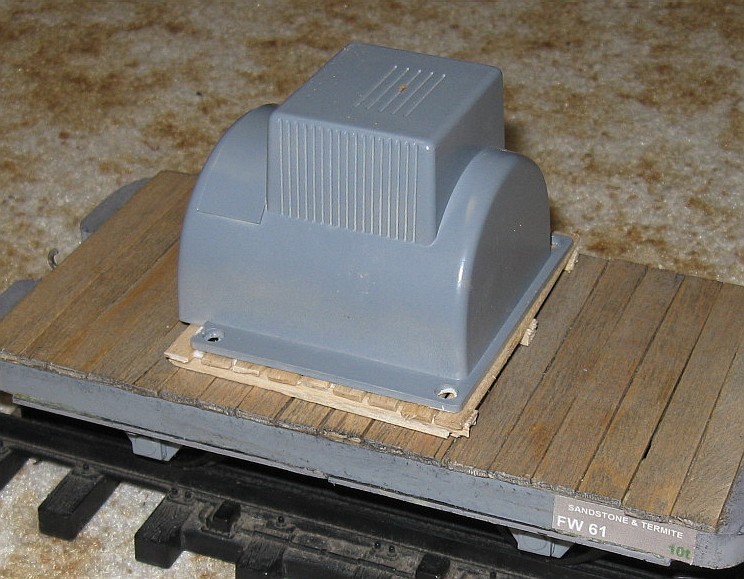
With the cold weather, I decided to make a few small 'loads' for wagons, so I could work inside. Took longer than I expected to make a couple of pallets, a crate and to convert an old motor (thanks Geof) and an old speaker housing (thanks Mark).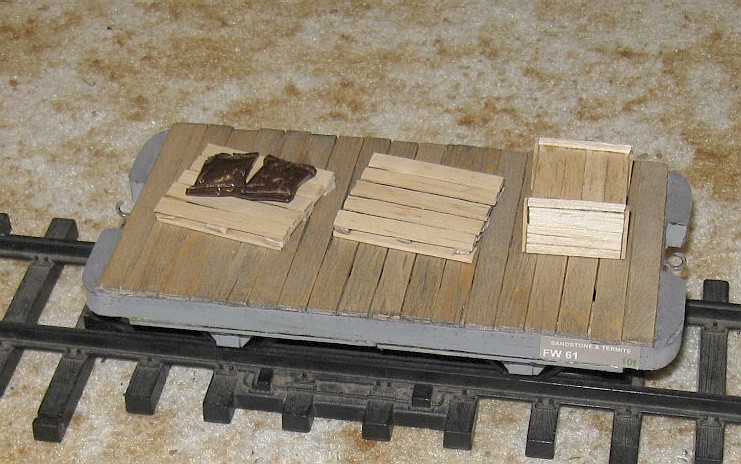
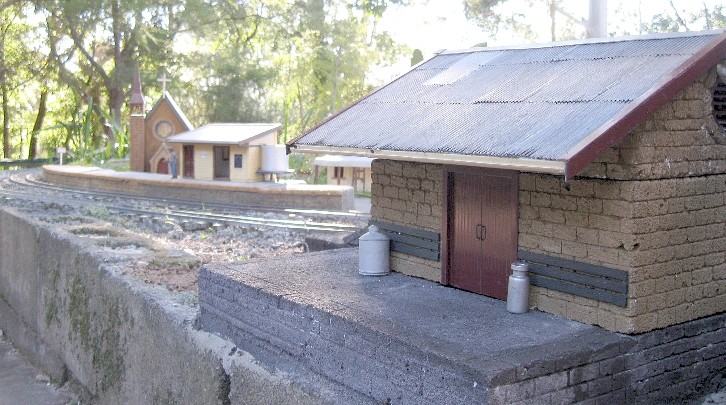
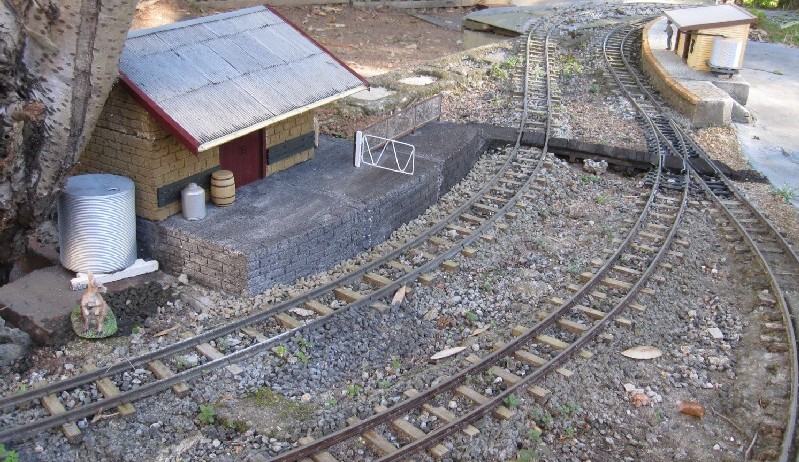
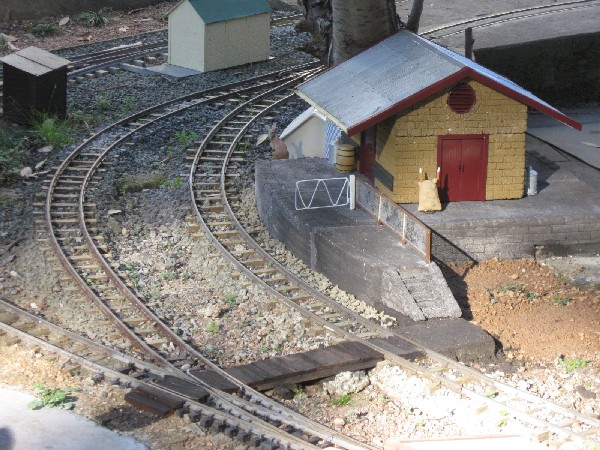
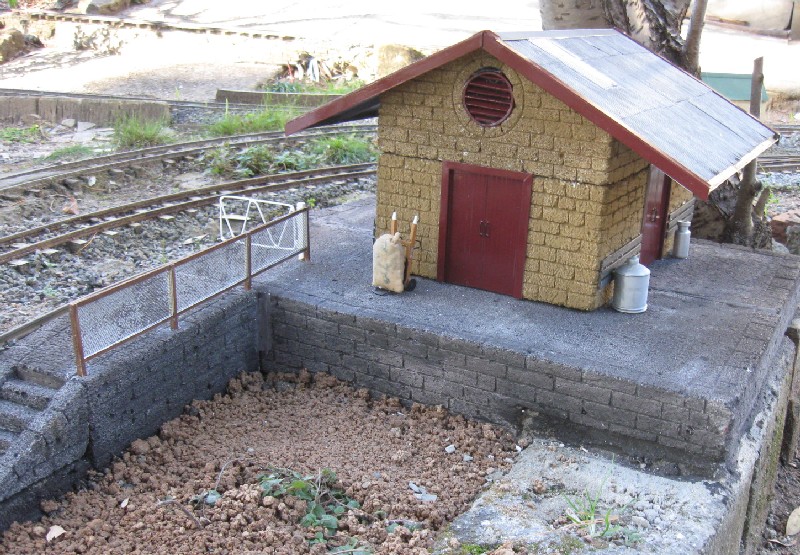
Aug 7, 2012
The goods shed at Lilyvale is finished. It is adjacent to the loop track at Lilyvale, but I hope in future to add a goods siding on the other side of the shed so it is essentially �2-sided� While I was building the goods platform, I decided to add a short length to become a 2nd passenger platform (leftover piece of Hebel). It�s fenced off from the shed platform with fence made from flyscreen and styrene strips. There�s a timber boardwalk to cross the tracks to the main platform.
July 30, 2012
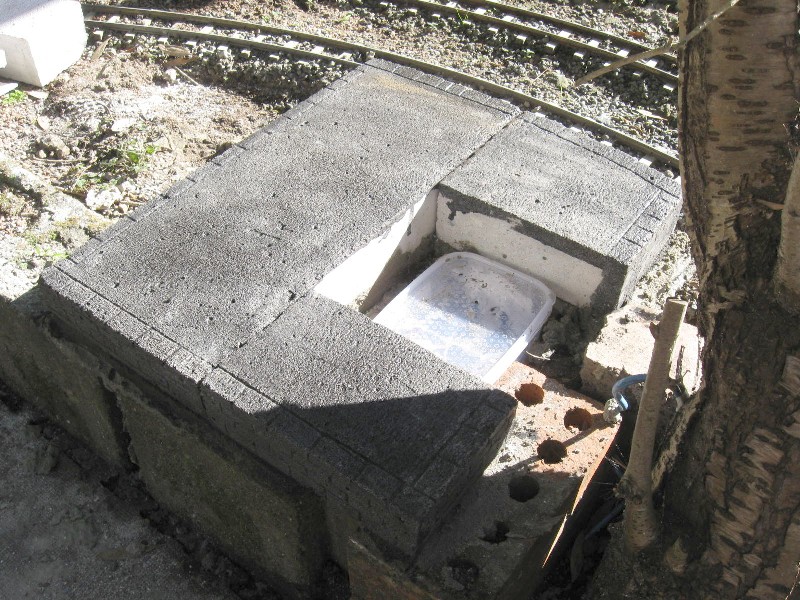
I used to have a track power control box on a 'pole' at Lilyvale, but it's no longer needed. as here....
So I cut it down, but still needed to terminate the power wiring to the points etc. I used a small plastic food container mounted at ground level. Then I decided to build a goods shed from Hebel to cover it..
It's a 100mm thick block cut in half and the roof shaped
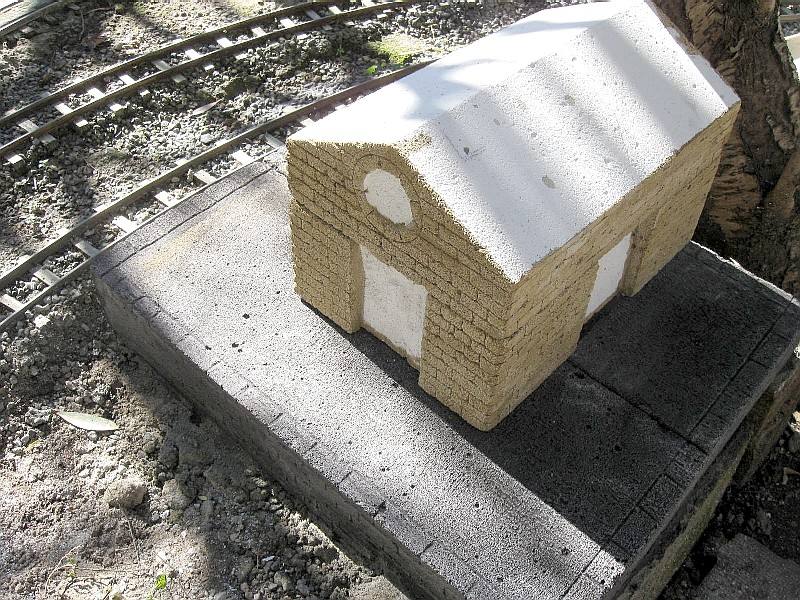
The doors will be styrene and the roof a styrene sheet covered by corrugated aluminium from cheap baking pans.
June 22, 2012
All my steam locos have 'normal' buffers at the front and my standard blocks of wood for buffers at the rear. It is impossible to push with the normal buffers as they lock on curves. I want to be able to double-head steamers or use them as push-ups, so I made a slip-on buffer as shown here...

May 23, 2012
Must be turnout building season. I made another one to replace the swiveller at Sandstone goods siding. It's installed but I won't ballast it till a few trains have run through for testing. Needs a long operating rod to move it from closer to the front of the tracks - it's a long reach!.
(That's another piece of track with no track power - I didn't bother rewiring it.)
May 14, 2012
I have built a new turnout for the Lilyvale reverse loop. (the old one was made from 'O' gauge rail and operated by a pair of solenoids, and was getting unreliable.) The new one is from brass rail with styrene frog. I decided to use a servo to operate it as I already had the Picaxe controller for the infra-red detector which controls the turnout. It was a simple program change to drive the servo instead of 2 signals to drive 2 solenoids.
BUT there were interference problems causing the servo to jitter. The picaxe and servo are separated by only about 500mm but obviously the servo signal wire was picking up interference. I finally solved it by using another wire twisted with the signal wire and connected to 0V at one end only. I hope it keeps working.
My previous servo controlled turnouts have used a 'solid' connection to the turnout blades, which meant they could not be operated manually. For this one a developed a new 'linkage' that allows the manual operation too.
Apr 24, 2012
Finally, the lettering for #20 has arrived. I was going to put yellow lines on too, but I think it's got enough yellow. Still need some more 'clutter' on the front.
A couple of short videos...
Link 1 ....
Link 2 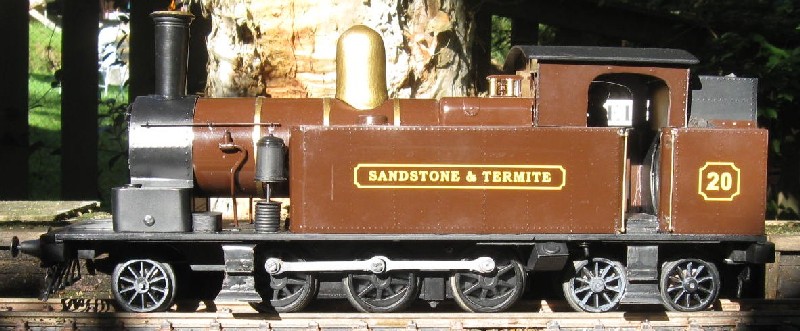
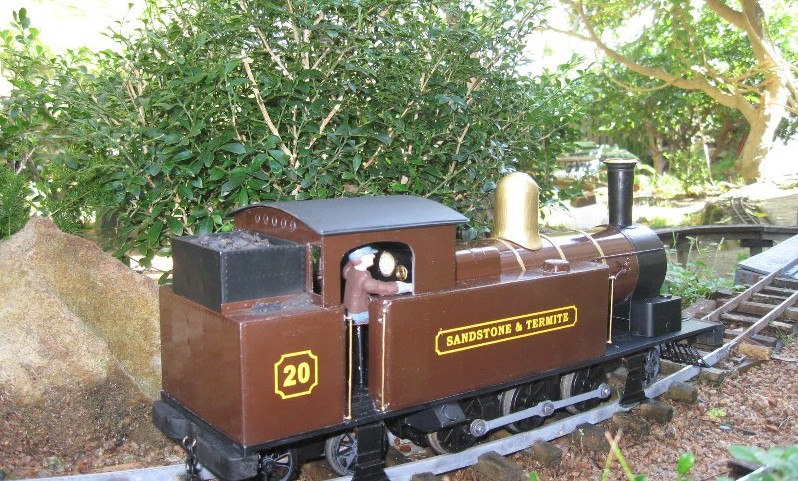
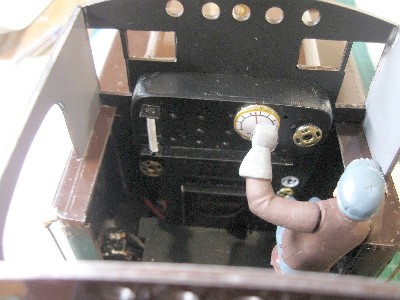
Here's some pics of the cab - the speaker on the rear wall and the firebox front. The driver can't find the regulator handle (yet).

Apr 19, 2012
I've added a "new improved" Picaxe sound system which sounds much better than the previous picaxe ones.
The speed control is standard Hobbyking 2.4GHz - left end of pic. The motor has a series resistor added to give a more variable speed as the train hits grades or curves. This also allows the sound system to calculate the motor current and give a better speed signal to the chuff rate, so that the chuffing starts exactly when the loco starts to move. It has 2 levels of volume selected by the left stick of the Tx.
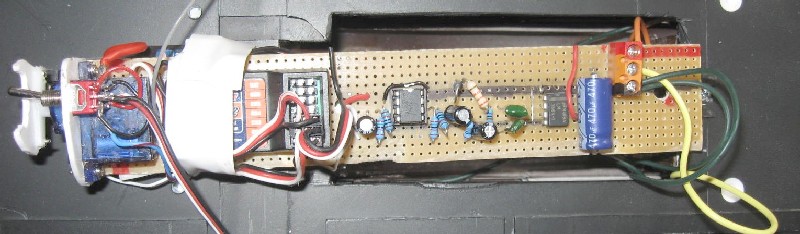
The speaker is in the coal bunker, facing into the cab.
Apr 9, 2012
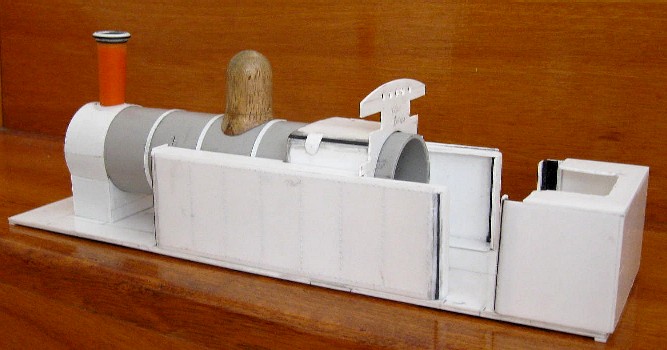
Finally the new tank loco has come together. Just needs lettering and lines and a few small details like handrails. I've installed 2.4GHz RC, but no sound yet.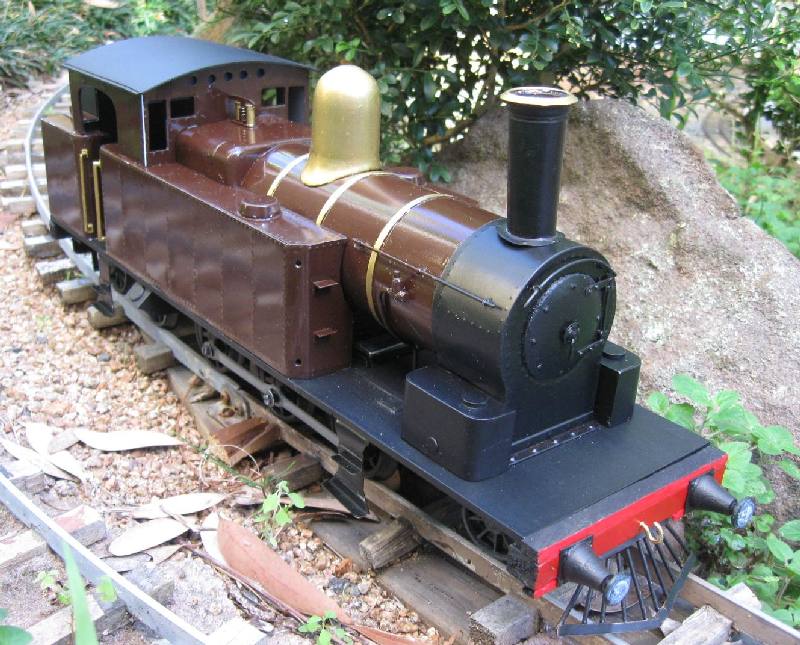
Apr 5, 2012
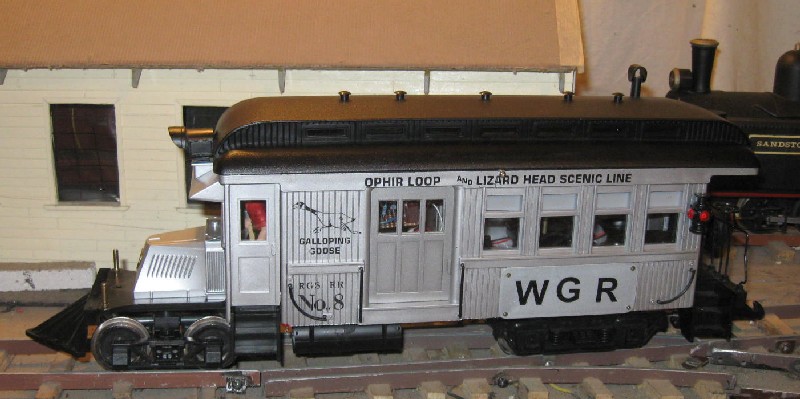
The SaTR has leased a railcar from the Wire Grass Rly. For the time being it will retain WGR colours.
I quickly fitted a basic RC system today to let the grandsons use it.
Apr 2, 2012
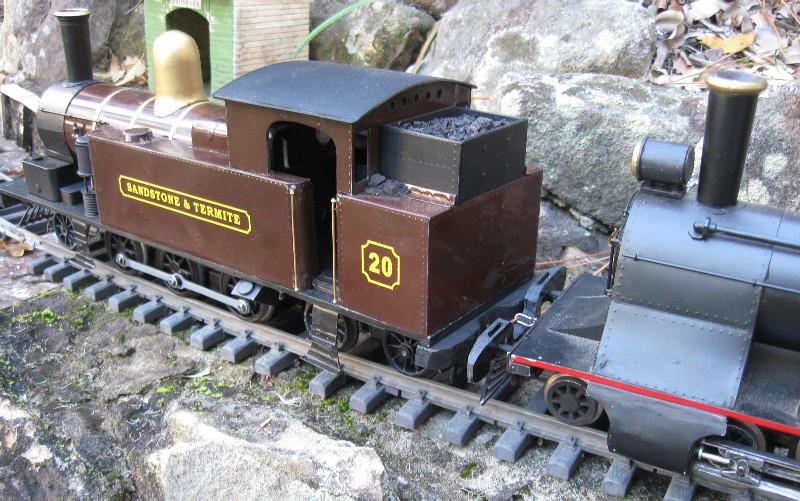
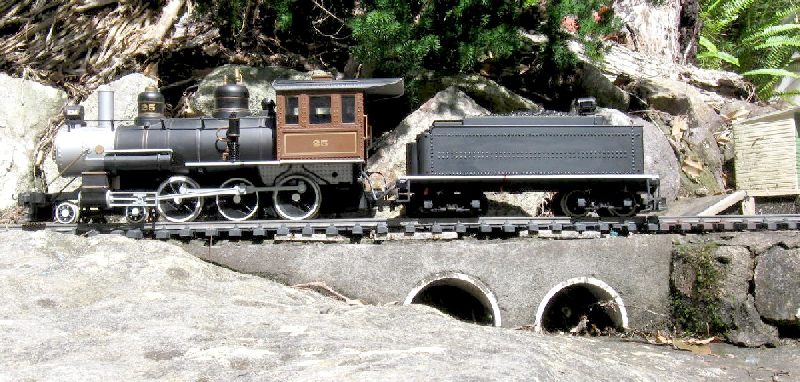
Just happened to stop all 3 of my black steam locos in a line today, so I thought a photo was called for.

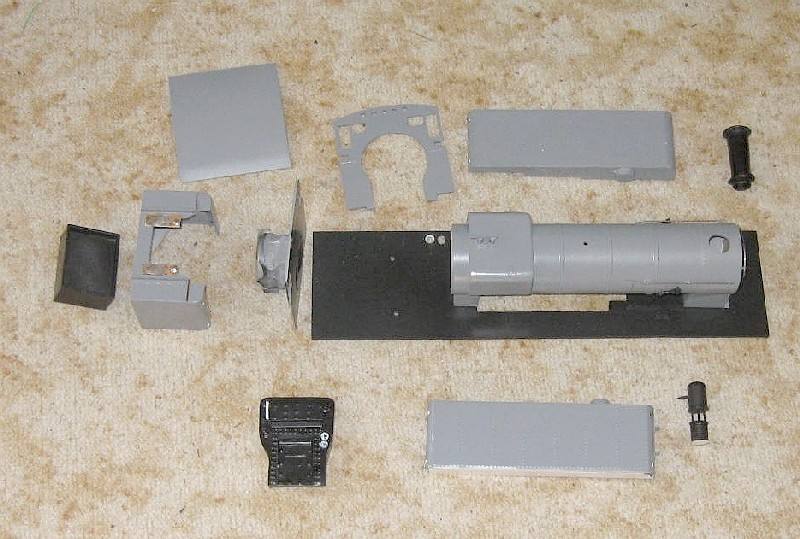
All parts of the new tank loco have been undercoated. I'm thinking of painting it brown with cream lining. The dome (not shown) will be brass for a change.
Mar 23, 2012
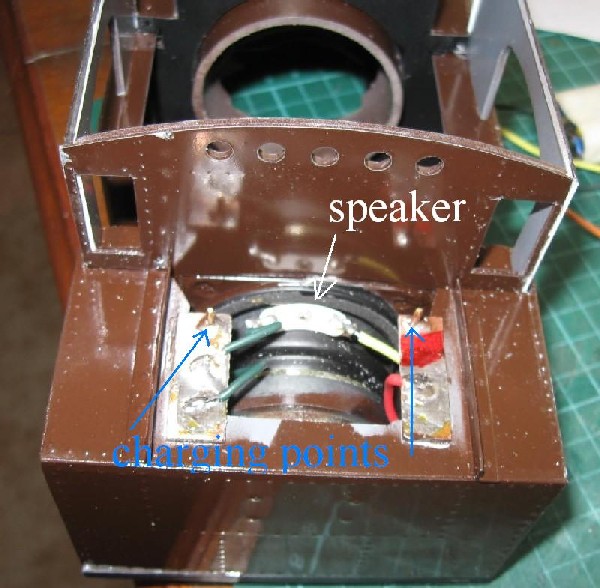
Starting to get a bit more done on the 20 class tank. Boiler, firebox and smokebox all done. Dome turned from wood. Tanks are taking shape. Speaker will be in rear tank facing into cab. Electronics are in the boiler and batteries in side tanks, all accessible from underneath.
I have to decide on a colour before much longer so I can paint bits before final assembly.
Feb 4, 2012
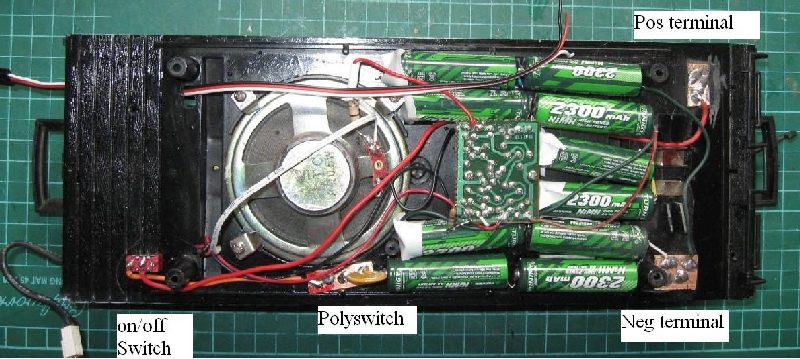
Way back in 2000, I bought a secondhand Bachmann Big Hauler as a source of spares for my other 4 similar locos.
The grandsons have been asking why they can't play with it so I did a quick conversion to 2.4GHz using bits from the junk box. Ten old AA NiMH cells in the tender, reused the existing sound board (runs off 12V OK), but did put in a servo controlled volume control.
gears are very noisy despite copious use of vaseline, so who knows how long it will last.
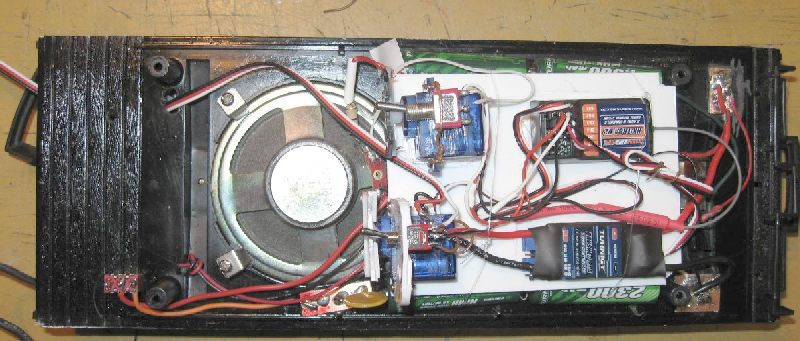
Here's the batteries on the tender floor...
and the electronics on top of the batteries...
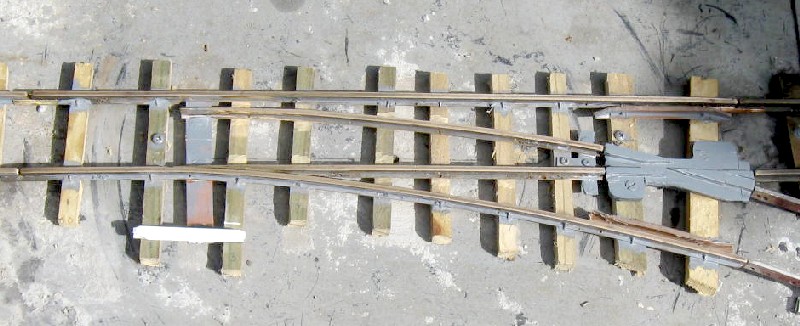
Jan 18, 2012
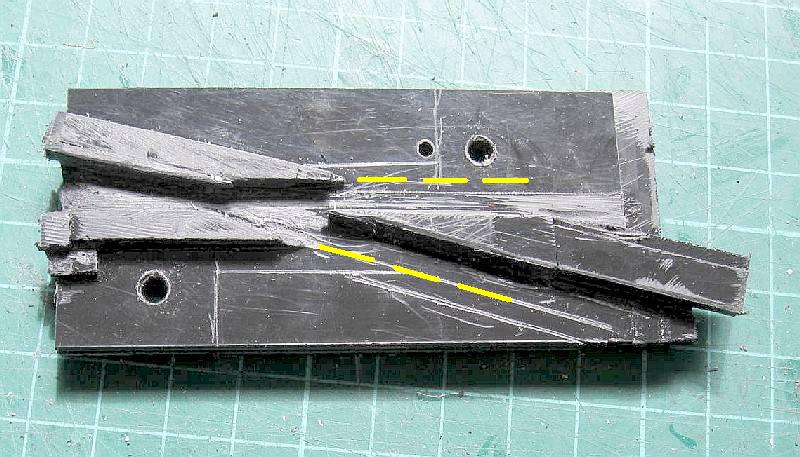
I made a pair of turnouts to replace the 3 way swivelling one at Sandstone. It was too prone to expansion and binding. Took me 2 days to make the 2 of them. I used my standard styrene frog system - built up from pieces of 1.5mm thick black styrene.
Step 1 is to make the fixed rails

Then the frog. Working with styrene is so easy - just file or cut the frog to required dimensions after all installed. Note how I don't use the 'wing' rails dotted yellow - they are unnecessary in models and just used for strength in the real thing.
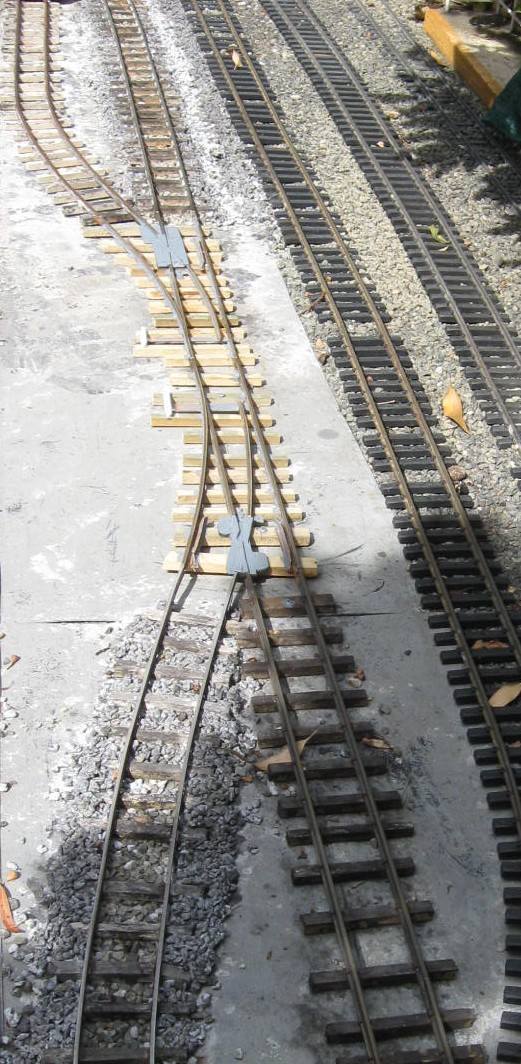
Here's the 1st one installed. I use plastic rail for the 'guide' rails - also easy to adjust if clearances too tight.
And both of them. Despite problems with the plastic rail expanding and buckling, I've reused it (top left siding). This time it's only screwed down at the mid point of the 4' length. I'll see how it goes and if OK will just loosely ballast it. If not it will be aluminiumised!
Jan 13, 2012
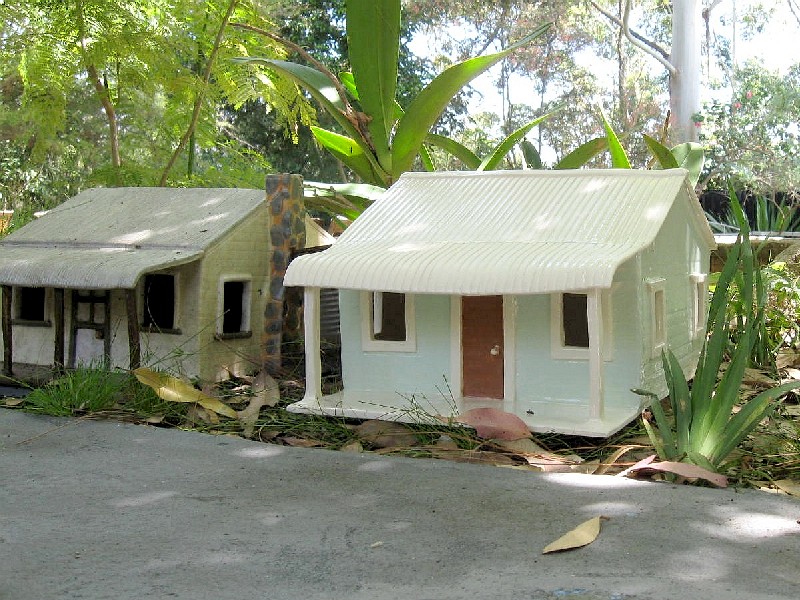
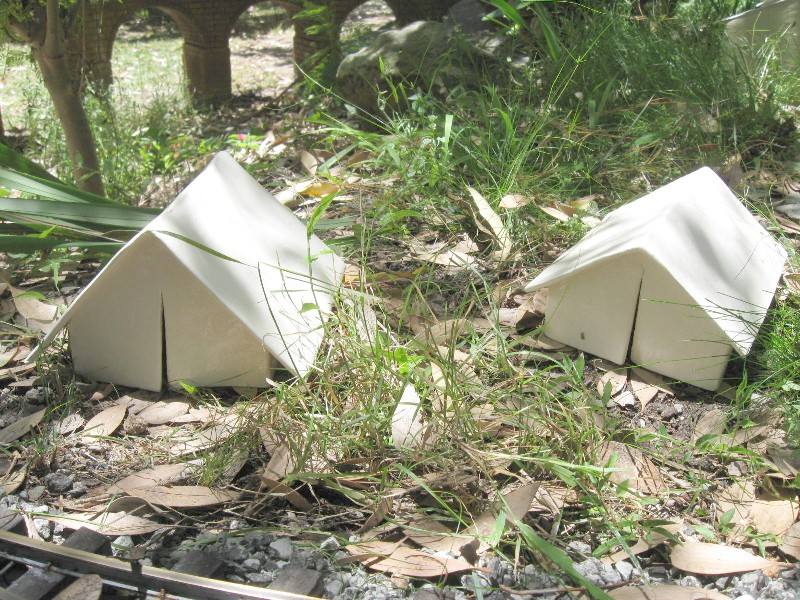
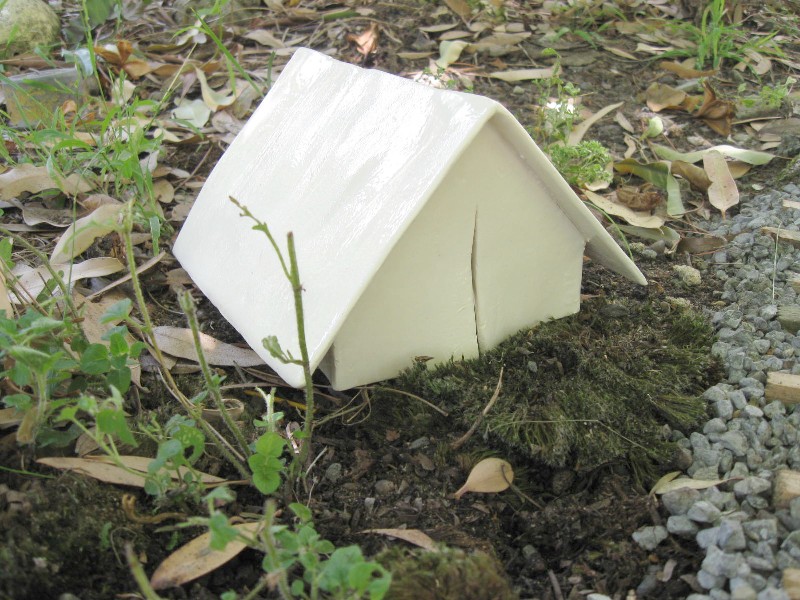
Pauline has made some more clay houses for me. Here's the new house beside the 15 yr old one, and a couple of fettlers' tents.