Planning Tips:
Plan, Plan, Plan. You should spend at least as much time
planning as building. I started planning in 1997 for my
layout and broke ground in 2000. I learned so much in
those three years, I can't imagine have starting any
earlier. In those 3 years I did things that didn't require
planning, so that once the track is laid down progress will go
quickly. You can build structures, locomotives, etc as you
plan the layout. Painting people and small details and
storing them until needed makes your layout really progress
quickly.
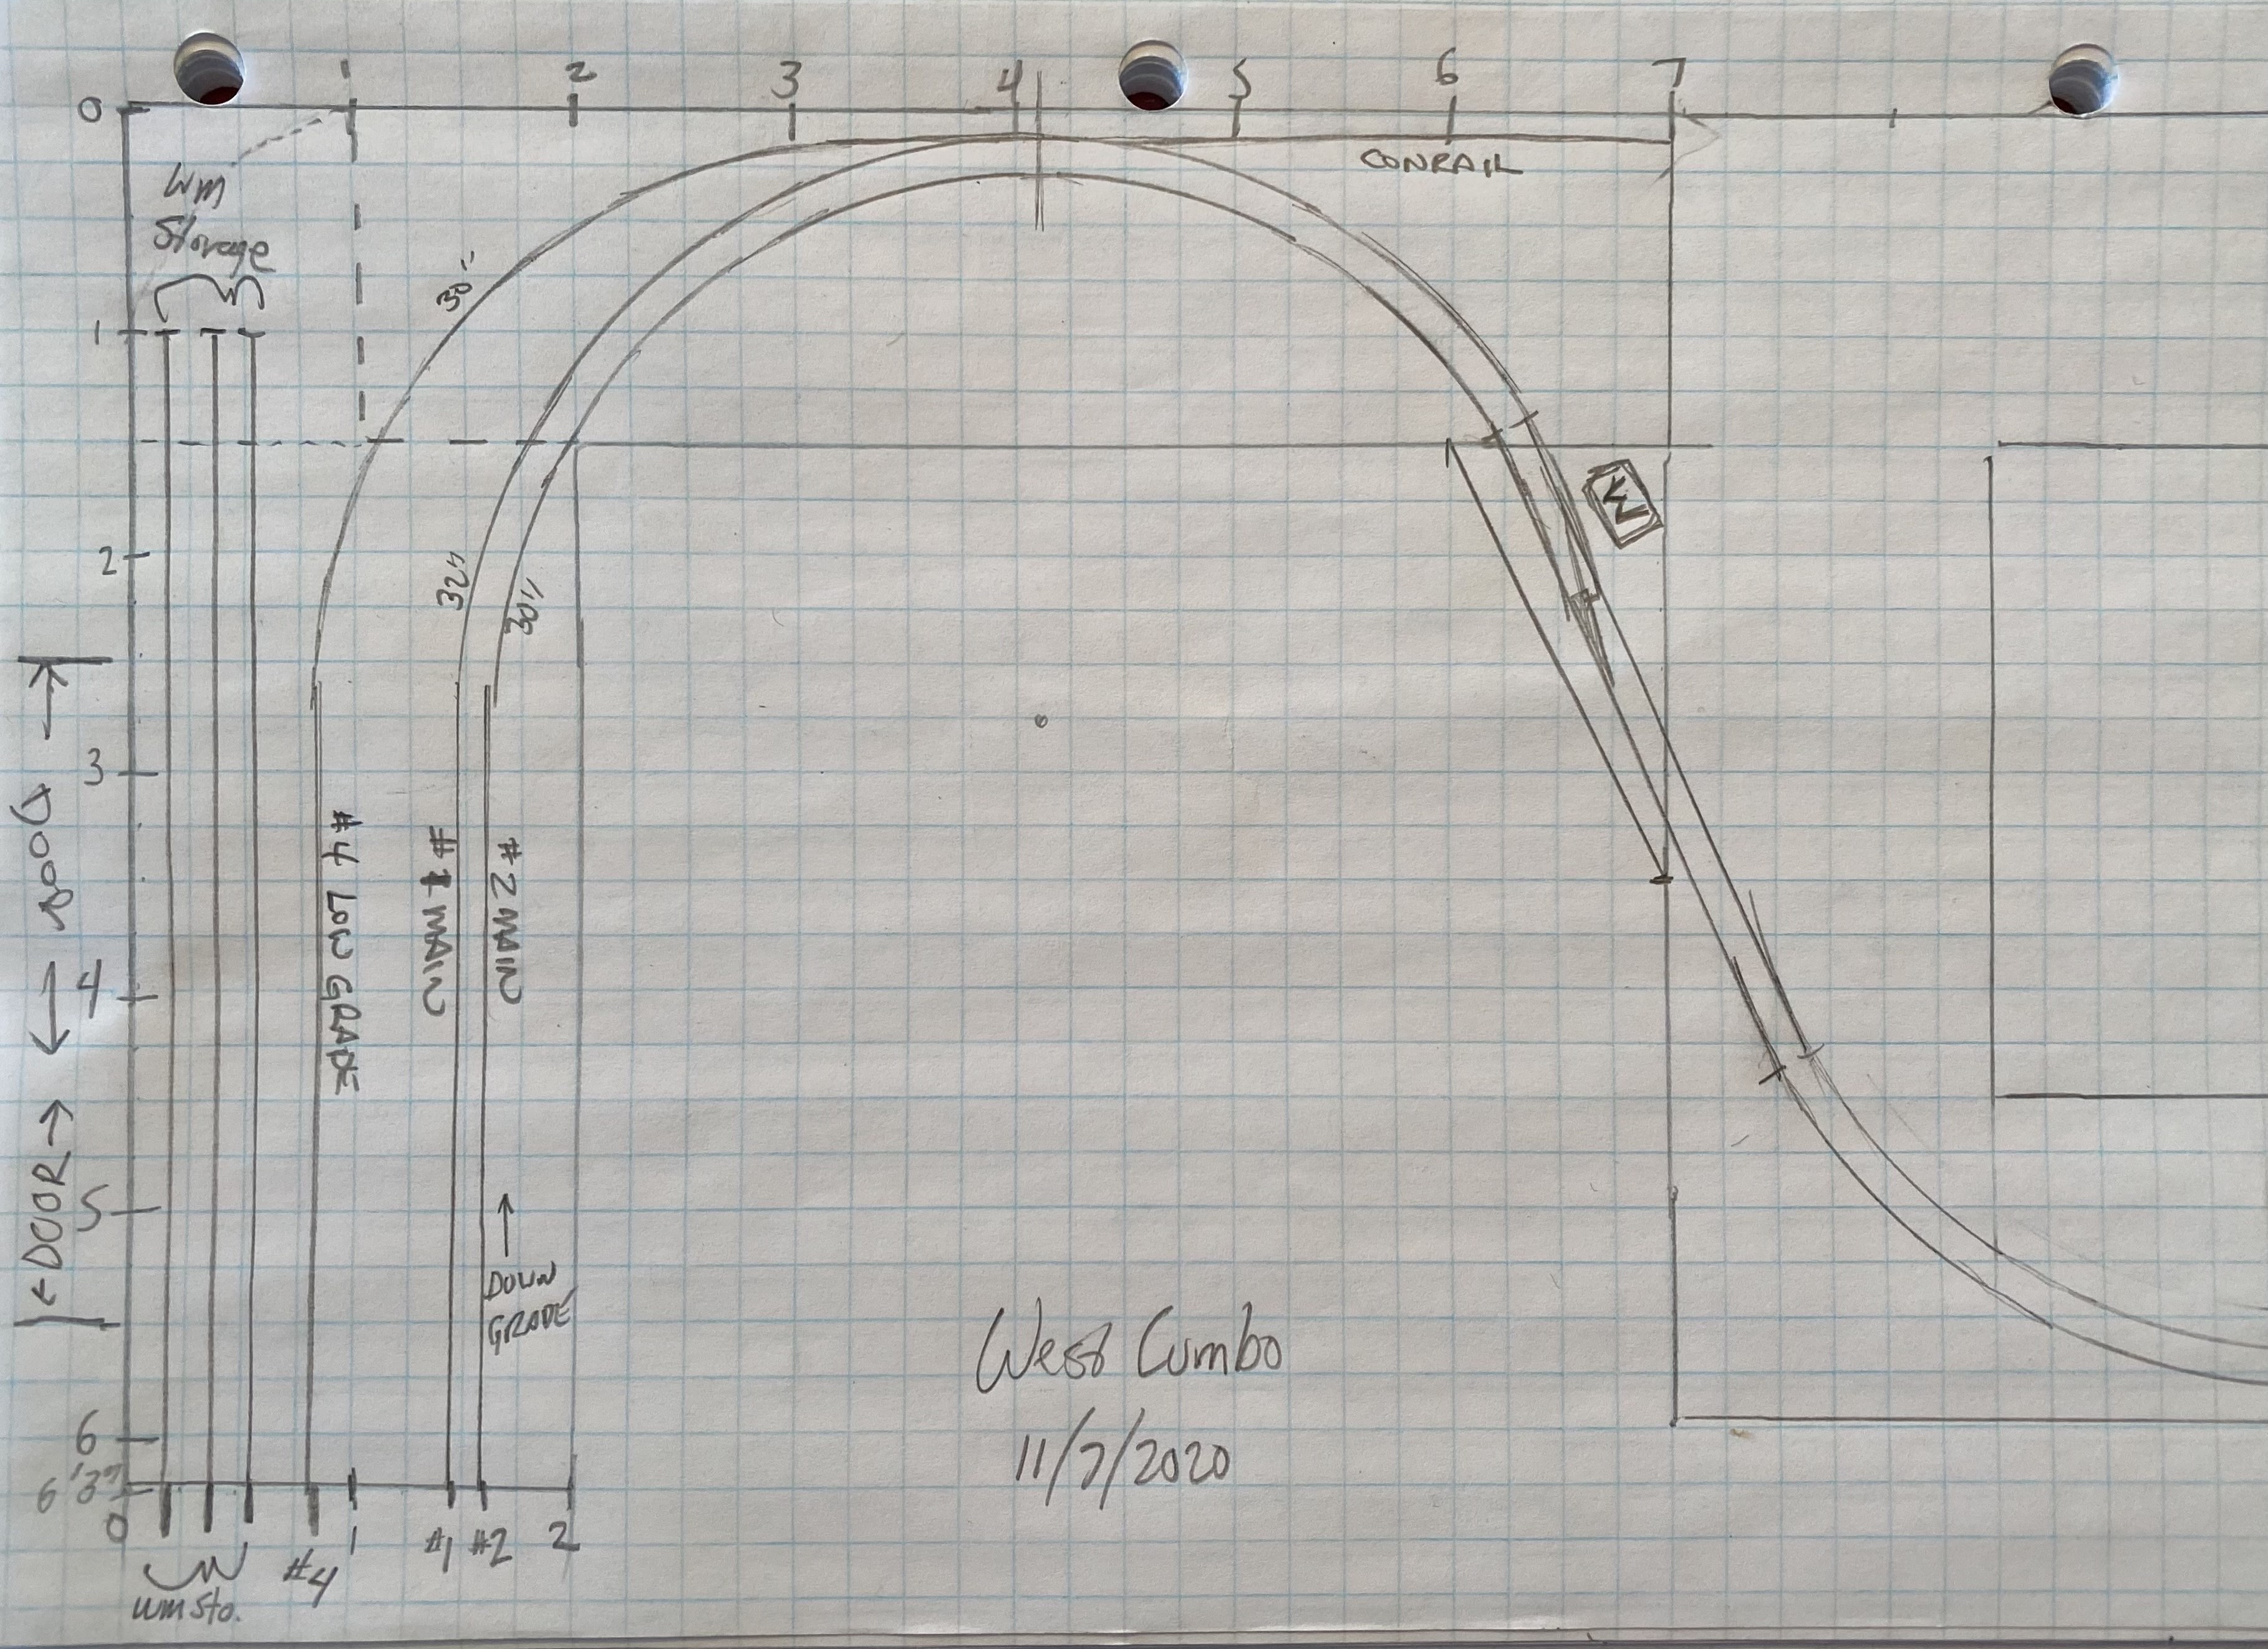
I also plan with graph paper and a track planning
template. This allows for lots of quick changes.
Additionally I save all the time not having to learn track
laying software. Below is a typical plan for my sections,
this one is Cumbo.
Building Tips:
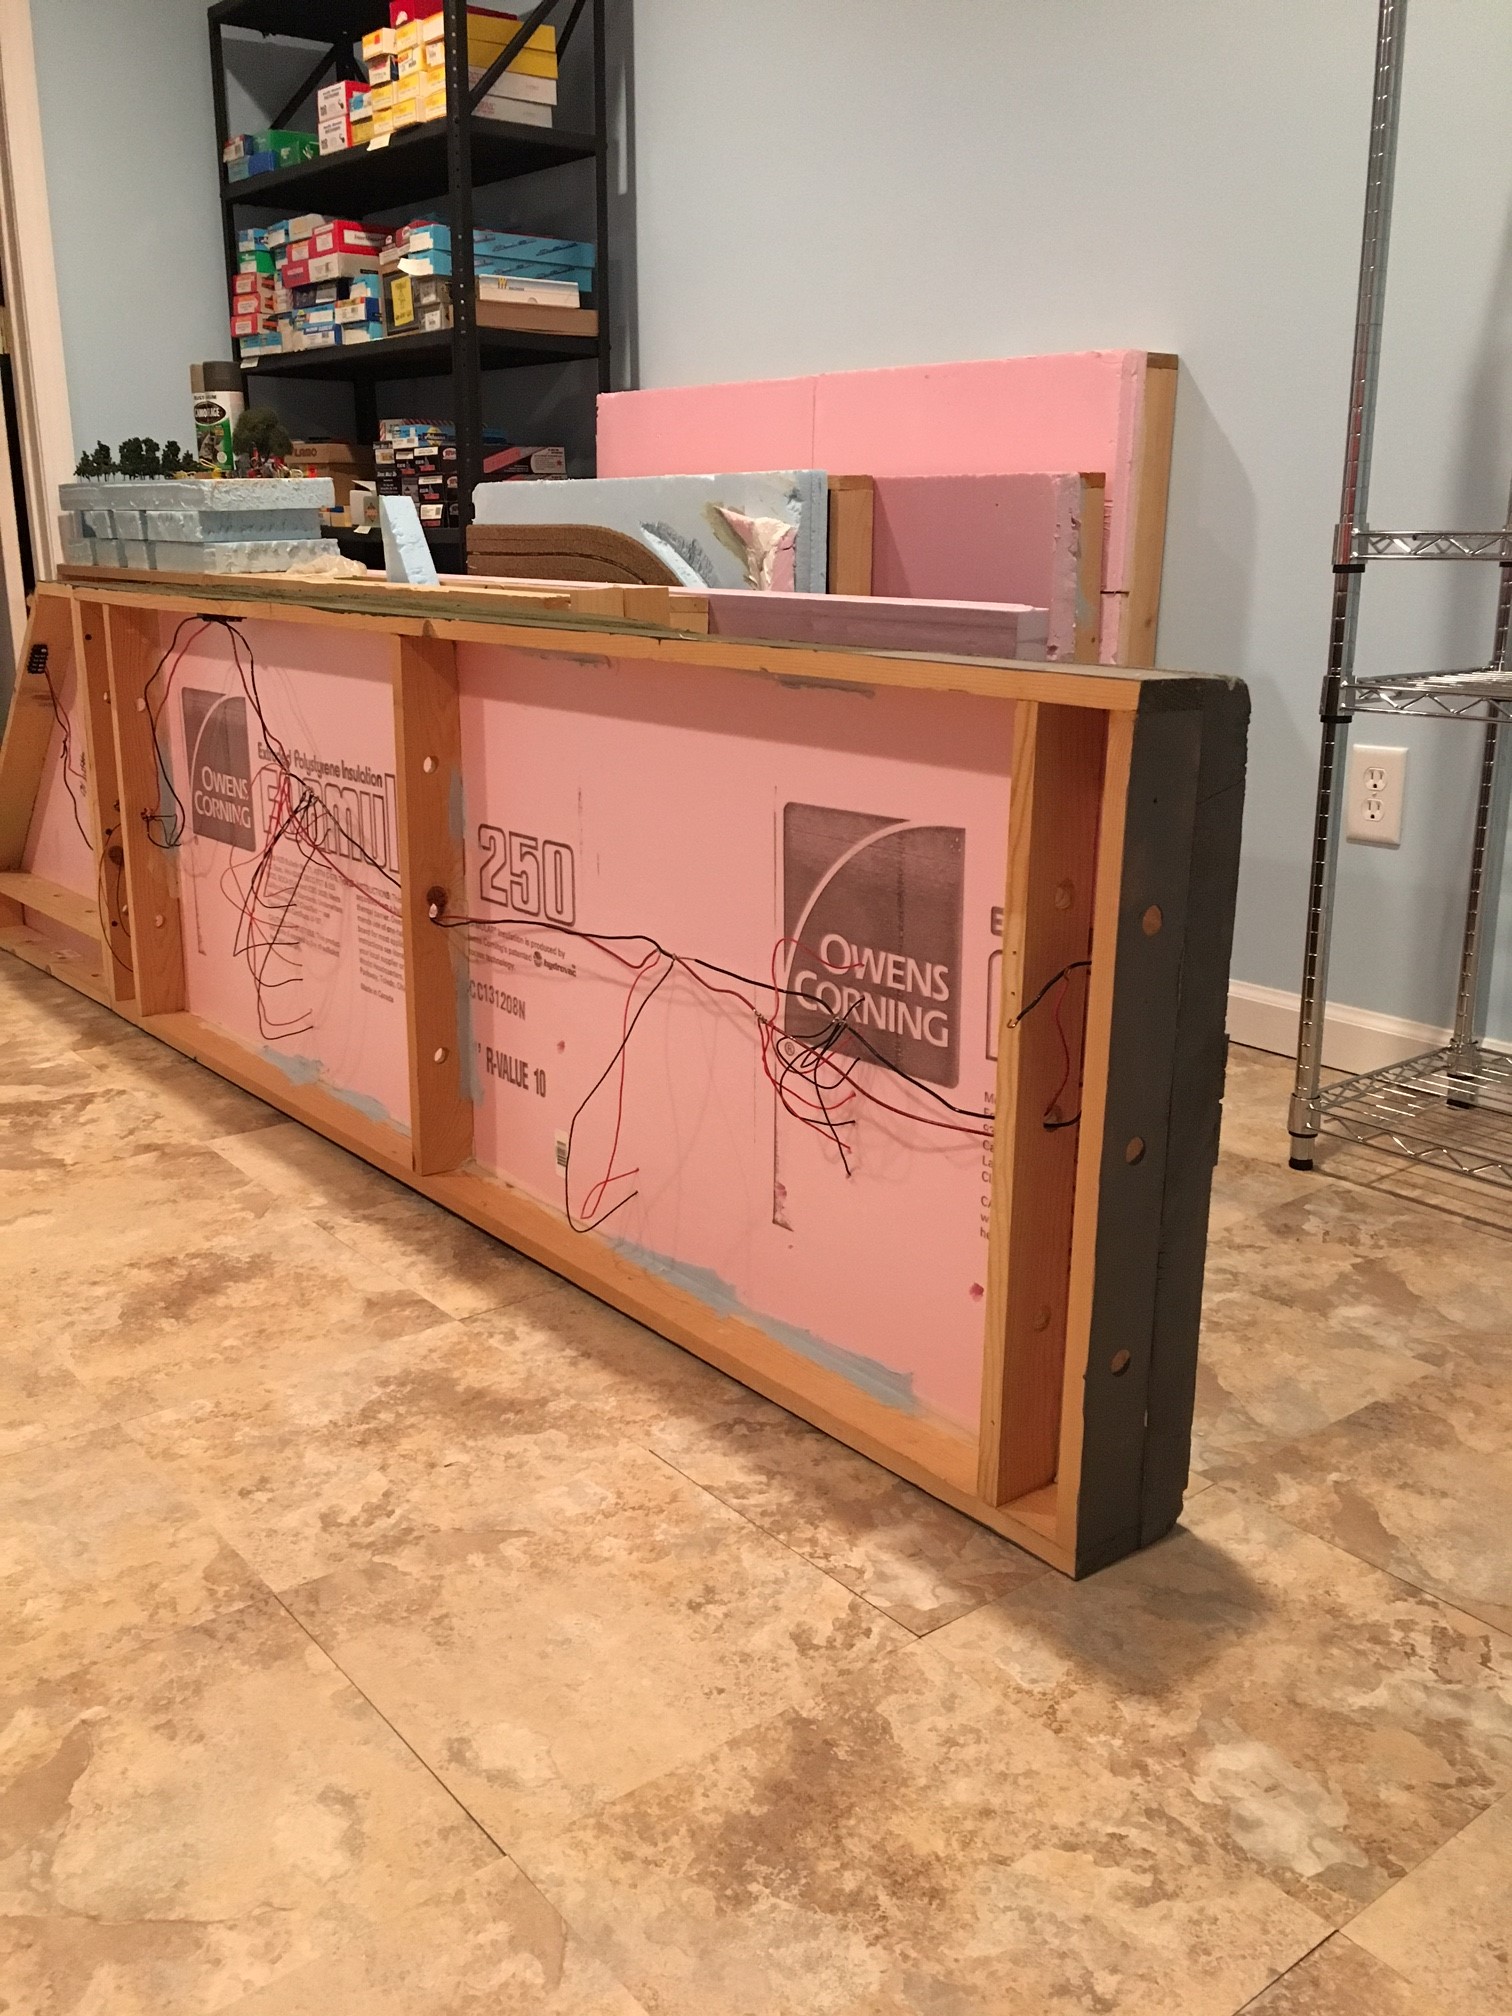
Build the layout to be portable. I build in 4, 6 or 8 foot sections of varying width,
though most are 24 inches deep. The sections can then be
disconnected and moved if need be. I have relocated about
10 sections from my first house to my current house. This
has allowed me to continue work quickly in the new house and not
waste time, materials and money. As seen below, on the
middle section of Hancock, there are lots of advantages to
this. I can work on my saw horses at an ergonomic level,
saving my back. I can have 360 degree access to the
modeling area, so I don't have awkward reaches to do
scenery. I also can tip the whole section on its side and
do the wiring much easier. Additionally, I can move these
sections by myself, as each is under 10 lbs. Finally, if I
ever have to move again, I can just disconnect the track and
move this to the next house. This section already has been
moved between houses once. Also, to my note above, these
four structures were built prior to the layout and have now been
mounted into the foam.
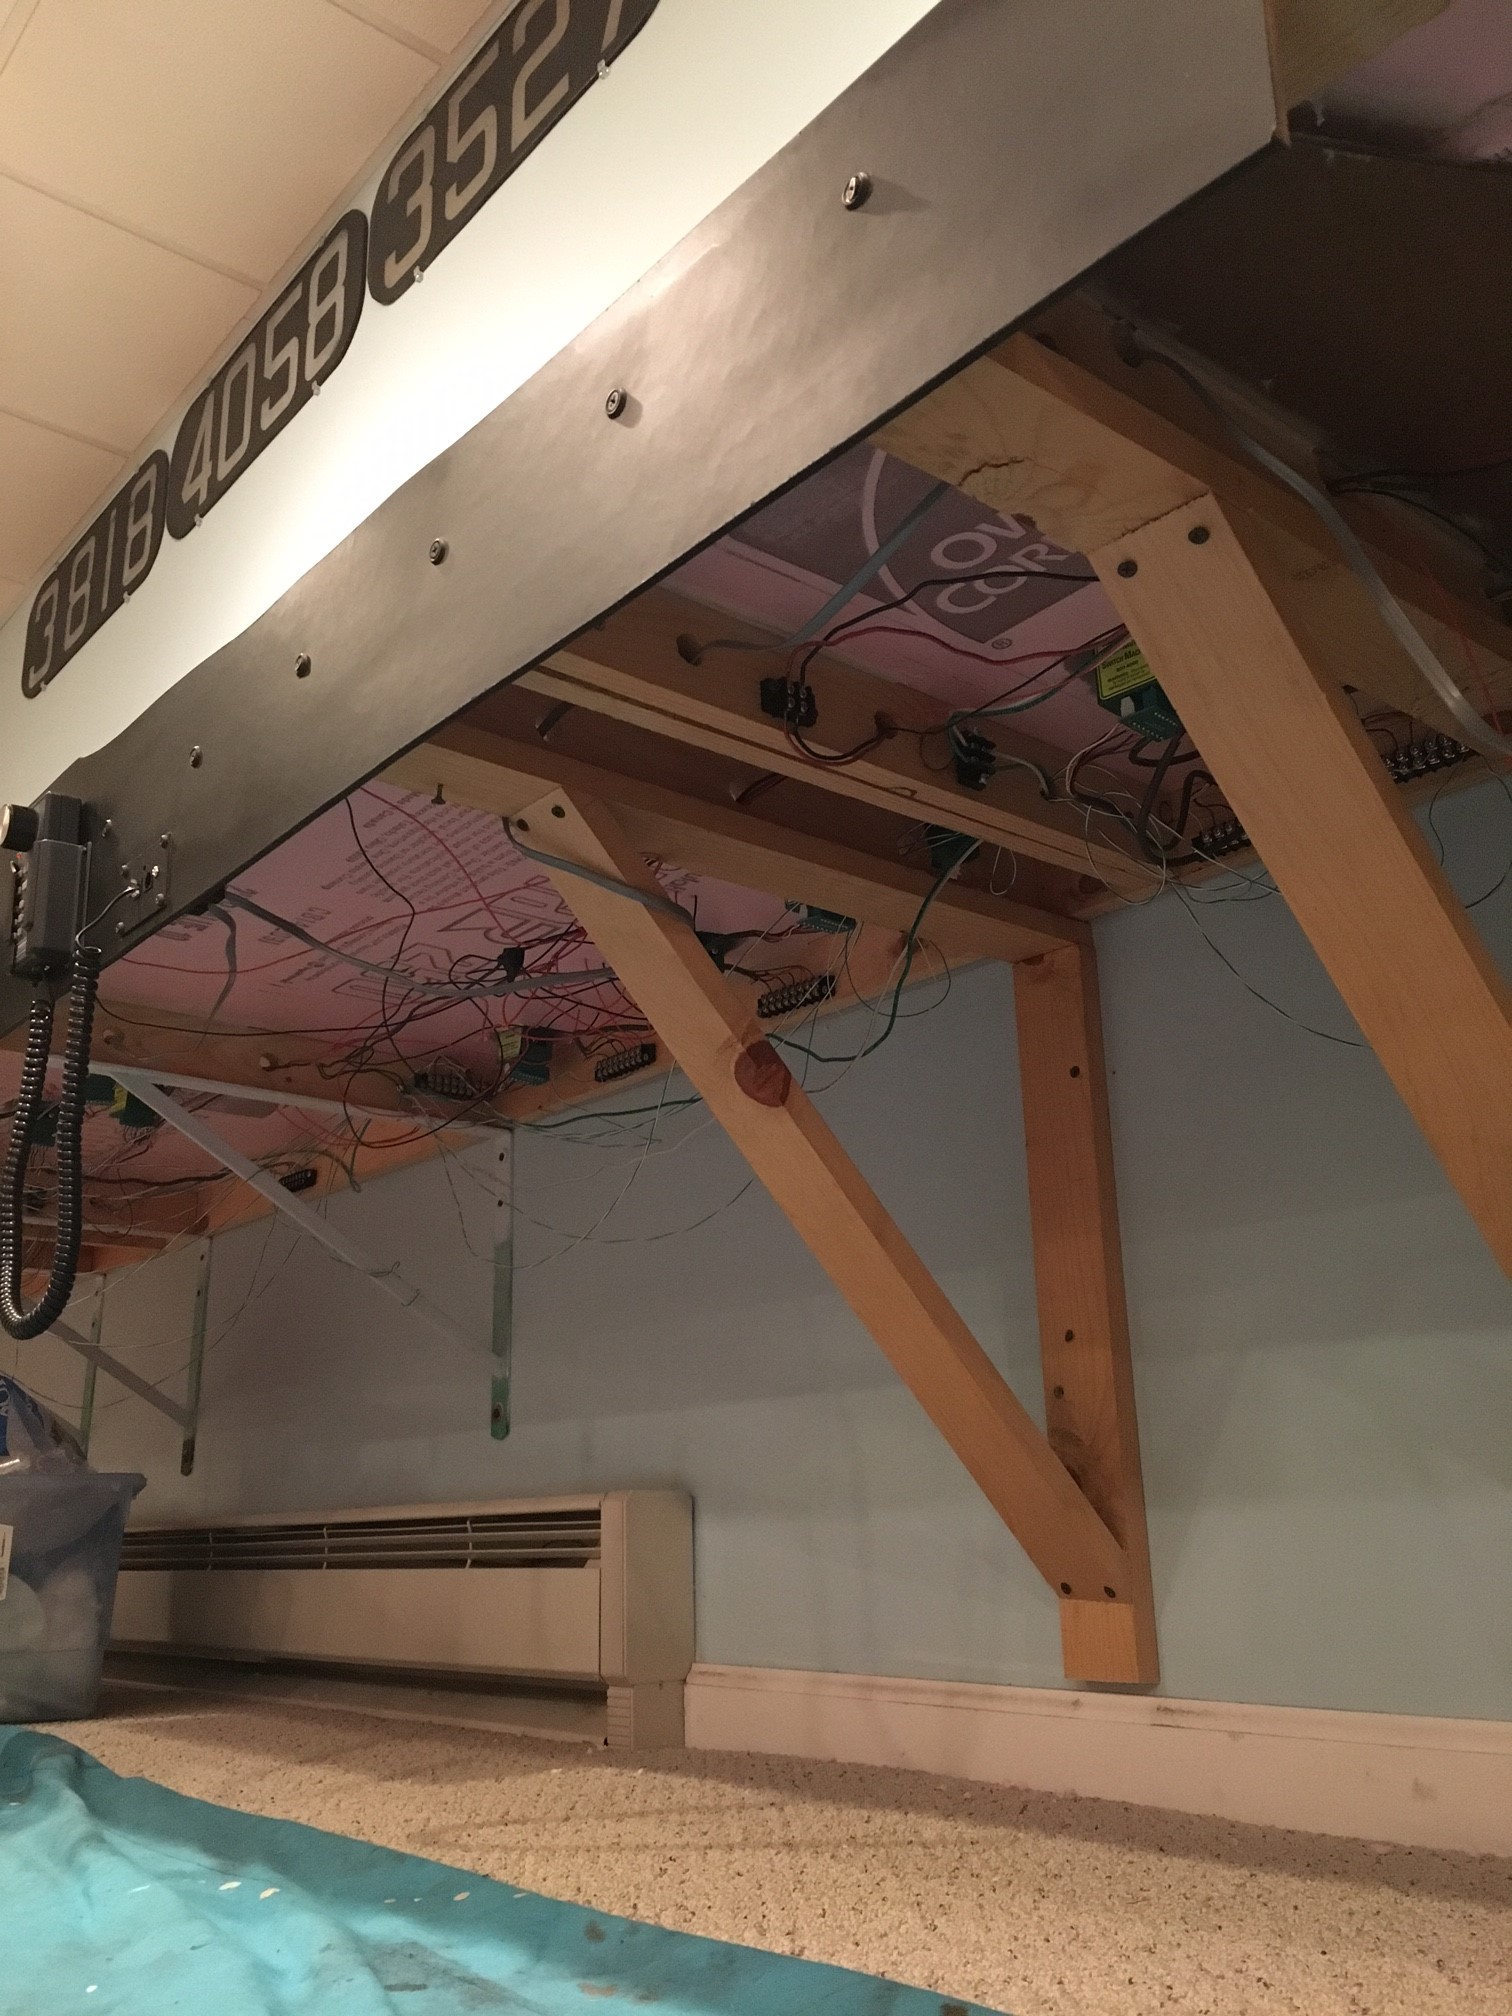
Drill holes in your cross beams. I use 1x3
dimensional lumber to make the support structure for the
foam. I put a cross beam every 16 inches now for
rigidity. I didn't do that before, and some sections
flexed. I then drill 3/4 inch holes 6, 12 and 18 inches
from the front of the 24 inch wide layout. This will allow
you to put wires through the holes so they don't dangle below
the layout. Below you can see I drill three 3/4 inch holes
in the cross beams. The first photo is the west end of
Hancock section. I use the middle hole for the main power
bus for the DCC system (black and red wires). You can see
where the wires from each section of track drop though the foam
and connect to the main power bus wire. I used the hole
closest to the back of the layout for the switch machine wires
(not in this photo yet) The hole closest to the front will
be for LED light strings to illuminate the lower level.
The second photo shows under Martinsburg. The terminal
blocks (black squares or rectangles) are used to connect the
wires under each section, so they can easily be separated.
The green and white wires are for the switch motors. I
could have done this much neater, but I was running them while
the sections were mounted on the wall, which I will never do
again. Working under the layout is not comfortable.
Also, since this section sits near my DCC system, the grey flat
wire in the photo is the one that runs the tethered throttles.
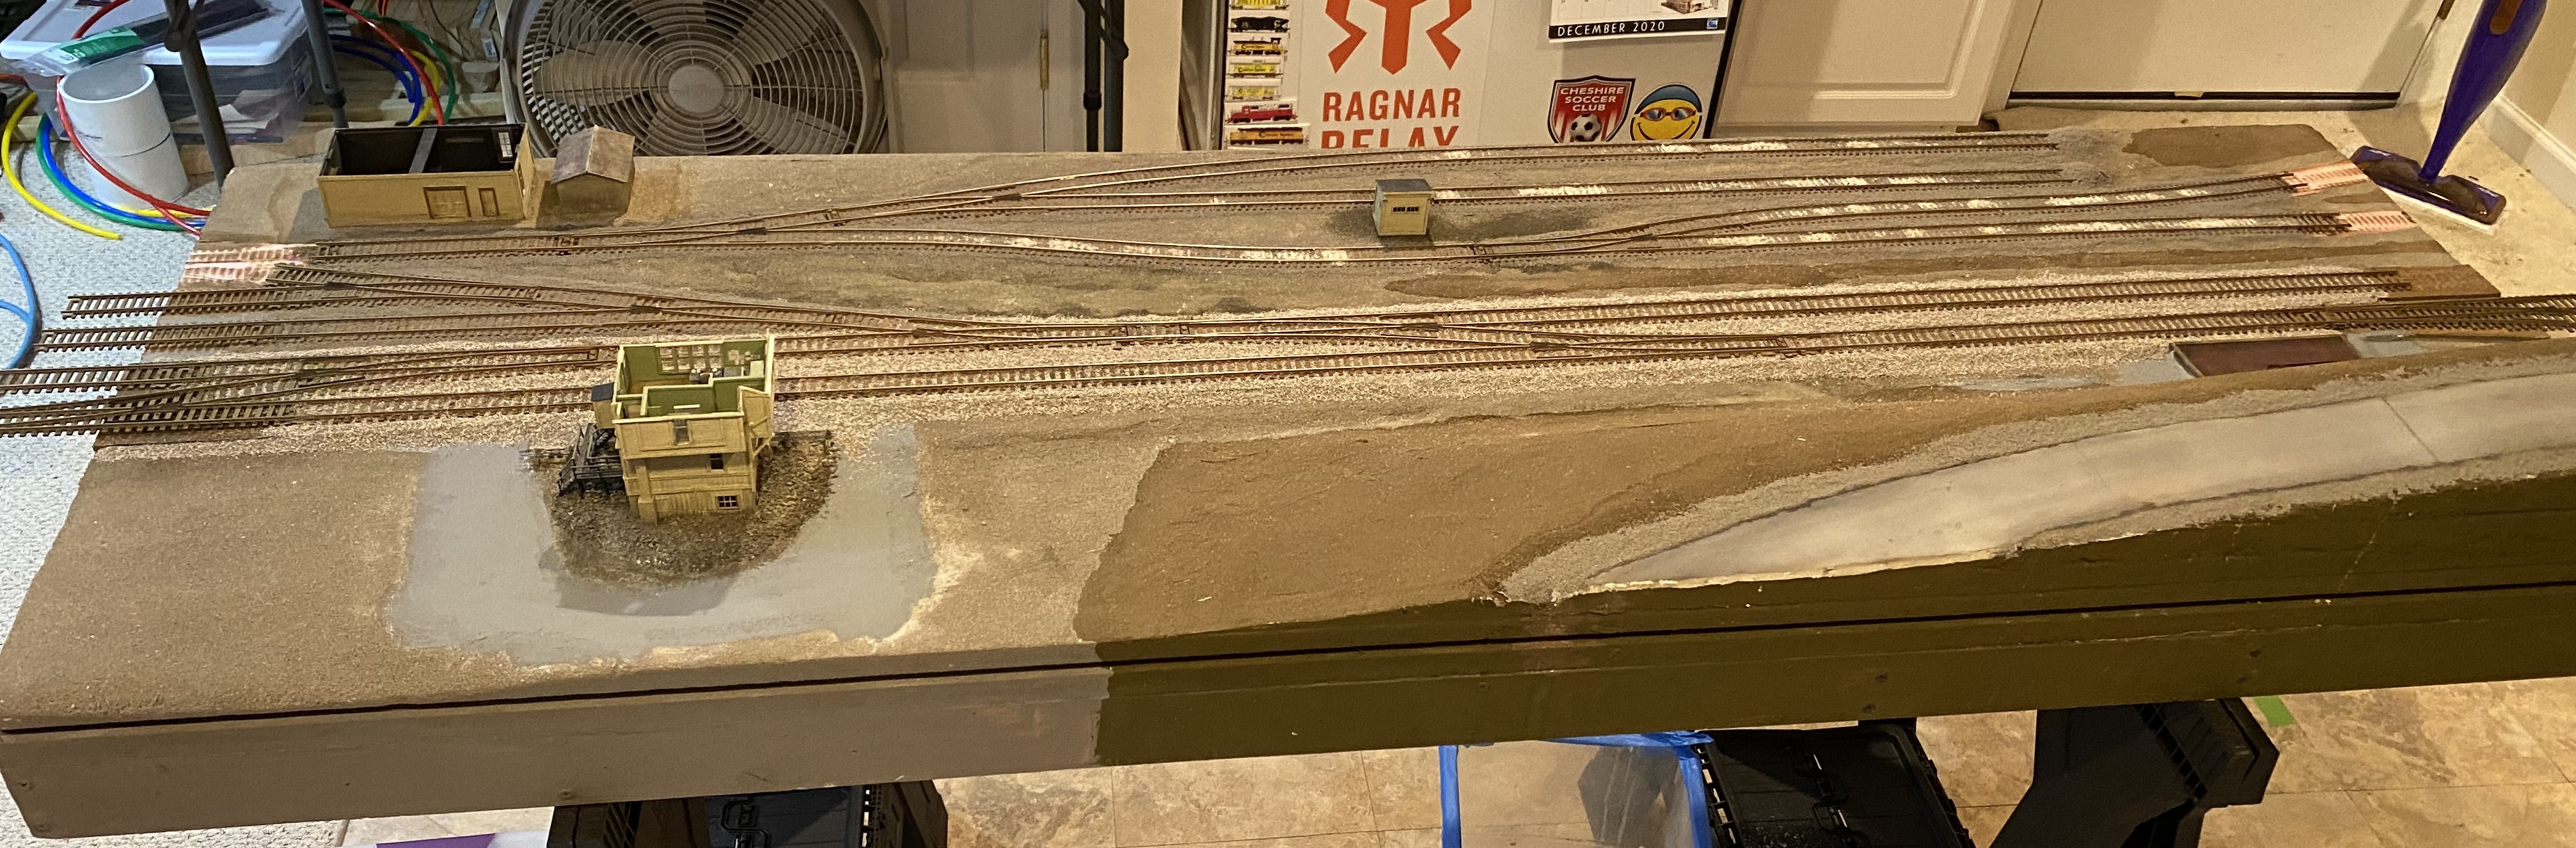
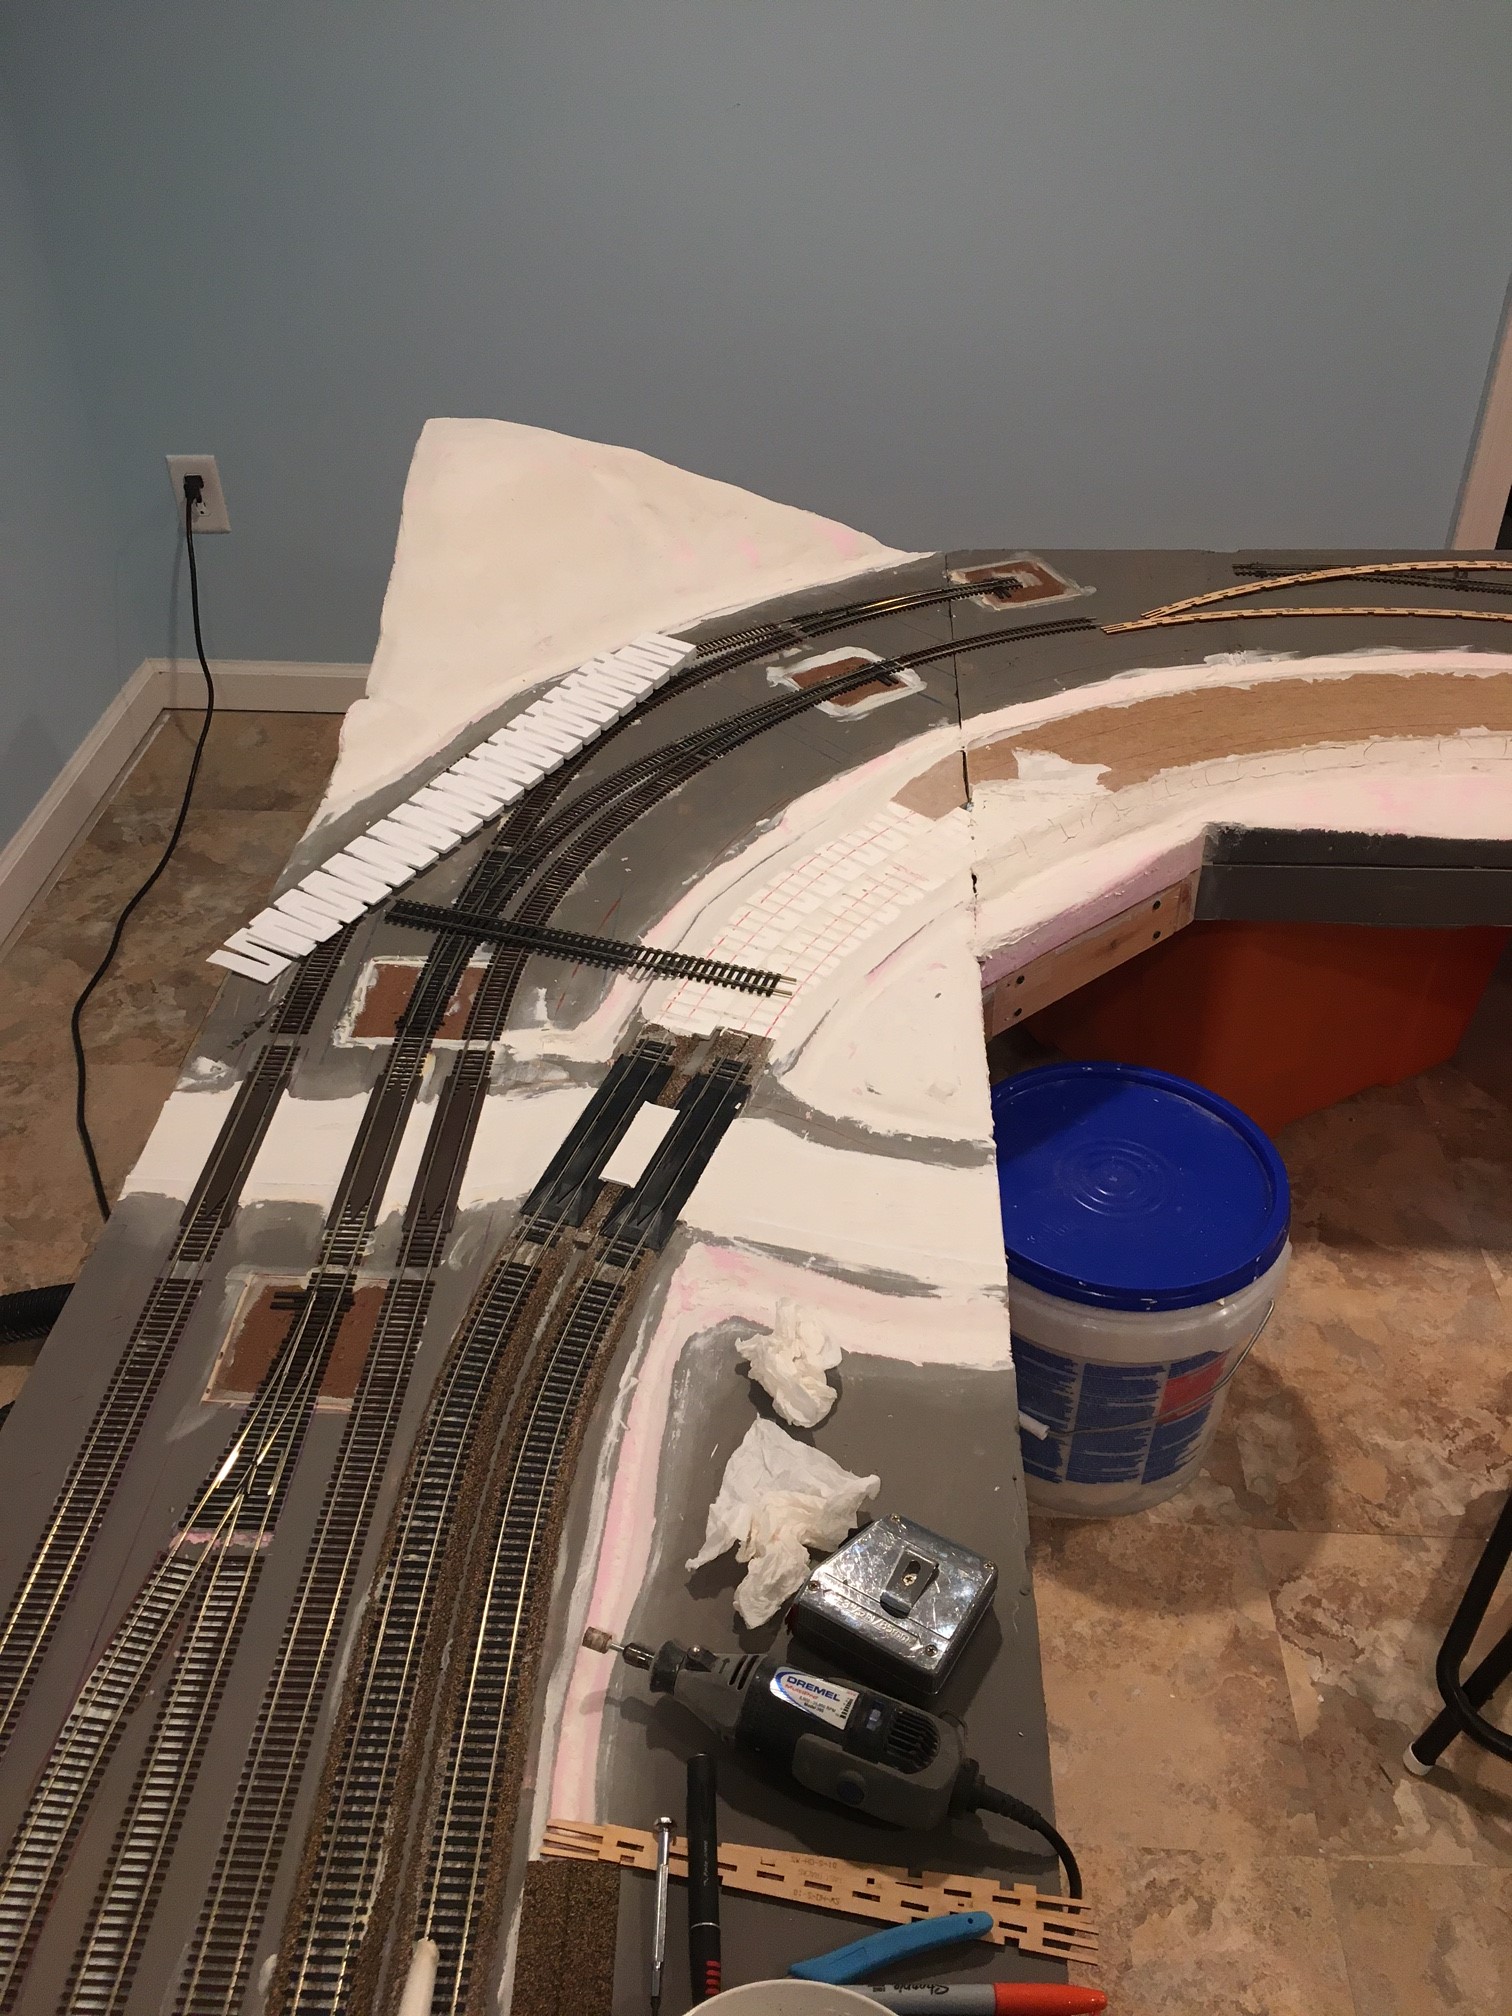
Put the switch motors in from the top. In
each of my tower controlled interlockings (Brunswick,
Martinsburg, Cumbo, Miller and Hancock) I use Circuitron's
Tortoise Switch motors to electrically move each turnout.
I mount each Tortoise switch motor to a 4x4 inch piece of fascia
board. I then cut a hole in from the top of the foam and
mount it flush to the rest of the foam. You can see four
of them in the photo of Miller below (brown squares under the
turnouts). I did not do this years ago on my first
sections in Hancock. See the photo above and you won't see
the switch motors. This took considerable time to fix, but
I found a way to mount them from the bottom, and all of the
Hancock sections have been modified to have switch motors.
Trust me, it is WAY easier to put them in from the top, as you
build the track. Another tip from this photo, that I've
learned is to paint the foam dark grey before starting
work. I used to just start with the bare pink foam.
The pink is so distracting, that I couldn't stand it
anymore. Painting it grey also allows for better
protection for chipped scenery and is actually better to bond
plaster or scenery materials to.
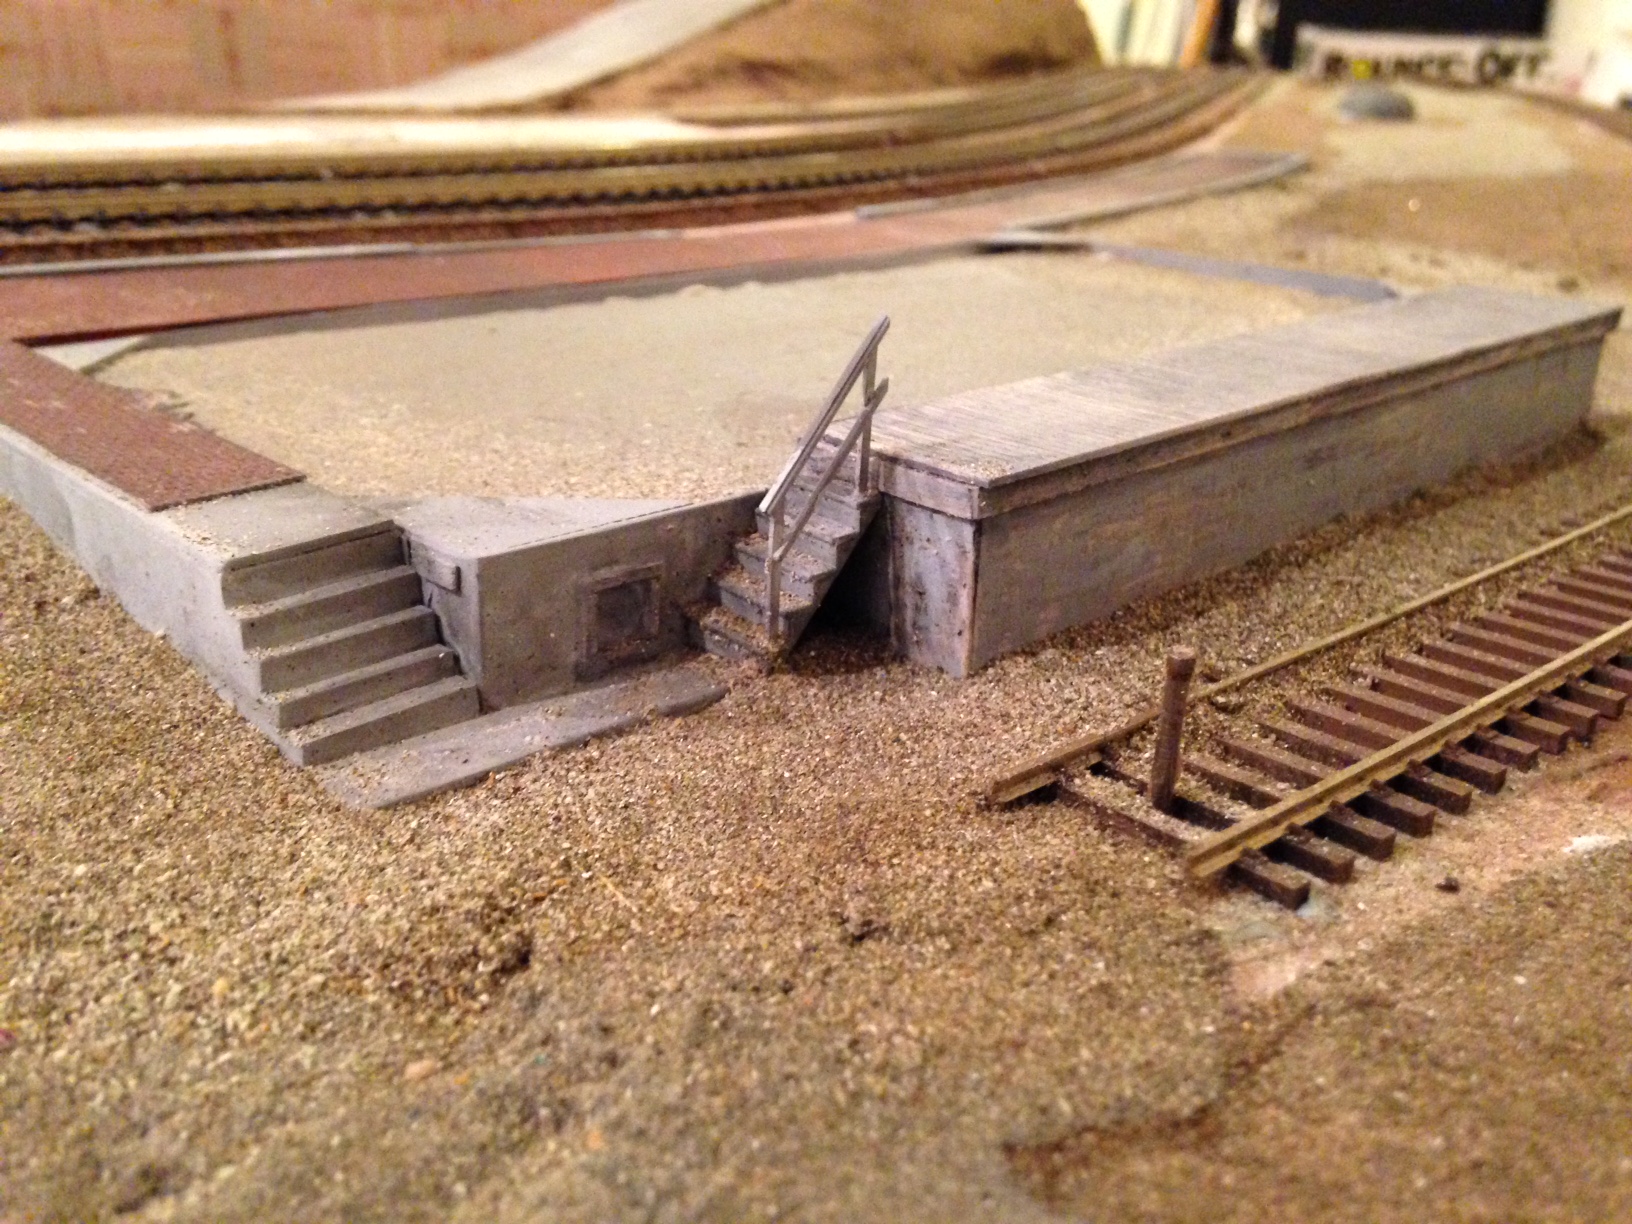
Mount your building foundations before you build
the building. This is the foundation for the Hancock
passenger station. I made it first and mounted it in the
scenery, prior to building the rest of the building. This
has two main benefits. First, you can continue with
scenery in this area, while not having to wait for the rest of
the building. Second, your building will be removable,
making transport easier and reducing the chance of damage if it
gets bumped. I didn't do this on my early buildings, but
it is a standard practice now.
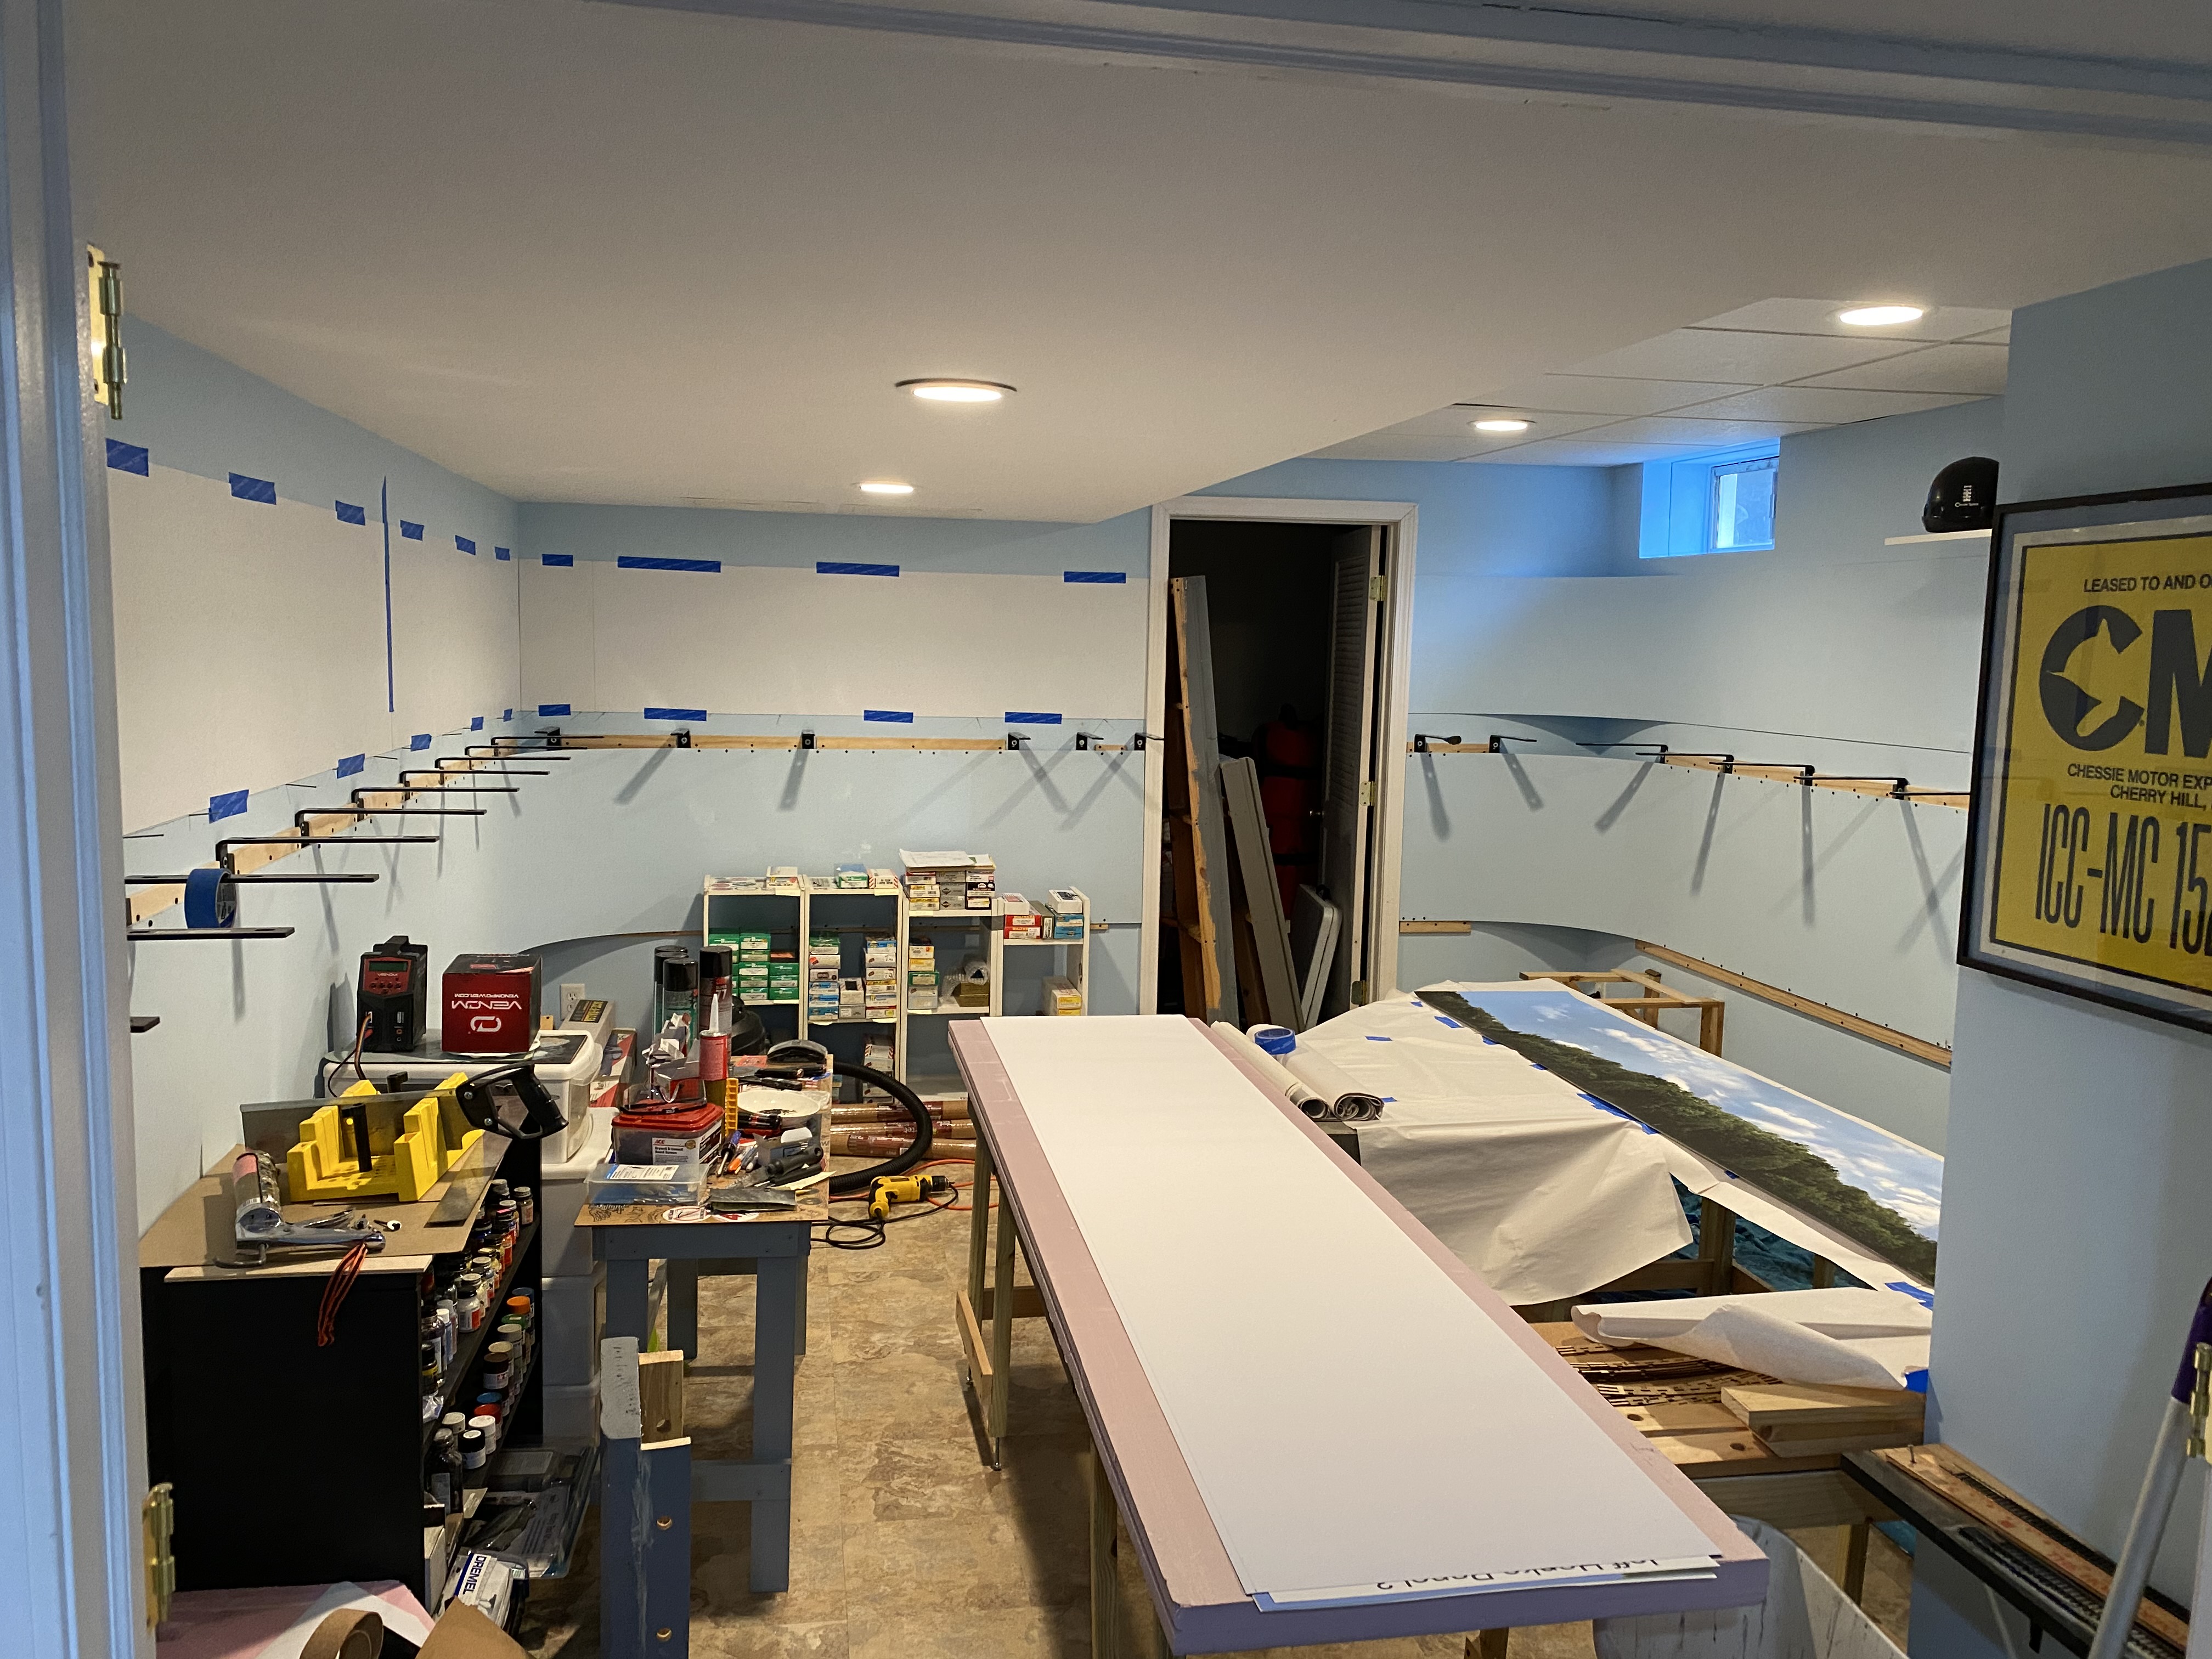
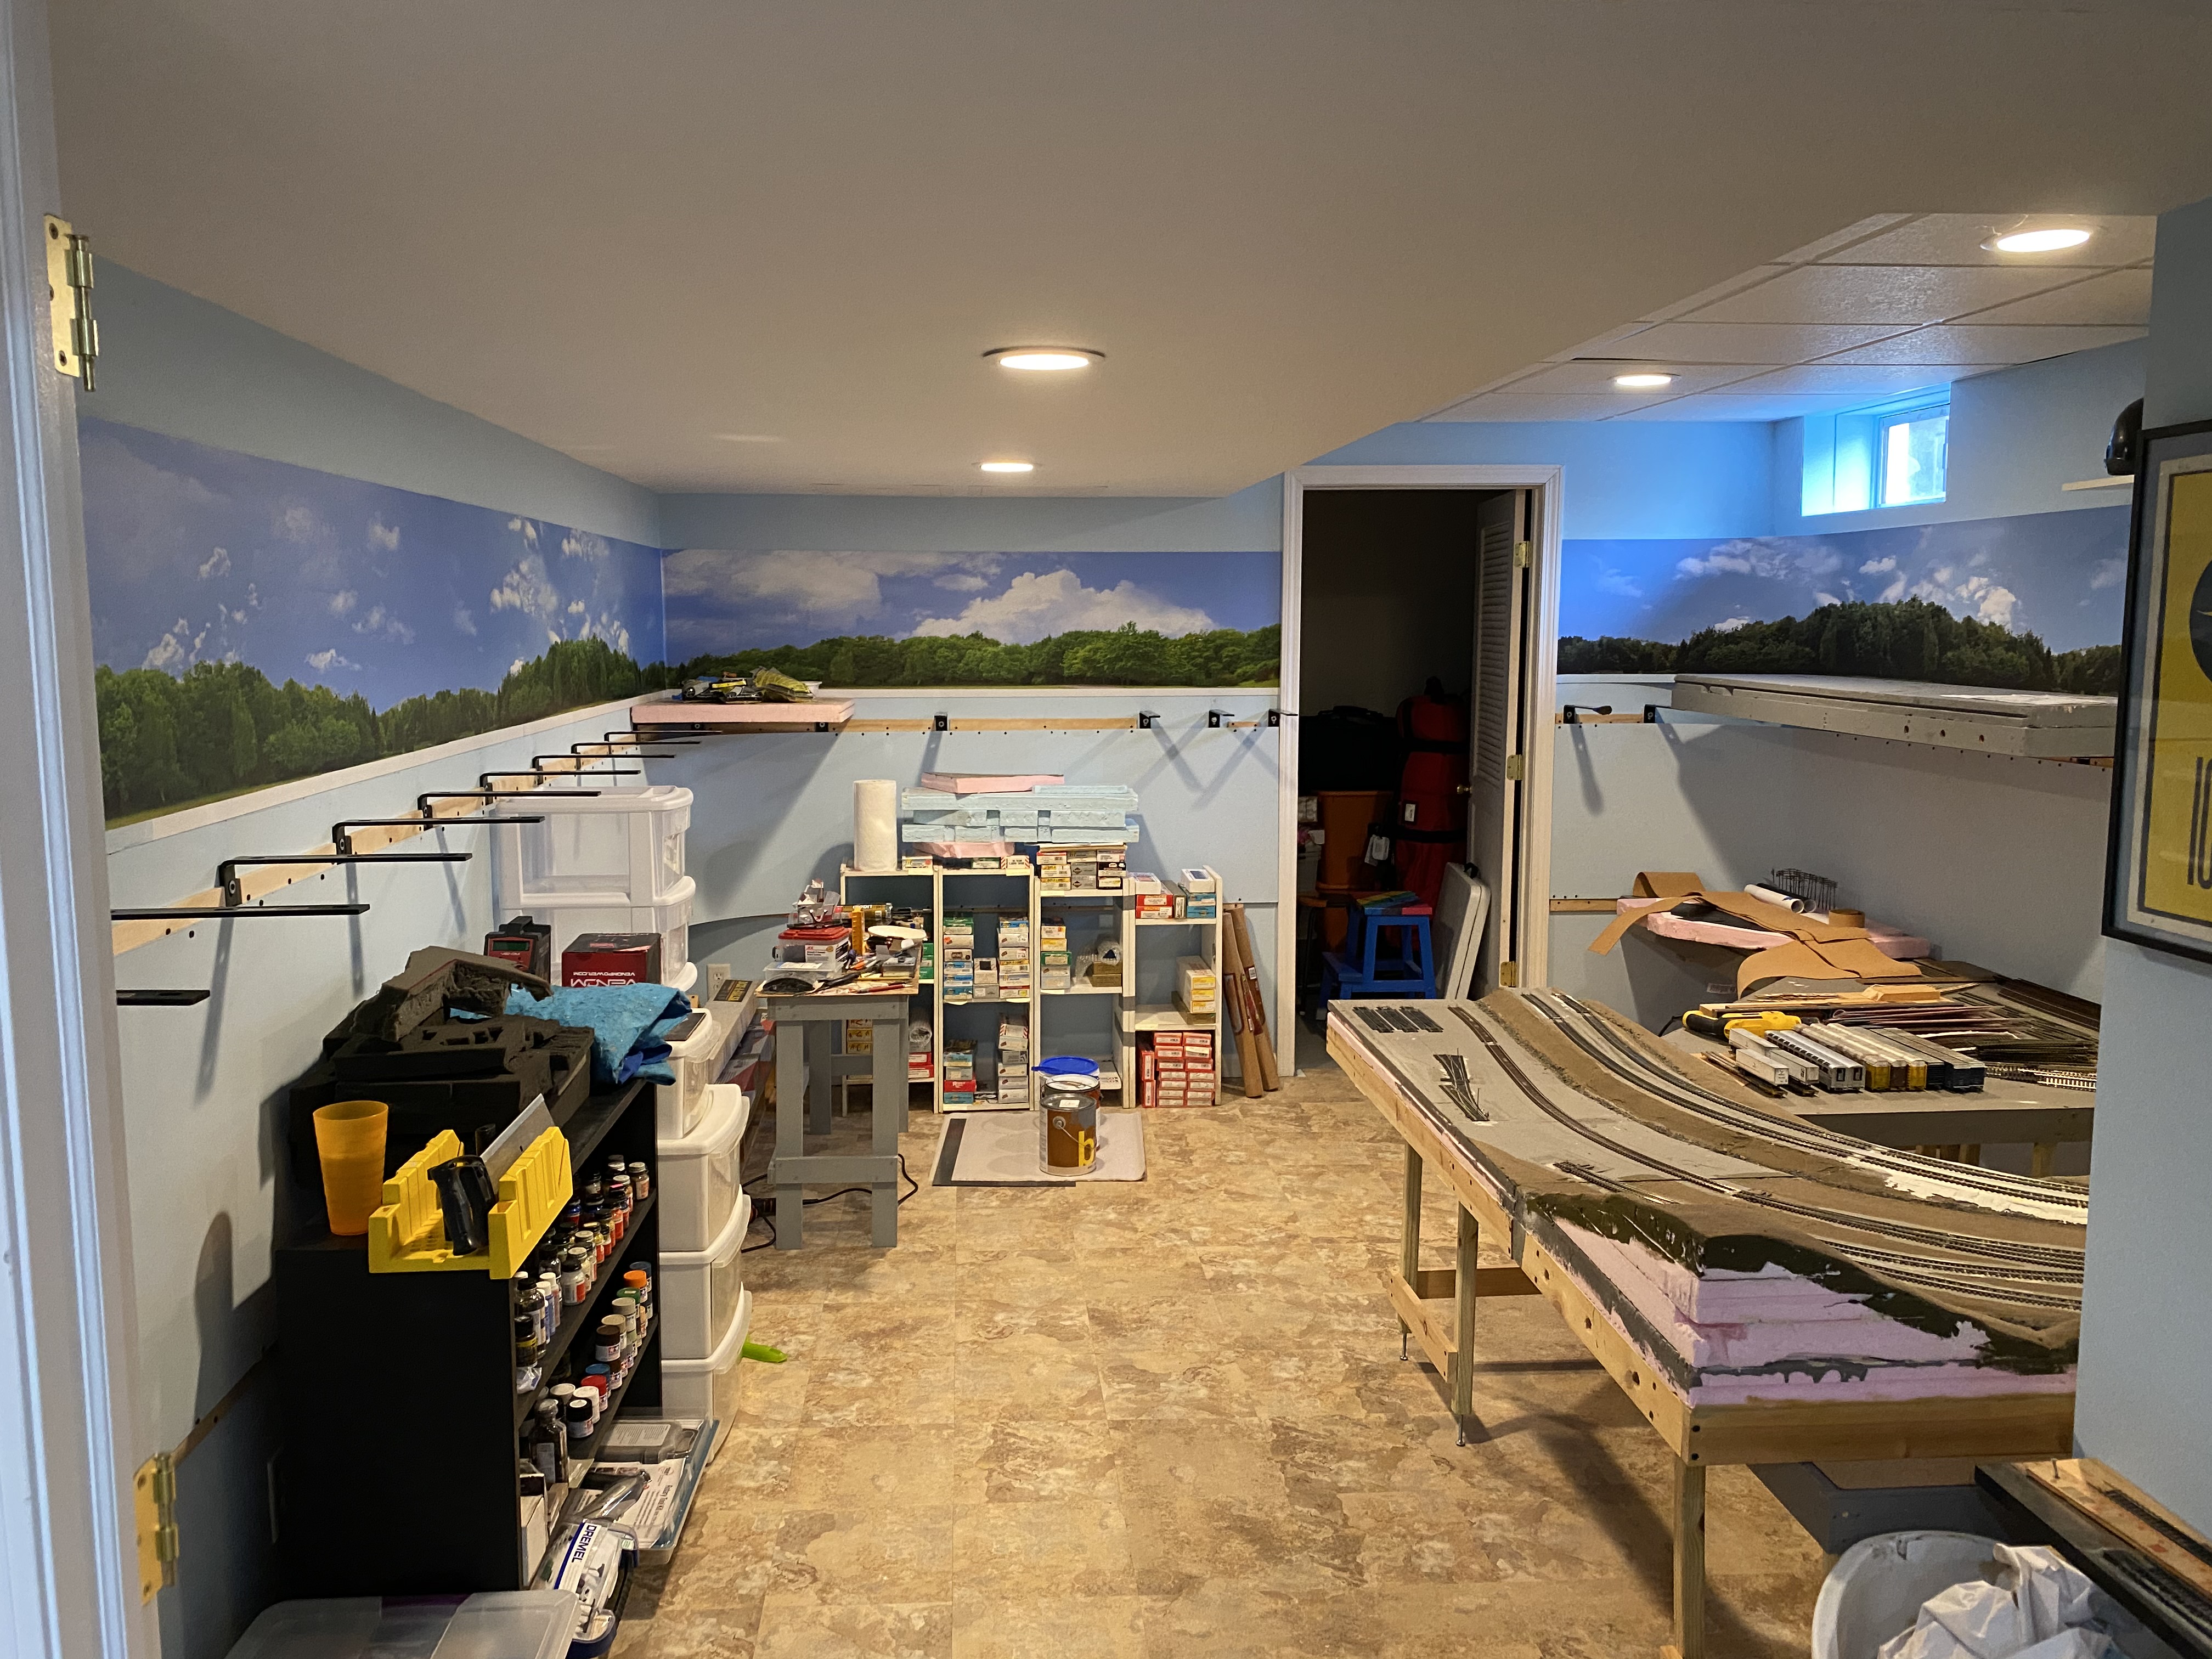
Start with the backdrop. I have done it
both ways, and trust me, it is much easier putting in the
backdrop first. I used both sheet styrene and hardboard
for my backdrops. I've found that hardboard backdrops
(which are a paper product) do better if you paint them on all
sides prior to installation. This keeps the swelling down
due to humidity changes through the seasons and helps eliminate
bubbles in your backdrop. The styrene or hardboard is
adhered with Liquid Nails to the wall. I also use 3M "90"
spray adhesive to adhere the backdrop itself to the styrene or
hardboard, which I have found is much better than their "77"
product. I also cove the corners, by bending the styrene
or hardboard, avoiding a harsh sharp corner on the layout.
These images show Miller on the upper left and Cumbo on the
upper right. Note the Brunswick (lower left) backdrops are
already installed, but benchwork construction hasn't begun there
yet.